Register Panasonic Phone with Yeastar Cloud PBX
This article is based on Panasonic KX-HDV130 v01.008 and Yeastar Cloud PBX v81.8.0.7.
- KX-HDV130
- KX-UT113
- KX-UT123
- KX-UT133
- KX-UT136
- KX-UT248
- KX-UT670
- TGP500
- TGP550
-
Start up the phone and check its IP address.
- Press Menu.
- Go to .
-
Open the web service for the Panasonic phone.
- Press Menu.
- Go to .
-
Log in the web page of the IP phone.
- Username: admin
- Password: adminpass
-
Click VoIP, choose a line to configure.
-
In the Basic section:
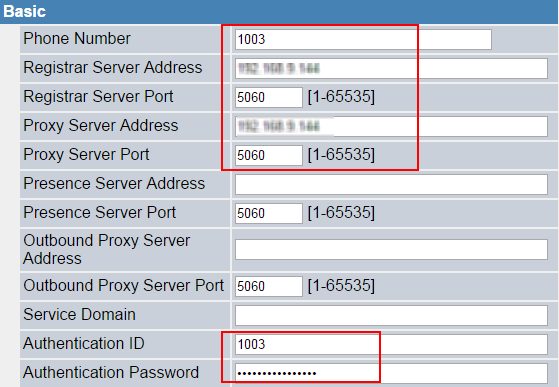
- Phone Number: Fill in the extension number.
- Registrar Server Address: Fill the domain of your PBX.
- Registrar Server Port: Fill in the SIP port of your PBX.
- Proxy Server Address: Fill in the domain of your PBX.
- Proxy Server Port: Fill in the SIP port of your PBX.
- Authentication ID: Fill in the extension's Registration Name.
- Authentication Password: Fill in the extension's Registration Password.
-
In the Advanced section:
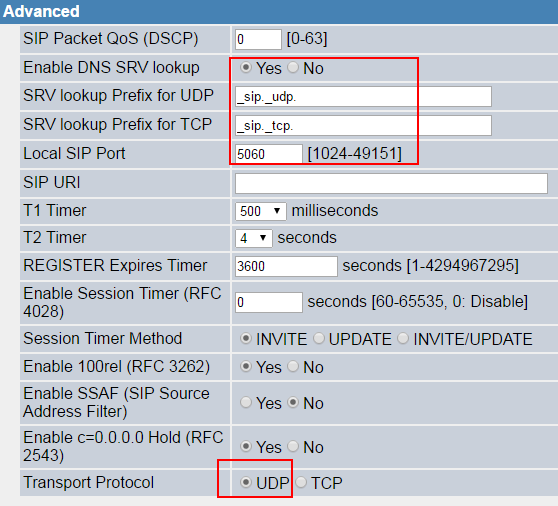
- SRV lookup Prefix for UDP: Enter
_sip_udp. - SRV lookup Prefix for TCP: Enter
_sip_tcp. - Local SIP Port: The SIP port number for each line must be unique, default value: 5060 (for Line 1) and 5070 (for Line 2).
- Transport Protocol: Choose the same transport protocol as the PBX.
- SRV lookup Prefix for UDP: Enter
-
In the Basic section:
-
Click Save.
If the extension is registered, you can see the VoIP status shows "Registered".