Register Htek Phone with Yeastar Cloud PBX
This article is based on Htek UC903 and Yeastar Cloud PBX v81.8.0.7.
Note: For the IP phone with different firmware version, the web GUI may be
different.
-
Log in the web page of the phone.
- Username: admin
- Password: admin
-
Click Account tab, choose one account to
configure.
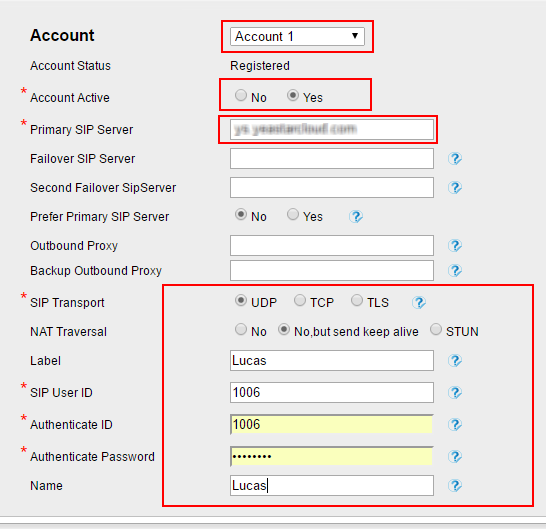
- Account: Select one account to configure.
- Account Active: Yes
- Primary SIP Server: Fill in the domain of your PBX.
- SIP Transport: Choose the same transport of the PBX. The default SIP transport on the PBX is UDP.
- Label: Set the name you want to appear on the phone screen.
- SIP User ID: Fill in the extension number.
- Authentication ID: Fill in the extension's Registration Name.
- Authentication Password: Fill in the extension's Registration Password.
- Name: The local phone name showing on the other phone when calling out.
-
Click Save Set.
If the extension is registered, the page will show "Registered".