Connect Yeastar S-Series VoIP PBX to OpenVPN Server
You can connect Yeastar S-Series VoIP PBX to the OpenVPN server by manual configuration or OpenVPN files package.
- Manual Configuration: If your VPN provider provides you the with information of OpenVPN server settings, certification files and key files, you can manually configure the OpenVPN client on Yeastar S-Series VoIP PBX and connect to OpenVPN Server.
-
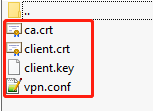
Upload OpenVPN Package: If your VPN provider provides you with a connection file, certification files and key files, you can compress these files, upload the package to Yeastar S-Series VoIP PBX and connect to OpenVPN Server.Note:
- The name of OpenVPN connection file should be vpn.conf.
- You need to save the certification files and key files in
the root directory, and compress them into a
.tar package.
-
The new option
remote-cert-tls serveris not supported on the Yeastar S-Series VoIP PBX, you need to change it tons-cert-tls server.
Manual Configuration on Yeastar S-Series VoIP PBX
- Go to , select the checkbox of Enable OpenVPN.
- In the drop-down list of Type, select Manual Configuration.
- Set the OpenVPN client settings according to the OpenVPN server.
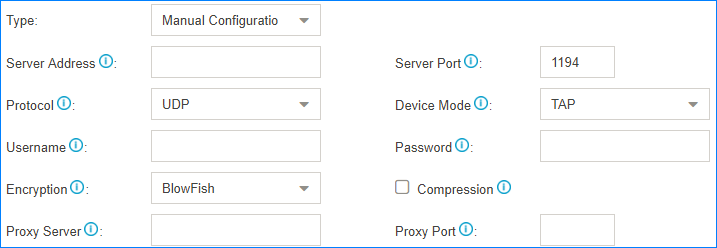
- Server Address: Enter the IP address of the OpenVPN server.
- Server Port: Enter the port of the OpenVPN server.
- Protocol: Select the same protocol as the OpenVPN server.
- Device Mode: Select the same mode as the OpenVPN server.
- Username: Optional. Enter the username to access the VPN server.
- Password: Optional. Enter the username to access the VPN server.
- Encryption: Select the same type as the OpenVPN server.
- Compression: Enable or disable compression for data stream. The server and client should be the same setting.
- Proxy Server: If the PBX is connected through an HTTP proxy to reach the OpenVPN server, enter the proxy server.
- Proxy Port: If the PBX is connected through an HTTP proxy to reach the OpenVPN server, enter the proxy port.
- Upload certificates and keys.
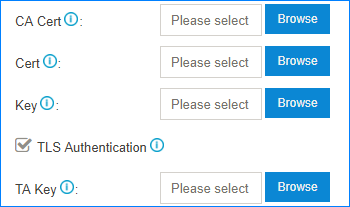
- CA Cert: Upload a CA certificate.
- Cert: Upload a Client certificate.
- Key: Upload a Client key.
- TLS Authentication: Enable or disable TLS authentication.
- TA Key: If you enable TLS Authentication, upload a TA key.
- Click Save and click the
 at the right-top corner to check the VPN client
status.
at the right-top corner to check the VPN client
status.
Upload OpenVPN Package
- Go to , select the checkbox of Enable OpenVPN.
- In the drop-down list of Type, select Upload OpenVPN Package.
- Click Browse, select the OpenVPN package.

- Click Save and click the at the right-top corner to check the
VPN client status.