Provision Gigaset N670/N870 IP PRO with Yeastar S-Series VoIP PBX
This guide is based on Gigaset N870 v2.26.0 and Yeastar S-Series VoIP PBX v30.13.0.15.
Supported phone models
This guide is applicable to the following devices:
| Gigaset DECT | Gigaset handsets |
|---|---|
|
|
Requirements
- Firmware
- Update PBX firmware, Auto Provisioning App, and DECT firmware to the required version.
- DHCP Server
- Make sure that a DHCP server is enabled in your local network to assign an IP address to the DECT.
- Network
-
- Connect the DECT and PBX in the same network segment, or the DECT could not be detected by PBX.
- Auto Provisioning cannot work in VPN network.
Step1. Enable "All in One - dynamic IP" mode
On delivery all N870 IP PRO devices are configured as base station.
Before provisioning the N870 IP PRO, you need to change the device role to "All in One - dynamic IP" mode. For more Information of the device role, see Gigaset FAQ Nx70 - Installation.
- Press the device button for at least 10 seconds until all LEDs switch off.
- Release the button.
- Short press the device button to switch the device role. Note: The IP address will be assigned by a DHCP server in your network.
When both LEDs become blue, the device role is "All in One - dynamic IP".

- Press the device button for 5 seconds to confirm the new role.
The device is rebooted and reset.
Note: The device takes few minutes to reboot.
Step2. Provision the DECT
The easiest way to provision the Gigaset N870 is using Plug & Play method (PnP). Alternatively, you can configure the phone using DHCP option 66. For more information, see Auto Provision Phones by DHCP Method.
- Connect the DECT to the same network of the PBX.
A PnP request is sent to the PBX.
- Log in the PBX web page, go to .
The detected devices are displayed. If the DECT is not displayed, click Scan to scan devices in the local network.
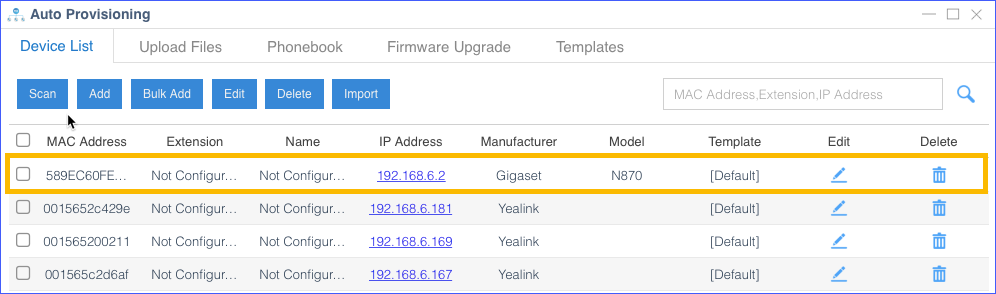
- Find the DECT, and click
 .
. - Select the handsets, and assign extensions to them.
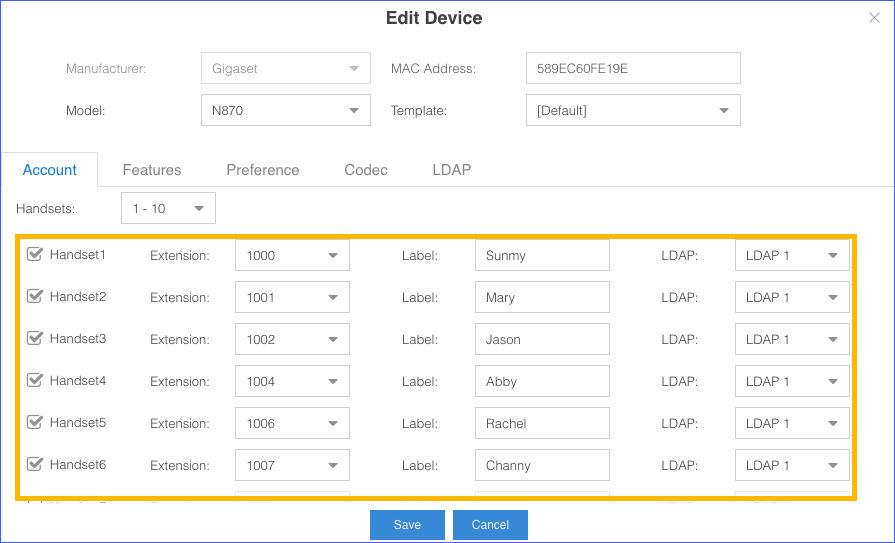
- Configure other settings according to your needs.
- Click Save.
A pop-up dialog prompts you whether to reboot the phone immediately or not.
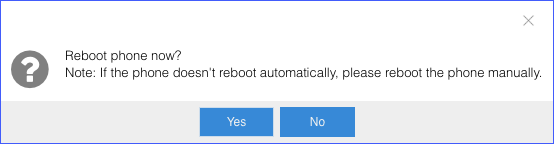
- Click Yes.Note:
- For the first time that you provision the DECT, you must reboot the DECT to take effect.
- For updating the Auto Provision settings, the configurations take effect after you save the changes. You don't need to reboot the DECT.
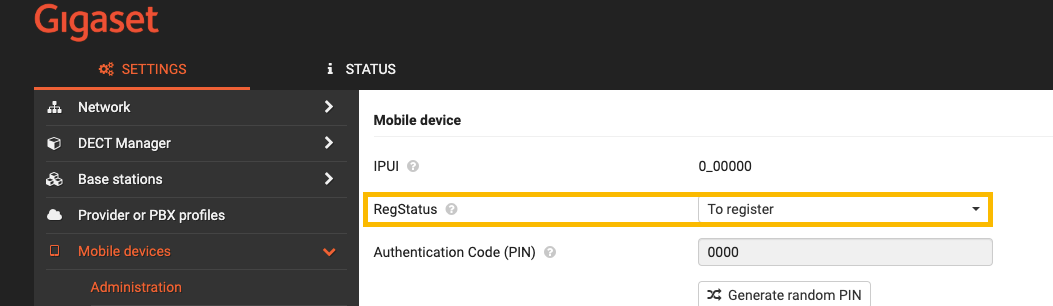
Step3. Register handsets
- Log in the DECT web interface, go to .
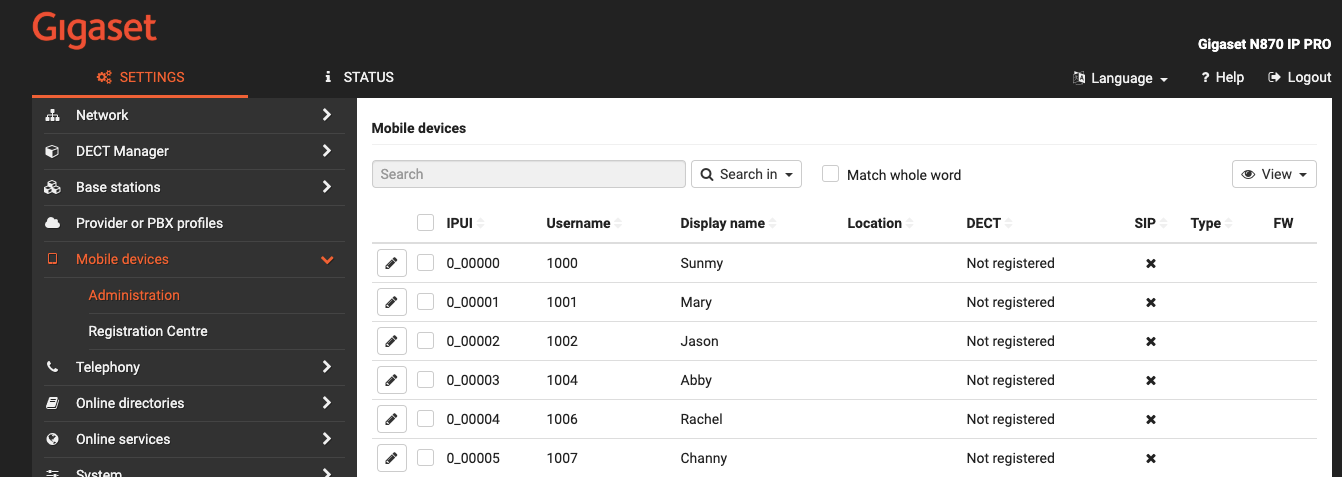
- Click
 to edit a handset.
 - Set RegStatus to To register,
and scroll down the page, click Register
Now.
- Go to , click Start Now.
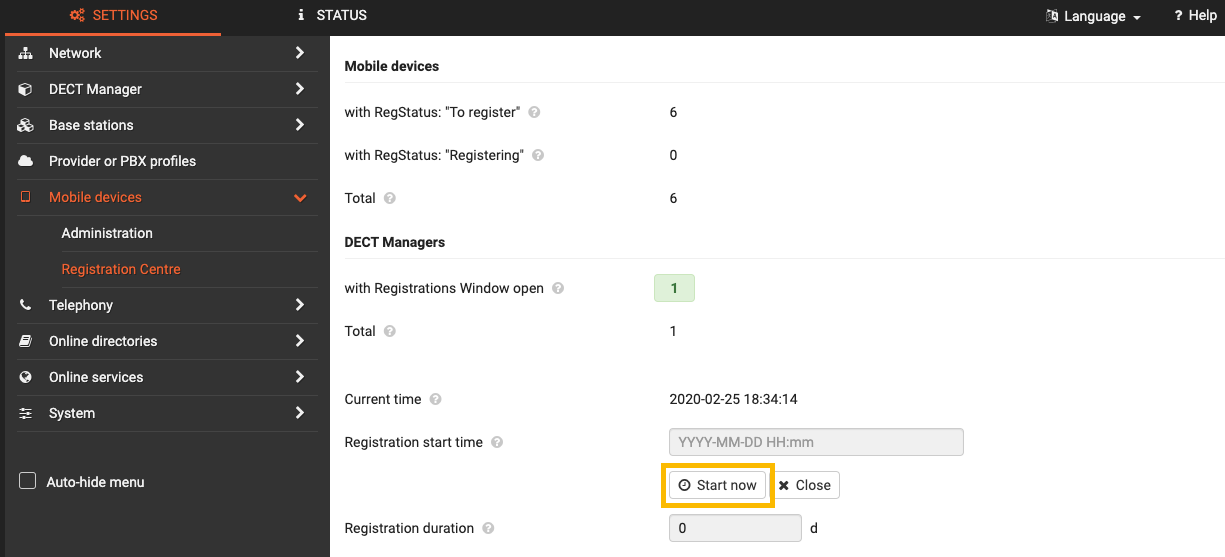
- Confirm registration on handsets.
- On the handset, press .
- Enter the PIN code (default 0000).
- Press OK.
Gigaset N670/N870 Provisioning options
In addition to provision the DECT Account, you can provision other settings to match your needs.
- Features
Configure Call Waiting, Voicemail and Central phonebook.
- Preference
Configure the phone preference settings, such as Language, Time Zone, Admin Password, etc.
- Codec
Select and configure the preferred codec list for the phone.
Note: Select at least one codec that is the same with the PBX codec, or audio problem will occur during a call. - LDAP
Configure LDAP phonebooks and assign LDAP phonebooks to specific handsets on Account page.
For more information, see Descriptions of LDAP Settings on Gigaset DECT.