LDAP Configurations on Gigaset DECT
In this example, we demonstrate how to configure LDAP phonebook on Gigaset N870 IP PRO (version 2.26.0) and give a Gigaset Handset the access to LDAP phonebooks.
Configure an LDAP phonebook
The following configurations are set according to default settings of Yeastar S-Series VoIP PBX LDAP server. You can use the following settings as a
starting point and adjust the filter and display attributes according to your
needs.
Note: You
can set up 10 corporate directories in LDAP format at most for Gigaset N870 IP
PRO.
- Log in Gigaset N870 IP PRO, and go to , click
 to edit an LDAP phonebook.
 - In the Access to the LDAP data server section, configure
the following settings.
Table 1. Setting Description Example Directory name Specify the phonebook name which will be displayed on handsets. Yeastar Enable Directory Enable this option to display the LDAP phonebook on handsets. Enabled Server address Enter the IP address of PBX. 192.168.6.11 Server port Enter the port which is used to send and receive LDAP requests. The default port is 389. 389 LDAP Search base (BaseDN) Enter the Username of LDAP server. dc=pbx,dc=com Username Enter the user name to log in the LDAP server. cn=admin,dc=pbx,dc=com Password Enter the password to log in the LDAP server. password Secure LDAP By default, LDAP server is handled via an insecure connection. You can encrypt traffic by enabling secure LDAP. This is accomplished by installing a CA certificate signed by the secure LDAP server onto the system. - None
- SSL/TLS
- STARTTLS
SSL/TLS - In the Search in LDAP database section, define search
criteria (filters) to decide which entries can be searched in the LDAP database.Note: Multiple attributes can be separated by commas.
Table 2. Field of a directory entry Attribute name in the LDAP database First name givenName Surname sn, cn, displayName Phone (home) homePhone, telephoneNumber Phone (office) telephoneNumber Phone (mobile) mobile E-mail mail Fax facsimileTelephoneNumber Company company, o, ou Street street City I, postAddress Zip postCode Country friendlyCountryName, c Additional attribute user-defined Additional attribute can be dialled Enable this option when an additional attribute (phone number) is defined. - In the Configuration of directory items section, specify display
attributes of Gigaset LDAP, so that the directory entries can be displayed on handsets.
Table 3. Setting Description Example Enable list mode Specify what should be initially displayed when users open the LDAP phonebook. - Enable: A list of all contact entries of the LDAP phonebook will be displayed.
- Disable: An editor is opened first that allows users to select a specific search area within the LDAP database.
Enabled Name filter Specify the name attributes for LDAP searching.
- The
*symbol in the filter stands for any character. - The
%symbol in the filter stands for the entering string used as the prefix of the filter condition.
(|(cn=%)(sn=%)) Number filter Specify the number attributes for LDAP searching.
- The
*symbol in the filter stands for any character. - The
%symbol in the filter stands for the entering string used as the prefix of the filter condition.
(|(telephoneNumber=%)(mobile=%)) Additional filter #1 name Specify an additional attribute for refine search. City Additional filter #1 value Specify an additional attribute value for refine search. (|(I=%)) Additional filter #2 name Specify an additional attribute for refine search. Street Additional filter #2 value Specify an additional attribute value for refine search. (|(Street=%)) Display format Format of LDAP results displayed on handsets. %sn, %givenname Max. number of search results Specify the maximum number of search results to be returned by the LDAP server. 50
Give a Gigaset handset access to LDAP phonebooks
Note: Before you get started, make sure your Gigaset handset is registered.
- On Gigaset web page, go to .
- Select a registered handset which you want to give access to LDAP phonebook,
and click .
- Go to LDAP authentication to configure as follows.
- Select LDAP phonebook: Select the LDAP phonebook which will be displayed on the handset.
- Show other LDAP servers: Decide whether to display phonebooks from other LDAP servers.
- LDAP authorization type: Select how the user
authentication should be performed.
- Global: Credentials are set for all handsets during the LDAP phonebook set-up.
- User: Individual credentials are used. Enter credentials in Username and Password field.
- SIP: The credentials for the user's SIP account are used (Authentication name and Authentication password).
- Click Set.
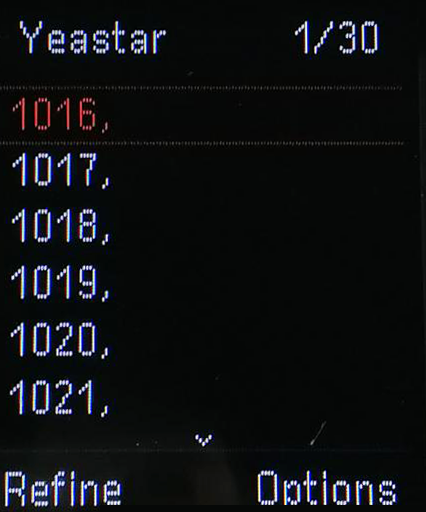
Search LDAP contacts on Gigaset handsets
Enter the search criteria to search a contact from LDAP phonebook and call the contact.
- Press
.png) to enter LDAP phonebook.
to enter LDAP phonebook. - Go to Options, and decide the search method.
- Refine Search: Search contacts from the last searching results, which indicates that the search criteria are transferred from the previous search and entered into the current corresponding fields.
- New Search: Start a new search for a contact.