Configure AI Voicemail Transcription with Amazon Service
Yeastar P-Series Software Edition supports AI voicemail transcription powered by Amazon Transcribe service, converting audio in voicemail messages into readable text. This topic describes how to configure AI voicemail transcription with the third-party service on the PBX.
Requirements
Yeastar P-Series Software Edition should meet the following requirements:| Item | Requirement |
|---|---|
| Firmware | 83.23.0.83 or later. |
| Subscription |
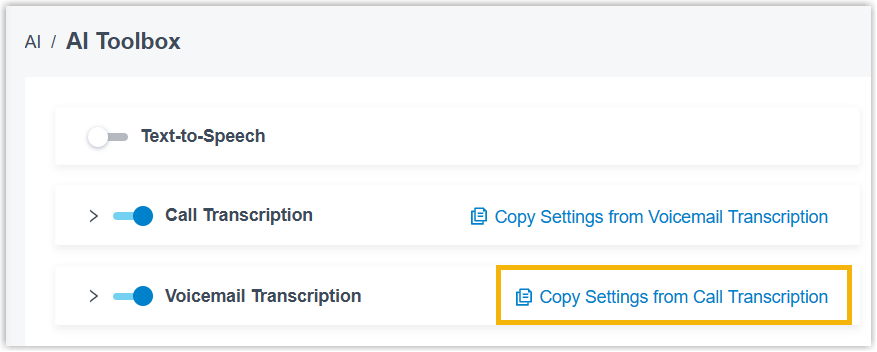
The AI Transcription feature includes one-time free minutes with your plan subscription (120 minutes for Enterprise Plan or 240 minutes for Ultimate Plan). To expand AI transcription minutes, subscribe to the following add-on service(s) (Path: ). 
Note: If both services are subscribed,
minutes are deducted from the monthly quota pack
first. |
Prerequisites
| Item | Prerequisites |
|---|---|
| PBX network access | Make sure the Yeastar P-Series Software Edition can access the
following domains to use Amazon Transcribe service:
Note:
|
| Third-party service account |
|
Procedure
Step 1. Create an access key for Amazon Transcribe service
To securely access the Amazon Transcribe service from the PBX, you must create an access key on Amazon Management Console first for the service API request authentication.
- Log in to Amazon Management Console using your Amazon account ID, IAM username and password.
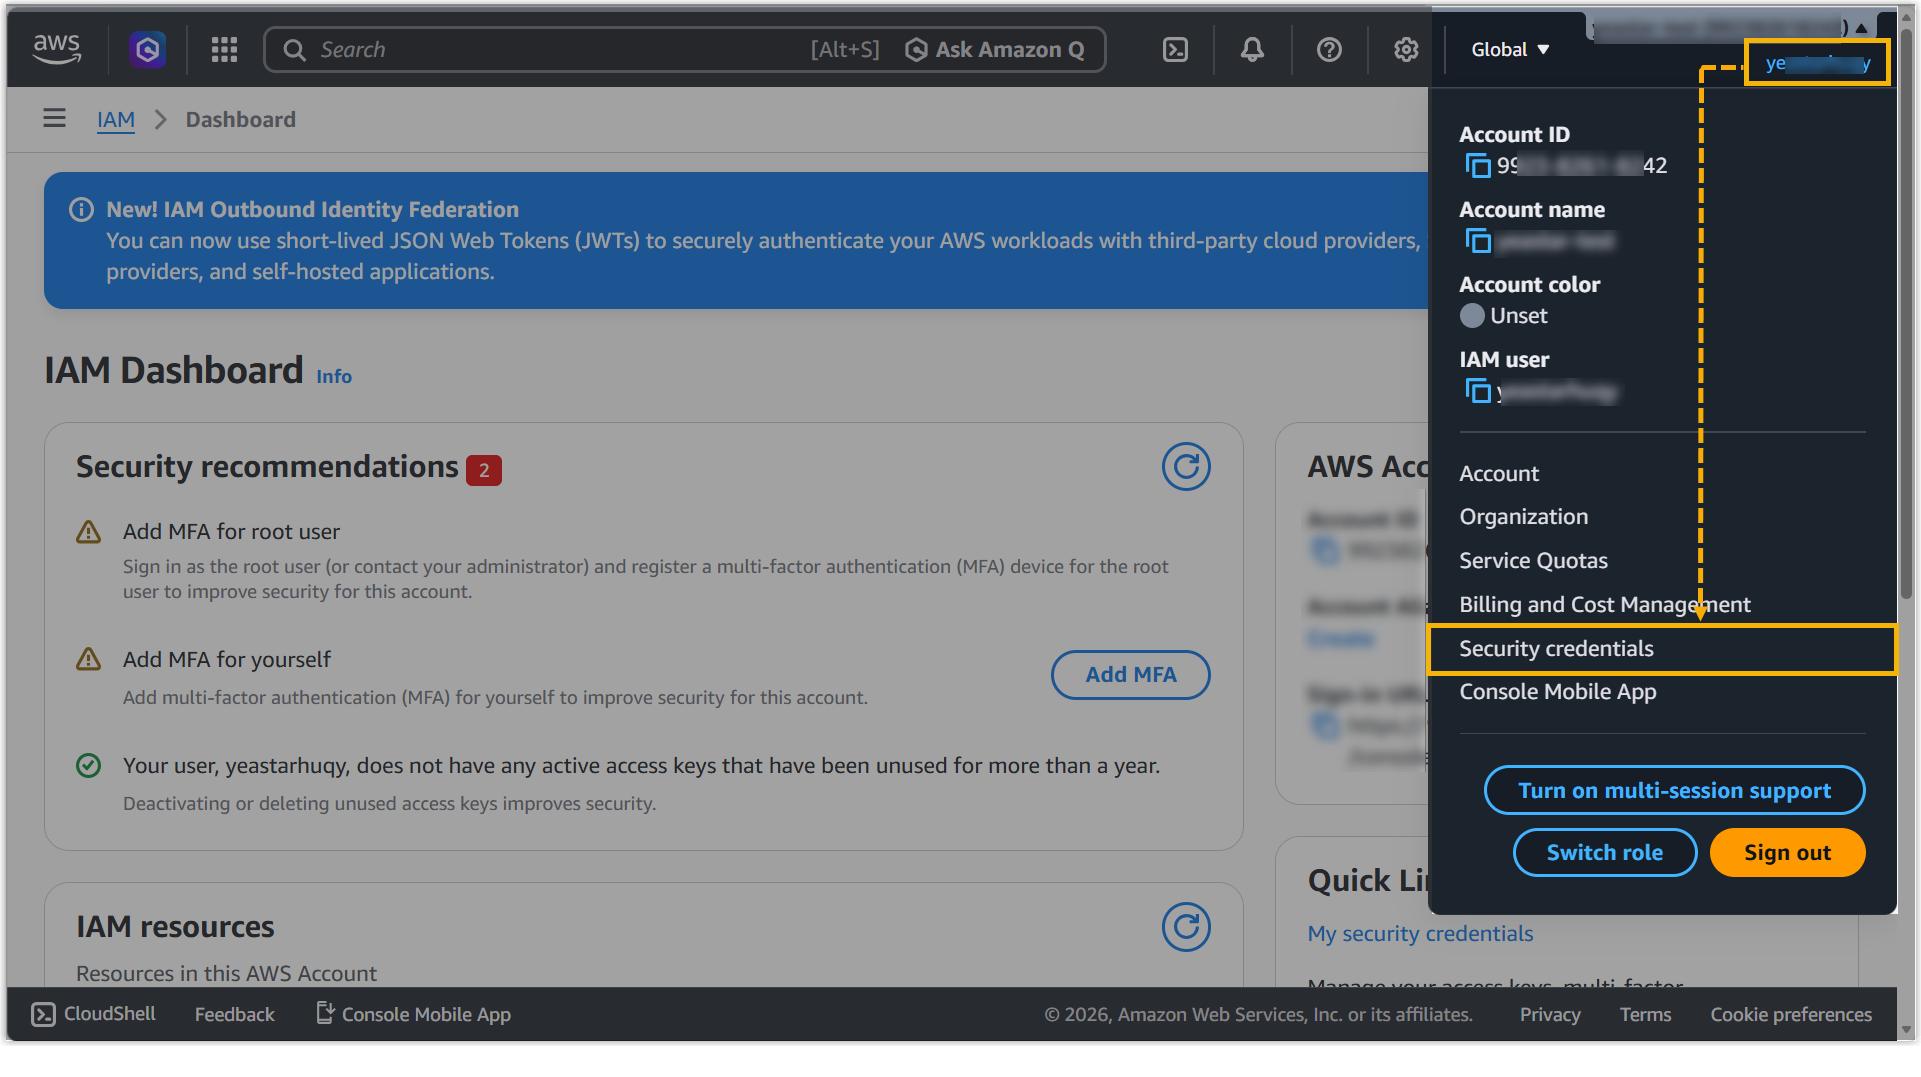
- At the top-right corner, click your account, and
select Security credentials.
- On the My security credentials page, scroll down to the Access keys section, and click Create access key.
- Create an access key.
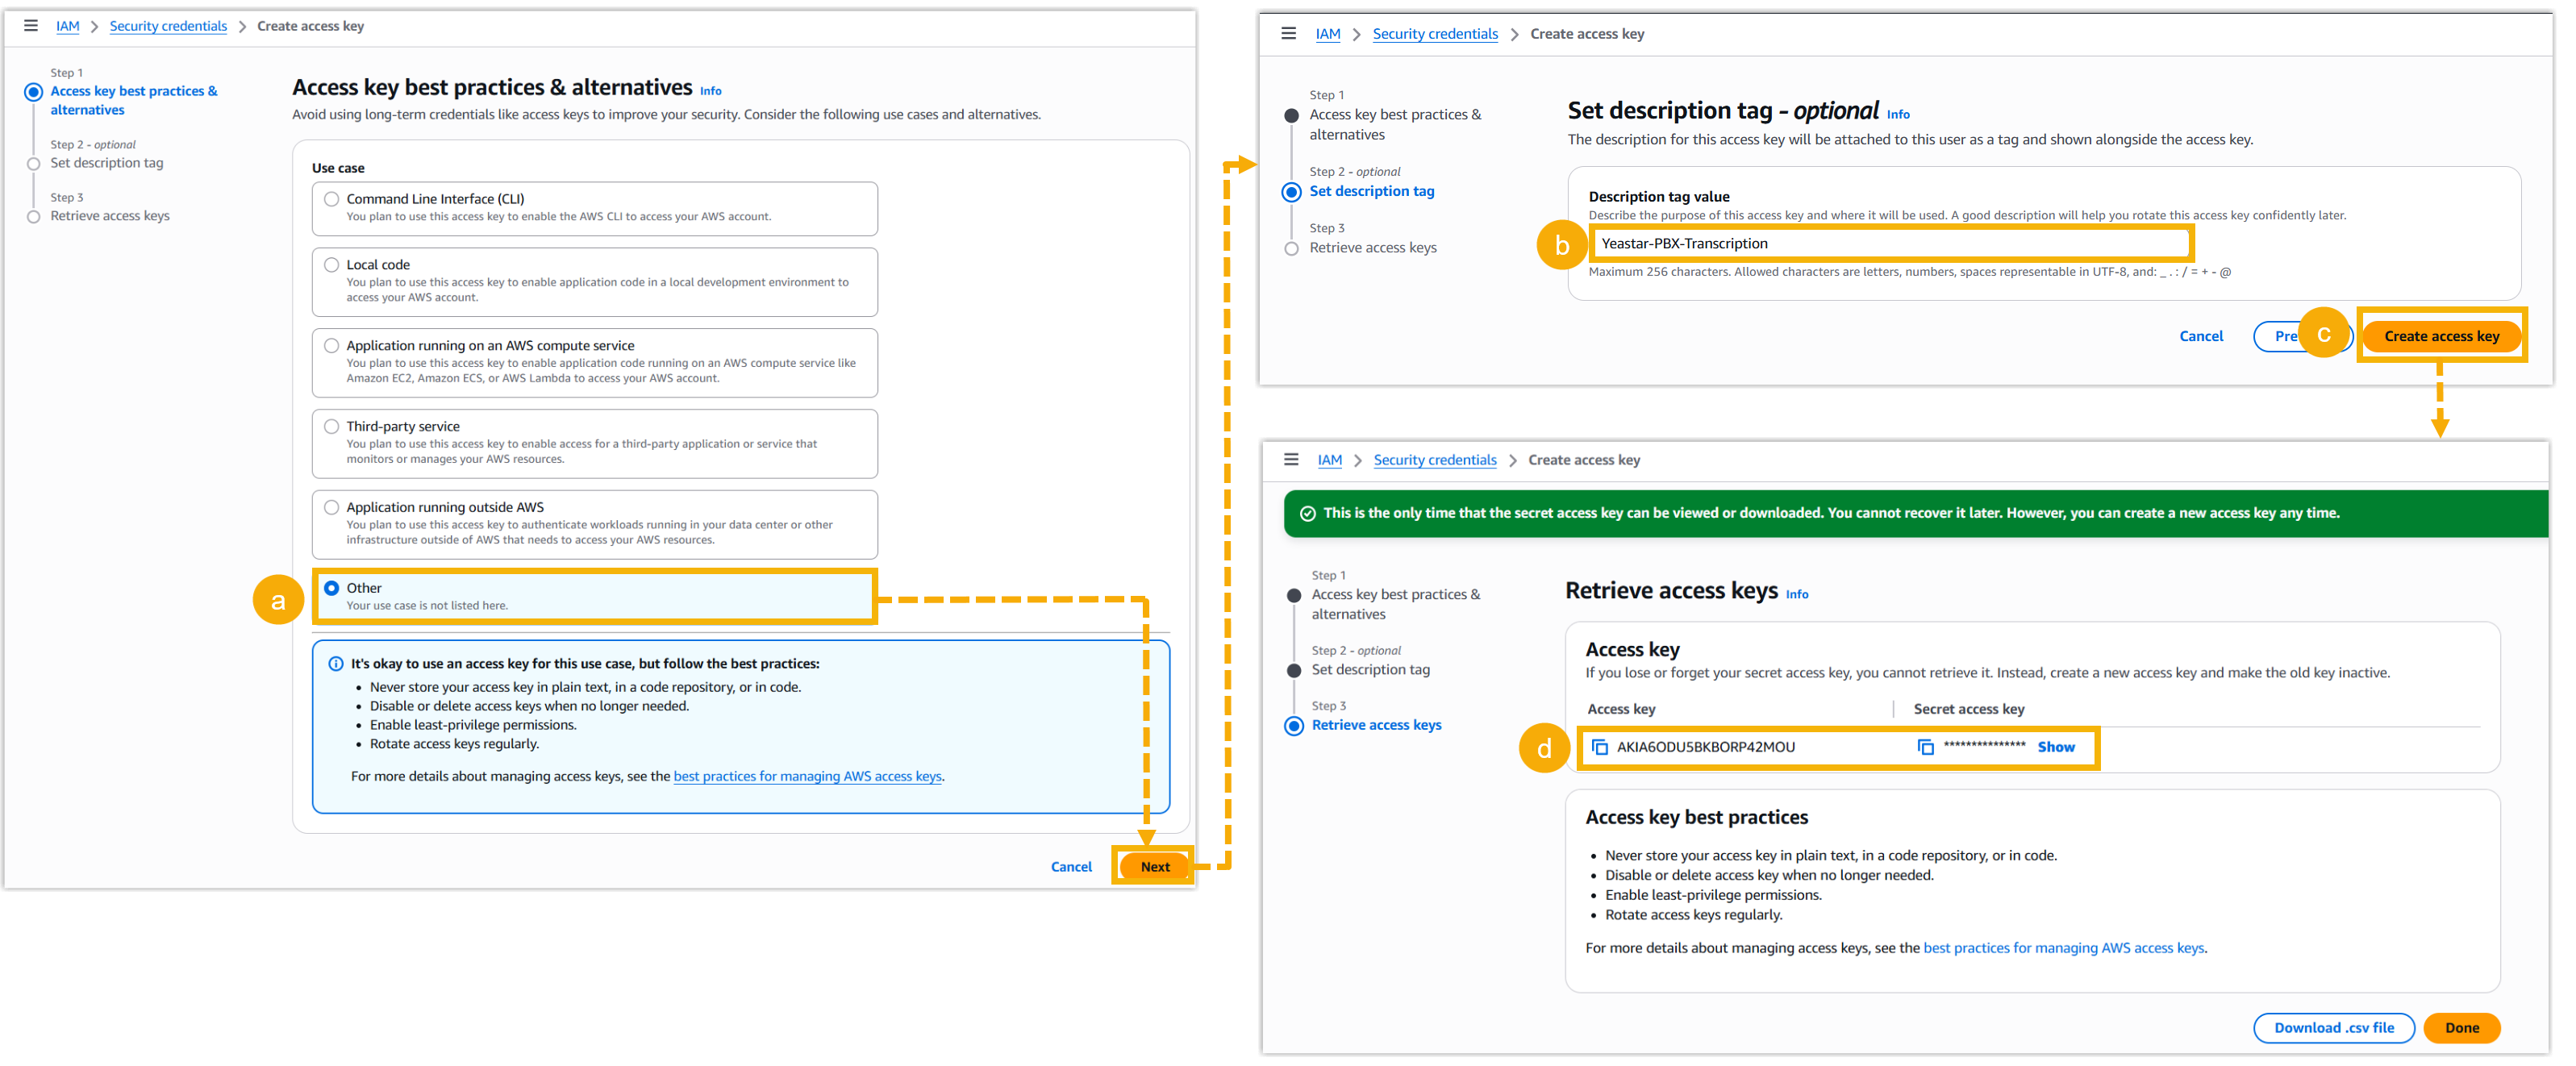
- In the Use case list, select Other and click Next.
- Optional: In the Description tag value field, enter a description to help you identify the access key.
- Click Create access
key.
The access key is successfully generated.
- In the Access key section,
click
 beside Access key
and Secret access key to copy and save them for
later use.
beside Access key
and Secret access key to copy and save them for
later use.
Step 2. Configure AI voicemail transcription on the PBX
After you create an access key for Amazon Transcribe service, you need to configure corresponding settings on the PBX to establish a connection with the service.
- Log in to PBX web portal, go to .
- Turn on the switch of Voicemail Transcription.
- Configure AI voicemail transcription service.
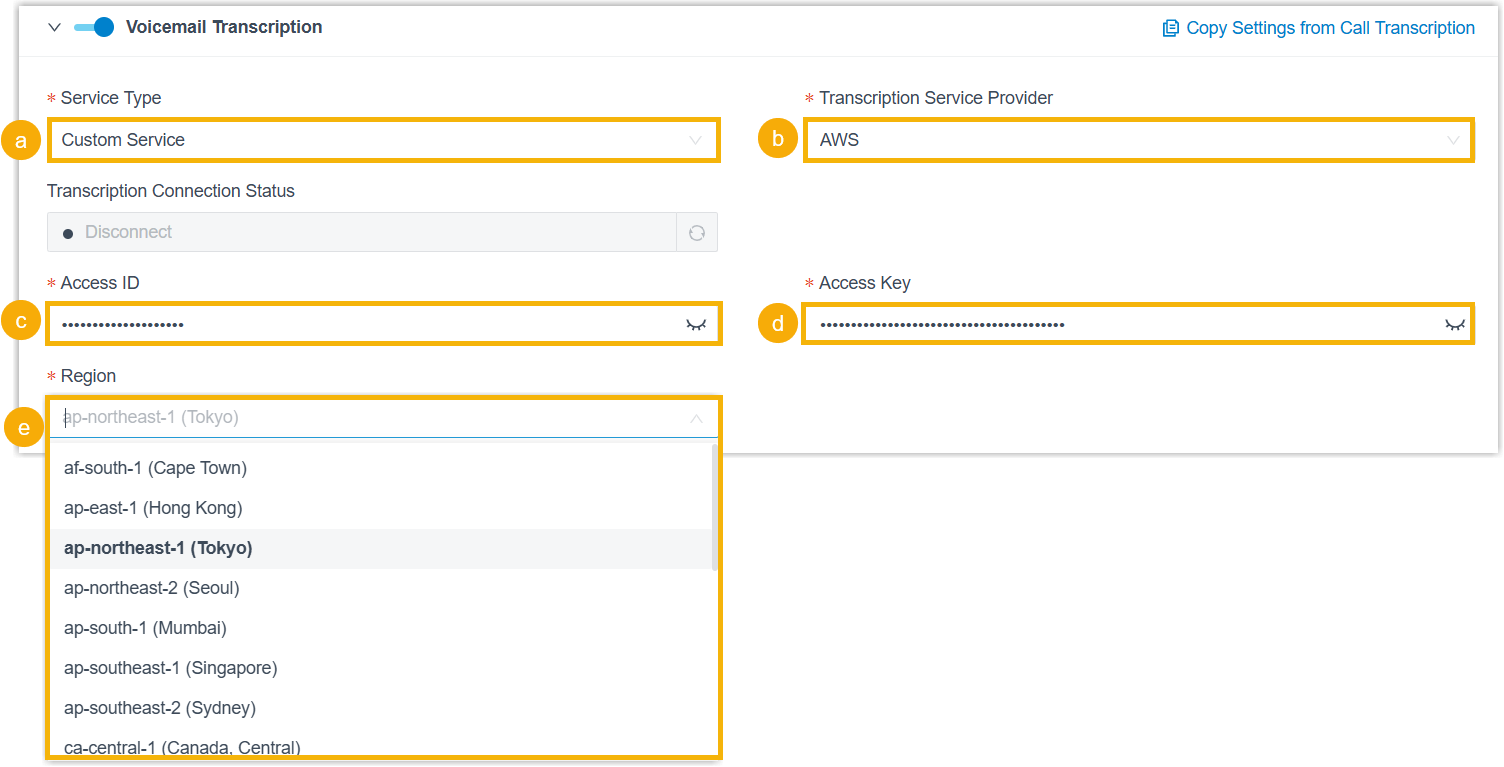
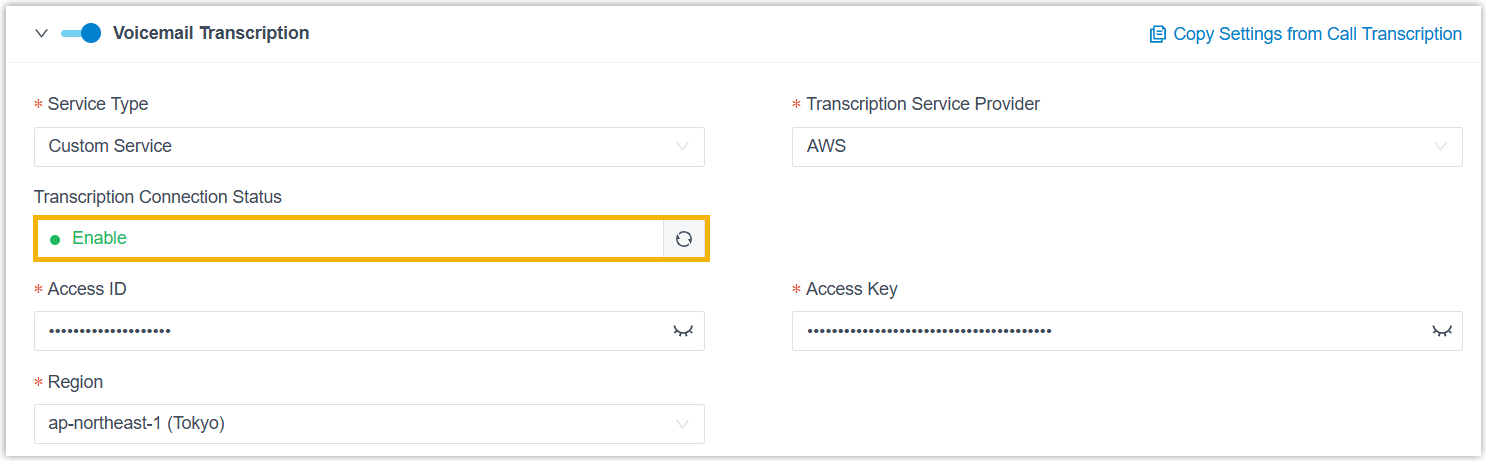
- In the Service Type drop-down list, select Custom Service.
- In the Transcription Service Provider drop-down list, select AWS.
- In the Access ID field, paste the access key obtained from Amazon Management Console.
- In the Access Key field, paste the secret access key obtained from Amazon Management Console.
- In the Region drop-down list, select the desired region.
- Set the transcription language.
- Language: In the drop-down list, select the desired language to be detected and transcribed for voicemail messages.
- Languages to
Auto-Detect: If you set the
Language to Auto Detection, select the
desired languages for auto detection.
The system will automatically detect and transcribe voicemail messages in the selected languages.
Note:- You can select up to 5 languages for auto-detection simultaneously.
- Only one region can be selected per language. For example, you cannot select both English (UK) and English (US) at the same time.
- In the
Extension Scope for This Feature section,
specify which extensions / extension groups / departments are
allowed to use voicemail transcription feature.
- All Extensions: All extensions can use this feature.
- Specific Extensions: Only selected extensions can use this feature.
- Click Save.
Result
The Transcription Connection Status displays Enable, indicating that the AI voicemail transcription feature powered by Amazon Transcribe service is enabled. Both group and extension voicemail messages can be detected and transcribed into readable text in the specified language via the Amazon service.