Add an MCP Server
An MCP Server provides a bundled set of tools, services, and data sources via the Model Context Protocol (MCP), enabling the AI receptionist to access an entire suite of capabilities through a single connection. This topic describes how to add an MCP server to Yeastar P-Series Cloud Edition.
Requirements
| Server | Requirement |
|---|---|
| PBX Server | The firmware version of Yeastar P-Series Cloud Edition is 84.24.0.30 or later. |
| MCP Server |
|
Limitations
The PBX supports a maximum of 20 MCP servers.
Procedure
- Log in to PBX web portal, go to .
- Click Add.
- In the Basic section, configure the basic
information.
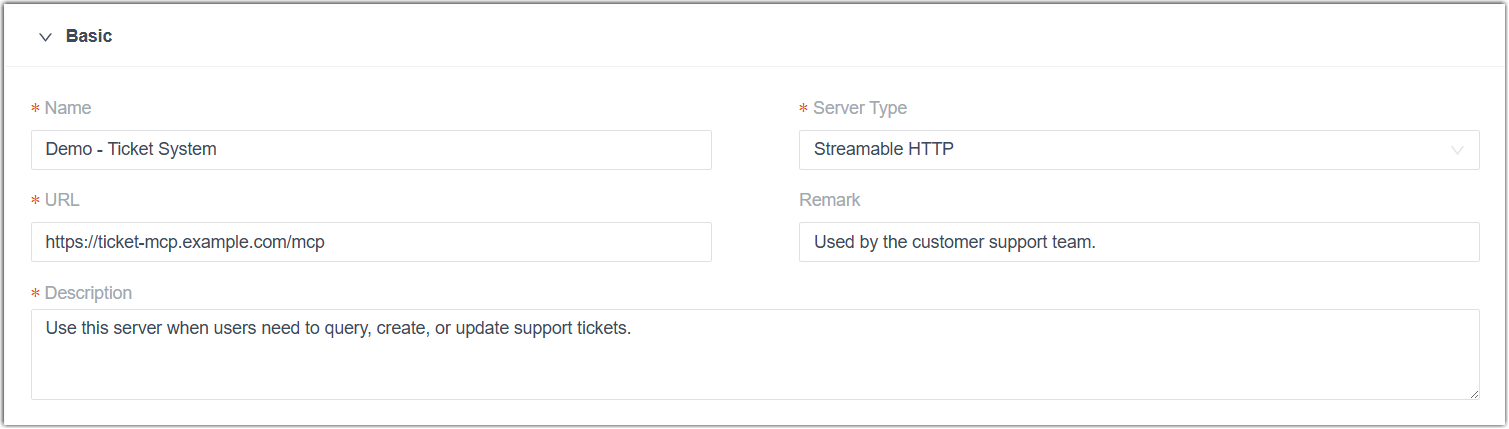
Table 2. Setting Description Name Specify a name to help you identify the MCP server. Server Type Select the transport mechanism that matches the MCP server's endpoint URL. For example, if the URL points to a Streamable HTTP endpoint, select Streamable HTTP.
URL Enter the complete endpoint URL of the MCP server. Note: The URL must start withhttps://.Remark Optional. Enter a note for quick reference, such as purpose, environment, or owner. Description Enter a natural language description to instruct the AI receptionist on when and how to use this MCP server. - In the Execution Rules section, configure the
execution rules for the MCP tools.
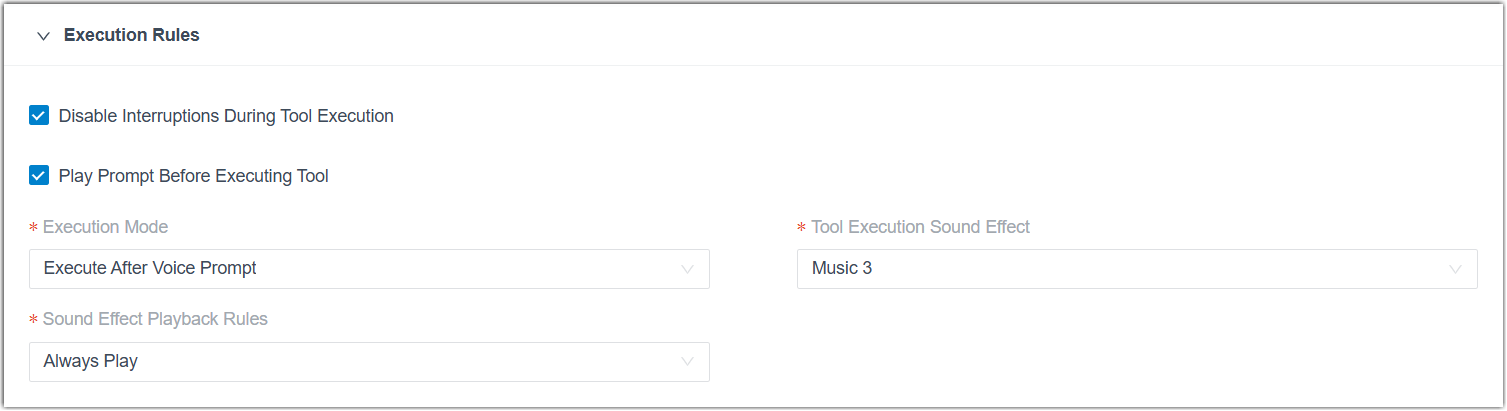
Table 3. Setting Description Disable Interruptions During Tool Execution When selected, callers can not interrupt the AI receptionist while the MCP tool runs. Play Prompt Before Executing Tool When selected, the AI receptionist always speaks a prompt (e.g., "Let me check that for you") before running the MCP tool. When unselected, the AI receptionist decides whether to speak a prompt automatically based on the recent execution latency of the MCP tool. For example, skipping it for fast responses and speaking first for slow ones.
Execution Mode Determines the execution behavior of the MCP tool. - Execute Immediately on LLM Request: The tool runs as soon as the AI receptionist requests it.
- Execute After Voice Prompt: The tool runs after the AI receptionist plays a voice prompt.
- Async: The tool runs in the background
without pausing the conversation. The AI
receptionist does not wait for the response and
continues speaking immediately.Note: This mode is best suited for operations that don't require a response, such as sending an email or triggering an external workflow.
Tool Execution Sound Effect Specify the ambient sound during MCP tool execution. Note: This setting is not available when Execution Mode is Async.- None: No sound will be played.
- Typing Sound: Play a keyboard typing effect.
- Music 1 - Music 4: Play one of the built-in ambient sound.
Sound Effect Playback Rules Specify when to play the ambient sound.Note: This setting is not available when Execution Mode is Async or Tool Execution Sound Effect is None.- Play Only After Voice Prompt: Plays only when the AI receptionist speaks a prompt before executing the tool.
- Always Play: Plays during every tool execution, regardless of whether the AI receptionist speaks a prompt first.
- Optional: In the Headers section, add and
specify headers to be included in the request.Note:
- Only supports static header values. If
authentication needs to be passed in headers, use
static credentials (e.g.,
Authorization:
                                                  Bearer <Your_API_KEY>
). - Supports up to 20 headers.
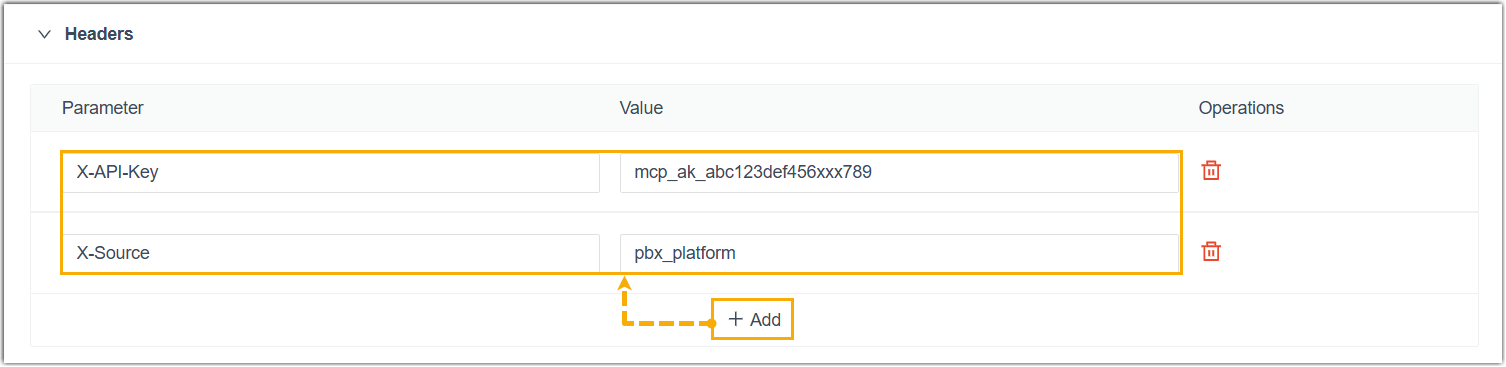
Table 4. Setting Description Parameter Header name. Values Fixed header value. Note: Dynamic values are not supported. - Only supports static header values. If
authentication needs to be passed in headers, use
static credentials (e.g.,
- Click Save.
Result
- You can verify the connection status in the Status
column. A
 (Connected) status
indicates that a secure connection to the remote MCP server has been
established.
(Connected) status
indicates that a secure connection to the remote MCP server has been
established. 
- You can click
 beside the MCP server to view the available
tools provided by the server.
beside the MCP server to view the available
tools provided by the server.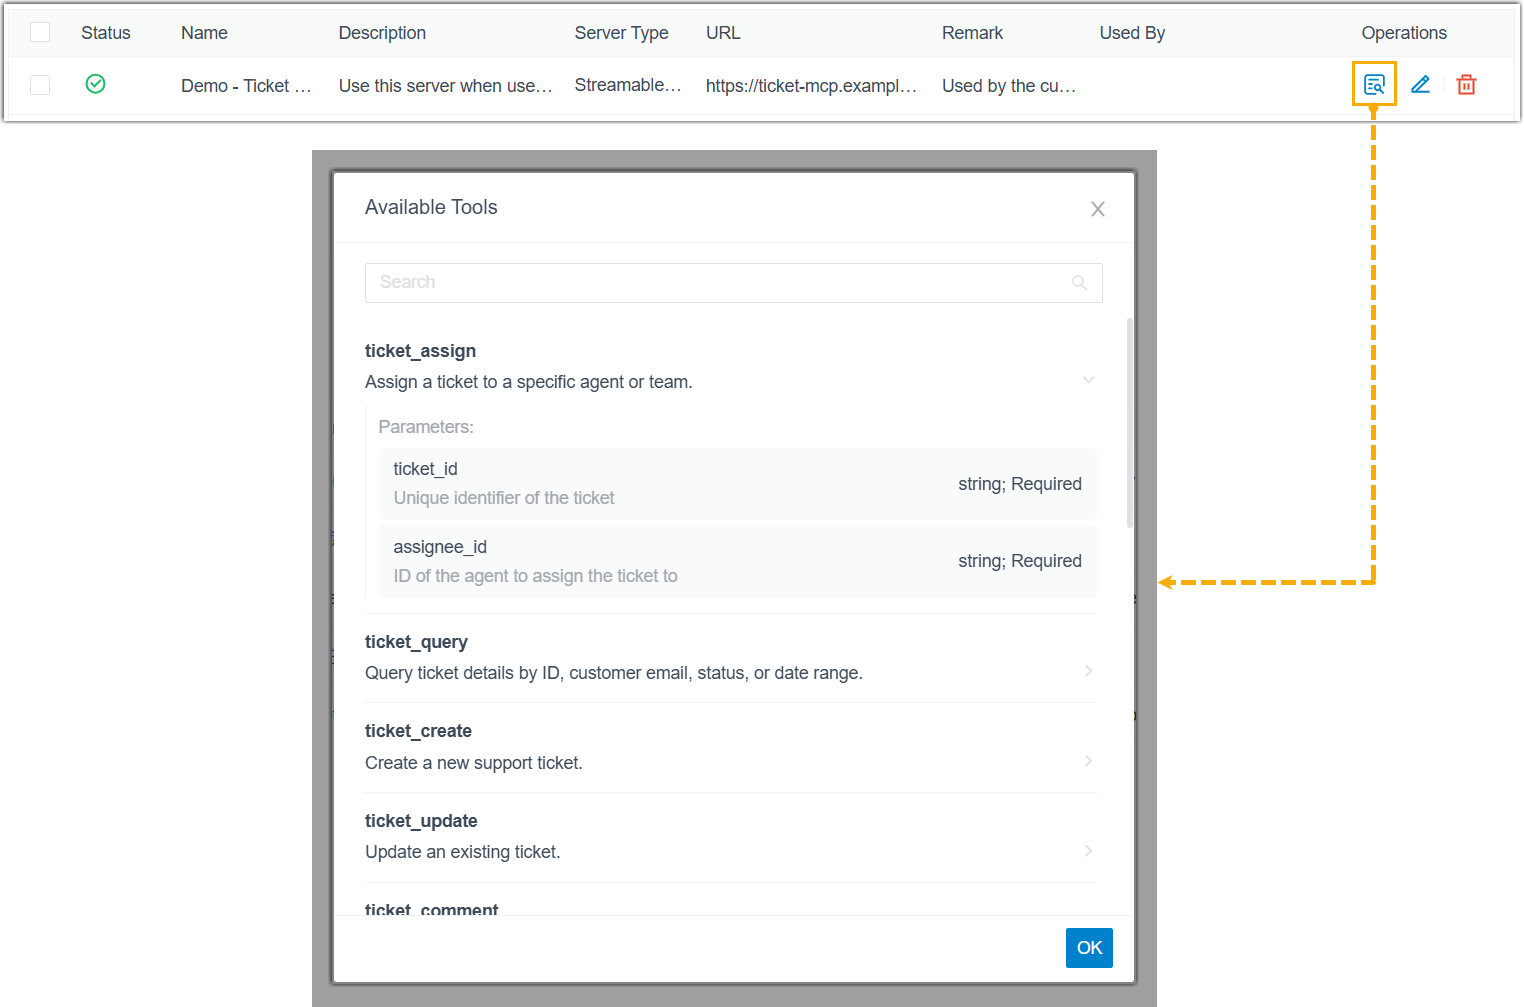
What to do next
Assign the MCP server to an AI receptionist and test it in a conversation.