Set up Communication from Headquarters PBX to Branch PBX
After interconnecting the two P-Series PBX systems, you need to set up routes on the PBXs to allow the extensions of Headquarters PBX to make calls to the extensions of Branch PBX. This topic describes the basic route settings for the PBXs.
Background information
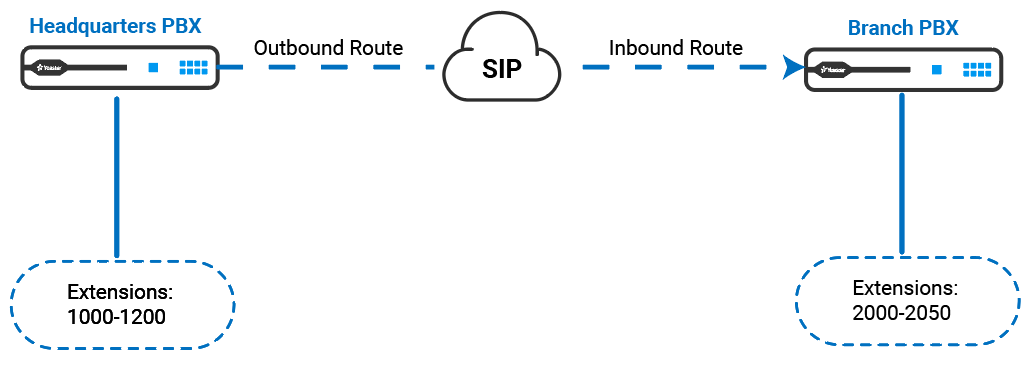
To make calls from Headquarters PBX to Branch PBX, do as follows:
| Device | Instruction |
|---|---|
| Headquarters PBX | Set up an outbound route on Headquarters PBX to route calls out |
| Branch PBX | Set up an inbound route on Branch PBX to receive calls |
We provide a diagram to help you understand the call routing in a better manner.
Set up an outbound route on Headquarters PBX
- Log in to the web portal of Headquarters PBX, go to .
- Click Add to add an outbound route.
- Configure the outbound route.
- In the General section, specify a name to help you identify the outbound route.
- In the Dial Pattern section, configure dial rules
for the outbound route as needed.
In this example, retain the default settings.
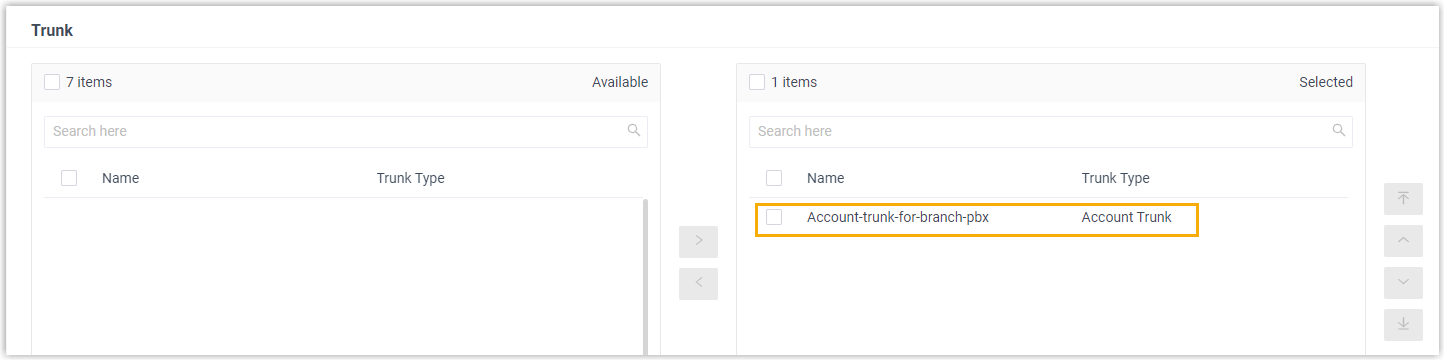
- In the Trunk section, select the trunk that is
created for Branch PBX from Available box to
Selected box.
- In the Extension/Extension Group section, select
all the extensions from Available box to
Selected box.
In this way, all extension users are allowed to make calls to Branch PBX.
- Click Save and Apply.
Set up an inbound route on Branch PBX
- Log in to the web portal of Branch PBX, go to .
- Click Add to add an inbound route.
- Configure the inbound route.
- In the General section, specify a name to help you identify the inbound route.
- In the DID Pattern section, set up the DID
matching rule.

- DID Matching Mode: Select Match DID Range to Extension Range.
- DID Range: Enter the DID range. In this
example, enter the extension range of Branch PBX, namely
2000-2050.
When the dialed number is matched with the DID number, the call will be routed to the corresponding extension.
- In Caller ID Pattern section, set up the caller
ID match patterns as needed.
In this example, retain the default settings.
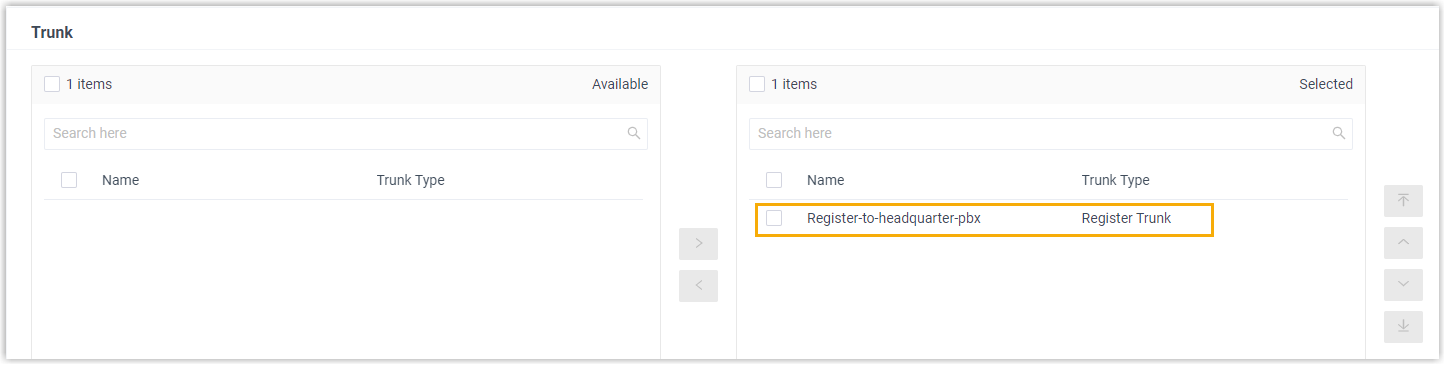
- In the Trunk section, select the trunk that is
created for Headquarters PBX from
Available box to
Selected box.
- In the Default Destination section, select the
desired destination.

- In the Default Destination drop-down list, select Match Extension Range.
- In the extension range field, enter the extension range of Branch PBX. In this example, enter
2000-2050.
- Click Save and Apply.
What to do next
Make a call to test.
For example, extension user 1000 in the headquarters dials 2000, the extension 2000 in the branch office will ring.