Submit App for Review
After you set up a Facebook channel, you need to test message delivery between Facebook Page and Yeastar P-Series PBX System, then submit your app for review.
Before you submit
Test message delivery between Facebook Page and Yeastar P-Series PBX System.
- (Optional) Add a user as a
Tester.
By default, only your Meta Developer account has permission to interact with the app. You can directly use your Meta Developer account to test message delivery, but we recommend that you add a Tester account with limited access to aid with the testing process. This helps avoid exposing your Meta Developer account, as Meta requires a Facebook account to test your app.
- Test message delivery and record two screencasts.
- A screencast that demonstrates how
you send a message to your Facebook Page and how the message is
received and replied on Yeastar P-Series PBX System within 24
hours.
We provide an example screencast for your reference, as shown below:
- A screencast that demonstrates how your
app uses a human agent tag to respond to customer messages outside
the 24-hour window.
We provide an example screencast for your reference, as shown below:
- A screencast that demonstrates how
you send a message to your Facebook Page and how the message is
received and replied on Yeastar P-Series PBX System within 24
hours.
Step 1. Complete app settings
- Go to the Basic settings page of your Meta app.
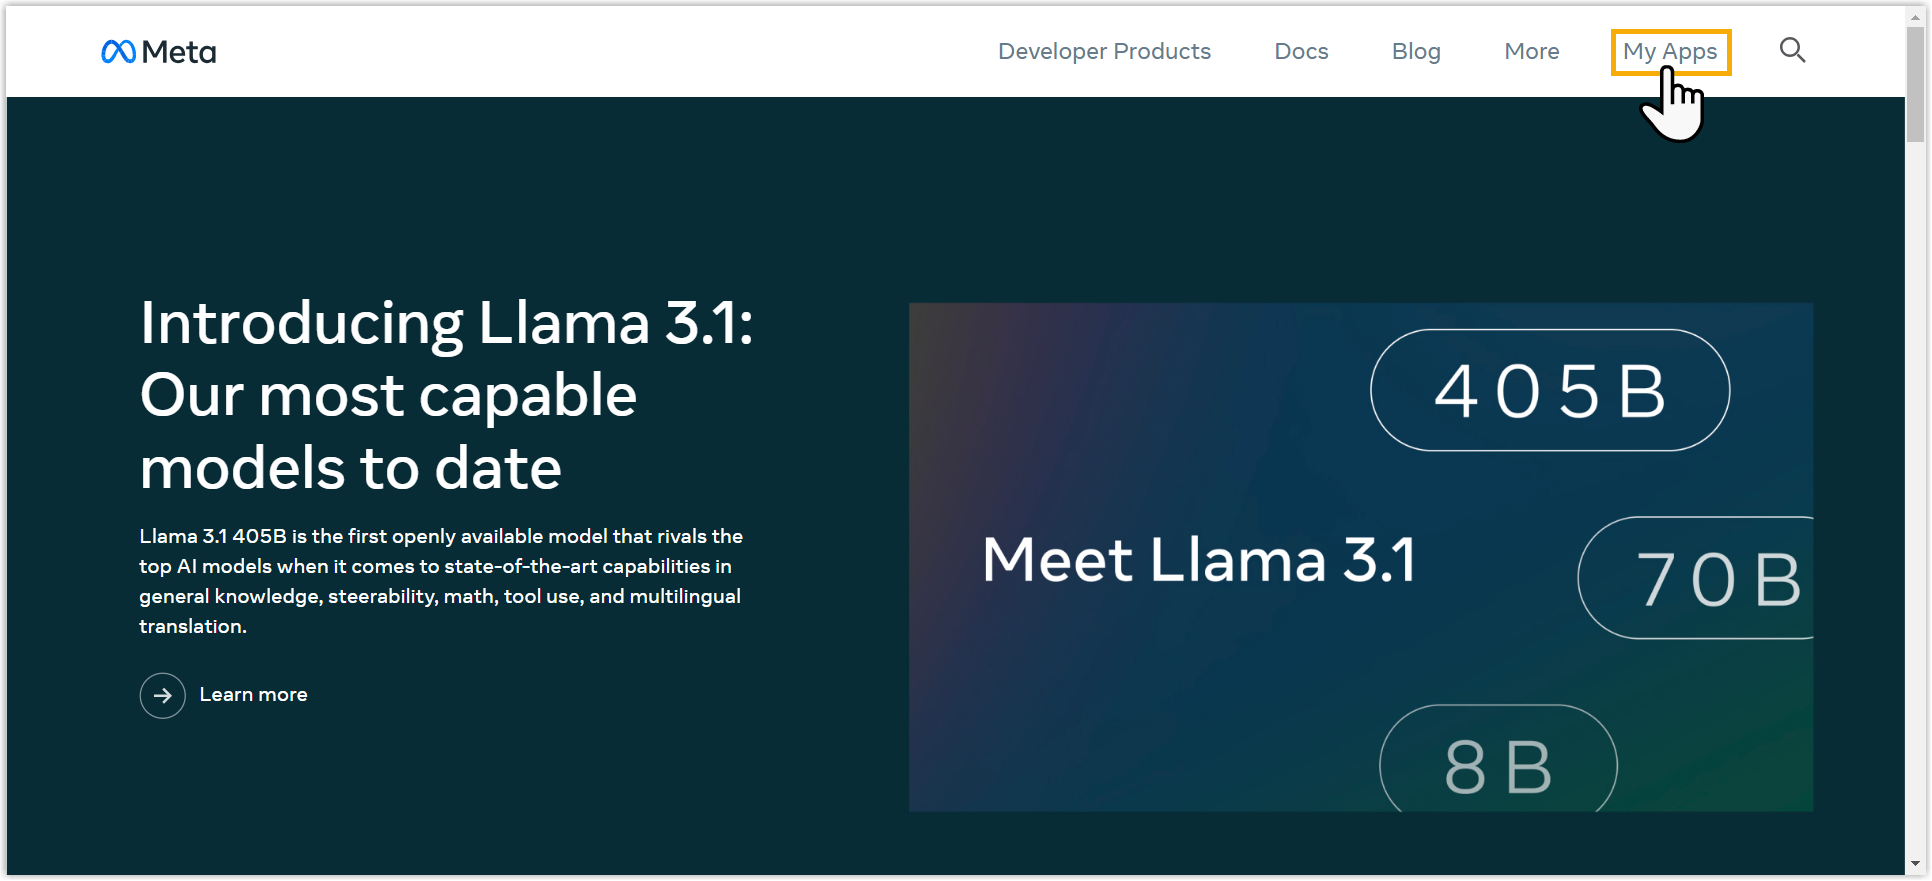
- Log in to 'Meta for Developers' portal, then go to
My Apps from the top menu.
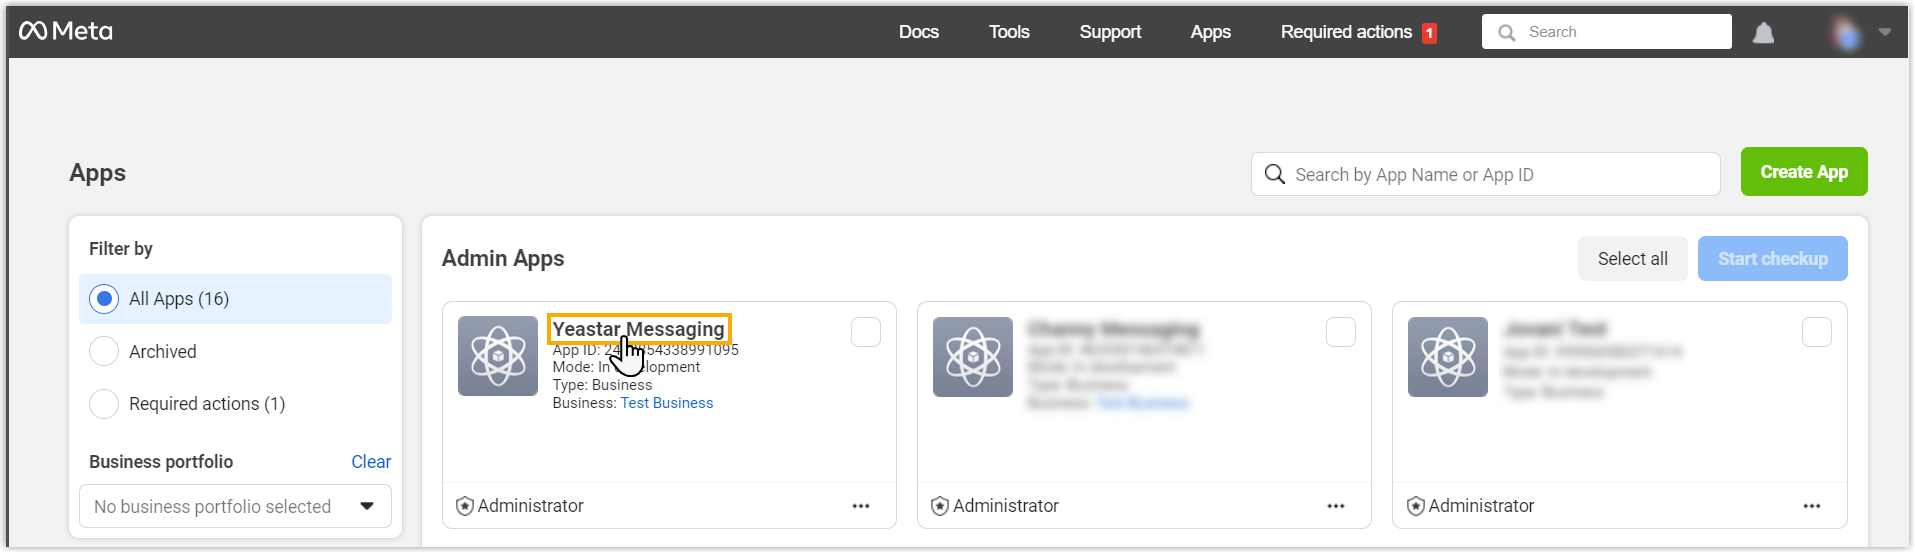
- On the App list, click your Meta app.
- On the left navigation bar, go to .
- Log in to 'Meta for Developers' portal, then go to
My Apps from the top menu.
- At the top of the page, complete the following settings.
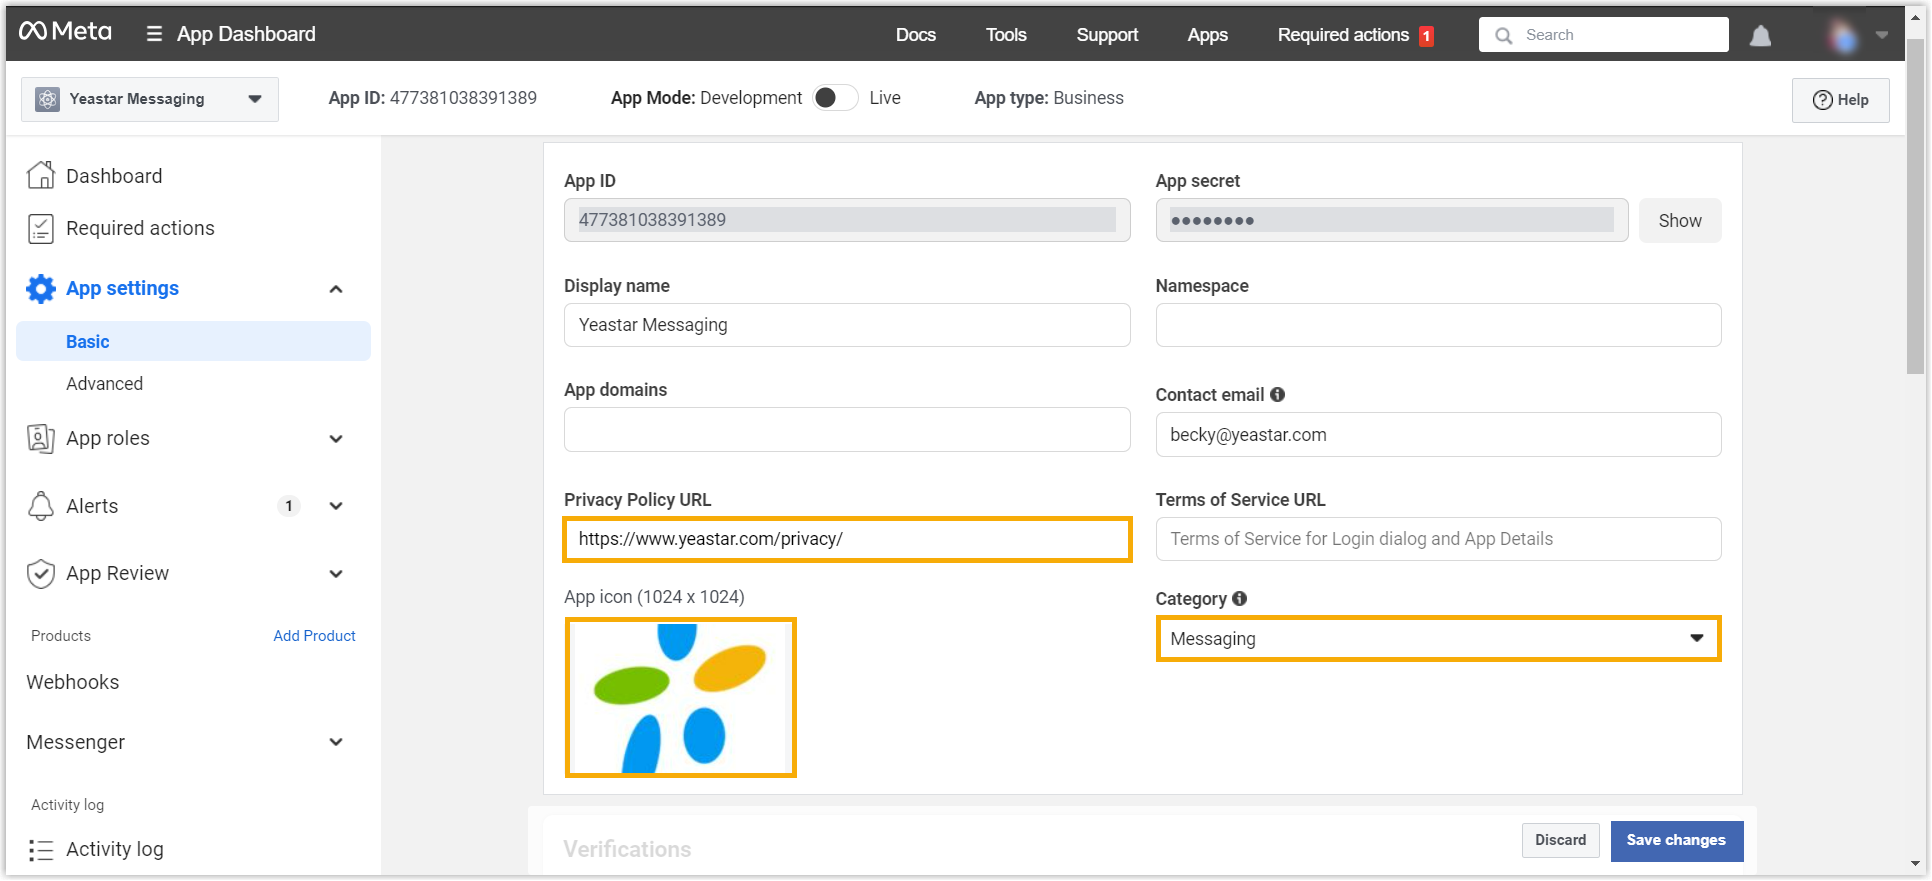
- Privacy Policy URL: Enter your organization's privacy policy URL.
- App icon: Upload your organization's icon.
- Category: Select Messaging.
- Scroll down to the bottom of the page, add a website platform to share the PBX
URL with Meta.
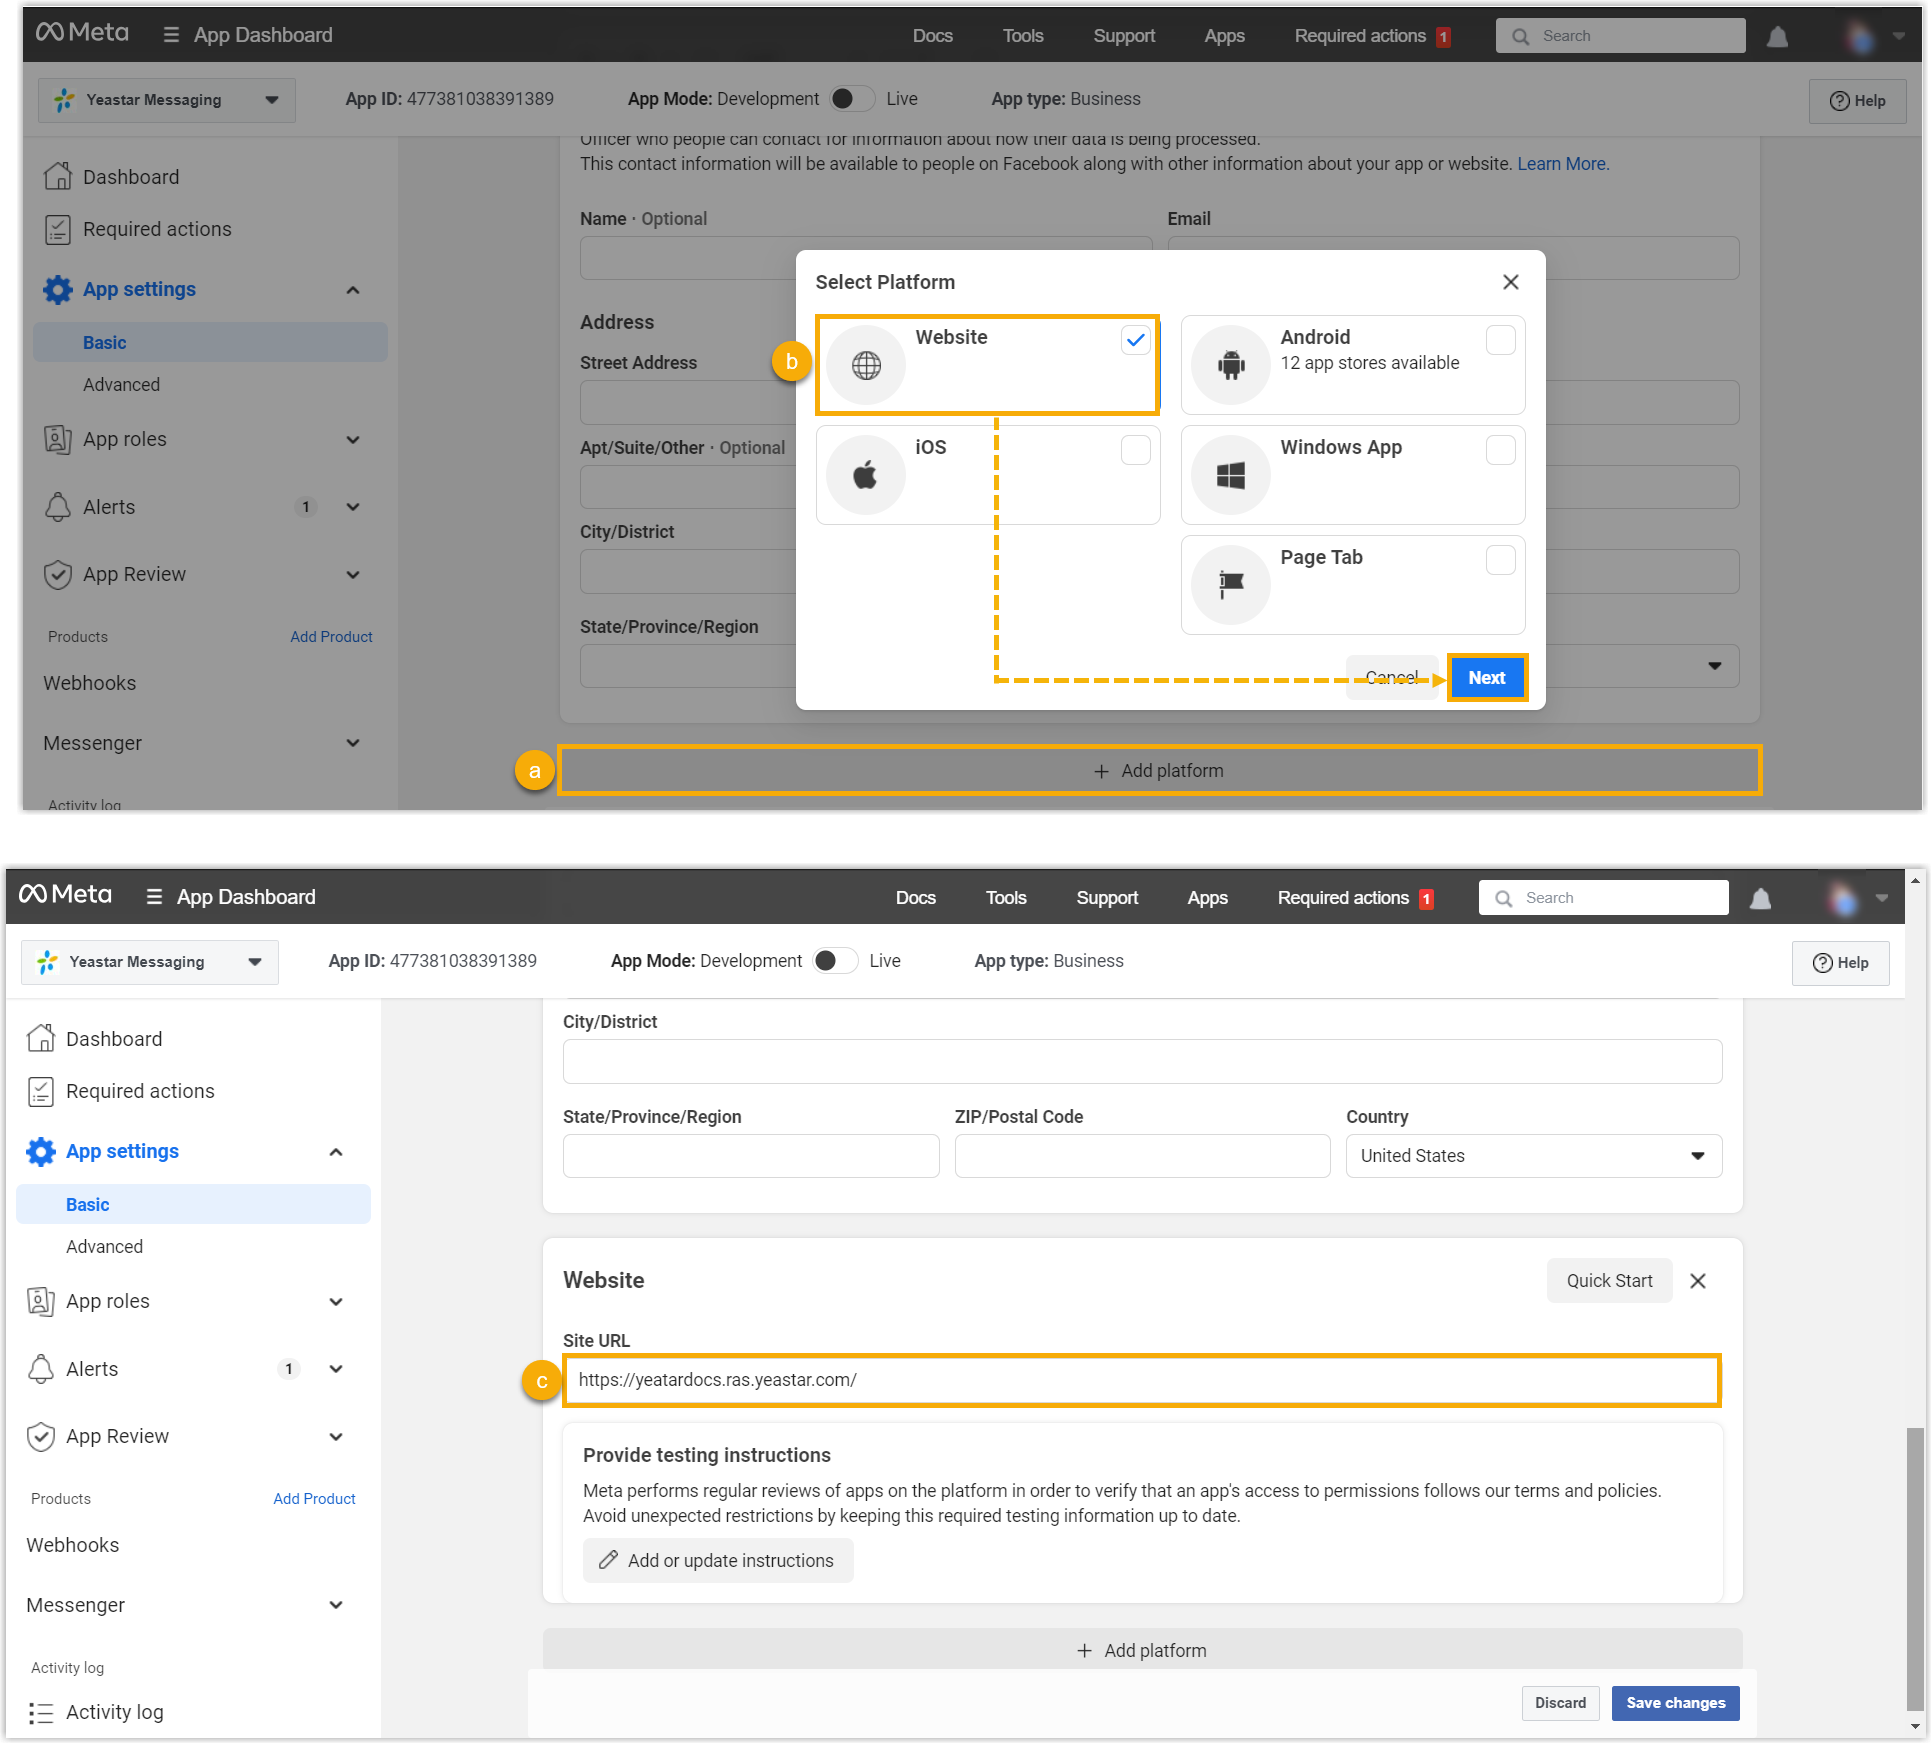
- Click Add platform.
- Select the checkbox of Website, then click Next.
- In the Site URL field, enter the FQDNof your PBX system.
- Click Save changes.
Step 2. Select permissions and features
- On the left navigation bar, go to .
- Search for the required permissions (pages_messaging,
Human Agent, and Business Asset User
Profile Access) and click the corresponding
Request advanced access button to add them to
your submission.
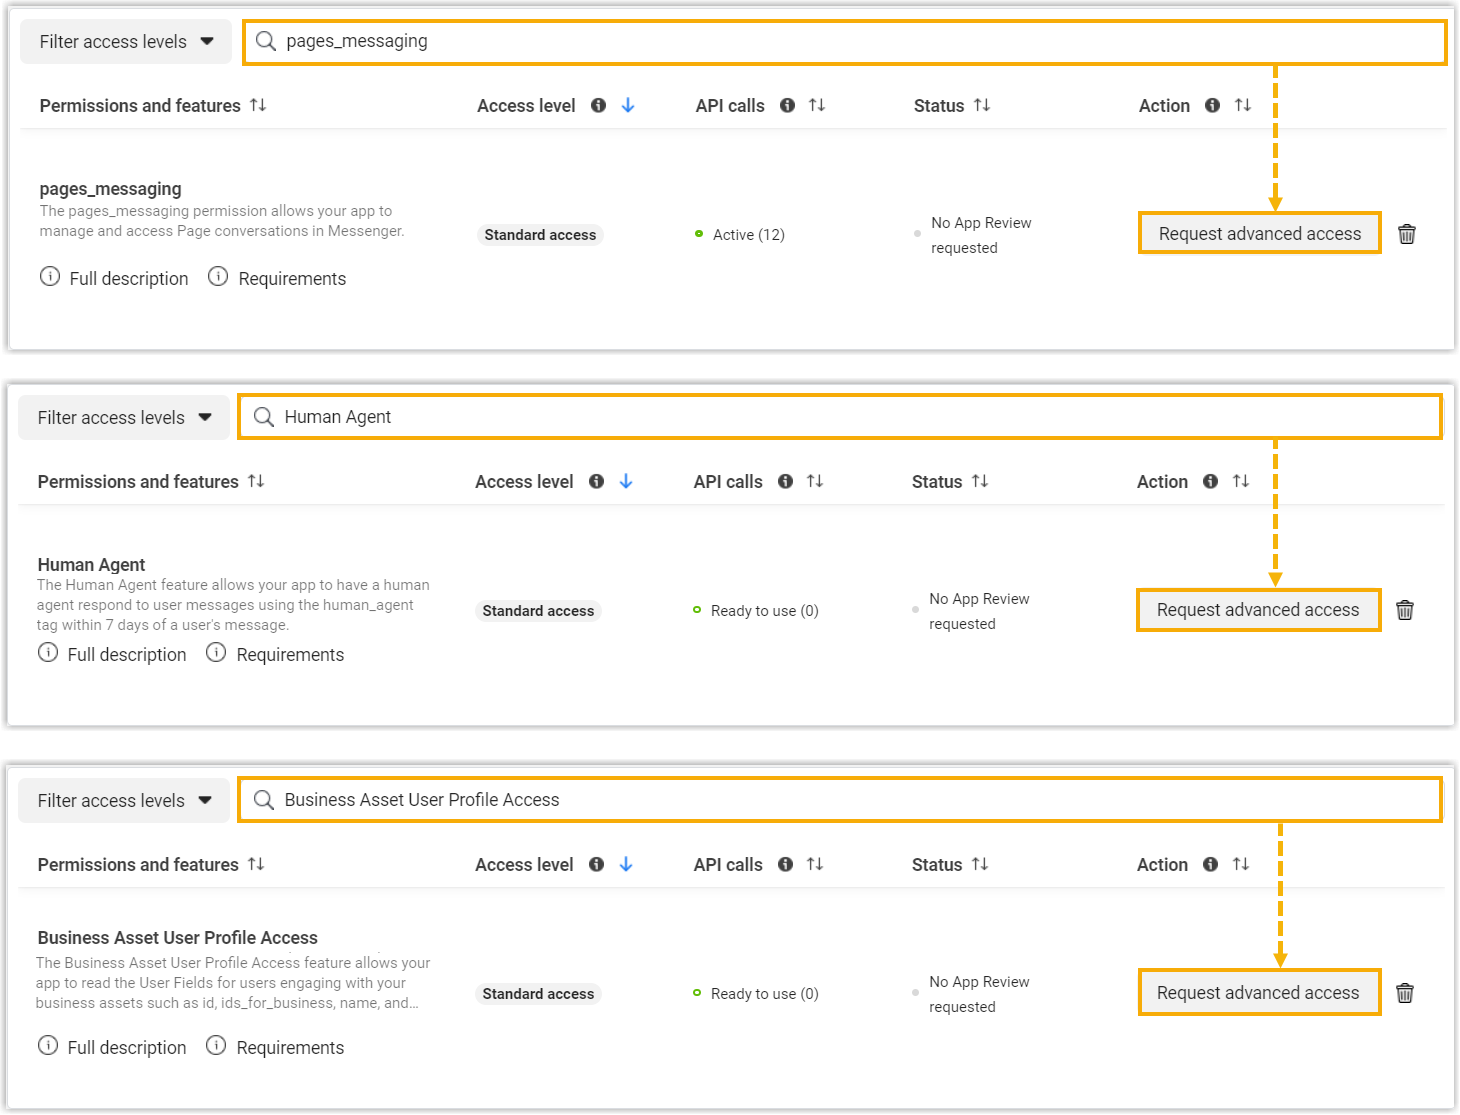
- Click Continue request.
Step 3. Remove unnecessary permissions
- On the left navigation bar, go to .
- In the 3. Complete App Review section, click
Request Permission.
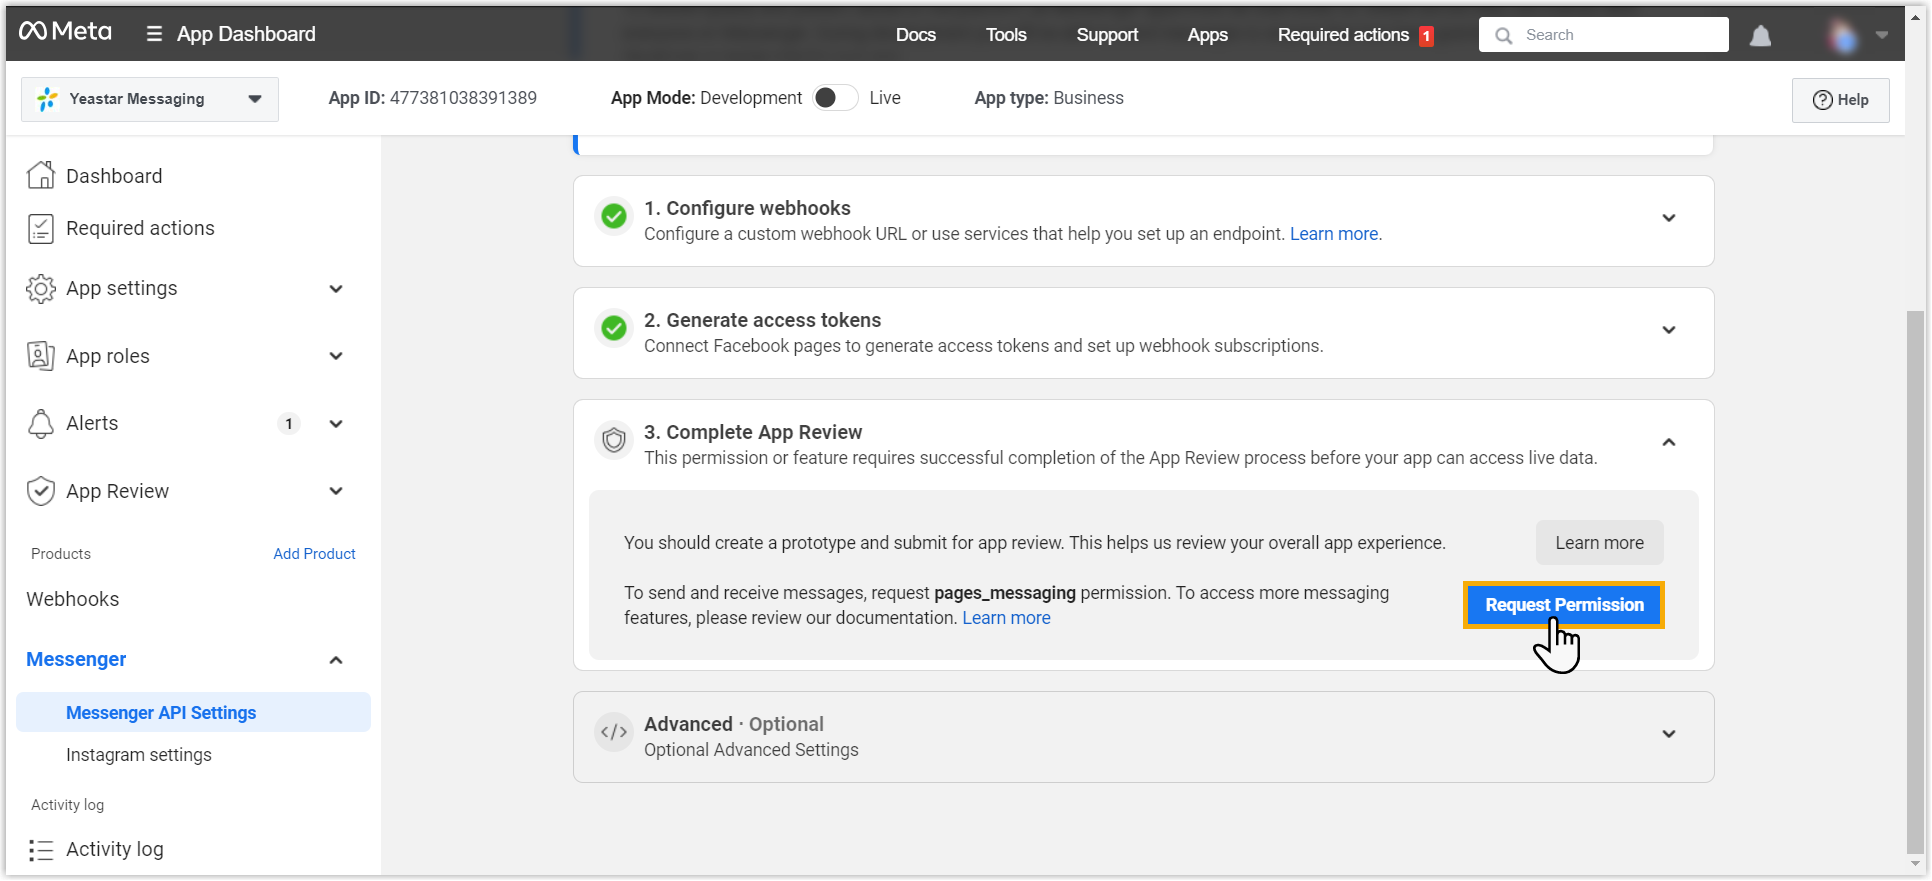
- Unselect the checkboxes of the following permissions, then click
Request Permission.

You will be redirected to .
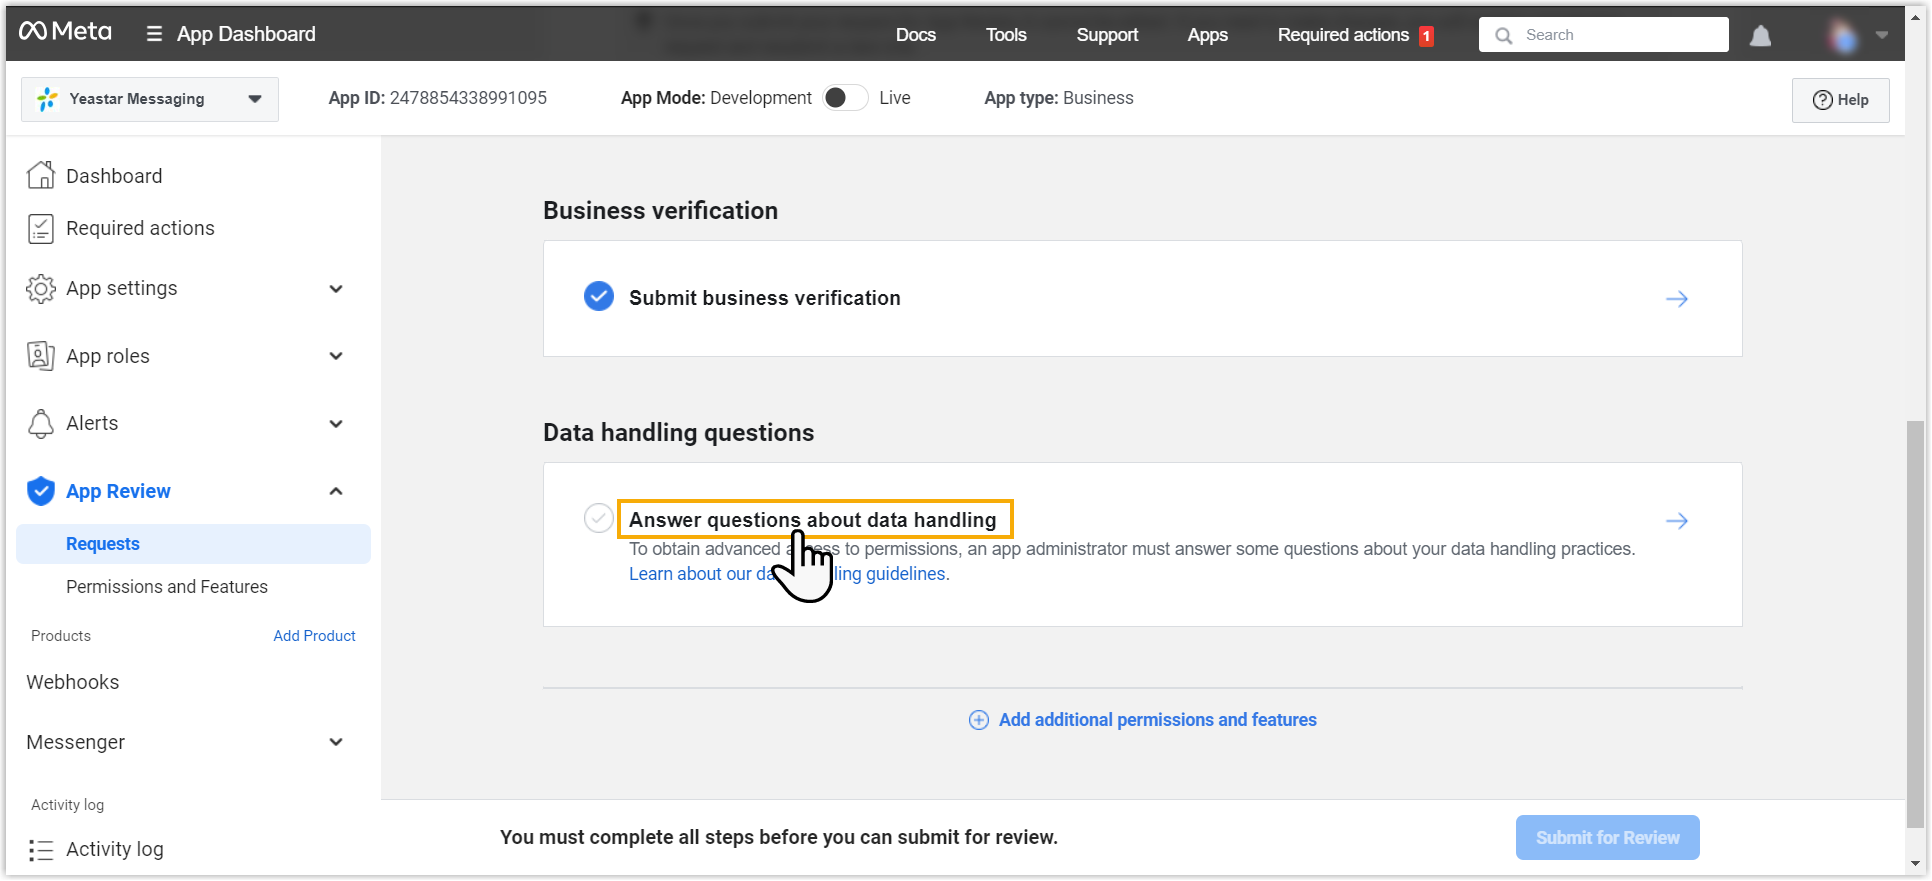
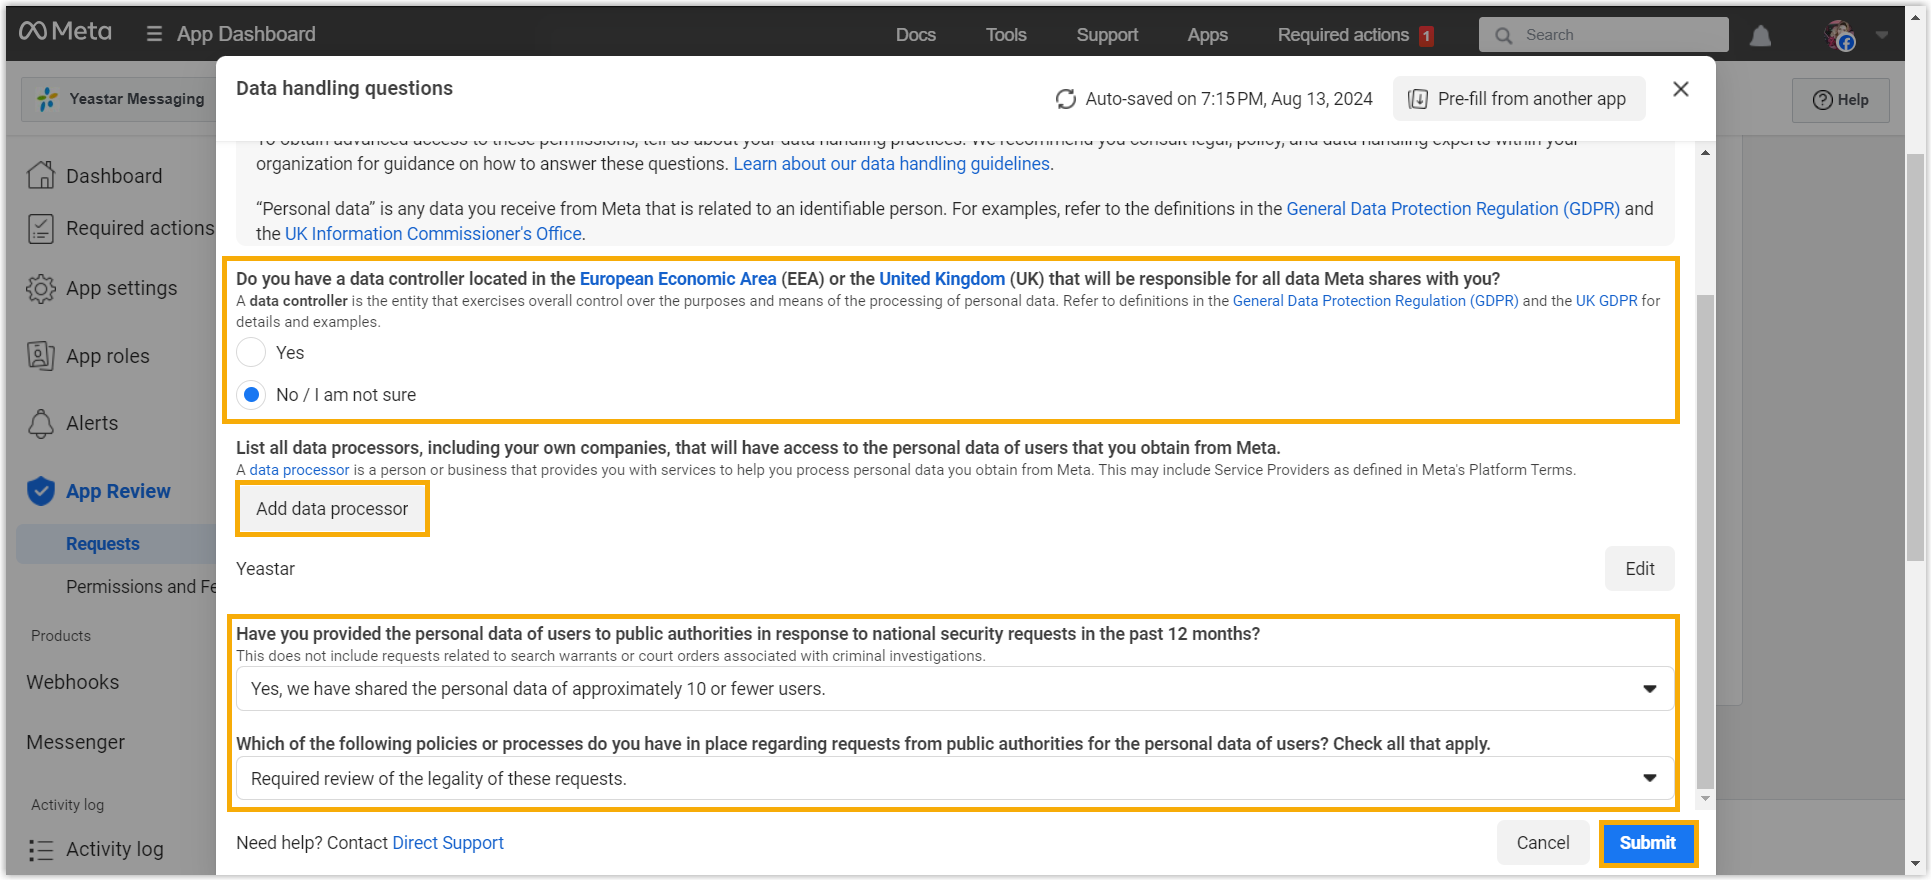
Step 4. Answer data handling questions
- On the left navigation bar, go to .
- Scroll down to the Data handling questions section, then
click Answer questions about data handling.
- Fill in the following information based on your situation, then click
Submit.
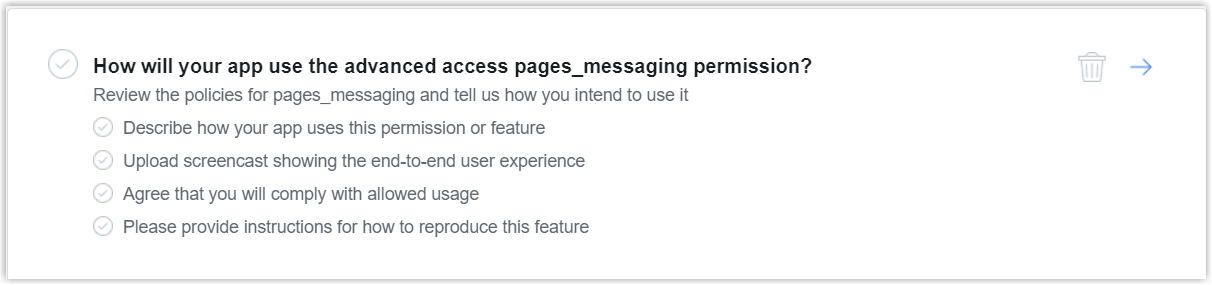
- Complete the following tasks to demonstrate why the
pages_messaging permission with advanced access is
needed and how the app uses it.
- Click How will your app use the advanced access
pages_messaging permission?.
- Copy and paste the following text in the detailed description box.
This app is used to integrate Yeastar Phone System with Facebook Messenger. After obtaining the "pages_messaging" permission, agents can manage Page messages within Yeastar Phone System.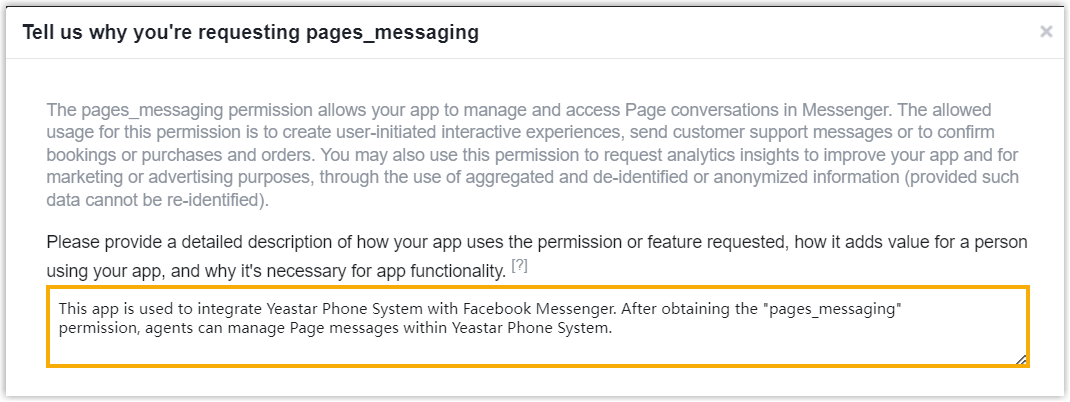
- In the Test and reproduce the functionality of your
integration section, select your Facebook Page, copy
and edit the following text based on your situation, then paste in
the text field.
Step 1: Log in to Yeastar Phone System with the following credentials:
Login address:{pbx_fqdn}
Username: {extension_number_or_email_address}
Password: {password}

Step 2: Log in to Facebook with the following credentials and send a message to the Facebook Page:{url_for_facebook_page}
Email or phone: {email_address_or_phone_number}
Password: {password}

Step 3: Receive and reply to the message on Yeastar Phone System.
In this example, we paste the following text:
Step 1: Log in to Yeastar Phone System with the following credentials:
Login address:https://yeastardocs.ras.yeastar.com
Username: smith@yeastar.com
Password: rz9nDg3CrO

Step 2: Log in to Facebook with the following credentials and send a message to the Facebook Page: https://www.facebook.com/profile.php?id=61563743597525
Email or phone: yangym@yeastar.com
Password: YpeS345joi

Step 3: Receive and reply to the message on Yeastar Phone System.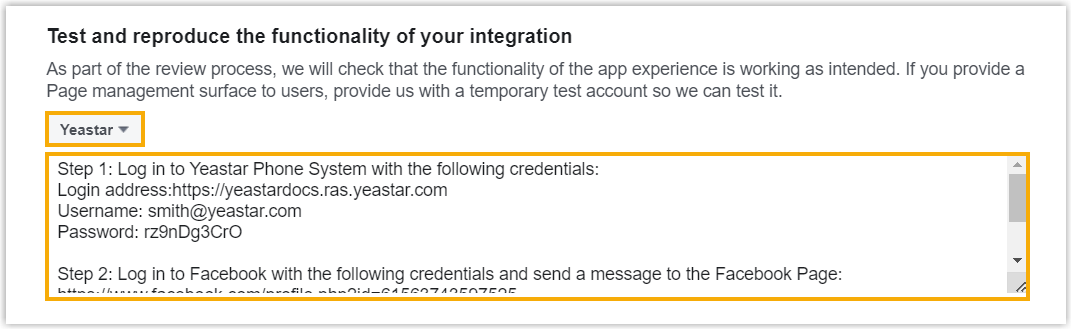
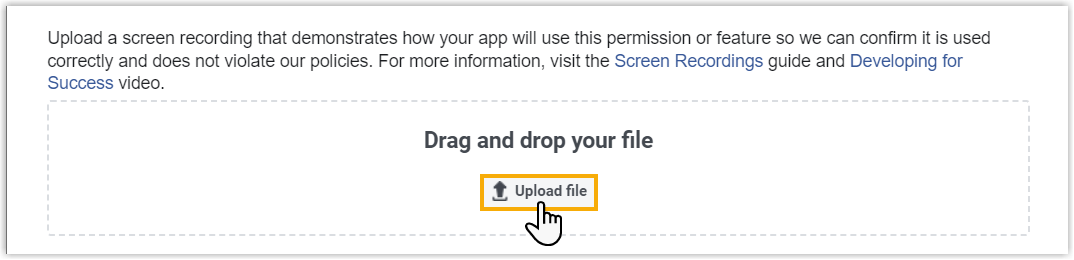
- Click Upload file to upload the screencast that demonstrates how you
send a message to your Facebook Page and how the message is received
and replied on Yeastar Phone System.
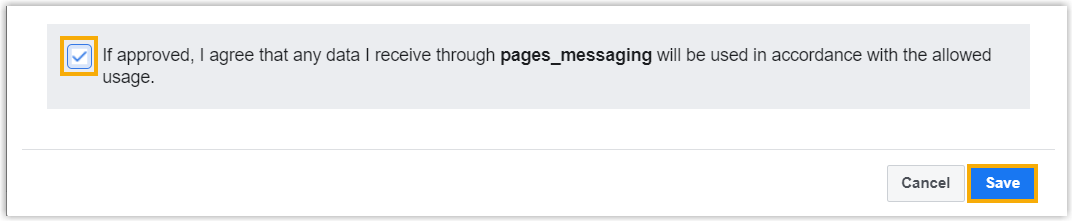
- Select the checkbox to agree that you will comply with the allowed
usage, then click Save.
- Click How will your app use the advanced access
pages_messaging permission?.
- Complete the following tasks to demonstrate why the Business Asset
User Profile Access permission with advanced access is needed
and how the app uses it.
- Click How will your app use the advanced access Business
asset user profile access feature?.
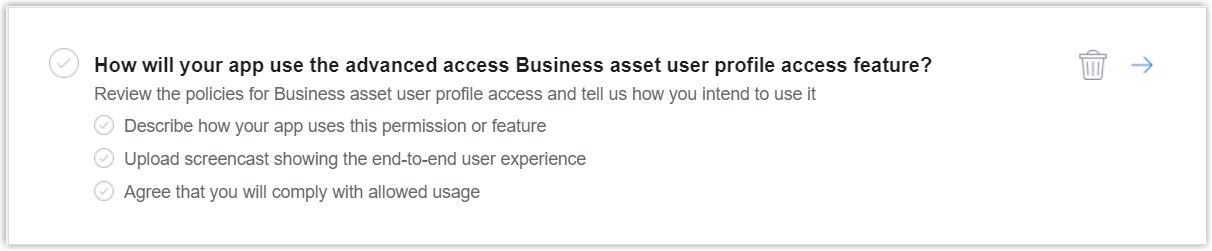
- Copy and paste the following text in the detailed description
box.
This app is used to integrate Yeastar Phone System with Facebook Messenger. After obtaining the "Business Asset User Profile Access" permission, agents can view the name of Facebook users who send messages to the Page directly within Yeastar Phone System, which enables them to identify different Facebook users and provide better services.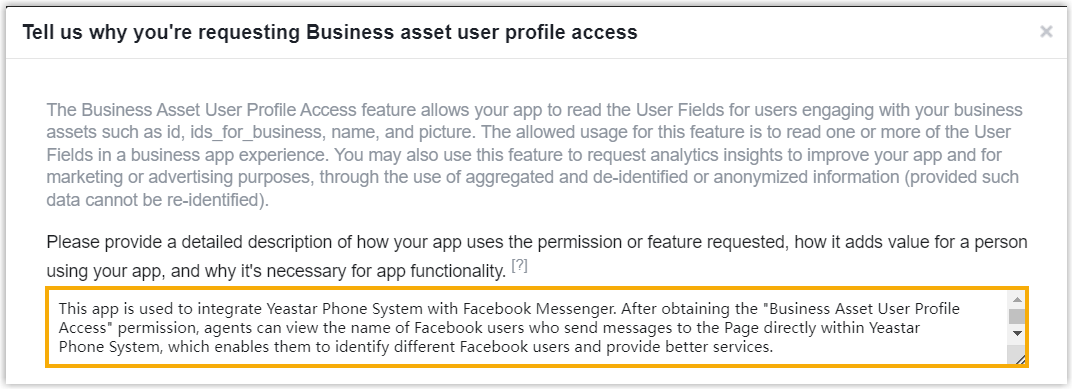
- Click Upload file to upload the screencast that you have uploaded for
pages_messaging.
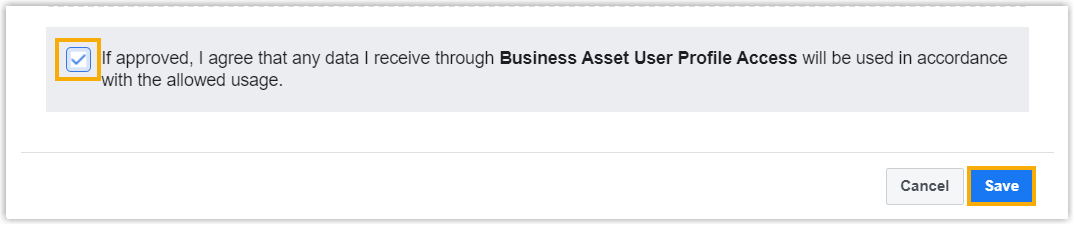
- Select the checkbox to agree that you will comply with the allowed
usage, then click Save.
- Click How will your app use the advanced access Business
asset user profile access feature?.
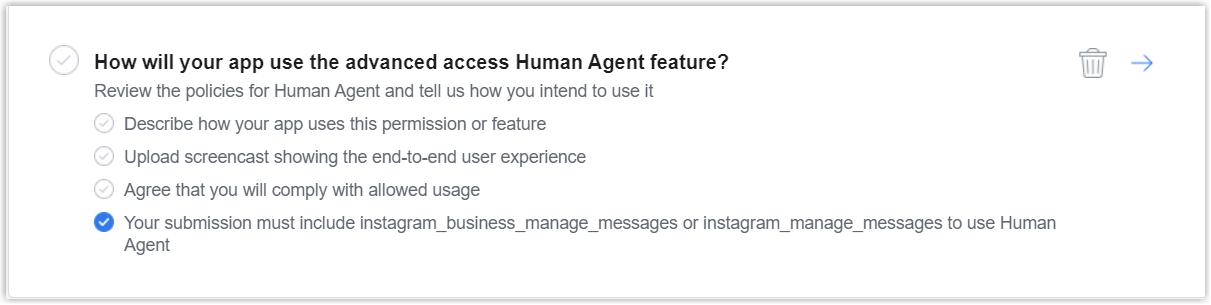
- Complete the following tasks to demonstrate why the Human
Agent permission with advanced access is needed and how the app
uses it.
- Click How will your app use the advanced access Human
Agent feature?.
- Copy and paste the following text in the detailed description box.
This app is used to integrate Yeastar Phone System with Facebook Messenger. According to Facebook's rules, user can only use the Message Tag feature to send messages to users outside the 24-hour Standard messaging window.
After obtaining the "Human Agent" permission, when a customer's inquiry cannot be resolved within the standard messaging window, the agent can use the human_agent tag to continue providing services to the customer.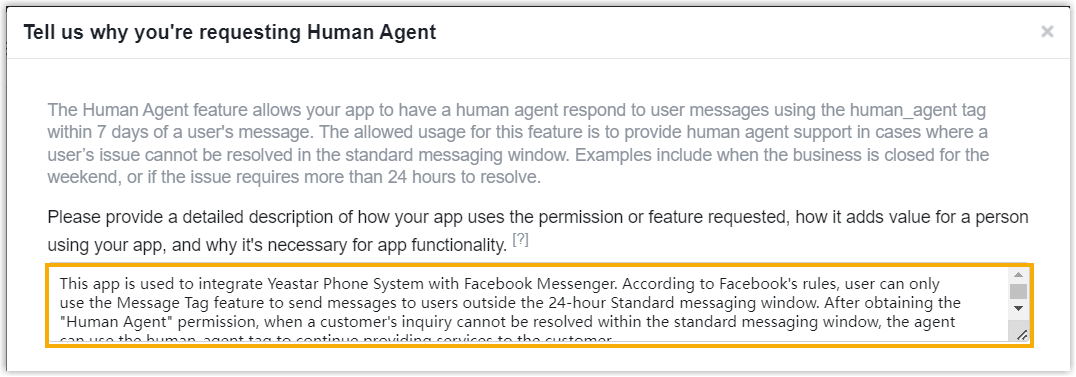
- Click Upload file to upload the screencast that demonstrates how your
app uses a human agent tag to respond to customer messages.
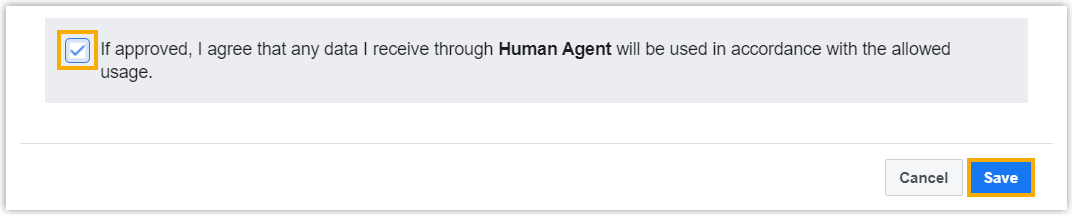
- Select the checkbox to agree that you will comply with the allowed
usage, then click Save.
- Click How will your app use the advanced access Human
Agent feature?.
- At the bottom of the page, click Submit for Review and enter password to confirm your operation.
Result
Your submission is queued and you will receive the review result in a few days.
What to do next
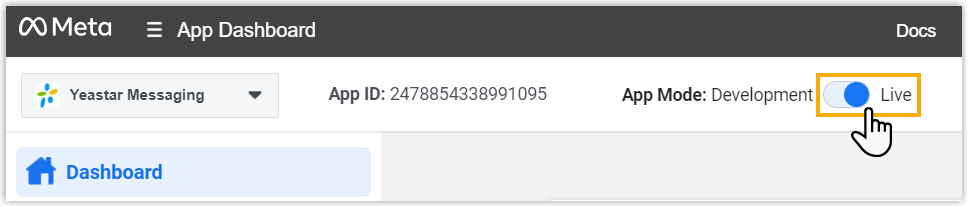
After you pass App Review, you need to switch your app to Live mode on 'Meta for Developers' portal, as shown below.