Create a User
This topic describes how to create and configure a user.
Limitation
The number of users supported depends on your subscription capacity.
Procedure
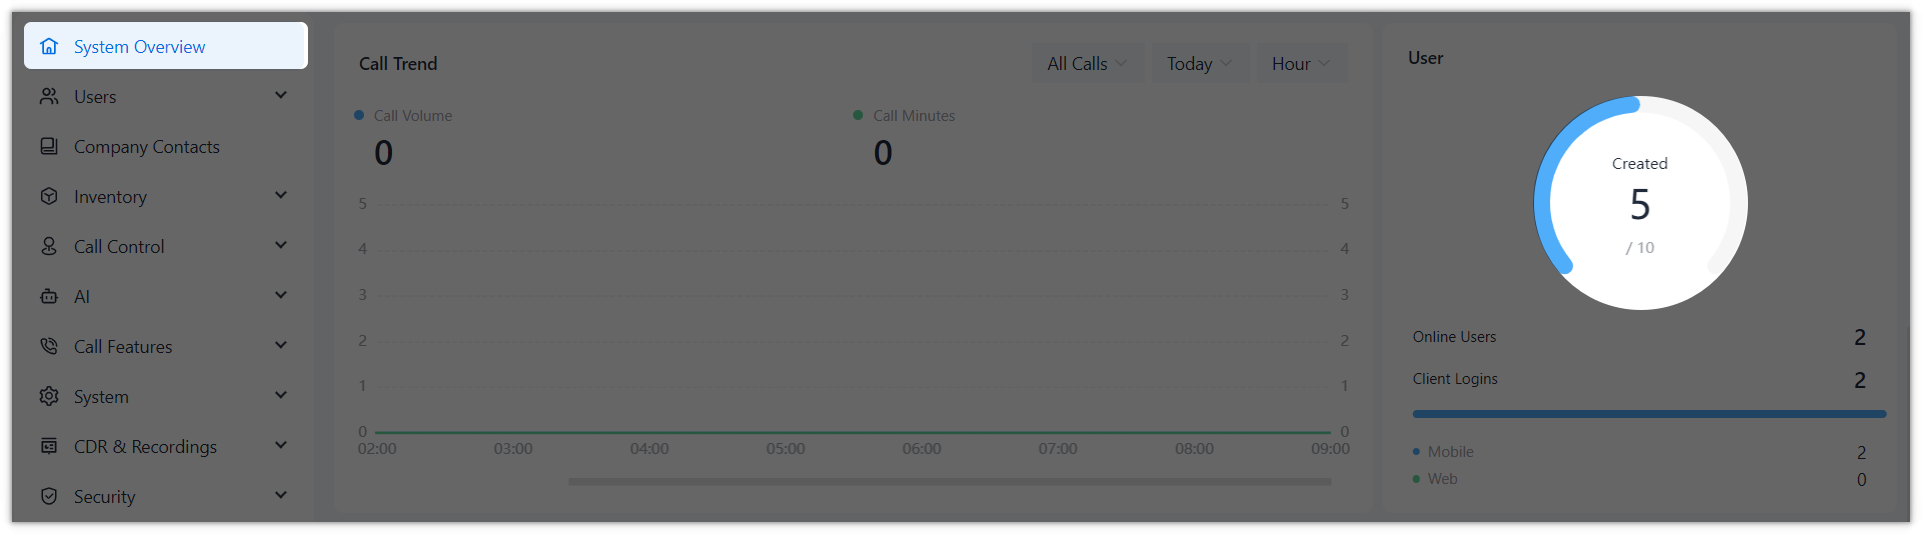
- Log in to NovoOne Tenant portal, go to .
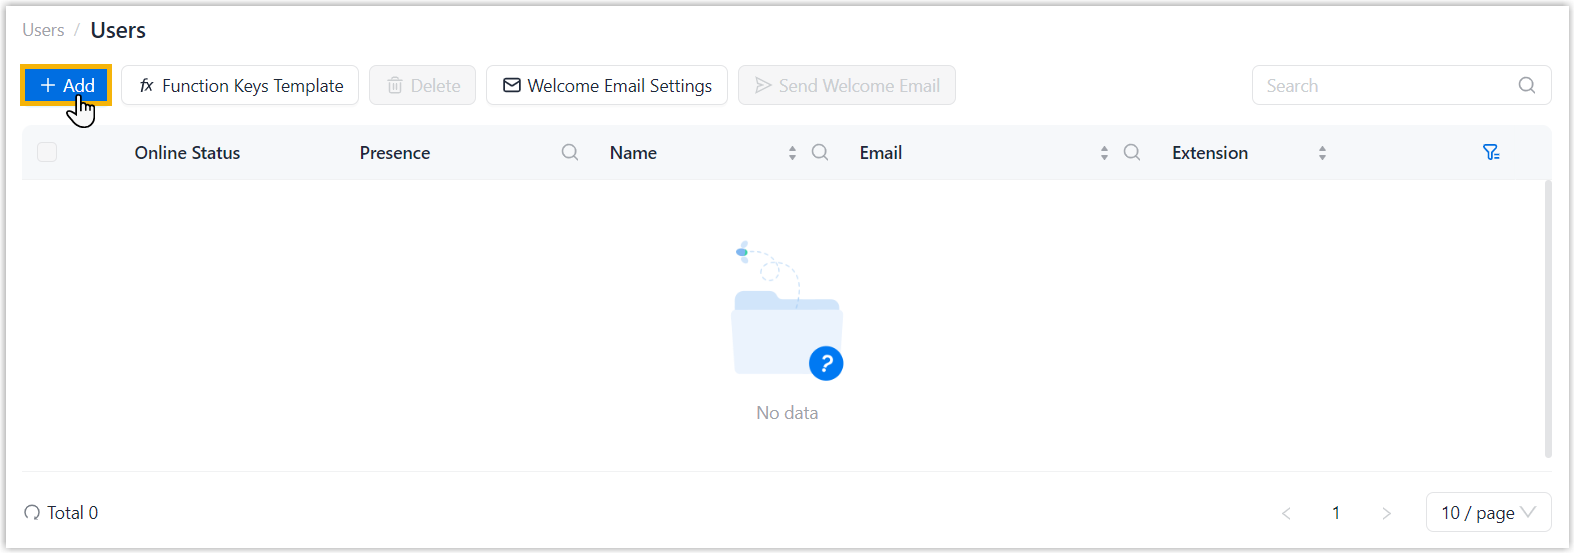
- At the top of the list, click Add.
- In the General tab, configure the general settings.
- In the Basic Information section, configure the basic
settings.
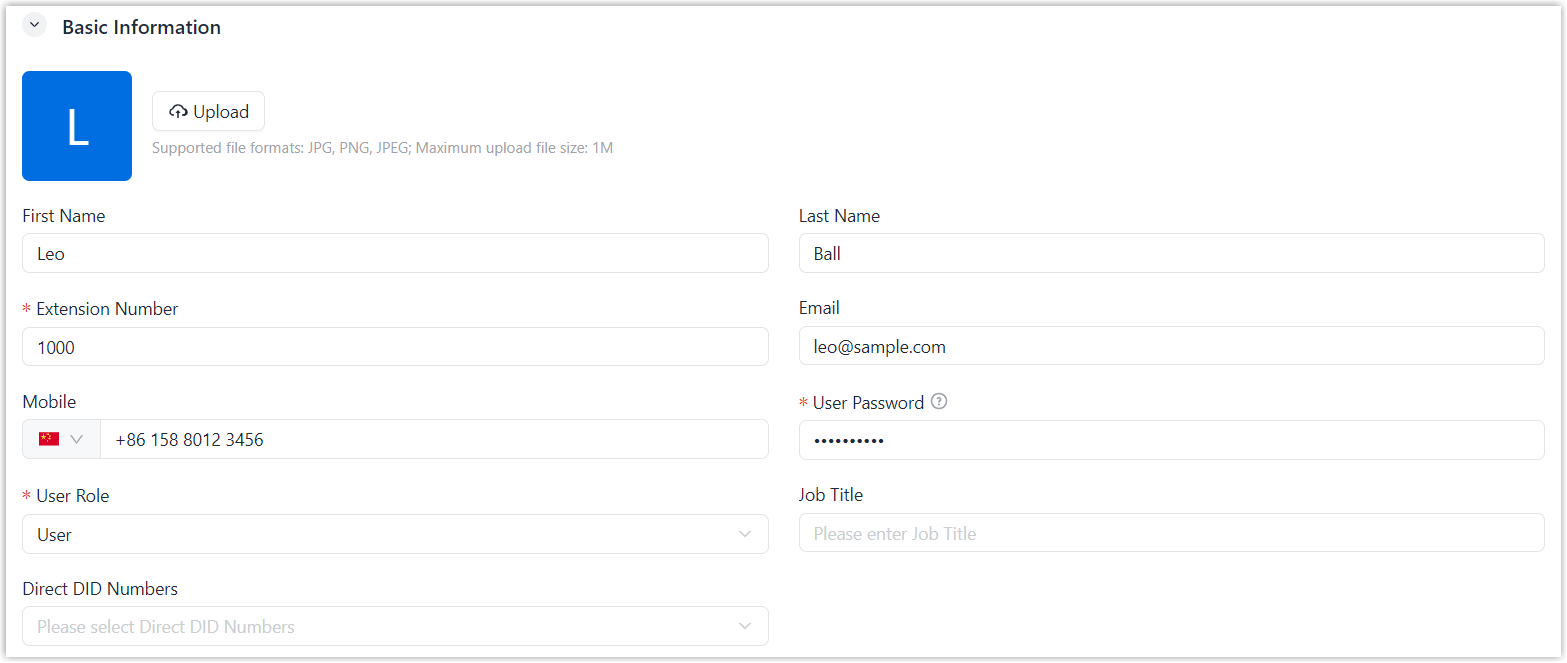 Note: The display format of First Name and Last Name is determined by the Name Display Format setting (Path: ).
Setting Description Avatar Click Upload to upload an avatar. First Name Enter the user's first name. Note: Either First Name or Last Name is required.Last Name Enter the user's last name. Note: Either First Name or Last Name is required.Extension Number By default, the system assigns the first available virtual number from the default user extension range (1000 - 5999, which is defined in ) for callers to reach the user.
You can change the user extension to a number within or outside the configured range.
Email Enter the user's email address. The user can reset their login password and receive welcome emails, voicemail messages, and event notifications via the email address.
Mobile Select a country code from the drop-down list, then enter mobile number. The user can receive calls via the mobile number.
User Password Enter a user password. The user can log in to NovoOne clients via the user password.
User Role Assign a role to the user, which determines the user's access to Tenant admin portal. - Admin: The user can access the Tenant
admin portal and manage the tenant with full permissions.Note:
- If the user doesn't have access to Web Client, they access the Tenant admin portal when signing in to NovoOne.
- If the user has access to Web Client, they access the
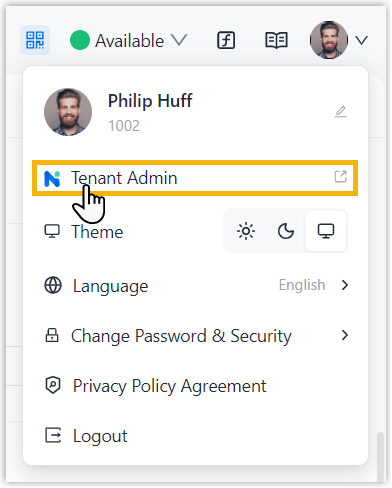
Web Client by default when signing in to NovoOne. They can access the Tenant
admin portal as shown below.
- User: The user doesn't have access to the Tenant admin portal.
Job Title Enter the user's job title, which will be displayed across NovoOne clients. Direct DID Numbers Select DID number(s) associated with the extension. When callers dial the DID number(s), the call is routed to the user.
- Admin: The user can access the Tenant
admin portal and manage the tenant with full permissions.
- In the Register Information section, configure the
registration settings.
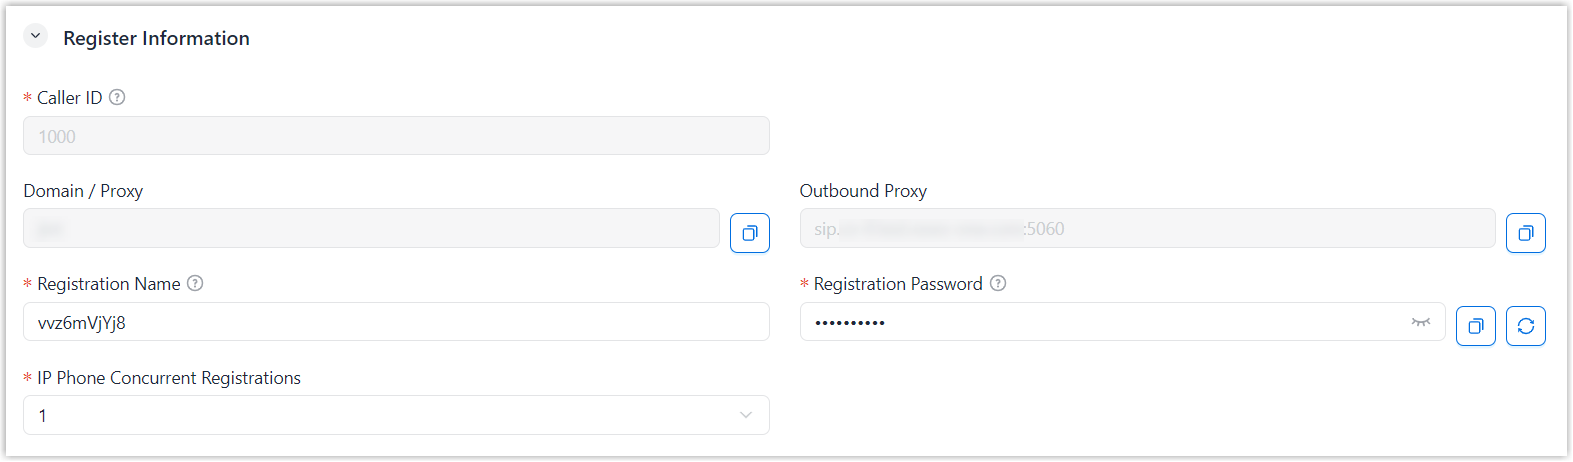
Setting Description Caller ID The Caller ID number that will be displayed on the callee's device when the user makes outbound calls. Domain / Proxy A unique identifier of the tenant, which is used when registering the user extension.
Outbound Proxy The public IP address/domain name and port of the tenant, which is used as the SIP outbound proxy when registering the account.
Registration Name The registration name used to register the user extension. You can retain the randomly generated name or set a new one.
Registration Password The registration password used to register the user extension.
You can retain the randomly generated password or set a new one.
Note: Make sure the password meets the following requirements:- 10 - 127 characters in length.
- Must include uppercase letters, lowercase letters, and numbers.
- NOT allowed to contain four consecutive identical numbers, sequential numbers, extension number, first name, or last name.
IP Phone Concurrent Registrations Set the maximum number of SIP phones that can simultaneously register with the user extension. Valid value: 1 to 5
- In the Language section, configure the language
settings.

Setting Description System Prompt Language By default, system prompts played during calls follow the default system language configured in .
You can keep the default setting to use the system default language, or select another language to override it for the user.
Voicemail Language By default, voicemail prompts played when callers access the user's voicemail box follow the default system language configured in .
You can keep the default setting to use the system default language, or select another language to override it for the user.
- In the Outbound Caller ID section, complete the following
settings.
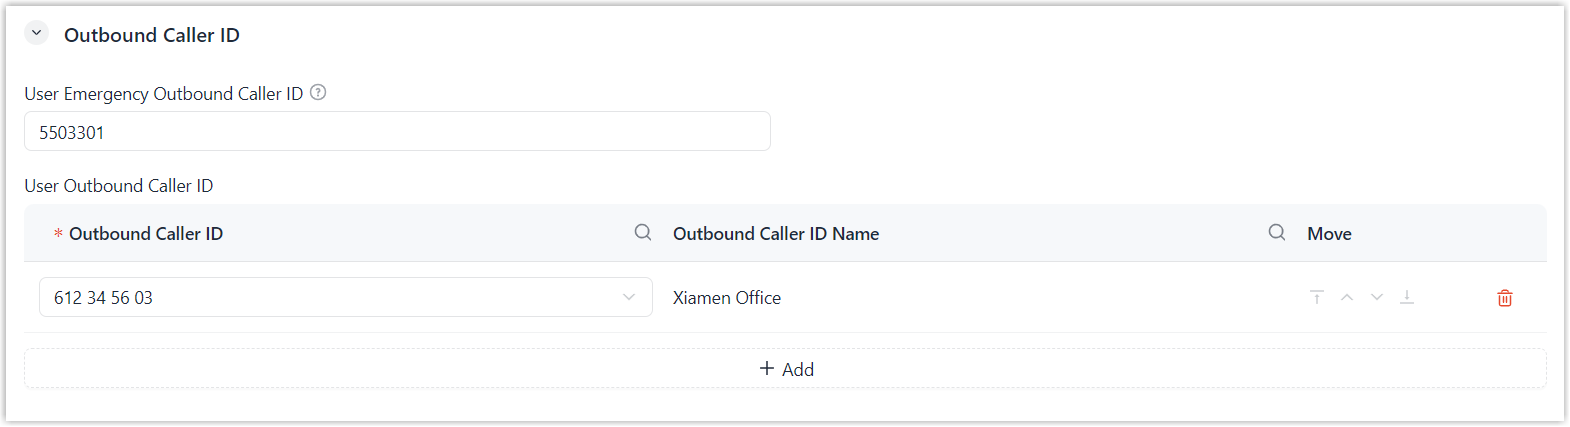
Setting Description User Emergency Outbound Caller ID Set the Emergency Outbound Caller ID to use when the user makes emergency calls. You can select a number from the DID pool, or enter a custom value.
Note: Whether this number is used depends on the priority setting configured in emergency number (Path: ).User Outbound Caller ID Click Add to select a number from the DID pool as the user's Outbound Caller ID for outbound calls. Note:- Whether this number is used depends on the trunk settings.
- You can adjust priority by clicking the icons in the Move column. The Outbound Caller ID listed at the top has the highest priority.
- In the Basic Information section, configure the basic
settings.
- Click other tabs to configure additional settings.
Setting Description Presence Configure status information, call forwarding, and ring settings for different presence statuses to customize how the user's status are presented and incoming calls are handled. For more information, see Configure Presence Setting for Users.
Voicemail Enable and configure voicemail. For more information, see Set up User Voicemail.
Advanced Configure VoIP settings, including DTMF transmission, SIP transport, and media encryption. For more information, see Configure VoIP Settings for Users.
Features Configure prompts, call recording permissions, and incoming call handling settings.
For more information, see the following topics:NovoOne Clients Enable NovoOne clients. For more information, see Enable NovoOne Clients for Users.
Phone Provision the user extension on an IP phone. For more information, see
Function Keys Set up function keys for quick access to calling features and status monitoring. For more information, see Function Keys Overview.
AI Enable and configure call transcription and voicemail transcription. For more information, see Override AI Call Transcription for a User and Override AI Voicemail Transcription for a User.
Security View the user's Two-Factor Authentication (2FA) status. Note: You can NOT enable 2FA for users. Users must enable it by themselves.For more information, see Two-Factor Authentication (2FA) Overview.
- Click Save.
Result
The user is created and displayed in the list.