Create an Advanced Auto Provisioning Template
This topic describes how to create an advanced auto provisioning template including general settings defined in a default provisioning template and additional parameters.
Procedure
- Log in to NovoOne Platform portal, go to .
- Click Add.
- In the Basic section, set basic information.
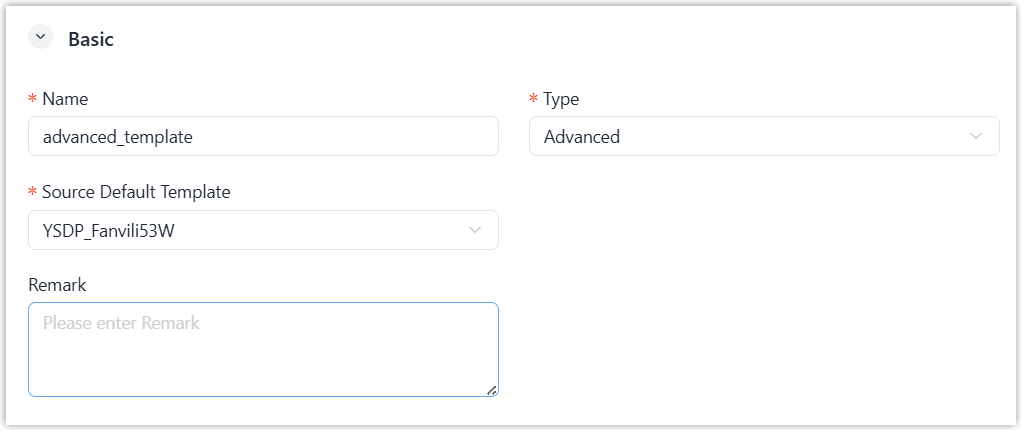
- Name: Enter a name to help you identify it.
- Type: Select Advanced.
-
Source Default Template: Select a default provisioning template to customize.
The values of general settings in the source default template are automatically filled in corresponding fields in the below Configurations section.
- Remark: Optional. Enter a short description about this template.
- In the Configuration section, customize
the settings provided by the source default template as needed.
Setting group Instruction Preference Modify the preference settings. Distinctive Ringtone Add distinctive ringtones for different incoming calls based on Alert-Info keyword. Codecs Modify codecs settings.
LDAP Directory Modify LDAP directory settings. VLAN Modify VLAN settings. - In the Customize Configuration
Parameters in Text section, add additional parameters that
are not provided by the source default template.Note: The variables that starts with
{{.and ends with}}are associated with the settings that can be configured on Configuration sections and function key configuration page for tenant user on the NovoOne Tenant portal. Please do not edit these variables in the below boxes if you still want to use the corresponding features.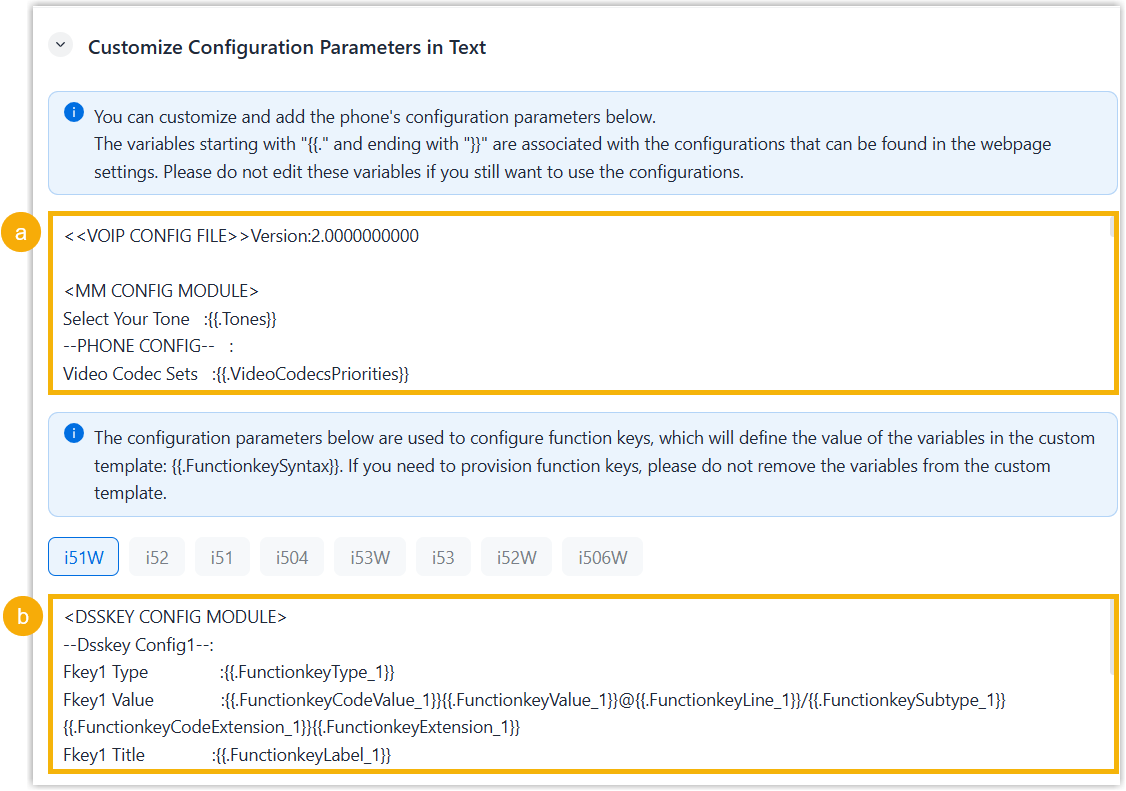
- In the first text box, add your configuration
parameters.Note: Contact your vendor to make sure that the parameters are supported for the device model.
- In the second text box, select which function keys to be applied
according to the phone model.
You can also add your function key parameters in the second text box.
- In the first text box, add your configuration
parameters.
- Optional: In the Assign section, assign
the resource to your tenants and your resellers.
- Assign the resource to your tenants
to
enable their tenant administrators to use
it.
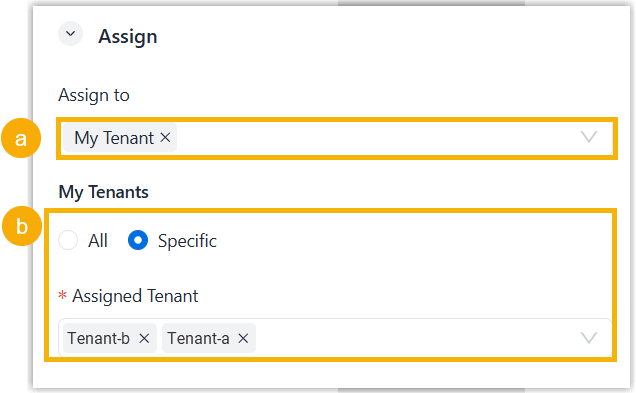
- In the Assign to drop-down list, select My Tenant.
- Specify the tenants as needed.
- To assign to all tenants, select All.
- To assign to specified tenants, select Specific and select desired tenants in the Assigned Tenant drop-down list.
- Assign the resource to your resellers to enable the resellers to use
it and assign it to their tenants.
- In the Assign to drop-down list, select Reseller.
- Specify the resellers using one of the following
methods.
Method Instruction Assign to all resellers except selected 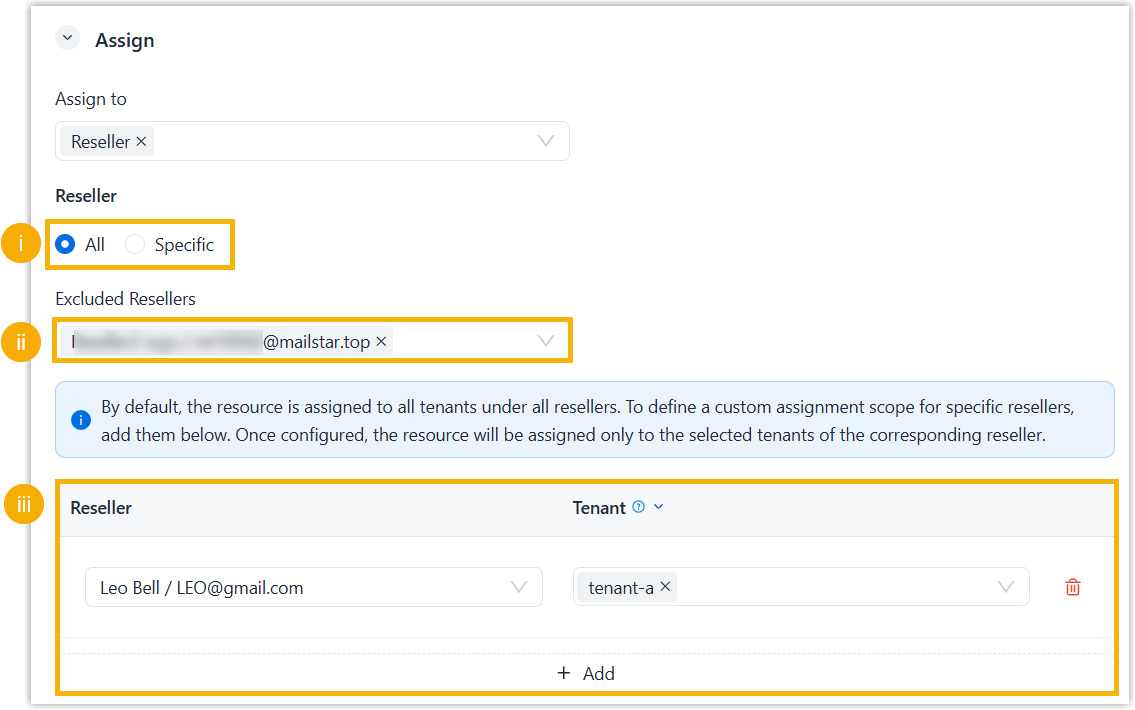
- Select All.
- Optional: To prevent specific resellers from using the resource, select the resellers in the Excluded Resellers drop-down list.
- Optional: To specify tenants whose
tenant administrators can use this resource, click
Add, select a reseller in
the Reseller drop-down list
and select the reseller's tenants in the
Tenant list.
To add more, repeat this step.
Assign to selected resellers only 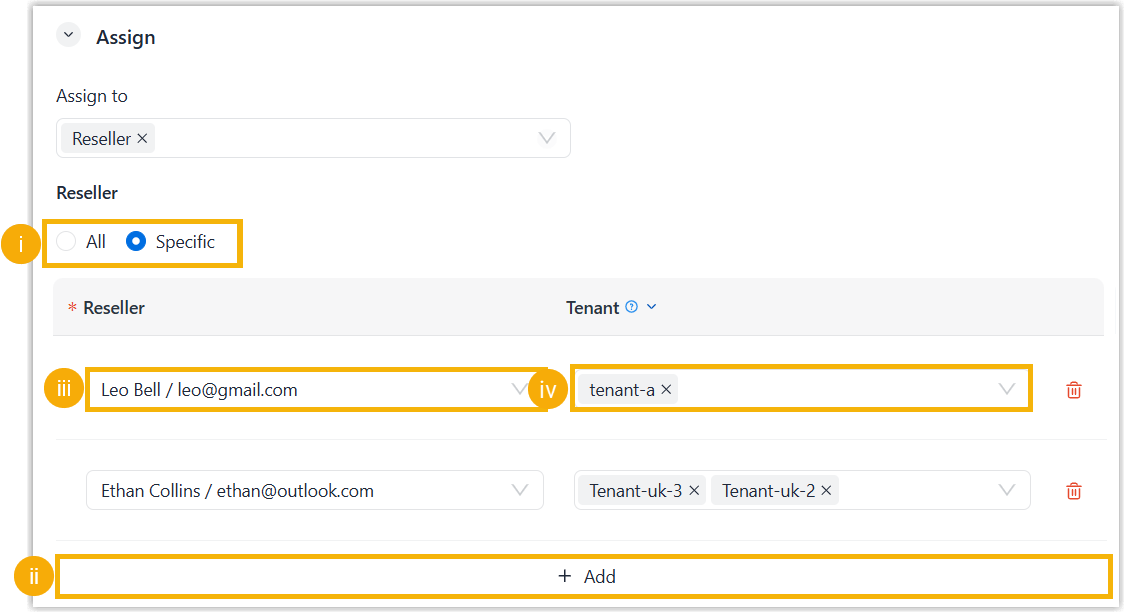
- Assign the resource to your tenants
to
enable their tenant administrators to use
it.
- Click Save.
Result
- The custom auto provisioning template is displayed on the Custom
Template list.
You can auto provision IP phones of the corresponding models to any tenant owned by you or your resellers using the custom template. For more information about provisioning IP phones, see Auto Provision an IP Phone.
- If you assigned the custom template to your tenants, the administrators for these tenants can auto provision IP phones of the corresponding models using the custom template.
- If you assigned the custom template to your resellers' tenants, the template is displayed on the Custom Templates list on the resellers' NovoOne Platform portal. They can reassign and use the template as needed.