Log in by Extension Account
Note: Extension Account Login is supported on both Linkus Desktop
Client and Linkus Mobile Client.
Contact system administrator to get the login information (PBX IP address / domain / SN,
Linkus server port, and your extension account credential), then manually enter the
login information according to different Yeastar PBX products and network
environments:
- Yeastar S-Series VoIP PBX
- Yeastar Cloud PBX
Yeastar S-Series VoIP PBX (with LCS/LCS Pro)
If system administrator has enabled the LCS/LCS Pro service, log in to Linkus as follows:- On the Linkus login page, enter the following information.
- Username: Enter extension number or email address.
- Password: Enter the password.
- SN/Domain: Enter the SN (Serial Number)
of PBX.Note: If the SN/Domain field is non-editable, click Custom Settings, and uncheck the option Enable Custom Settings.
- Click Login.
Yeastar S-Series VoIP PBX (without LCS/LCS Pro)
If system administrator does not enable the LCS/LCS Pro service, log in to Linkus as follows:
- Enter the Linkus server information.
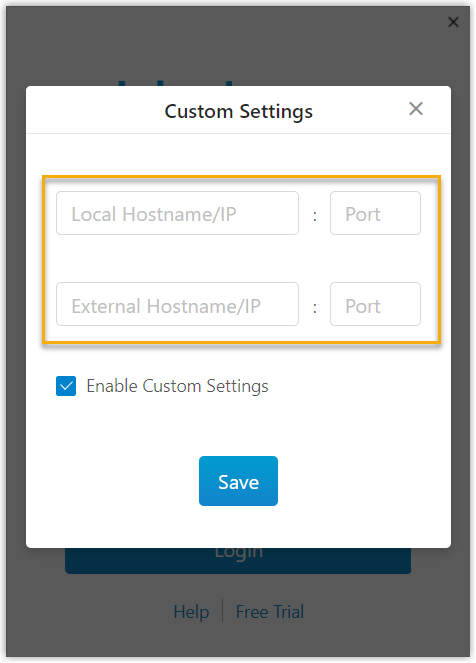
- On the Linkus login page, click Custom Settings.
- Select the checkbox of Enable Custom Settings.
- Enter the PBX address and Linkus server port.Note: When your computer/mobile phone is in the same network as PBX server, Linkus communicates through the local hostname/IP. Otherwise, Linkus communicates through the external hostname/IP.
Linkus Lite Linkus Mobile Client 

- Local Hostname/IP: Enter the private IP address of PBX. For example, enter 192.168.5.150.
- Local Port: Enter the local port of Linkus server. The default port is 8111.
- External Hostname/IP: Enter the public IP address of PBX. For example, enter 112.11.11.11.
- External Port: Enter the external port of Linkus server. For example, enter 18111.
- Click Save or tap OK to proceed.
- On the Linkus login page, enter the login credentials.
- Username: Enter extension number or email address.
- Password: Enter the password.
- Click Login.
Yeastar Cloud PBX
- On the Linkus login page, enter the following information.
- Username: Enter the email address that is associated with your extension.
- Password: Enter the password.
- SN/Domain: Enter the domain name of PBX.Note: If the SN/Domain field is non-editable, click Custom Settings, and uncheck the option Enable Custom Settings.
- Click Login.