Start or Stop a P-Series Cloud PBX
This topic describes how to start or stop a P-Series Cloud PBX.
Start a P-Series Cloud PBX
To allow users to access the Cloud PBX, you need to start the PBX first.
- Procedure
-
- Log in to Yeastar Central Management, go to .
- Select a desired PBX with status displayed as
 , then click
  .
.
- In the pop-up window, click Confirm to start the PBX.
- If the PBX has NOT been activated, the system will prompt you to
send PBX activation email(s).
- If you want to send the activation email(s) to
customer(s) now, select the checkbox(es) of desired
customer(s), then click Send.Note: The available customers are the ones who you have added when creating the PBX. To change customers for the PBX, see Change Recipients of Cloud PBX Activation Emails.
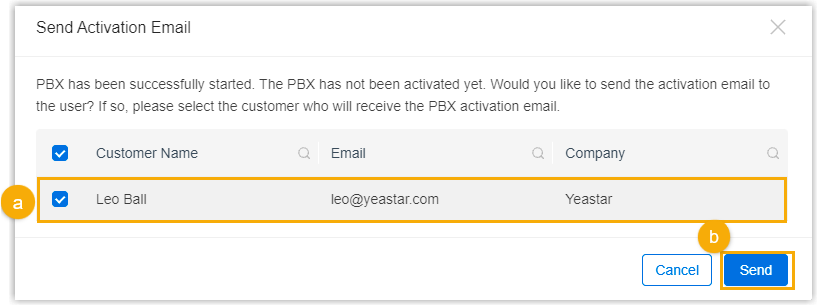
- If you don't want to send the activation email(s) right now, click Cancel.
- If you want to send the activation email(s) to
customer(s) now, select the checkbox(es) of desired
customer(s), then click Send.
- Result
-
- The PBX is starting, and the status is displayed as
 .
.
- After the PBX starts up, the status is displayed as
 .
. Note: If you have set a template for the PBX when creating, the system will automatically provision the PBX with the selected template on initial start-up, and the followings are achieved:
- After provisioning, the PBX system is already activated. PBX administrator only needs to set up super administrator account in the Installation Wizard, then the PBX is ready to use.
- You can check the provisioning result of the task
named
Provision-{PBX_Name}-{Serial_Number}on .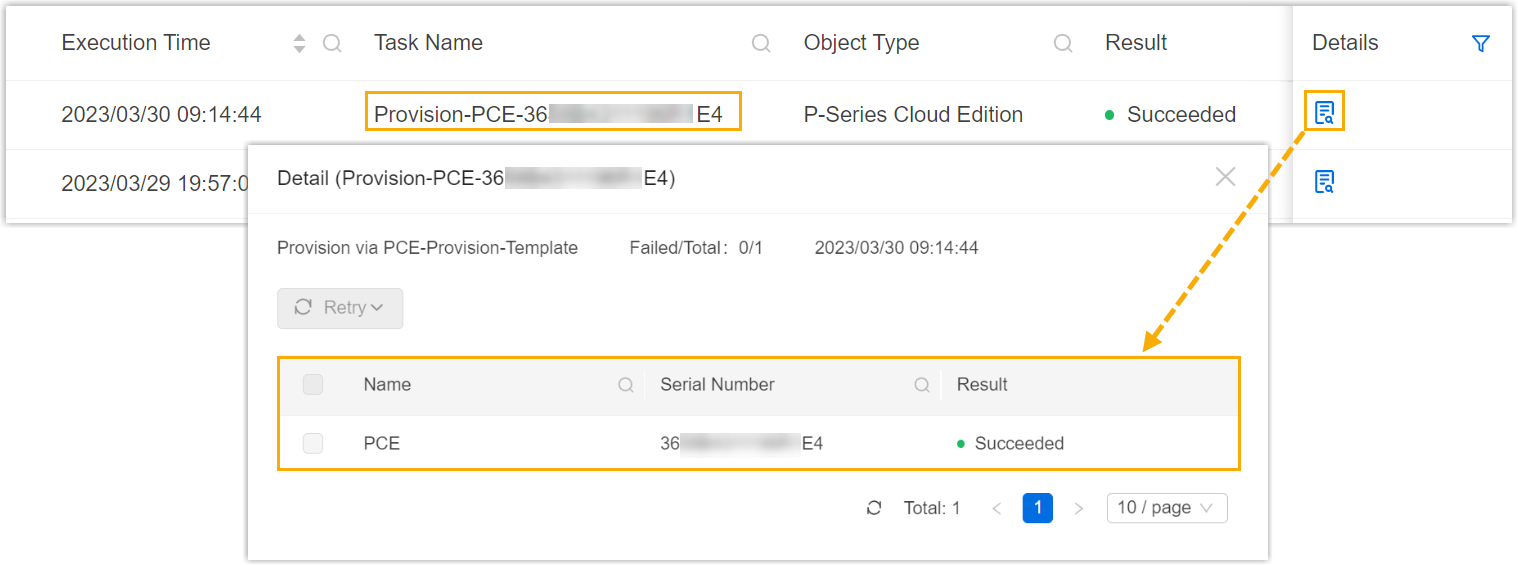
- The PBX is starting, and the status is displayed as
Stop a P-Series Cloud PBX
If users don't need the PBX temporarily, you can stop the PBX.
- Procedure
-
- Log in to Yeastar Central Management, go to .
- Select a desired PBX with status displayed as , then click
 .
.
- In the pop-up window, click Confirm to stop the PBX.
- Result
-
- The PBX system is stopped, and the status is displayed as .

- Users can NOT access the PBX.
- The PBX system is stopped, and the status is displayed as