Install Yeastar Room Display DS7315
This topic describes the hardware overview of Yeastar Room Display DS7315 and gives instructions on how to install, power up , and network a Yeastar Room Display DS7315.
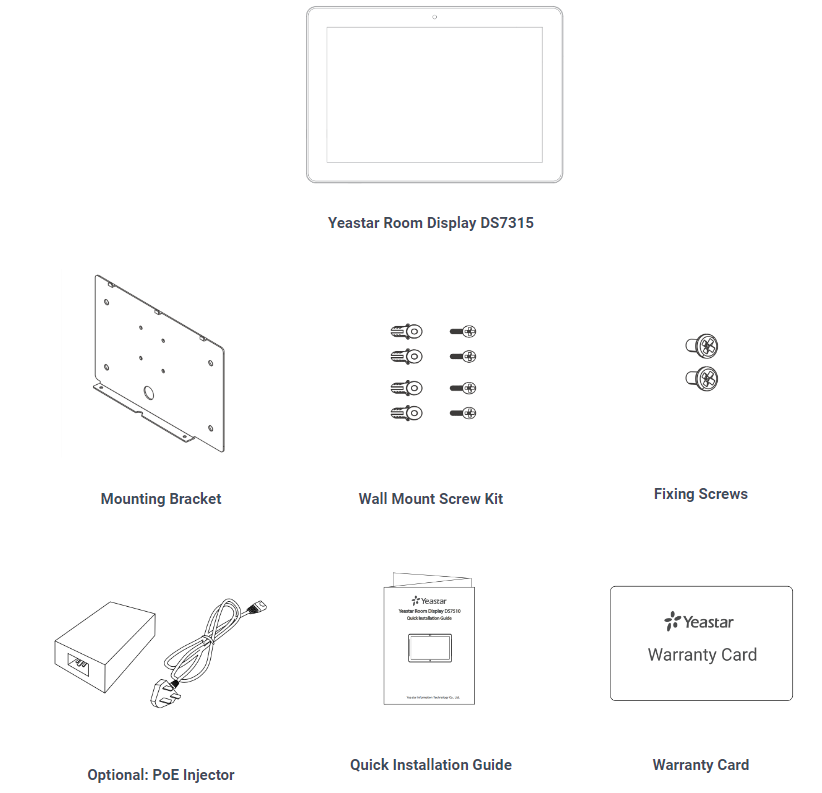
Package contents
Before you begin to install Yeastar Room Display, make sure all of the following items are included in the product package.
Hardware overview
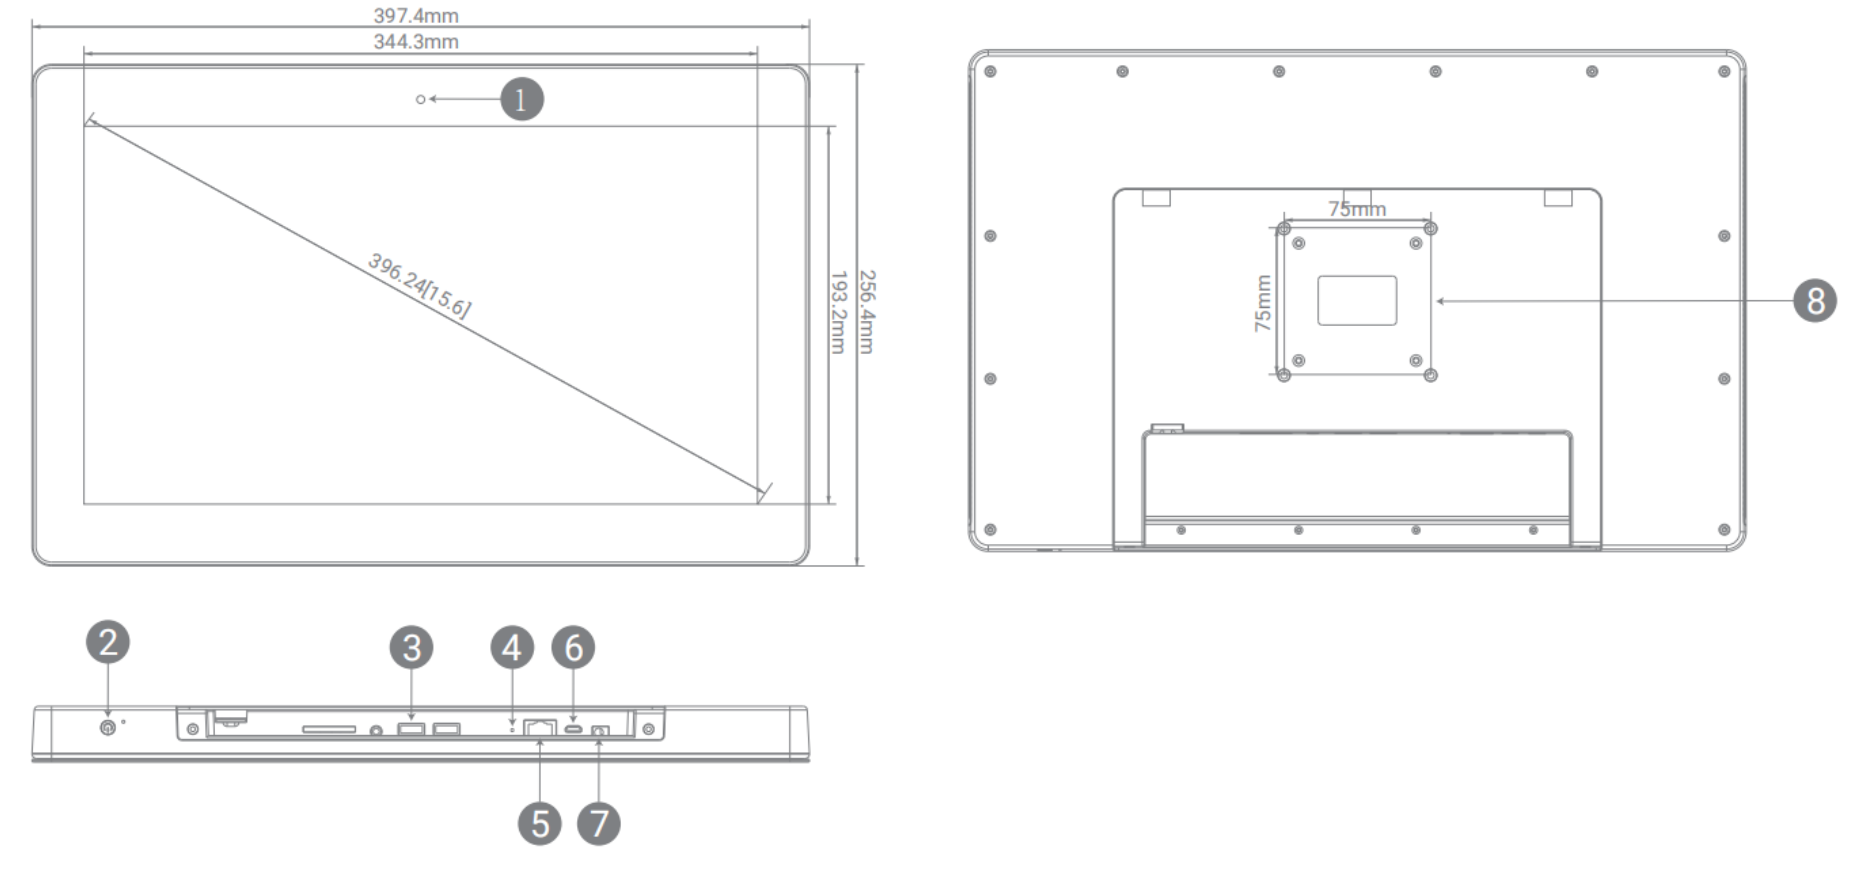
| No. | Description | No. | Description |
|---|---|---|---|
| ① | Camera | ⑤ | Ethernet port (PoE) |
| ② | Power Button | ⑥ | Micro USB OTG |
| ③ | USB 2.0 | ⑦ | DC power jack |
| ④ | Recovery | ⑧ | VESA 75*75mm |
Install Room Display DS7315
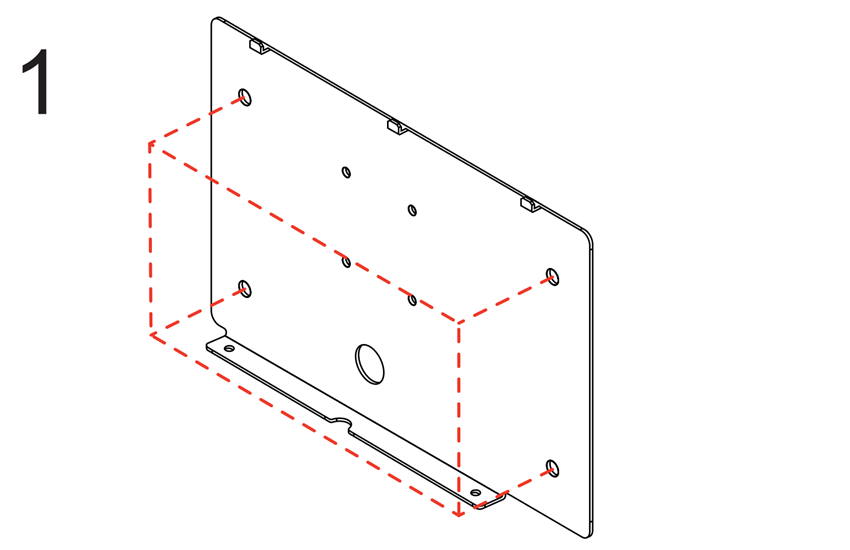 1. Position the mounting bracket on the desired height on the wall, and mark the four mounting holes at the corners. |
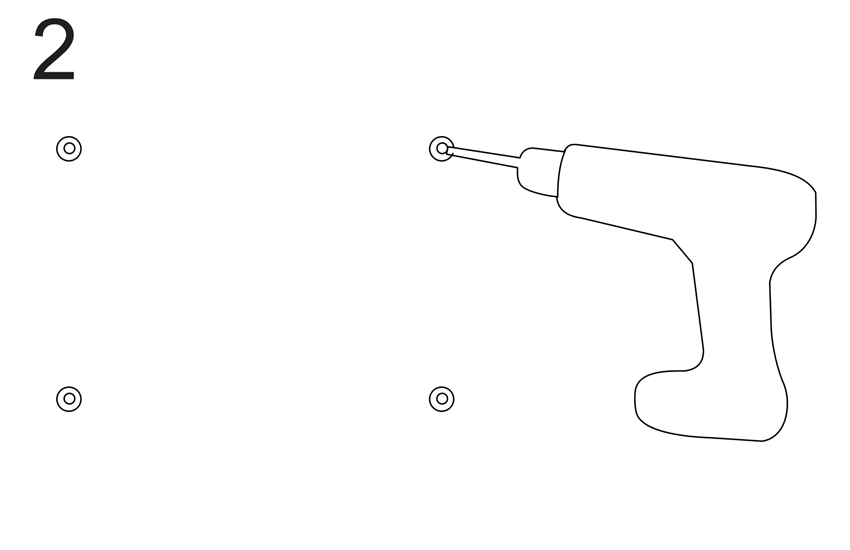 2. Use a 6mm diameter drill bit to drill four holes to a depth of 36mm on the marked locations. |
|
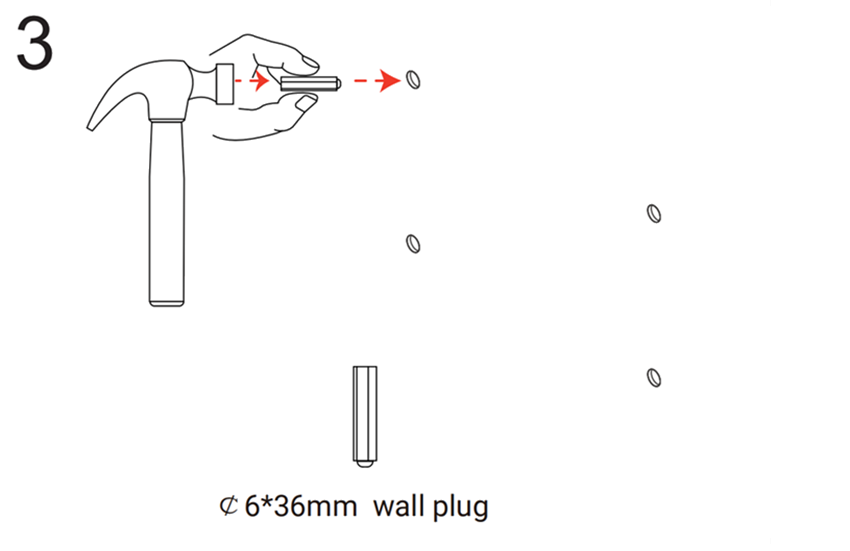 3. Hammer the wall plugs into the holes respectively. |
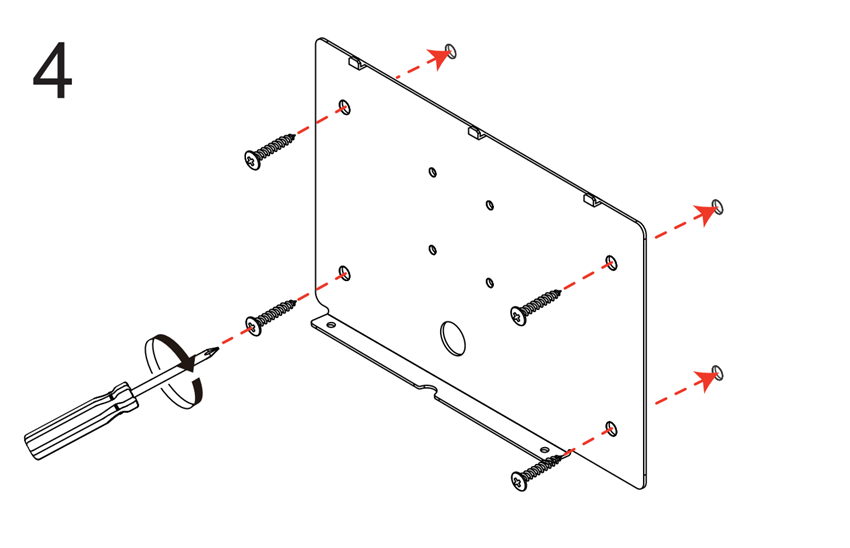 4. Press the mounting bracket on the wall and align its mounting holes with the wall plugs, then fix the screws into the wall plugs. |
|
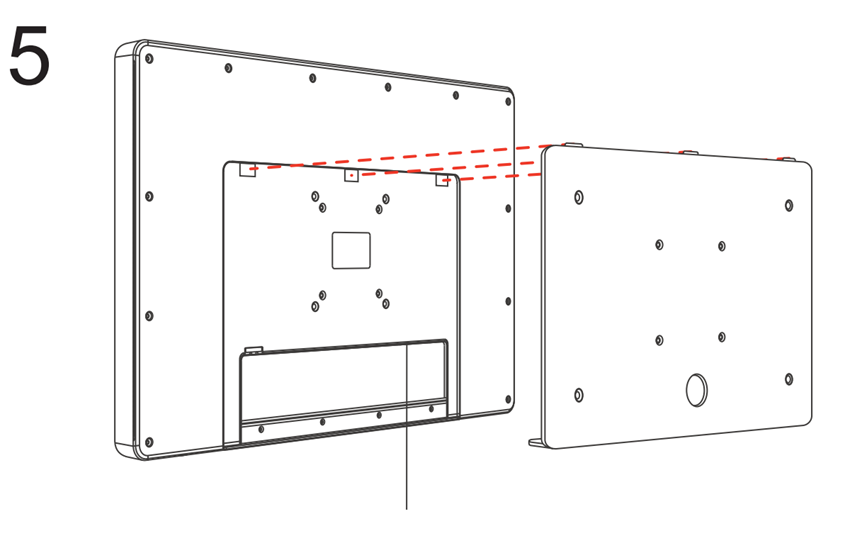 5. Plug an Ethernet cable into the Ethernet port of the Room Display. And slide the Room Display on the mounting bracket. |
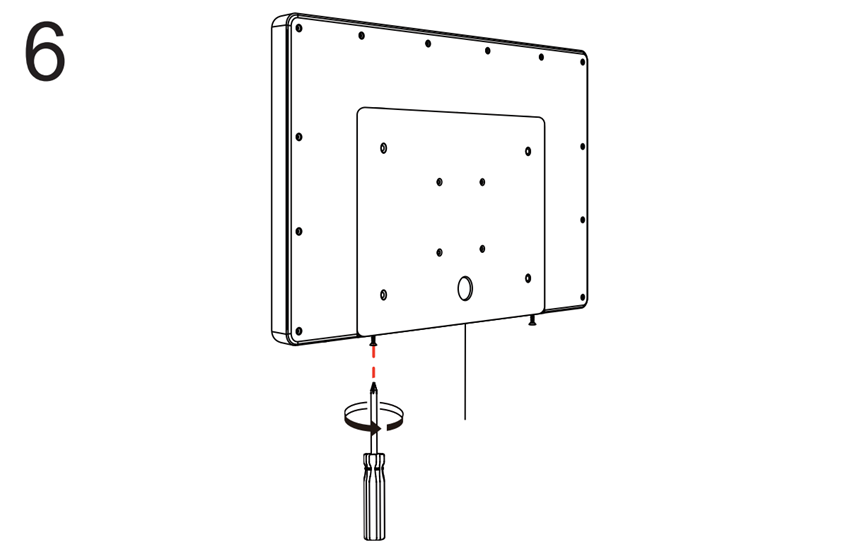 6. Secure the Room Display by screwing the two fixing screws into the holes at the bottom of the mounting bracket. |
Power supply and network connection
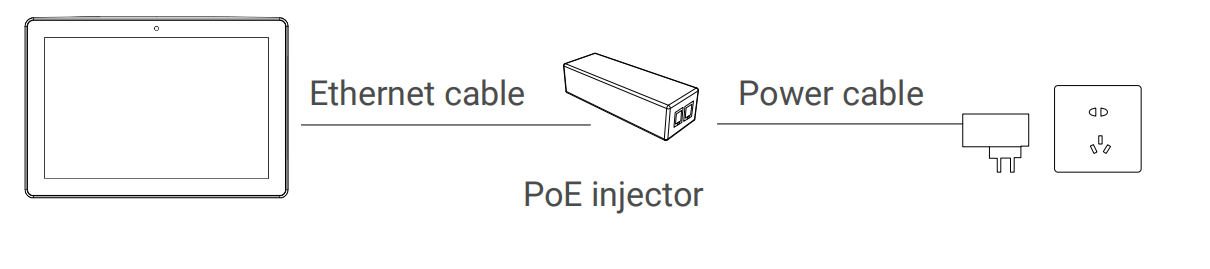
- PoE injector power supply and network connection
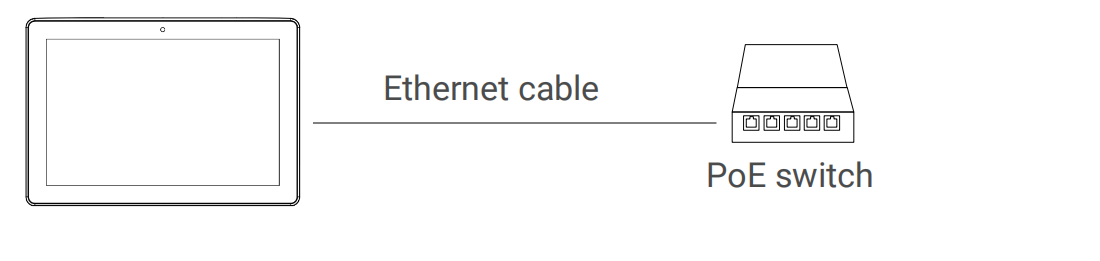
- PoE switch power supply and network connection
- DC power adapter power supply and network connection
- PoE injector power supply and network connection
-
- Powere on the device via a PoE injector.
-
Connect the Ethernet cable of the Room Display to the Data+Power port of the PoE injector.
-
Plug the power cable from PoE injector to a power outlet.
-
- Choose one of the following methods to connect the device to the
Internet.
- Wireless network connection:
-
After the Room Display boots up, tap Configure the System Network on the screen.
-
Enable Wi-Fi and connect the device to a Wi-Fi network.
-
- Wired network connection: Plug an Ethernet cable into the DATA port of PoE injector and connect it to the switch.
- Wireless network connection:
- Powere on the device via a PoE injector.
- PoE switch power supply and network connection
- Connect the Ethernet cable of the Room Display to a PoE switch. The Room
Display is powered on and connected to the Internet via the PoE
switch.
- DC power adapter power supply and network connection
-
- Connect the DC power jack of the Room Display and the power
outlet with a DC power adapter (3.5 X 1.3 mm plug).
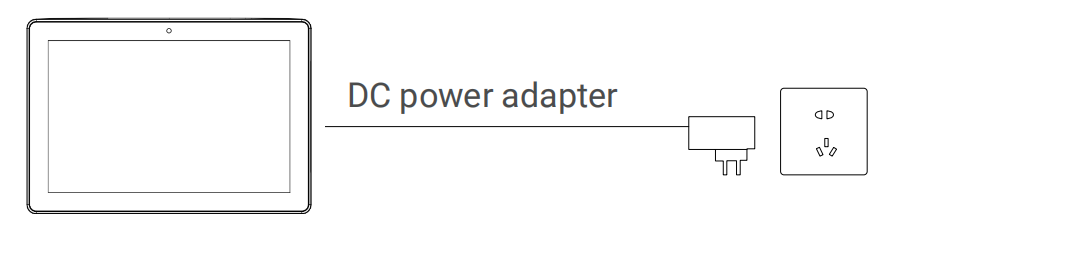
- Choose one of the following methods to connect the device to the
Internet.
- Wireless network connection:
- After the Room Display boots up, tap Configure the System Network on the screen.
- Enable Wi-Fi and connect the device to a Wi-Fi network.
- Wired network connection: Connect the Ethernet cable of the Room Display with a switch.
- Wireless network connection:
- Connect the DC power jack of the Room Display and the power
outlet with a DC power adapter (3.5 X 1.3 mm plug).
What to do next
After installation, you can register the Room Display to Yeastar Workplace.