How to Configure Yealink Remote Phone Books
This guide provides instructions on how to configure a remote phone book with Yeastar S-Series VoIP PBX.
You can configure a corporate directory with Yealink remote phone book. Then the users can access the remote phone book and dial a contact number directly on their phone.
The details in this guide takes Yealink SIP-T46S running firmware 66.84.0.10 as an example.
Step 1. Prepare an Yealink remote phone book file
- Get the remote phone book file template from Yealink support.
- Customize the remote phone book file.
The following is an example of an XML phone book.
<YeastarIPPhoneDirectory> <DirectoryEntry> <Name>Lily</Name> <Telephone label="Mobile Number">12345654626</Telephone> </DirectoryEntry> <DirectoryEntry> <Name>Jim</Name> <Telephone label="Office Number">654321</Telephone> <Telephone label="Mobile Number">37799801@192.168.9.144</Telephone> <Telephone label="Other Number">8608</Telephone> </DirectoryEntry> </YeastarIPPhoneDirectory> - Save the file as an XML file (for example, Yeastar.xml).
Step 2. Configure remote phone book on Yeastar PBX
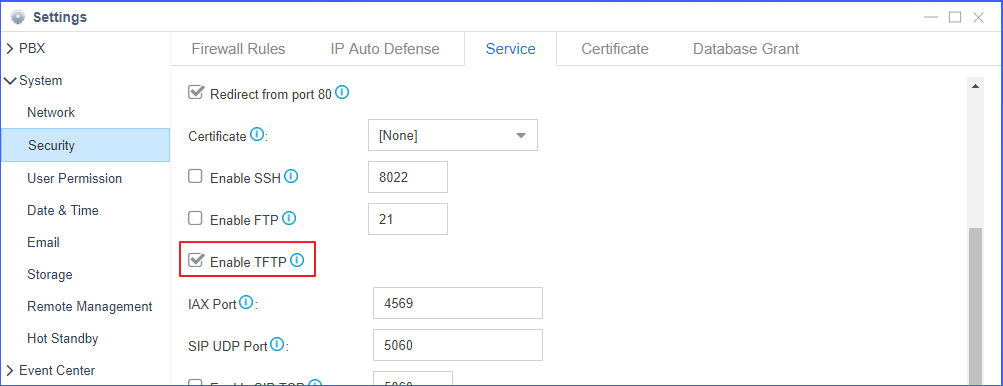
- Set the PBX as a TFTP server and upload XML phone book file to the TFTP
server.
- Go to , check the option TFTP, click
Save and
Apply.
The PBX is set up as a TFTP server.
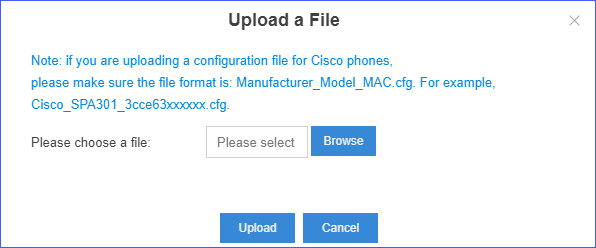
- Go to , click Upload a File, choose the XML file
(Yeastar.xml) to upload.
- Go to , check the option TFTP, click
Save and
Apply.
- Configure remote phone book for the phone.
- Go to , find your phone, click
 to edit the configurations.
 - Click Features tab, enter the phone book URL, and phone book name.Note: The phonebook URL is tftp://{pbx_ip}/upload/autopfile/{file_name}. In this example, the URL is tftp://192.168.6.36/upload/autopfile/Yeastar.xml.
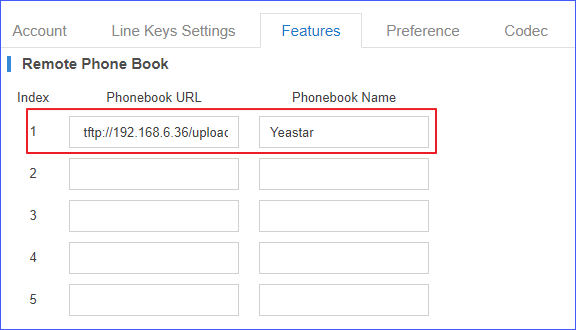
- Click Save.
A pop-up dialog prompts you whether to reboot the phone immediately.
- Click Yes.
The phone applies the changes and downloads the phone book.
Note: If the phone does not reboot automatically, reboot the phone manually to make the configurations take effect.
- Go to , find your phone, click
Step 3. Use remote phone book on Yealink phone
- On the Yealink phone, press .
- Select the desired remote phone book.
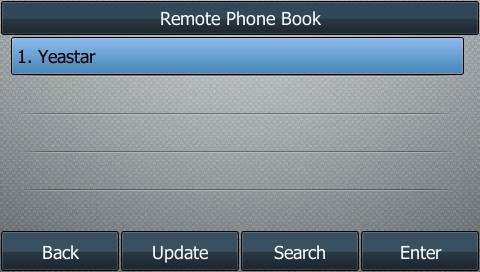
- Press the Enter soft key to load the corporate directory.
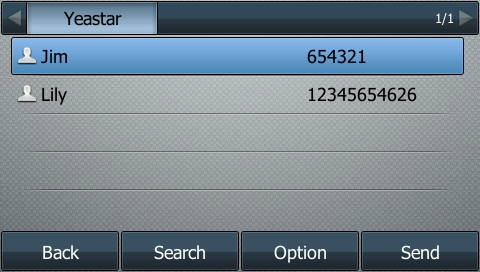
The phone then connects to the remote phone book and proceeds to load it.
The contacts in the remote phone book are displayed on the LCD screen.