Set up Hotel Service on Yeastar P-Series Software Edition
This topic describes how to enable and set up hotel service on Yeastar P-Series Software Edition.
Step 1. Enable hotel service
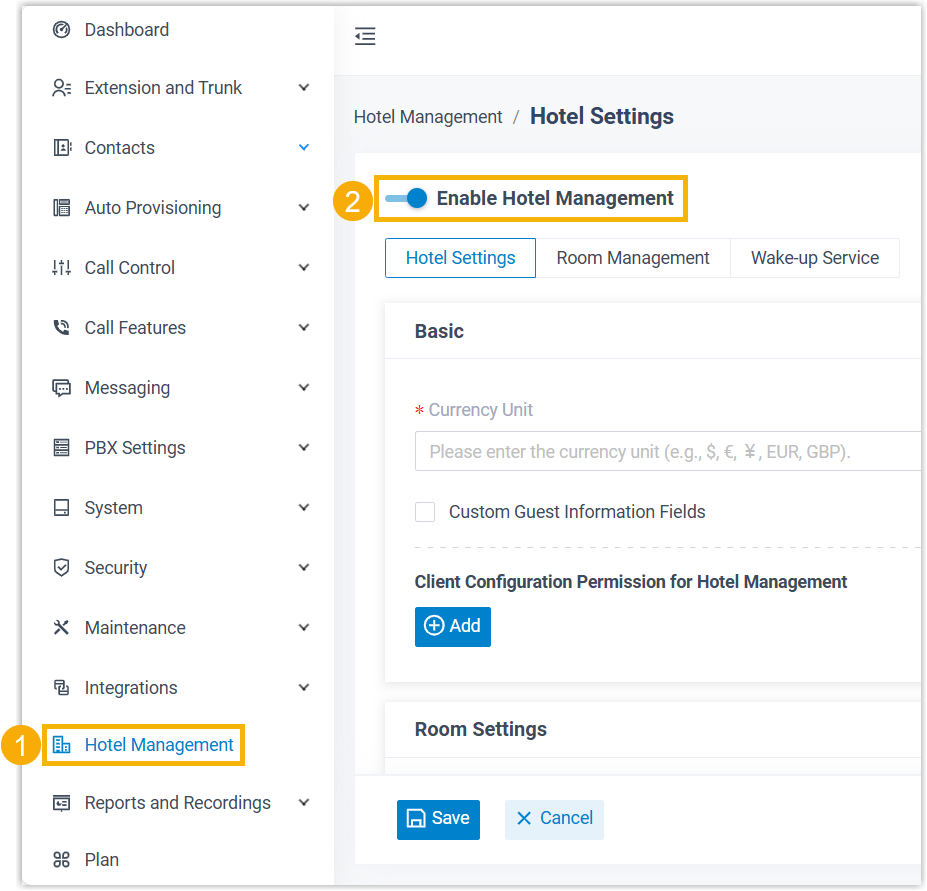
- Log in to PBX web portal, go to Hotel Management.
- Turn on the switch Enable Hotel Management.
Step 2. Configure basic hotel settings
Go to Hotel Settings tab to configure currency preference, guest information fields, staff privilege for room operations, guest room policy, and hotel information.
- Currency Preference
- Currency Unit is required and will be used in all billing and invoicing transactions.
-
Setting Effect 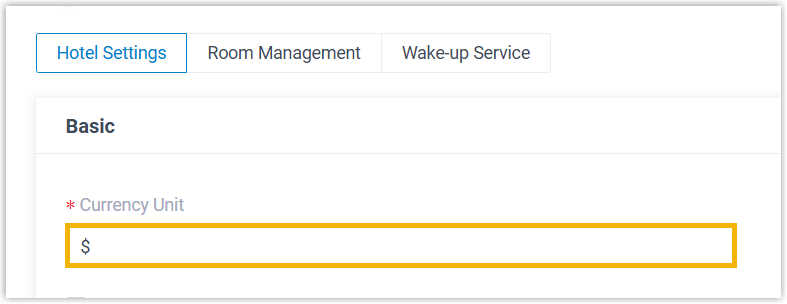
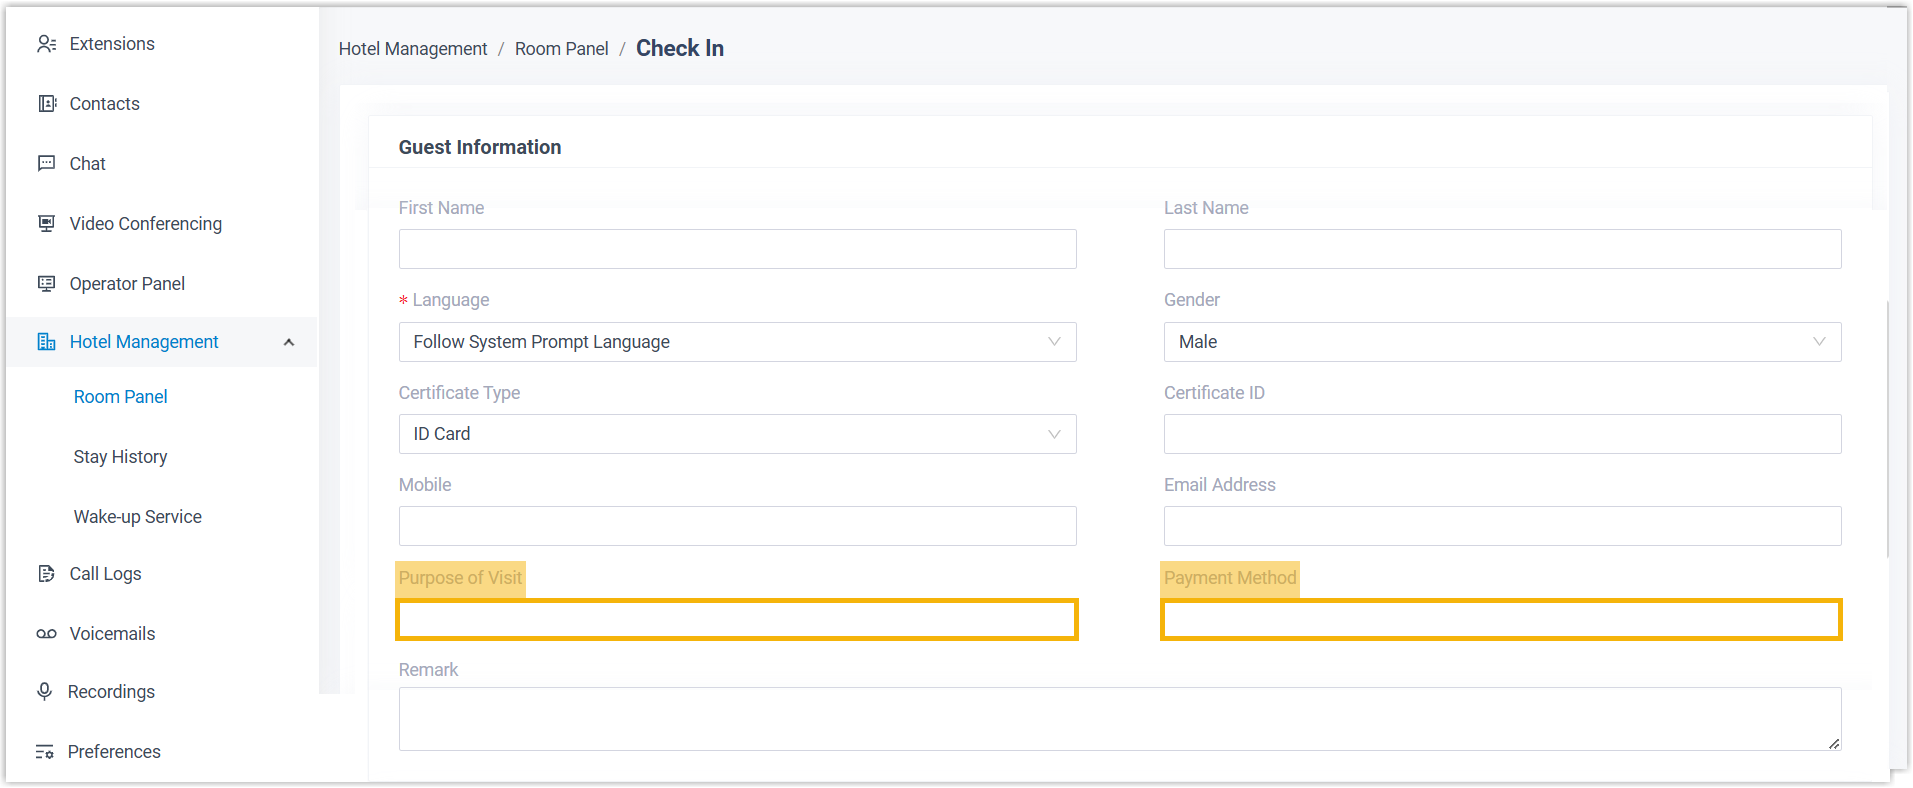
- Guest Information Field
- Guest Information Field is used to collect additional information from guests during check-in.
-
Setting Effect 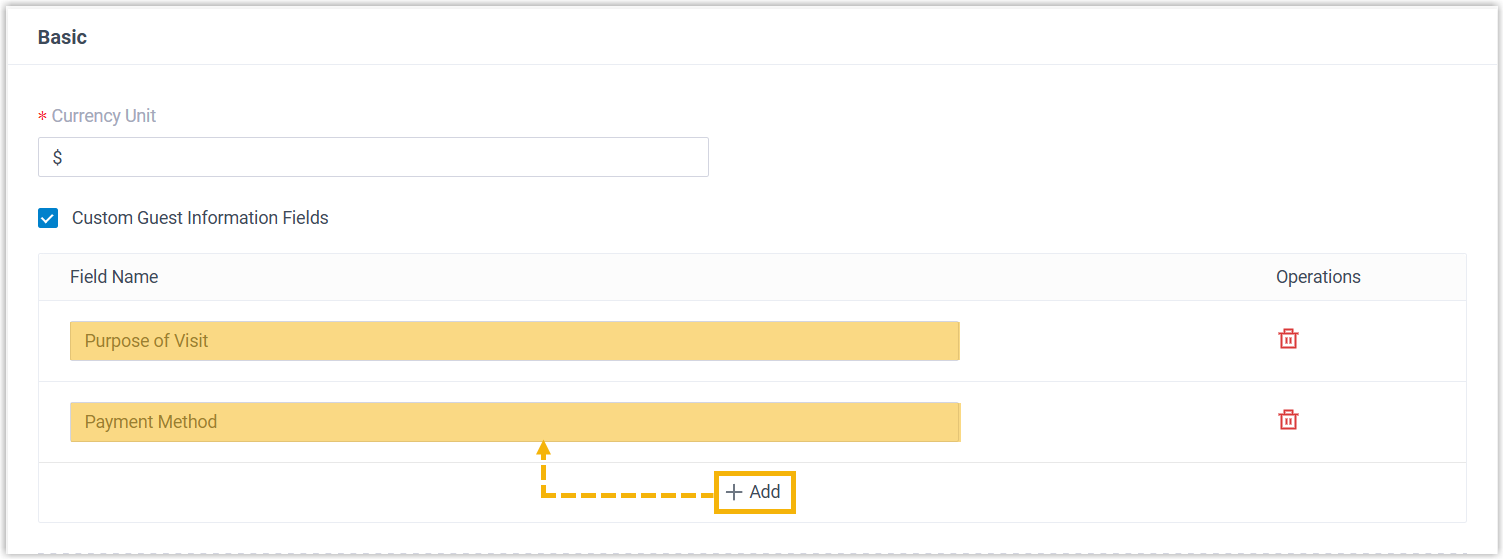
- Staff Privilege for Room Operation
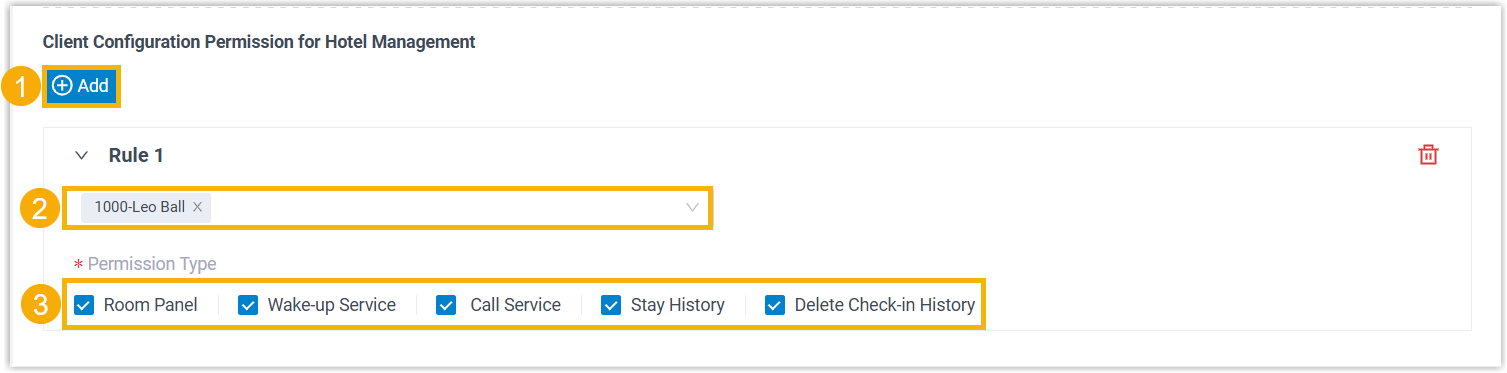
- Client Configuration Permission for Hotel Management enables you to grant specific room operation privileges to staff members (e.g. front desk). The authorized staff member(s) will be able to perform these operations on their Linkus Desktop/Web Client.
- You can click Add to add permission
rule(s).
-
Permission Description Room Panel The authorized staff member can access Room Panel on Linkus Desktop/Web Client (Path: ) to perform operations such as check-in, move rooms, set Do Not Disturb (DND), change room status, add wake-up calls, check out, etc.
Wake-up Service The authorized staff member can access Wake-up Service (Path: ) on Linkus Desktop/Web Client to perform operations such as schedule wake-up tasks and review the wake-up log.
Call Service The authorized staff member can manage guest calls from Operator Panel on Linkus Desktop/Web Client.Tip: Refer to Call Management Permission to learn more.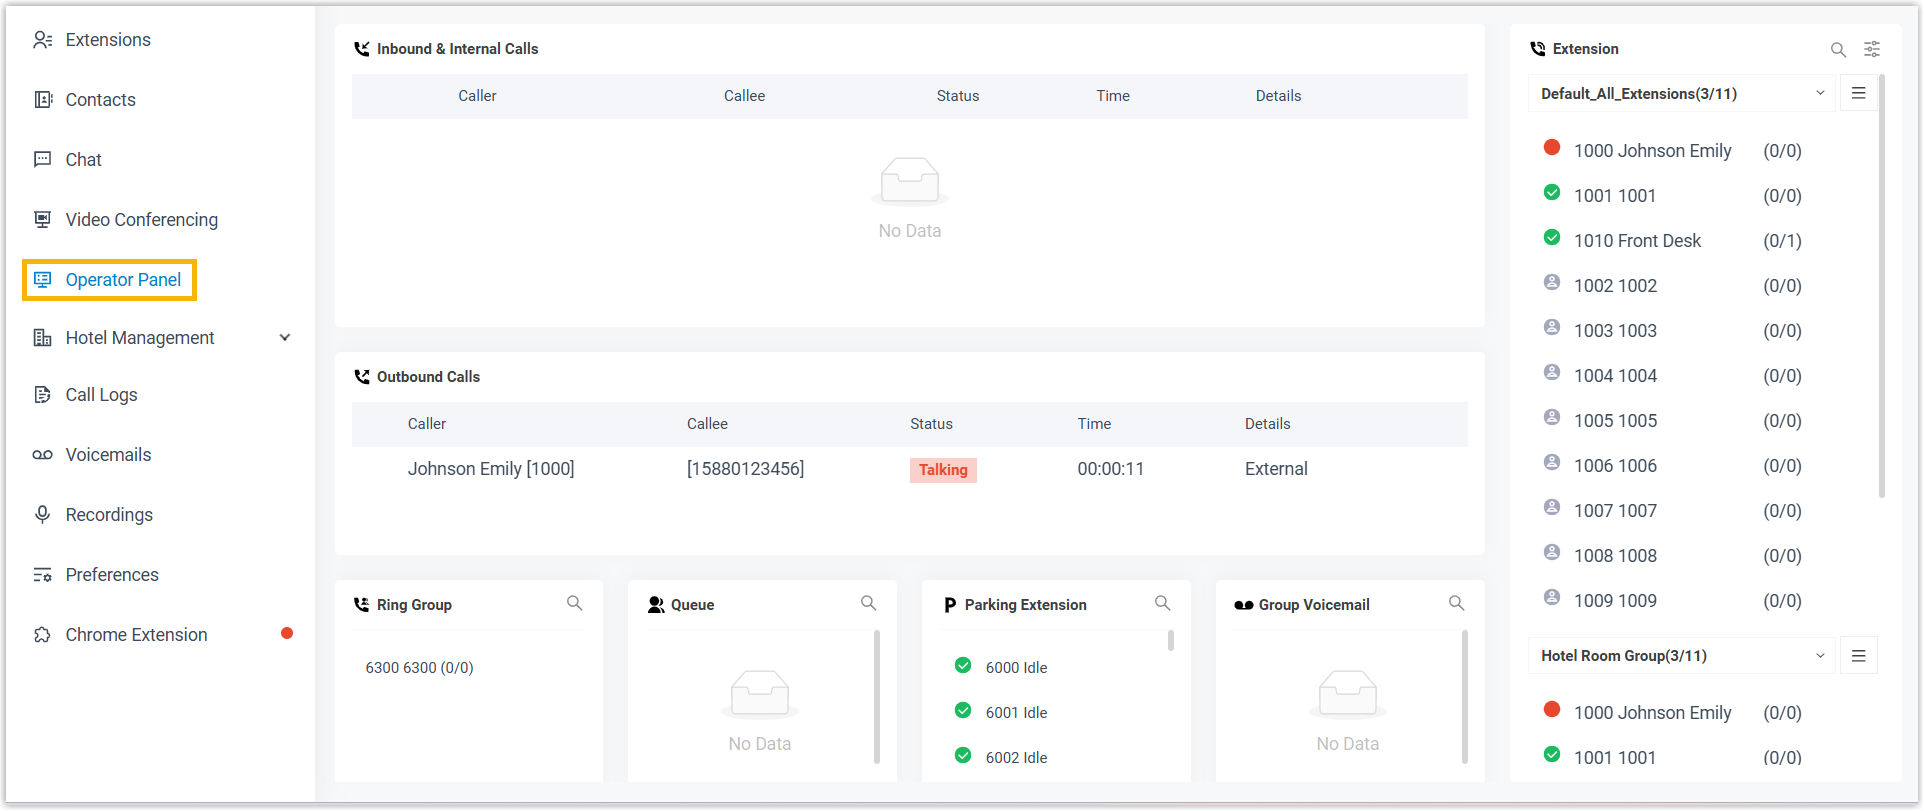
Stay History The authorized staff member can access Stay History on Linkus Desktop/Web Client (Path: ) to review guest stay history.
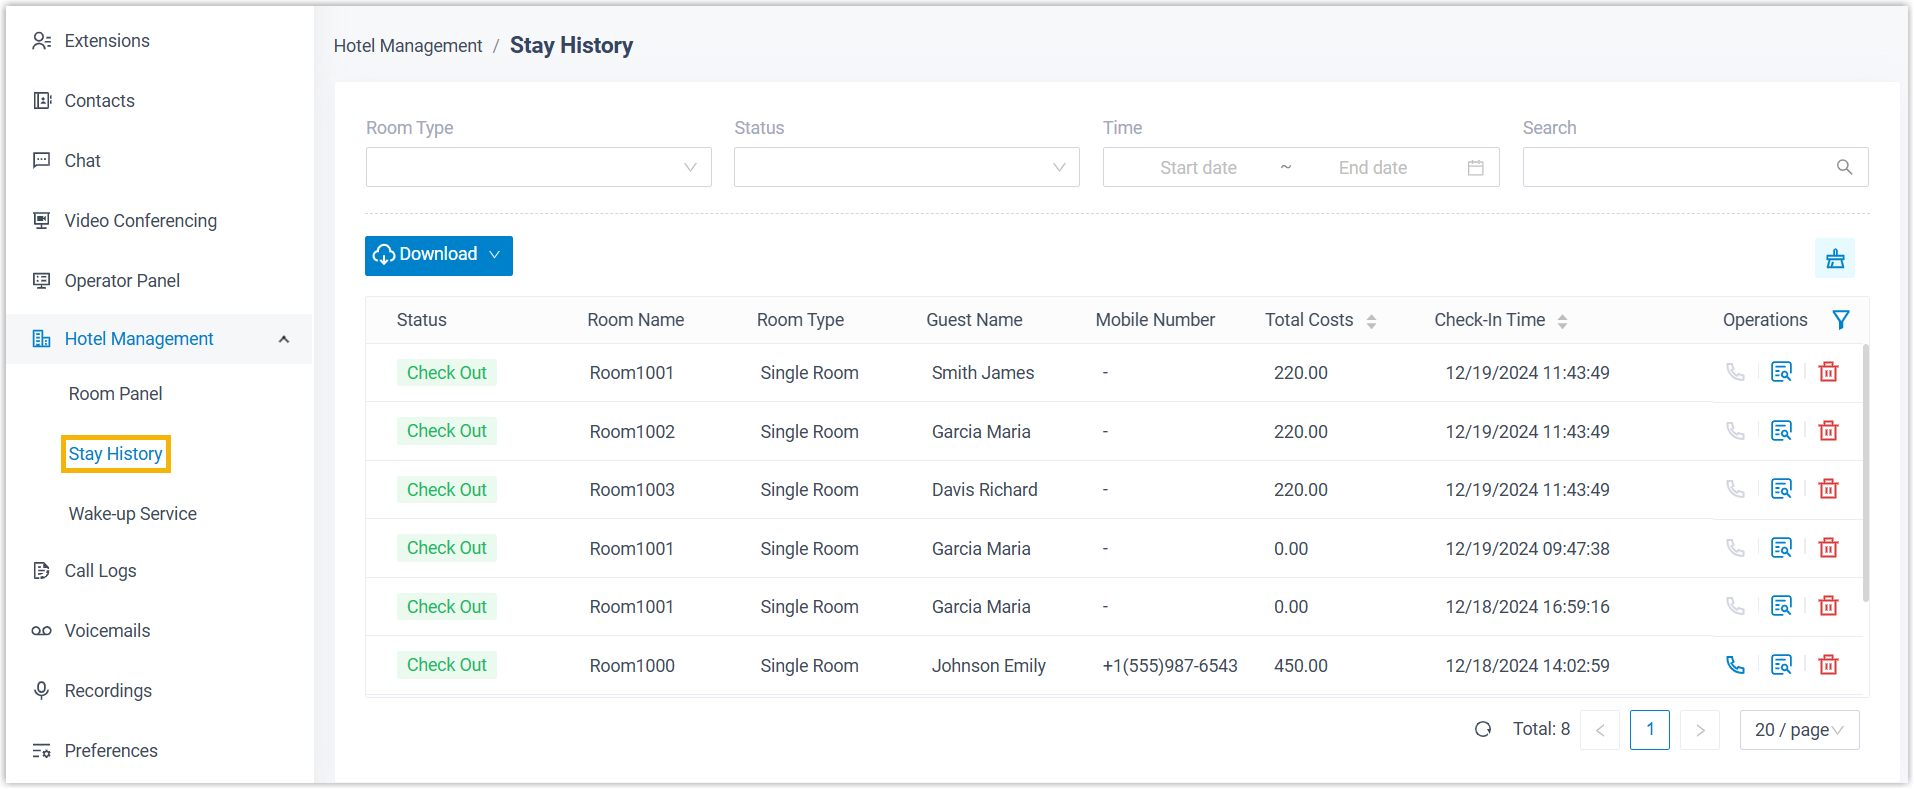
Delete Check-in History The authorized staff member can access Stay History on Linkus Desktop/Web Client (Path: ) to delete guest stay history.

- Guest Room Policy
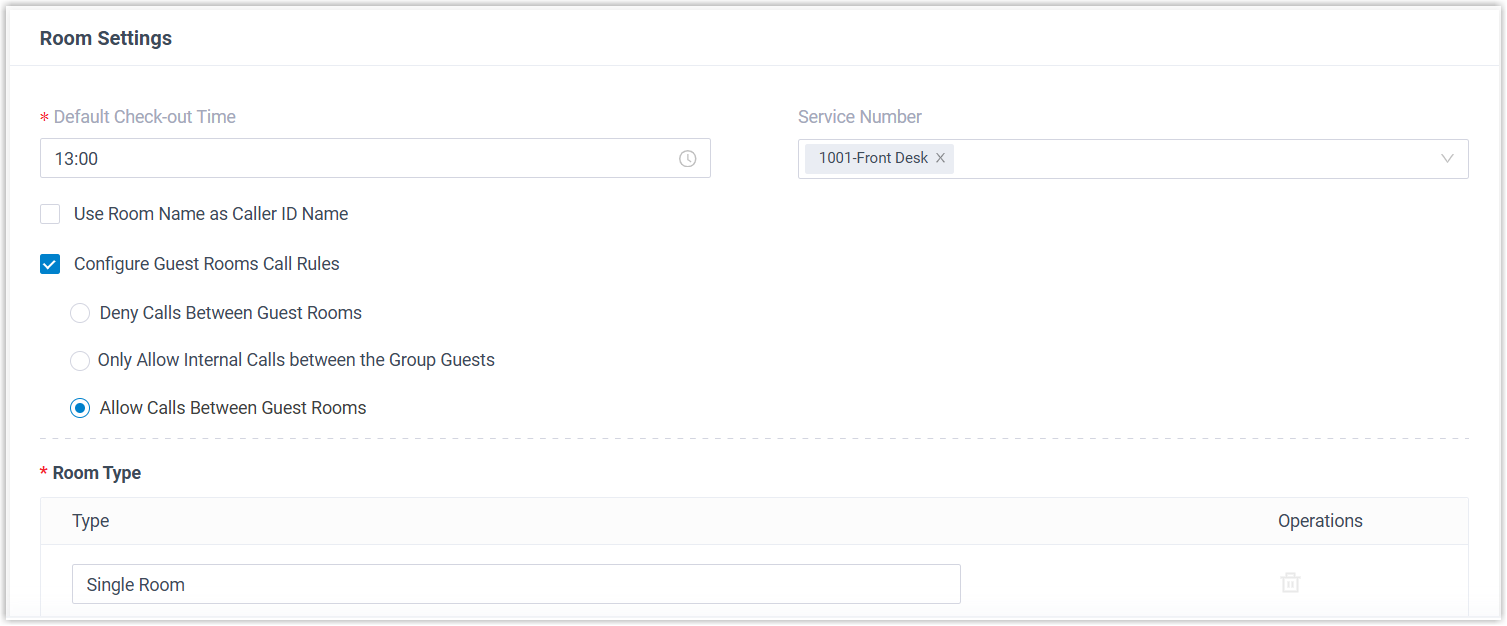
- Guest Room Policy is required, where you need to configure the general settings for guest rooms.
-
Setting Description Default Check-out Time Set the default check-out time. Service Number Service Number is the extension number or AI receptionist number assigned to hotel services, such as 24-hour front desk, laundry service, restaurant, etc. All guests can call this number from their room phones, regardless of check-in status.
Select one or more service numbers from the drop-down list to allow guests to call.
Use Room Name as Caller ID Name By default, when guests make internal calls from a room phone, the guest name registered at check-in is displayed as the Caller ID name, according to the name display format set in .

To display the room name (as configured in ) as the Caller ID name, enable the option Use Room Name as Caller ID Name.

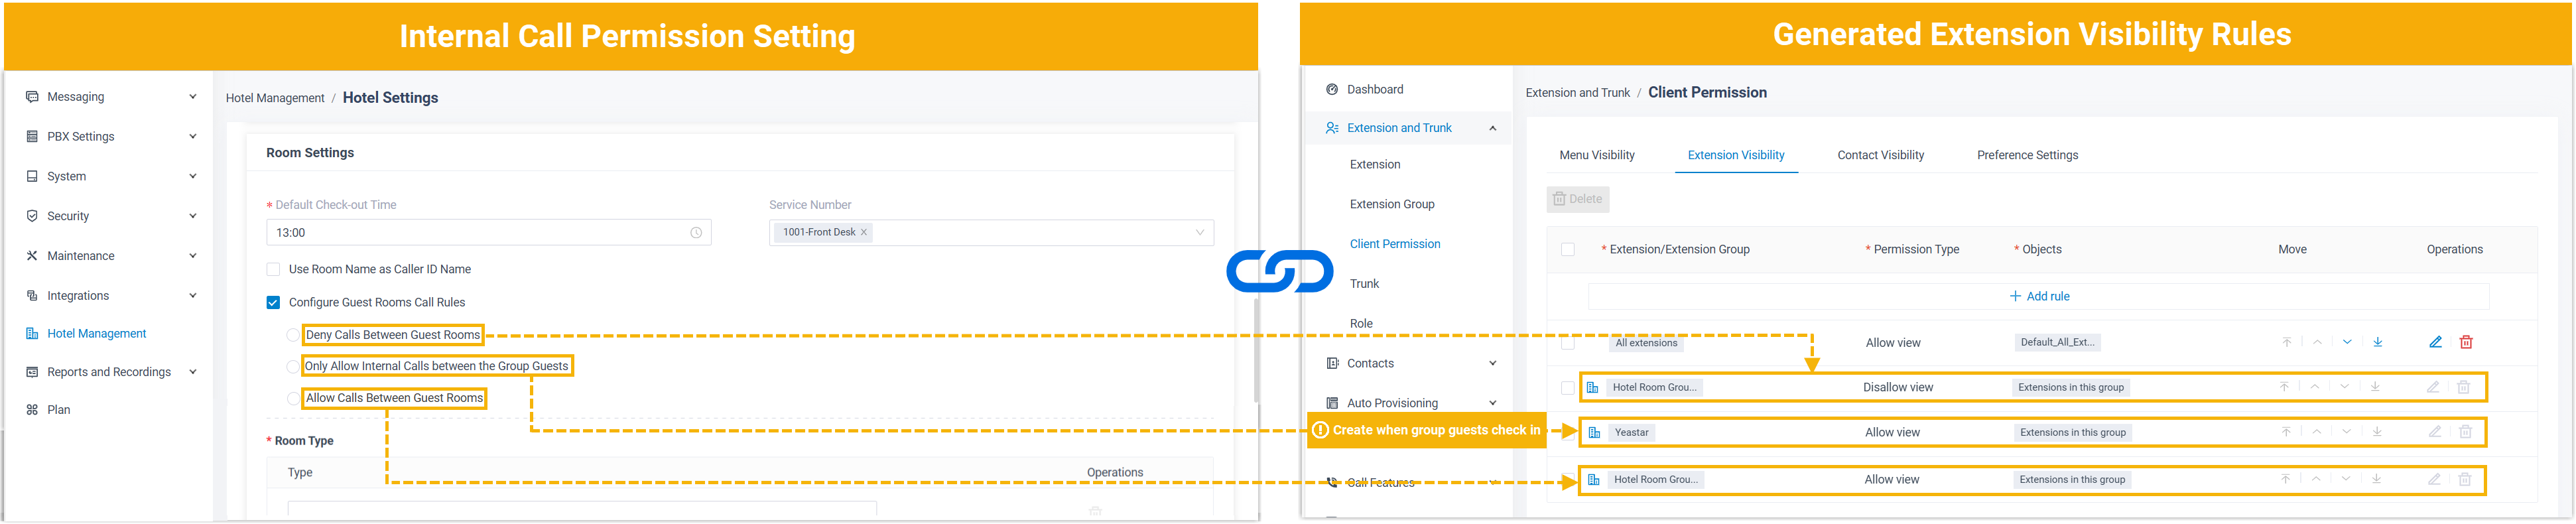
Configure Guest Rooms Call Rules By default, guests are NOT allowed to make internal calls between rooms. You can configure internal call permission for guest rooms as needed.
Note:- For Yeastar PBX, internal call permission is
associated with extension visibility. After you
configure the internal call permission, PBX will
create the corresponding extension visibility
rules on .
- If Organization Management (Path: ) is enabled on Yeastar PBX, this feature is DISABLED by default. To configure internal call permission, see Enable internal call permission (Department-based structure).
- Deny Calls Between Guest Rooms
- Only Allow Internal Calls between the Group Guests
- Allow Calls Between Guest Rooms
Note: When internal calls are enabled on room phones, only guests in checked-in rooms can make calls. Otherwise, only the emergency number, service number, and housekeeping feature code can be dialed.Room Type Set room types. Note: A maximum of 10 room types are supported. - For Yeastar PBX, internal call permission is
associated with extension visibility. After you
configure the internal call permission, PBX will
create the corresponding extension visibility
rules on .
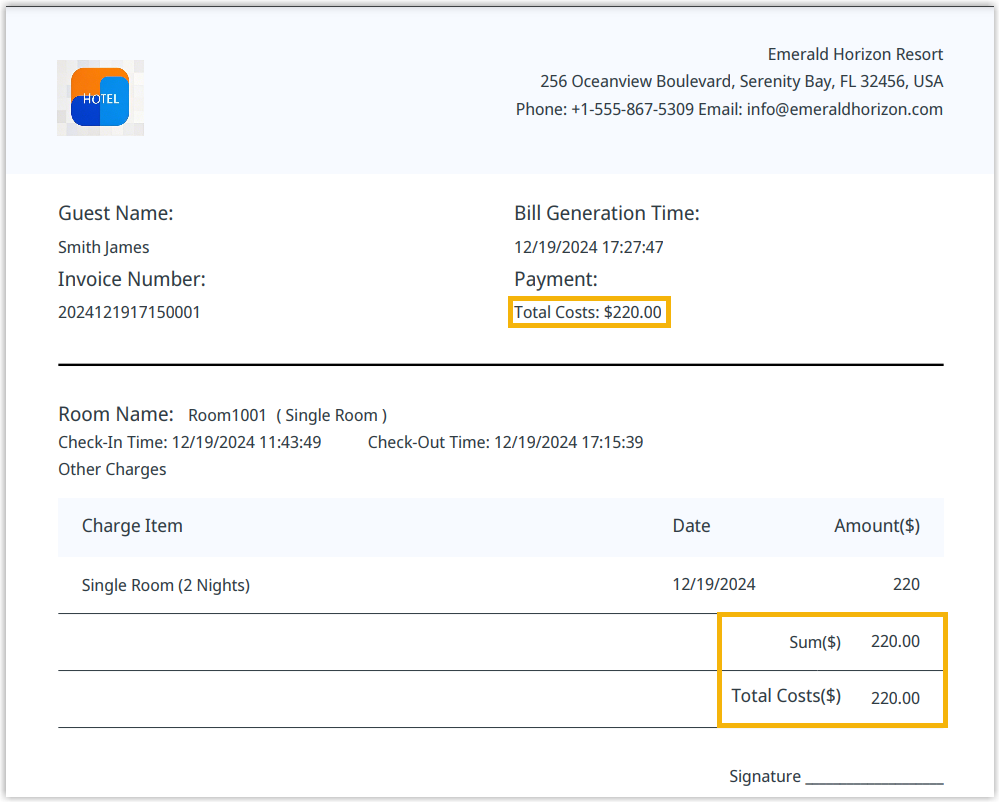
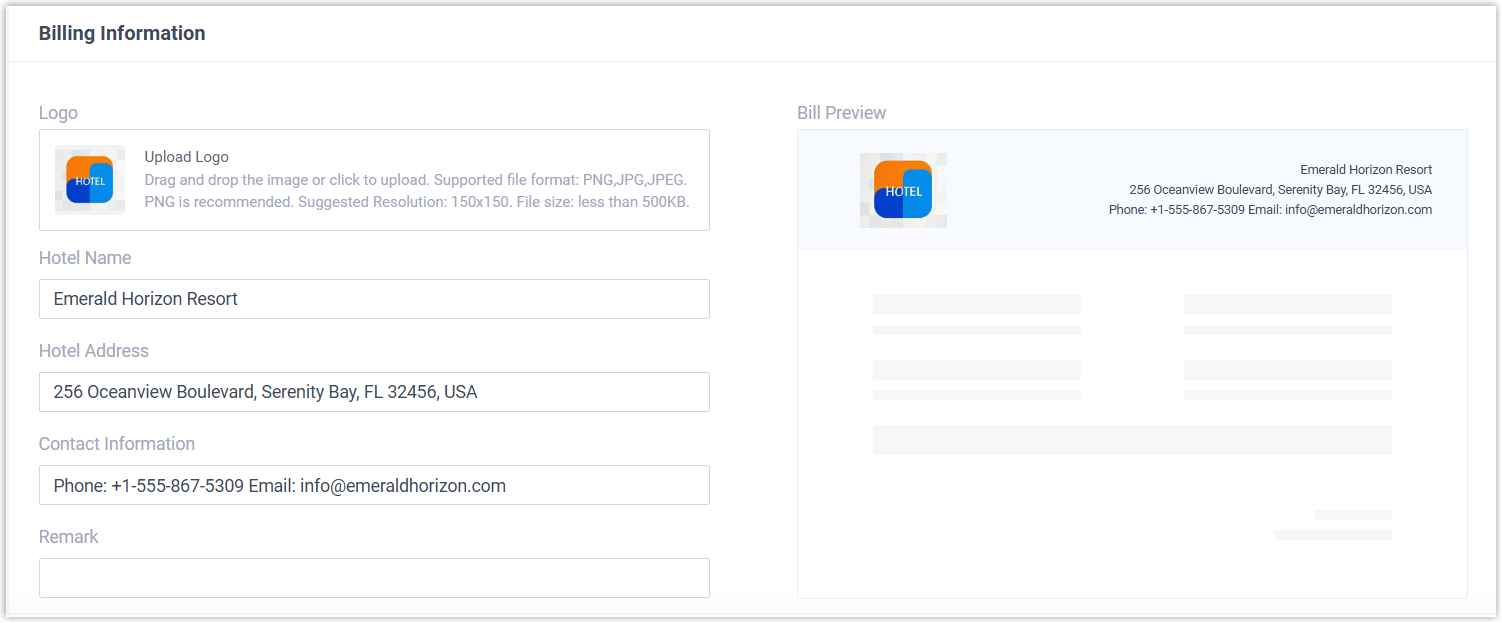
- Hotel Information
- Hotel Information will be used in all billing and invoicing transactions.
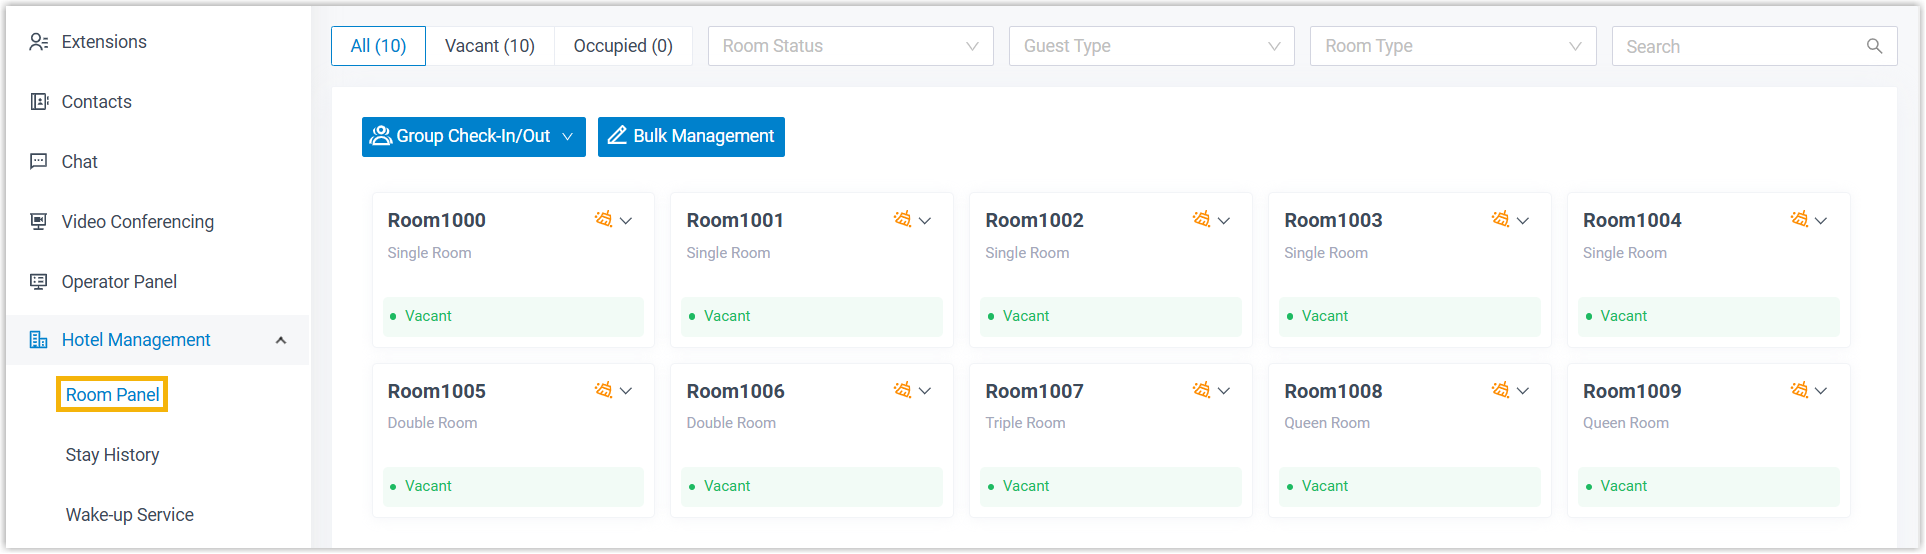
Step 3. Set up guest room
Go to Room Management tab to set room status and add guest rooms.
- Add Guest Room
- Add guest rooms in bulk or one by one as needed.
-
Scenario Instruction Add guest rooms in bulk 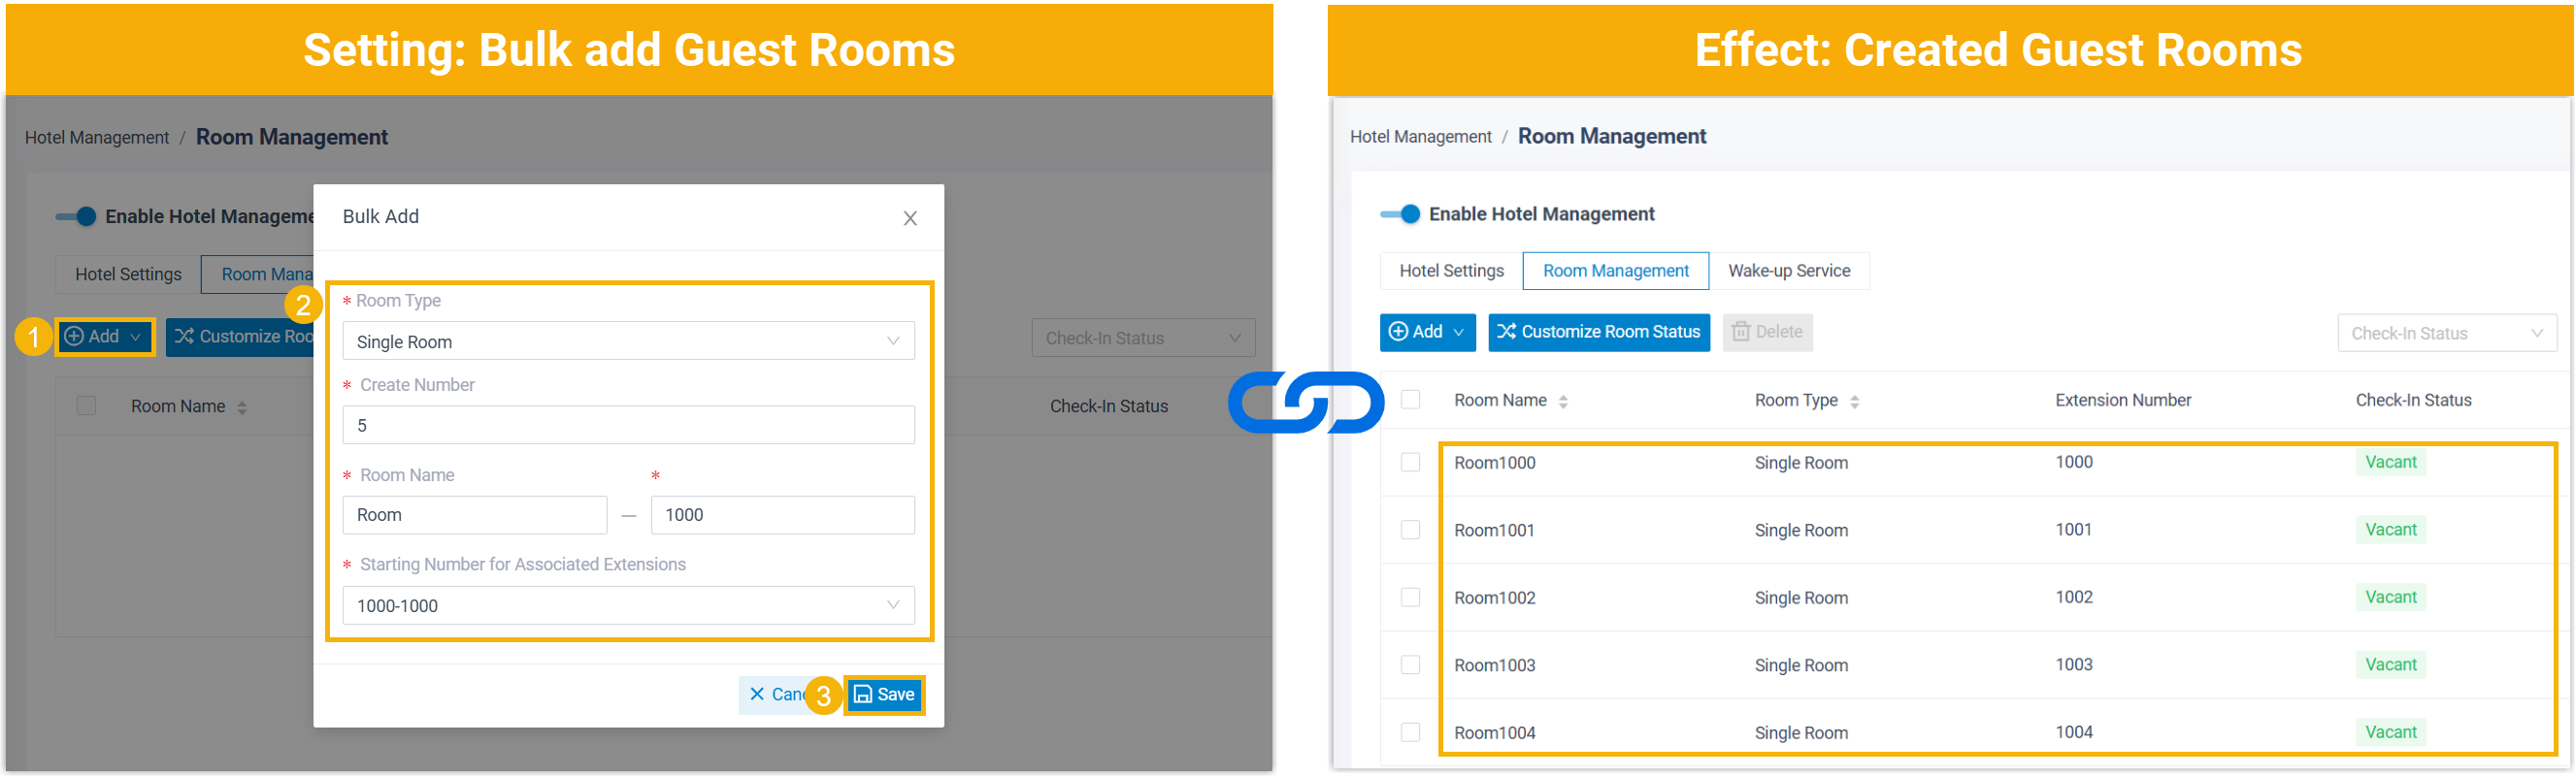
- Click .
- In the pop-up window, configure the following
settings:
- Room Type: Select a room type.
- Create Number: Set the
number of guest rooms that you want to create.Note: Enter a value between 1 and 99.
- Room Name: Set a prefix
and a suffix for the room name.
- Prefix: Any letter or number.
- Suffix: A number between 0 and 9999.
For example, set prefix as "Room" and suffix as "1000", the room name will be Room1000.
- Starting Number for Associated Extensions: Select an extension from the drop-down list. PBX will automatically assign available extension numbers to the created guest rooms, starting from the number you specify here.
- Click Save.
Add guest rooms one by one 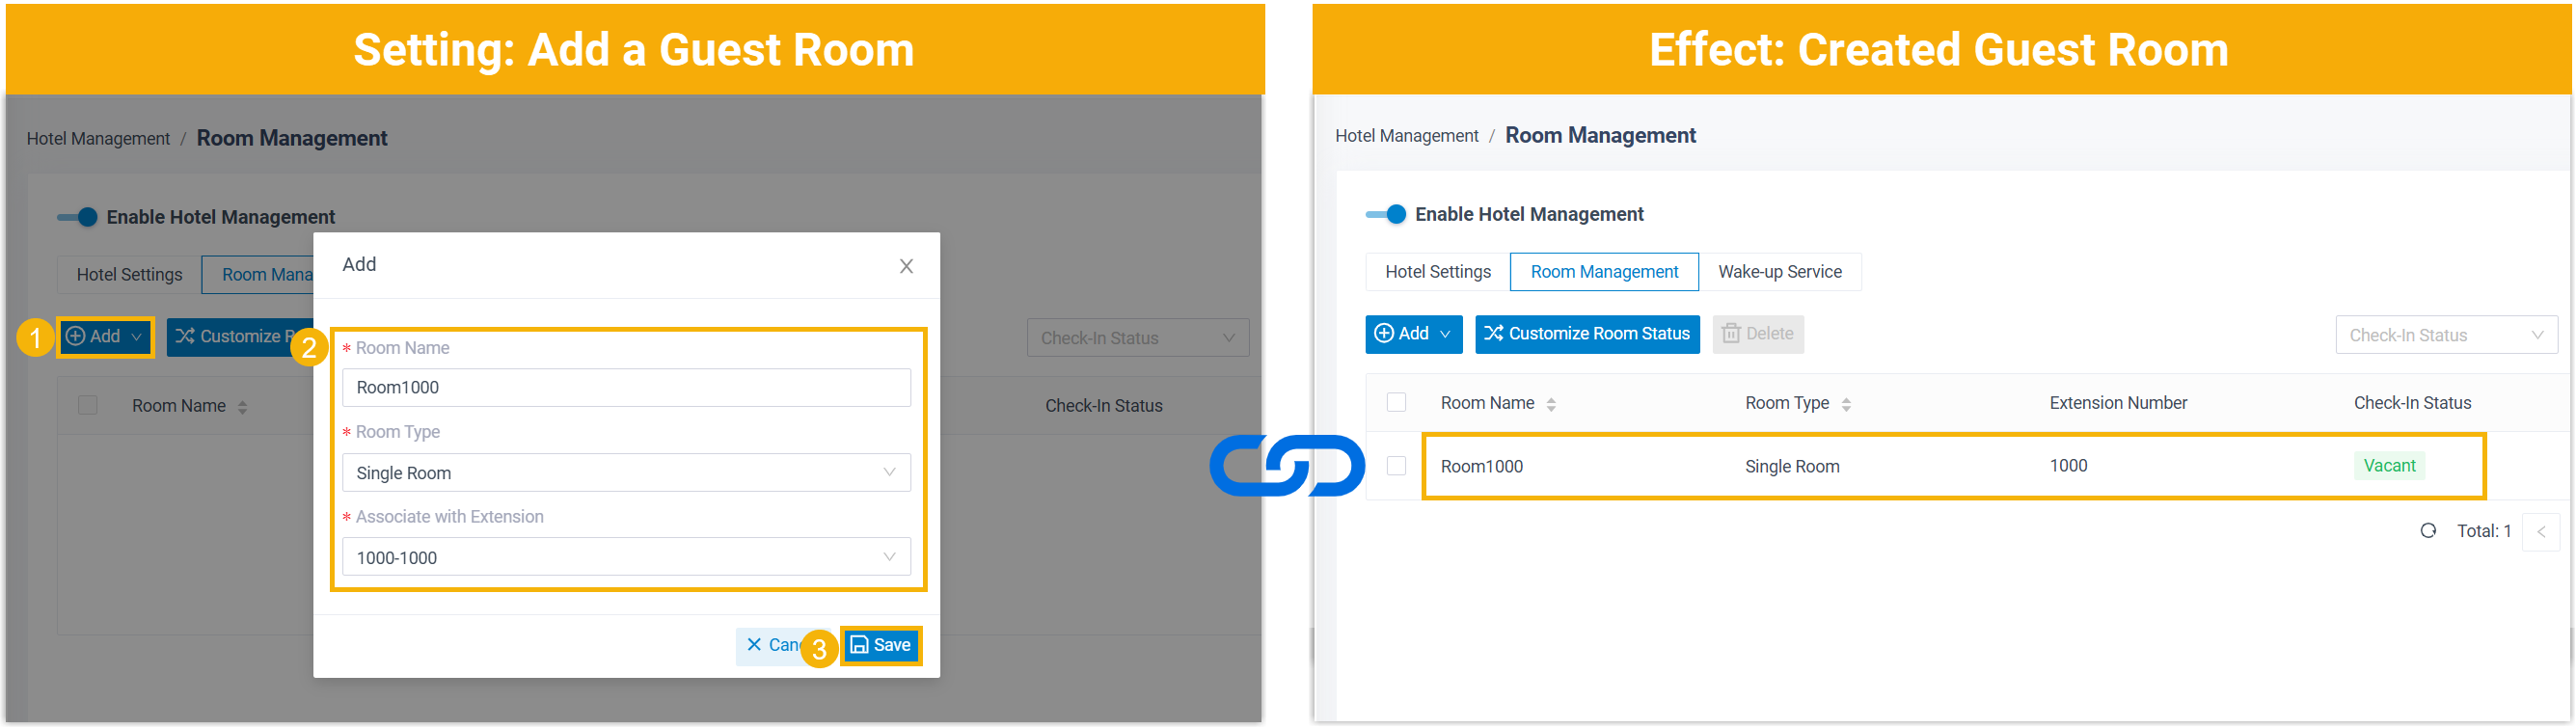
- Click .
- In the pop-up window, configure the following
settings:
- Room Name: Set the room name.
- Room Type: Select a room type.
- Associate with Extension: Select an extension from the drop-down list to associate with the guest room.
- Click Save.
- Set Room Status
- Yeastar provides 6 built-in room status - Dirty, Clean, Inspected, Repairing, Available, and Unavailable, along with feature codes to facilitate housekeeping management. You can also customize desired room status as needed, as shown below.
-
- Click Customize Room Status.
The default 3 room status rules are displayed on the list.
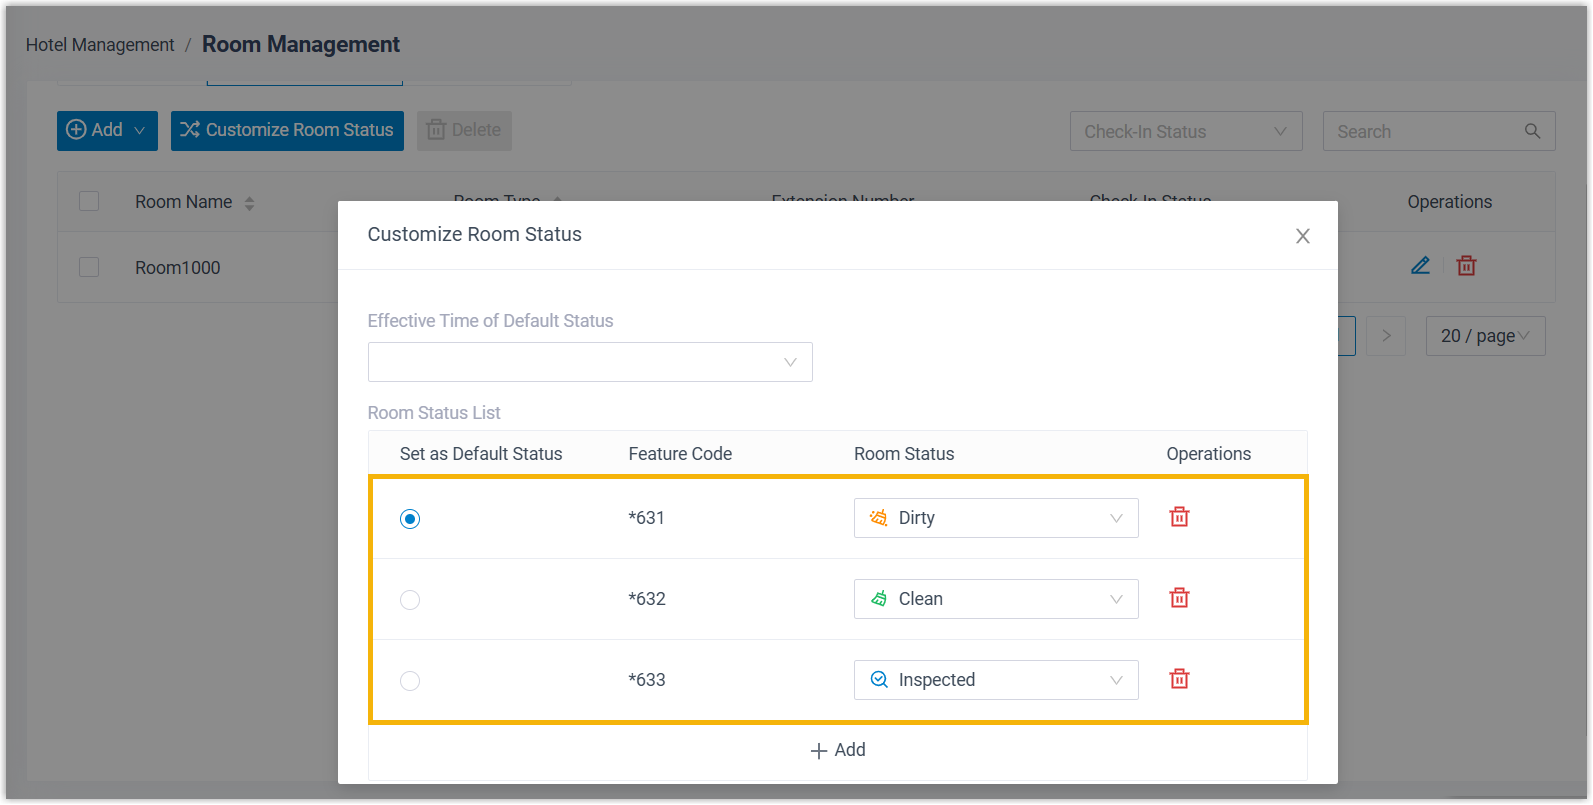
- Add room status.
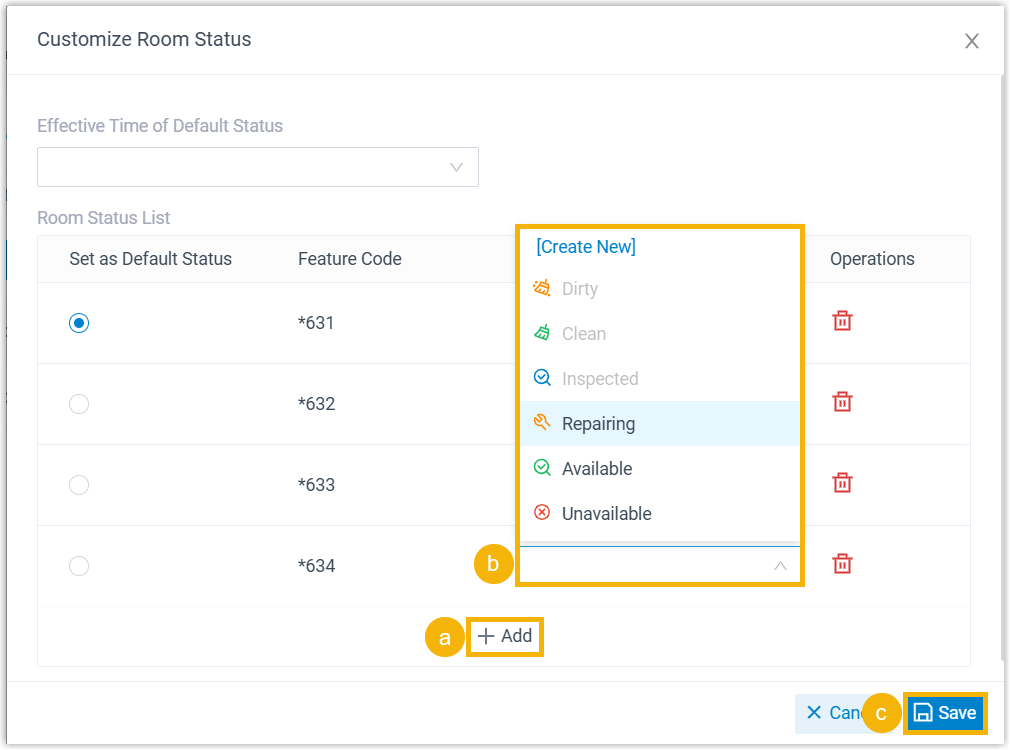
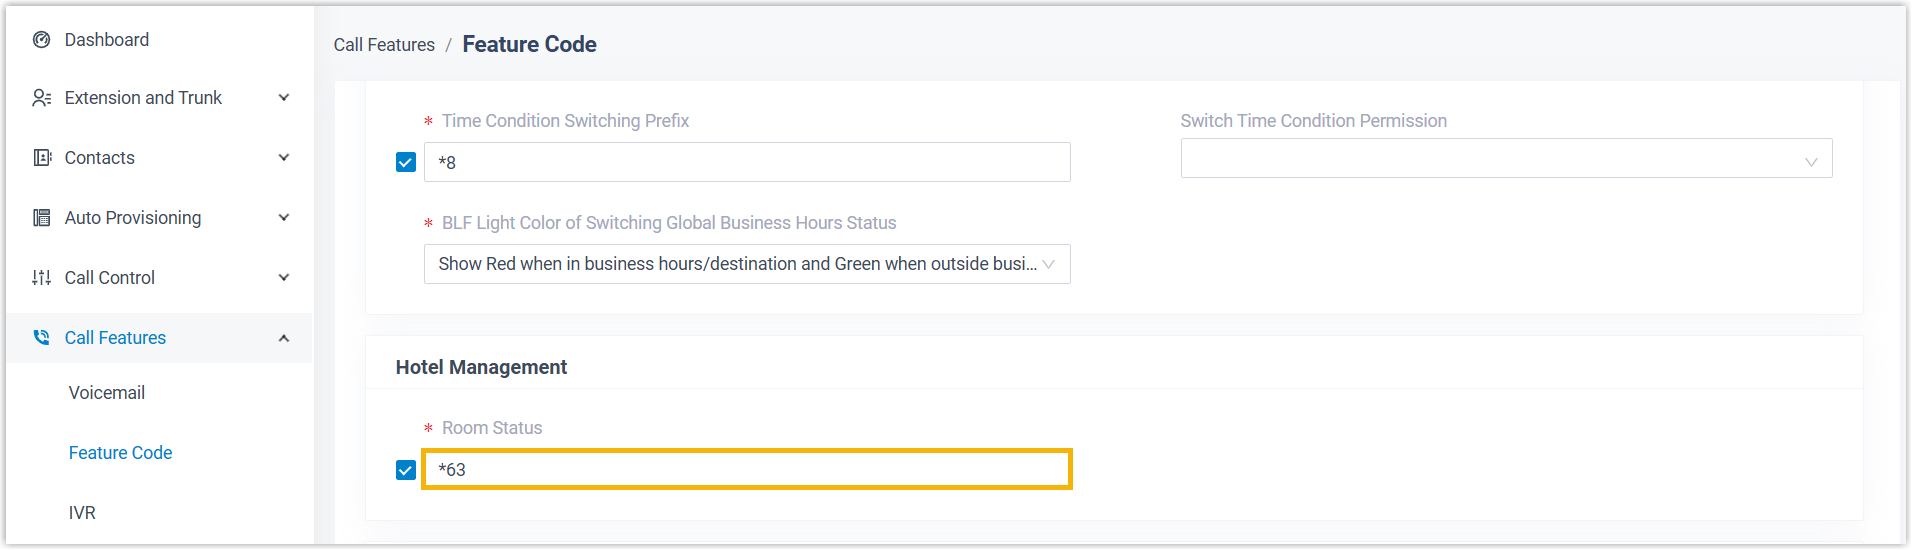
- Click Add.A feature code is automatically generated for the room status, allowing housekeepers to dial the code from room phone to change room status.Note: The feature code consists of a default room status code (*63) followed by a sequential number. To use a different room status code, go to to change it.
- In the Room Status drop-down list,
select an existing status or click Create
New to create a room status.Note: A maximum of 26 room statuses are supported, including 6 built-in statuses and 20 custom statuses.
- Click Add.
- Set the default room status and specify the scenario for resetting
room status to default.
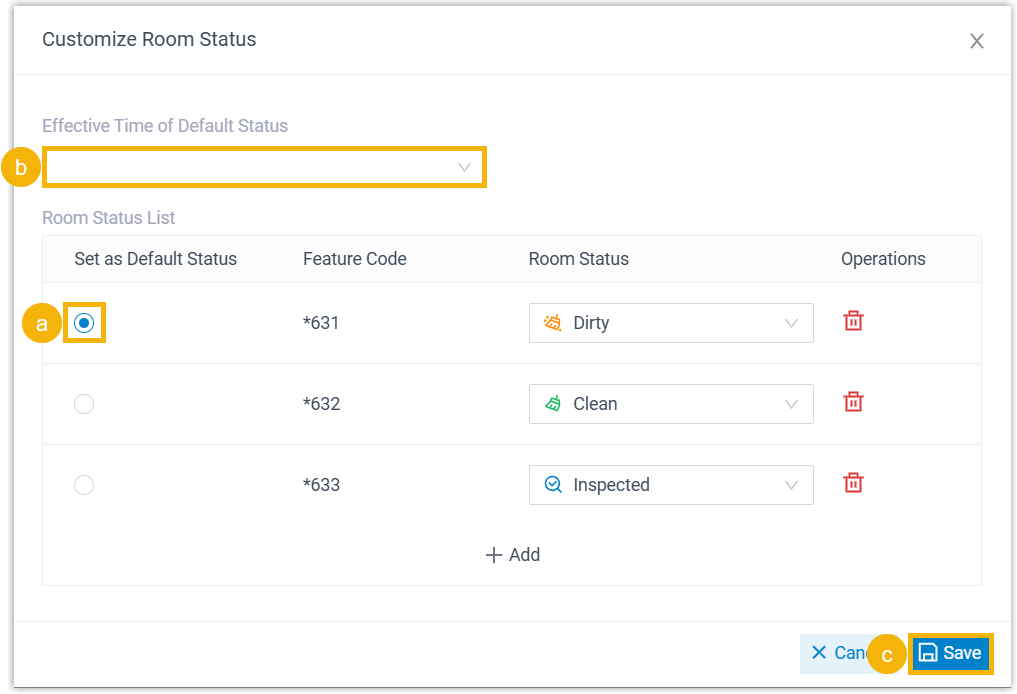
- In the Set as Default Status column, select the default room status.
- Optional: In the Effective Time of Default
Status drop-down list, select another
scenario where room status will be reset.
- At Check-In: Reset room status to the default when guests check in.
- Automatically Reset Every X
Days: Periodically reset room status
to the default.
If you choose this option, select the interval (in days) from the drop-down list.
- Click Save.
- Click Customize Room Status.
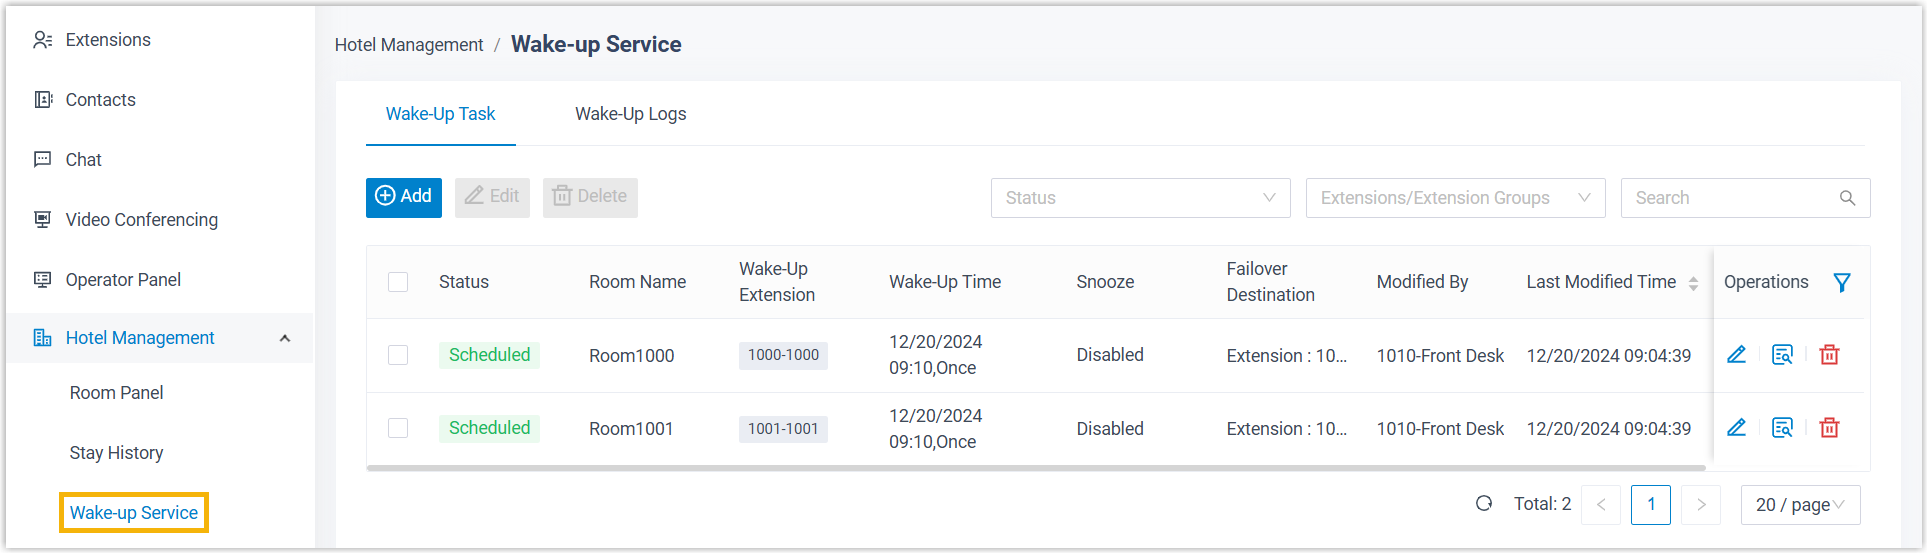
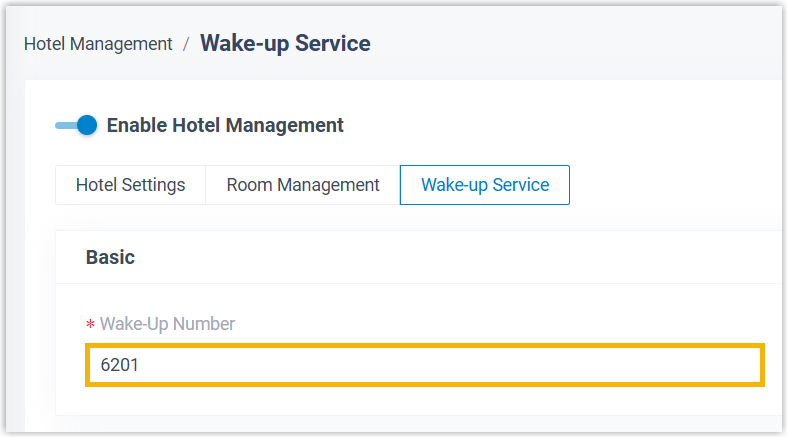
Step 4. Set up wake-up service
- Wake-up Number
- Wake-up Number is an internal number that guests can call to set wake-up calls.
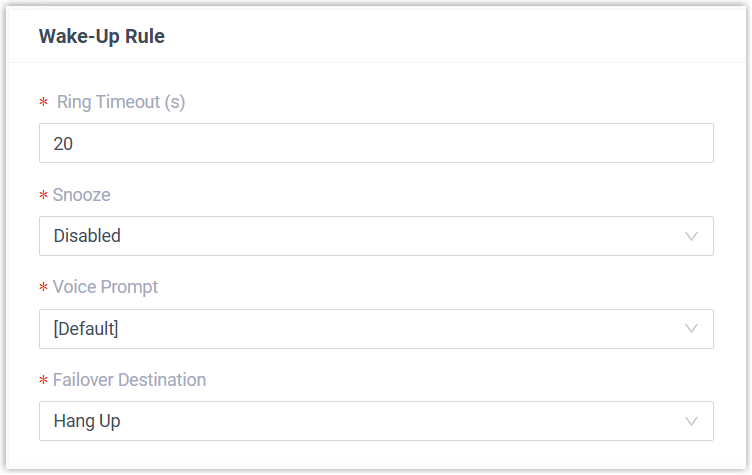
- Wake-Up Rule
- Customize the rule for wake-up calls.
Result
- Hotel service is set up on Yeastar P-Series Software Edition.
- An extension group Hotel Room Group is created, and
all extensions assigned to guest rooms are automatically added to the group
for centralized call management.
