Monitor Events via Webhook
Webhook is an HTTP-based callback mechanism, which allows the PBX to actively push notifications to a predefined URL in real-time when specific events occur. This topic provides an example on how to monitor PBX events via Webhook.
Prerequisites
-
Ensure that the firmware of Yeastar P-Series Software Edition is 83.20.0.21 or later.
- You have enabled Yeastar P-Series Software Edition API.Note: If you want to monitor extension status or trunk status, make sure that the corresponding monitor settings in the Advanced Settings are enabled.

-
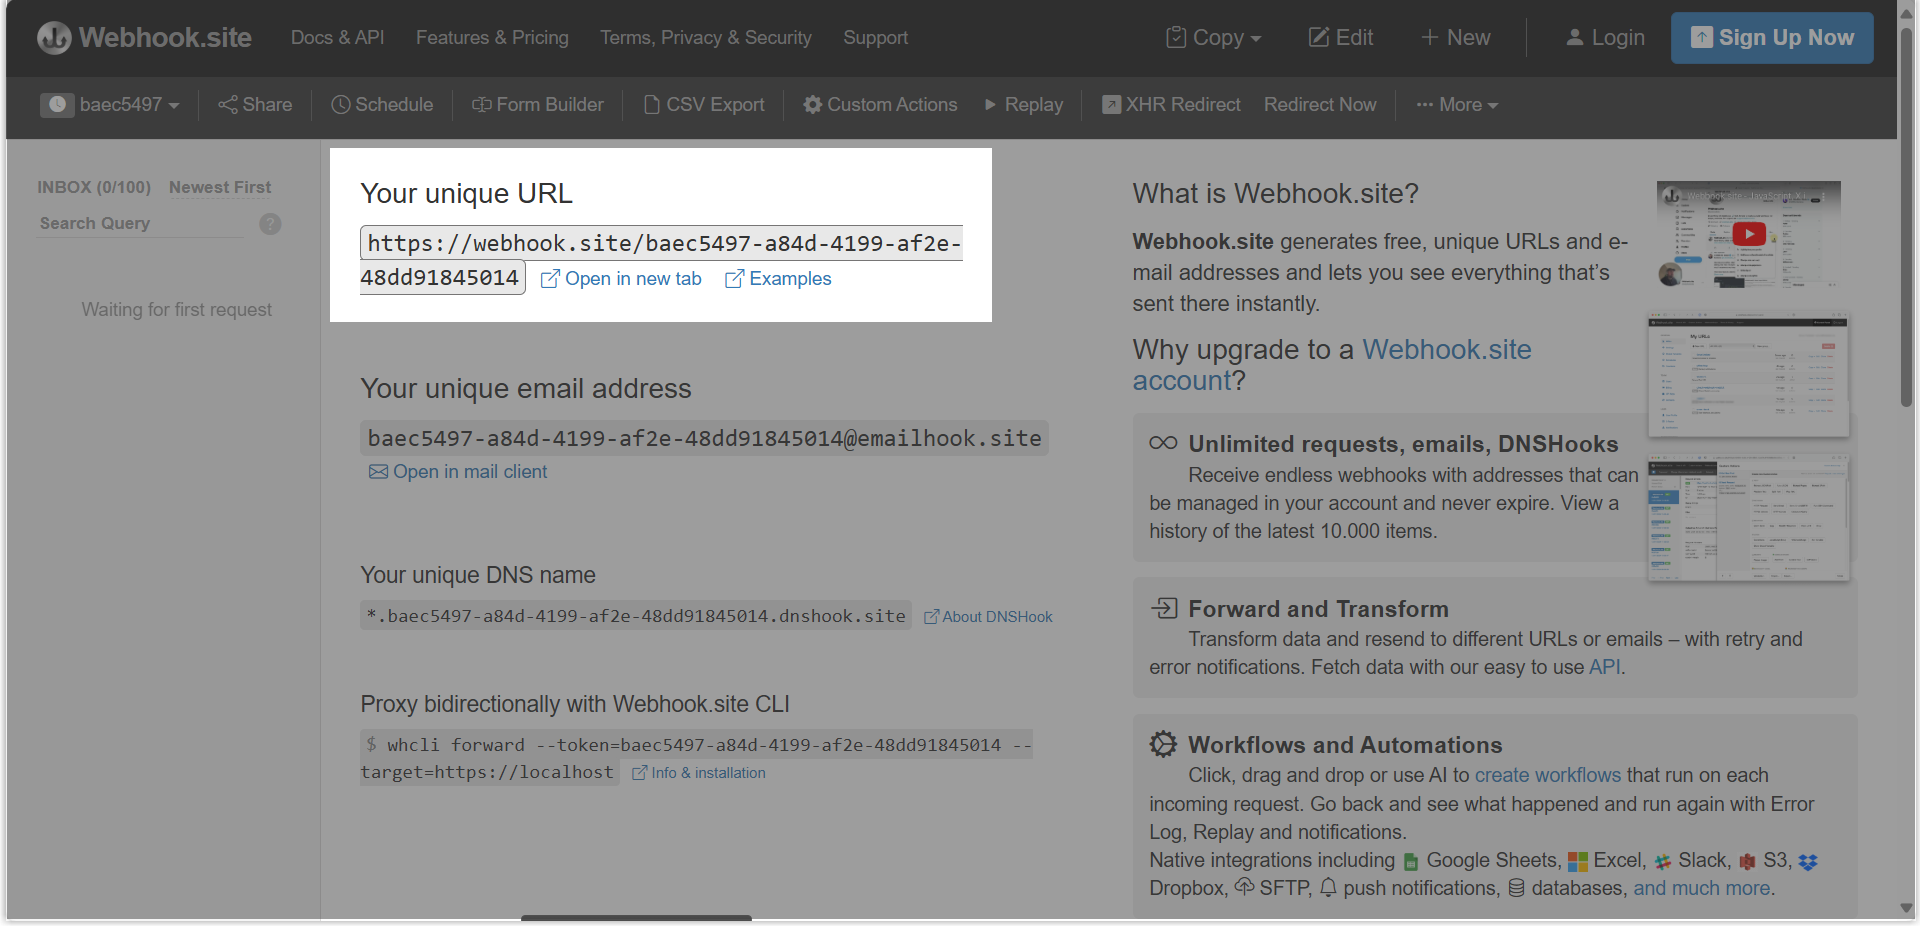
You have obtained a valid Webhook URL from the third-party application.
In this example, we will use the URL generated by Webhook.site.
Procedure
- Log in to the PBX web portal, go to .
- Select the checkbox of Webhook Event Push.
- Add a Webhook and fill in the Webhook information.
In this example, a Webhook is added to push events to the URL via a POST request when extension information is updated.
Note: Support adding up to 5 Webhooks.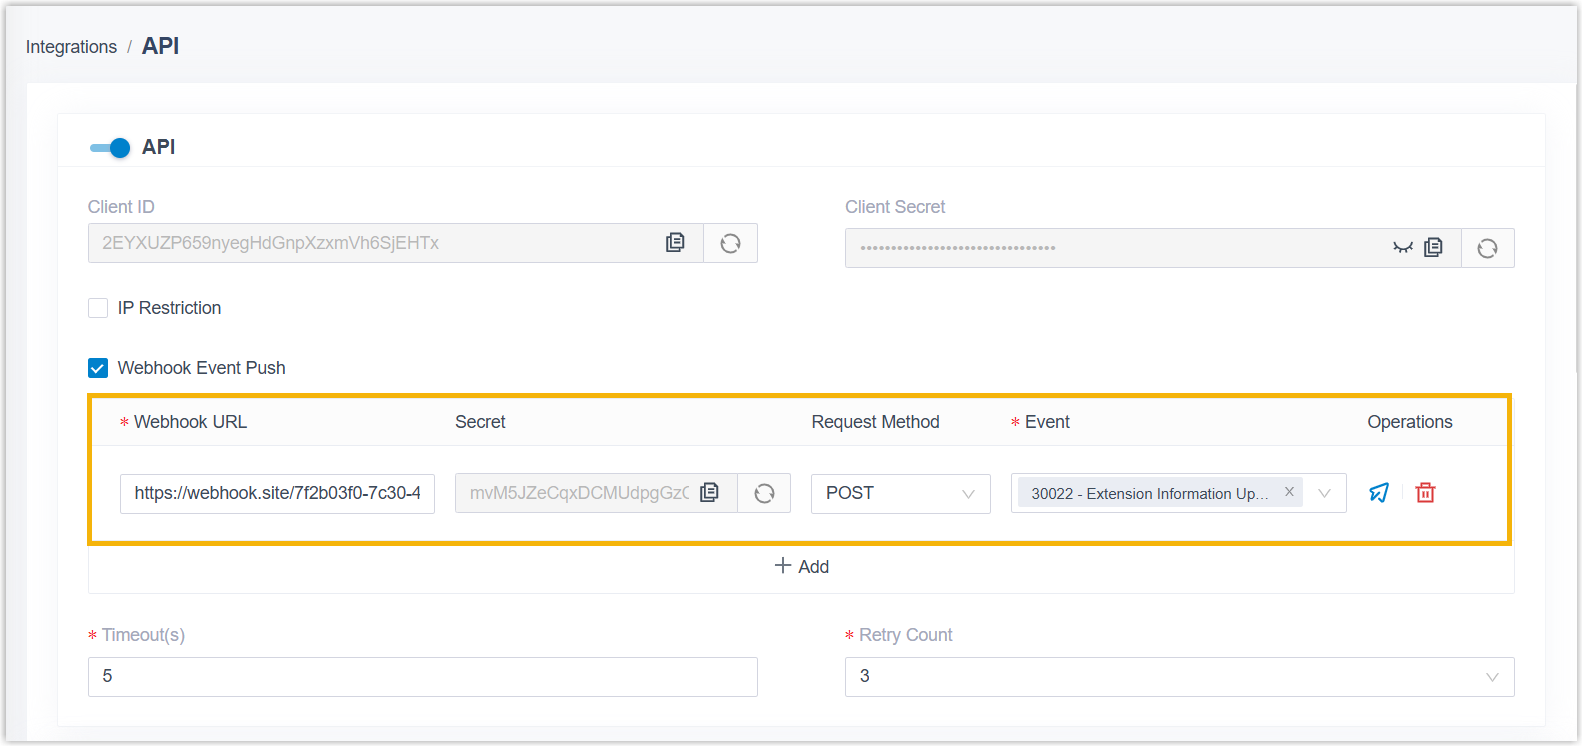
- Webhook URL: Enter the Webhook URL, which serves as the event push destination.
- Secret: A system-generated 32-character key used
to sign Webhook messages. When sending Webhook events, the system
includes the generated signature in the
X-Signatureheader, which can be used to verify the message's authenticity and integrity.Tip:- After receiving a Webhook request, the recipient can compute
an HMAC-SHA256 signature of the received raw message body
using the key, Base64-encode the result, and compare it with
the signature in the
X-Signatureheader. If the two match, the message is verified as correct and intact. - You can click
 to update it when
the key is at risk of being exposed.
to update it when
the key is at risk of being exposed.
- After receiving a Webhook request, the recipient can compute
an HMAC-SHA256 signature of the received raw message body
using the key, Base64-encode the result, and compare it with
the signature in the
- Request Method: Select the HTTP request method to be either GET or POST, based on the requirements of the third-party Webhook URL.
- Event: Select the events to monitor.Note:
- Select All if you want to subscribe to all events.
- For more information about the API events, see Events.
- To verify the Webhook configuration, click
 in
Operations to send a test message.
in
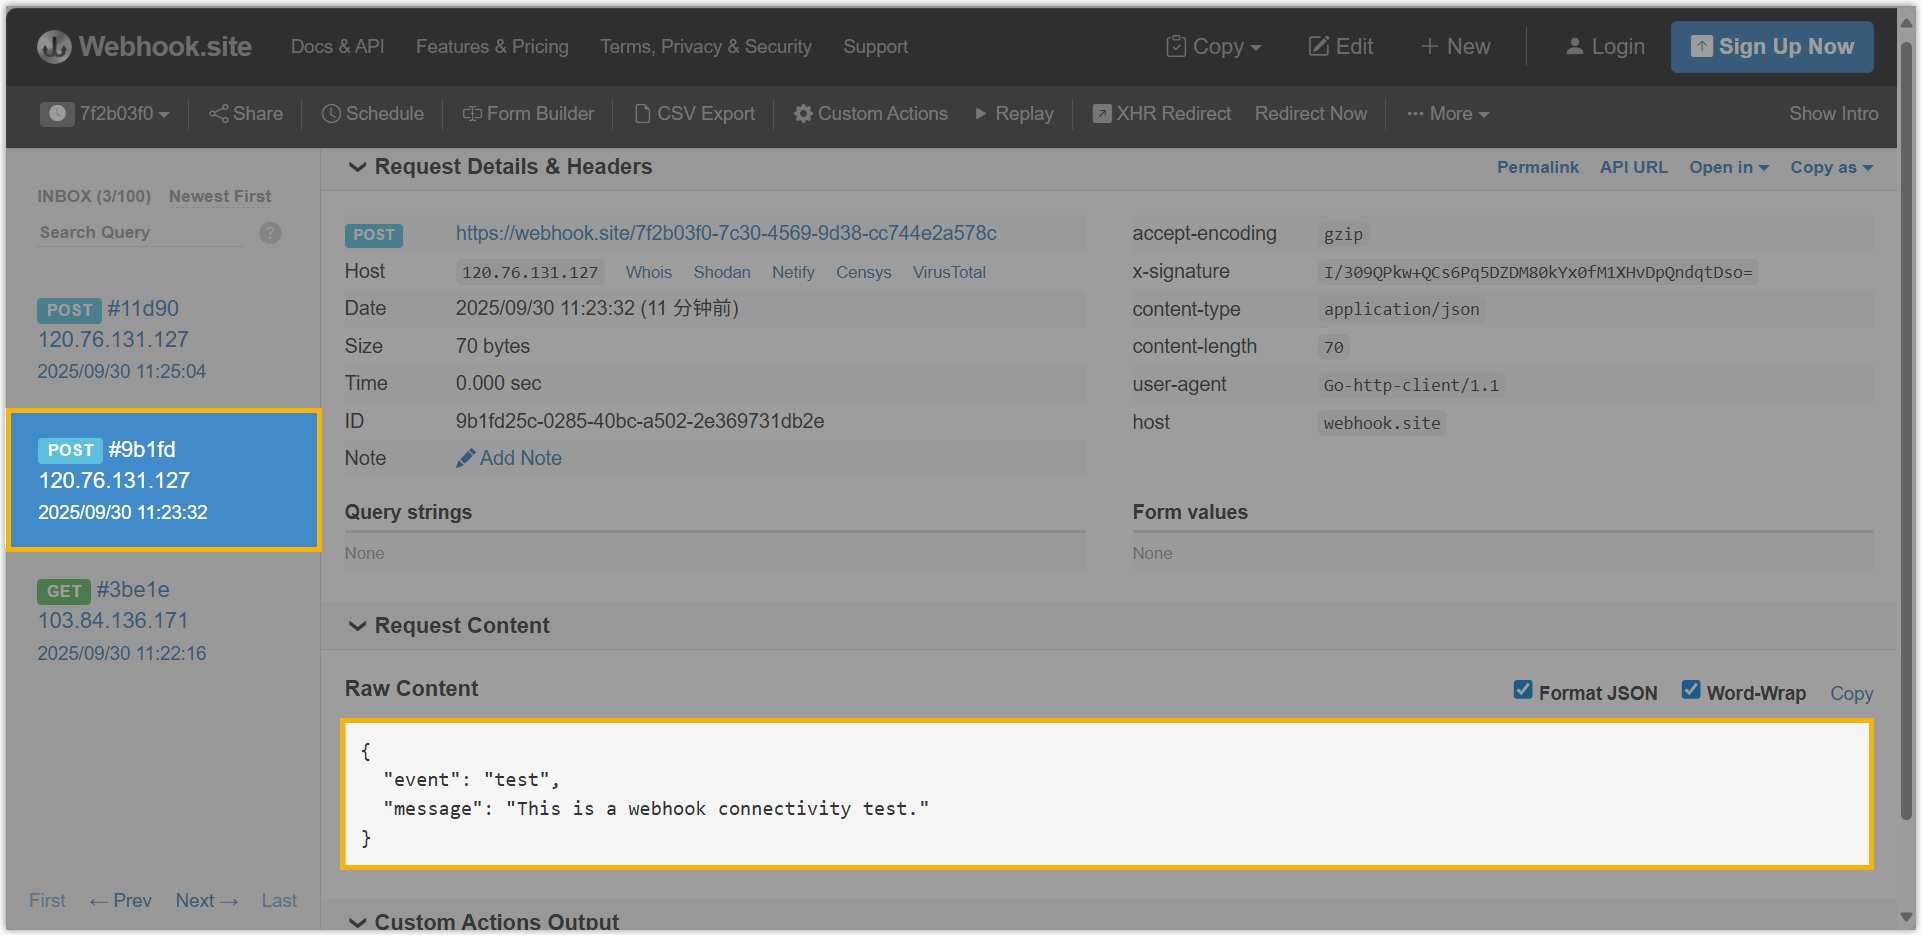
Operations to send a test message. If the test is successful, the third-party application pointed to by the URL will receive the following message in JSON format:
{
    "event": "test",
    "message": "This is a webhook connectivity test."
}
In this example, the Webhook.site received and displayed the test message.
- In the Timeout(s) field, set the maximum time to wait for
an HTTP response from the third-party application, with a time range of 3-10
seconds.
If the third-party application does not return a successful HTTP response (
2xx) within the specified time, the PBX will resend the request based on the Retry Count setting. - In the Retry Count drop-down list, select how many times the PBX should resend the request if delivery fails or no successful response is received.
- Click Save.
Result
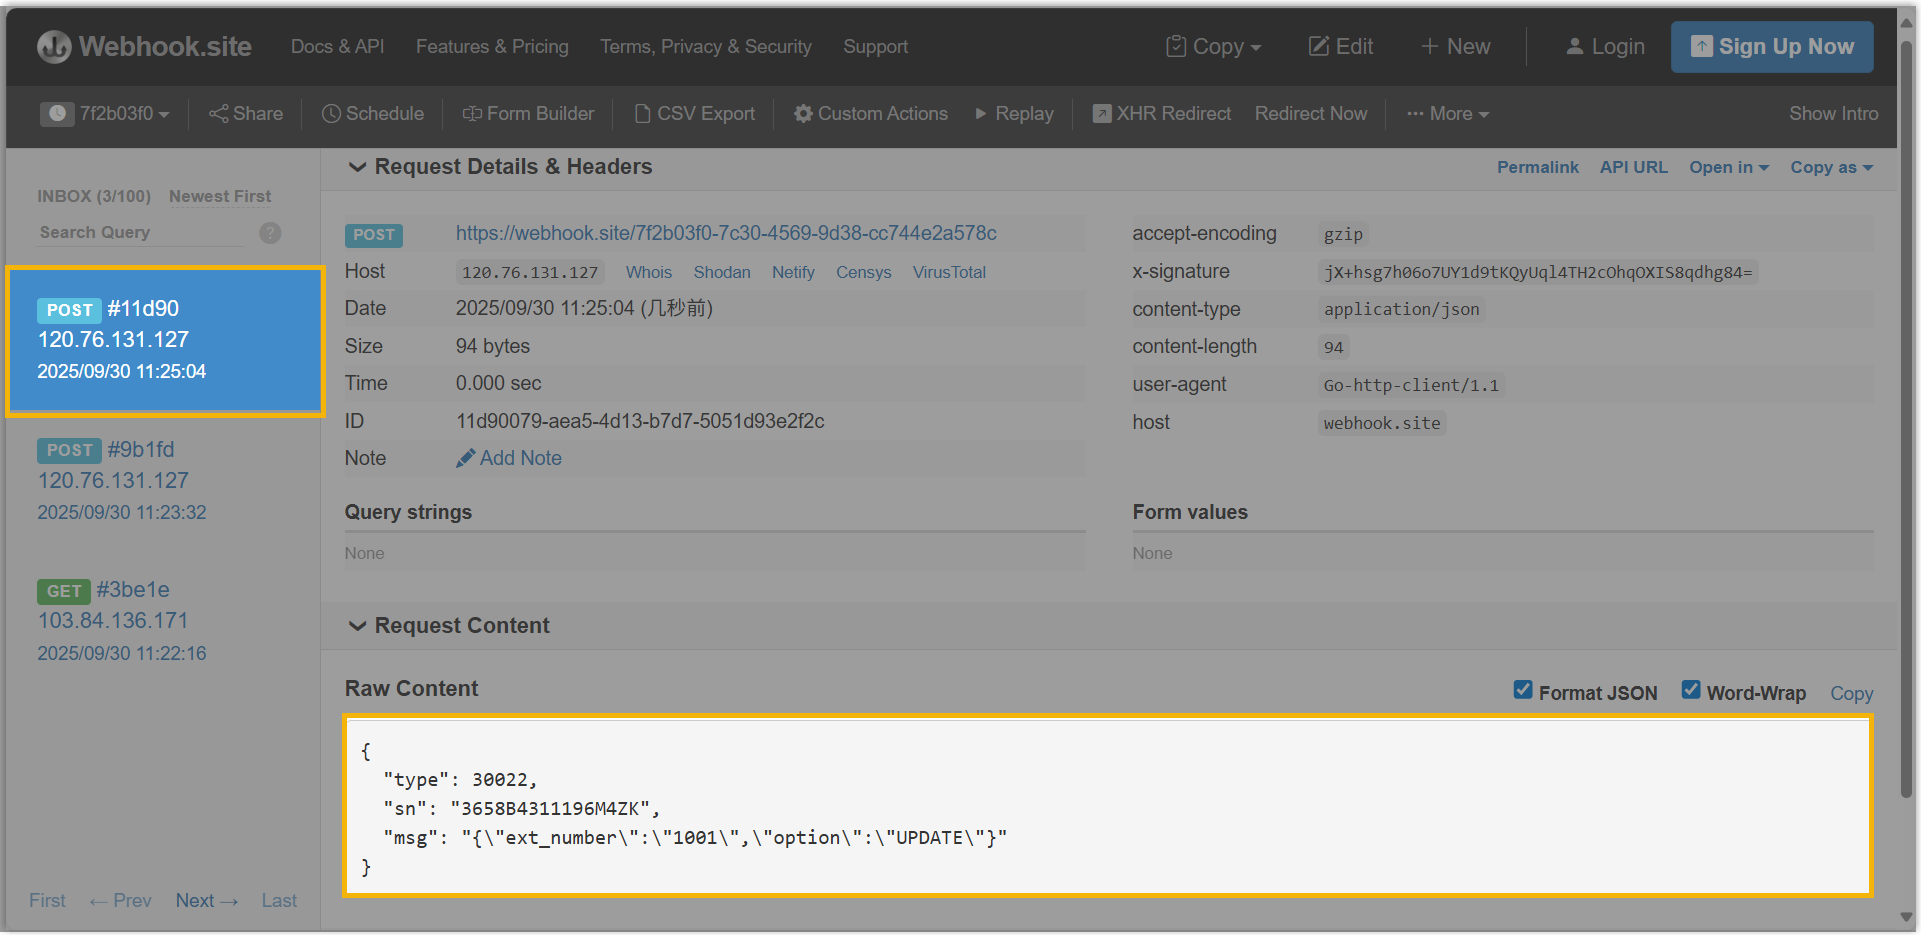
When a subscribed event occurs, the system automatically sends the event report.
In this example, when the Caller ID of extension 1001 is updated, the system automatically sends the corresponding event report to Webhook URL.