Configure Call Confirmation
Call Confirmation requires the called party to press a key to confirm before accepting a call, preventing voicemail or automated systems from answering the call. This topic describes how to configure call confirmation on Linkus Mobile Client.
Requirements
- PBX Server
- The firmware version of PBX Server is 84.24.0.73 or later.
- Linkus Mobile Client
- Your Linkus version meets
the requirement:
- Linkus iOS Client: Version 5.29.14 or later
- Linkus Android Client: Version 5.29.12 or later
Introduction
When calls to your extension are sent to an external number, either through call forwarding or simultaneous ringing, the external recipient may answer the call. However, the call could also be inadvertently answered by voicemail or other automated systems. To prevent this, you can enable call confirmation for your extension. When configured, external recipients will be prompted to press a key to confirm acceptance before the call is connected, ensuring that calls are answered by a person.
- Call Forwarding: The extension has call forwarding configured with the destination set to an external number or the extension's mobile number. For more information, see Configure call confirmation for call forwarding.
- Simultaneous Ring: The extension has simultaneous ring configured to ring its associated mobile number. For more information, see Configure call confirmation for simultaneous ringing.
Configure call confirmation for call forwarding
- Procedure
-
- At the top-left corner of the Calls page, tap your account.
- Go to Current Presence,
then tap
 beside the desired presence.
 - Go to Internal Calls or External Calls, then
complete the following call forwarding settings.
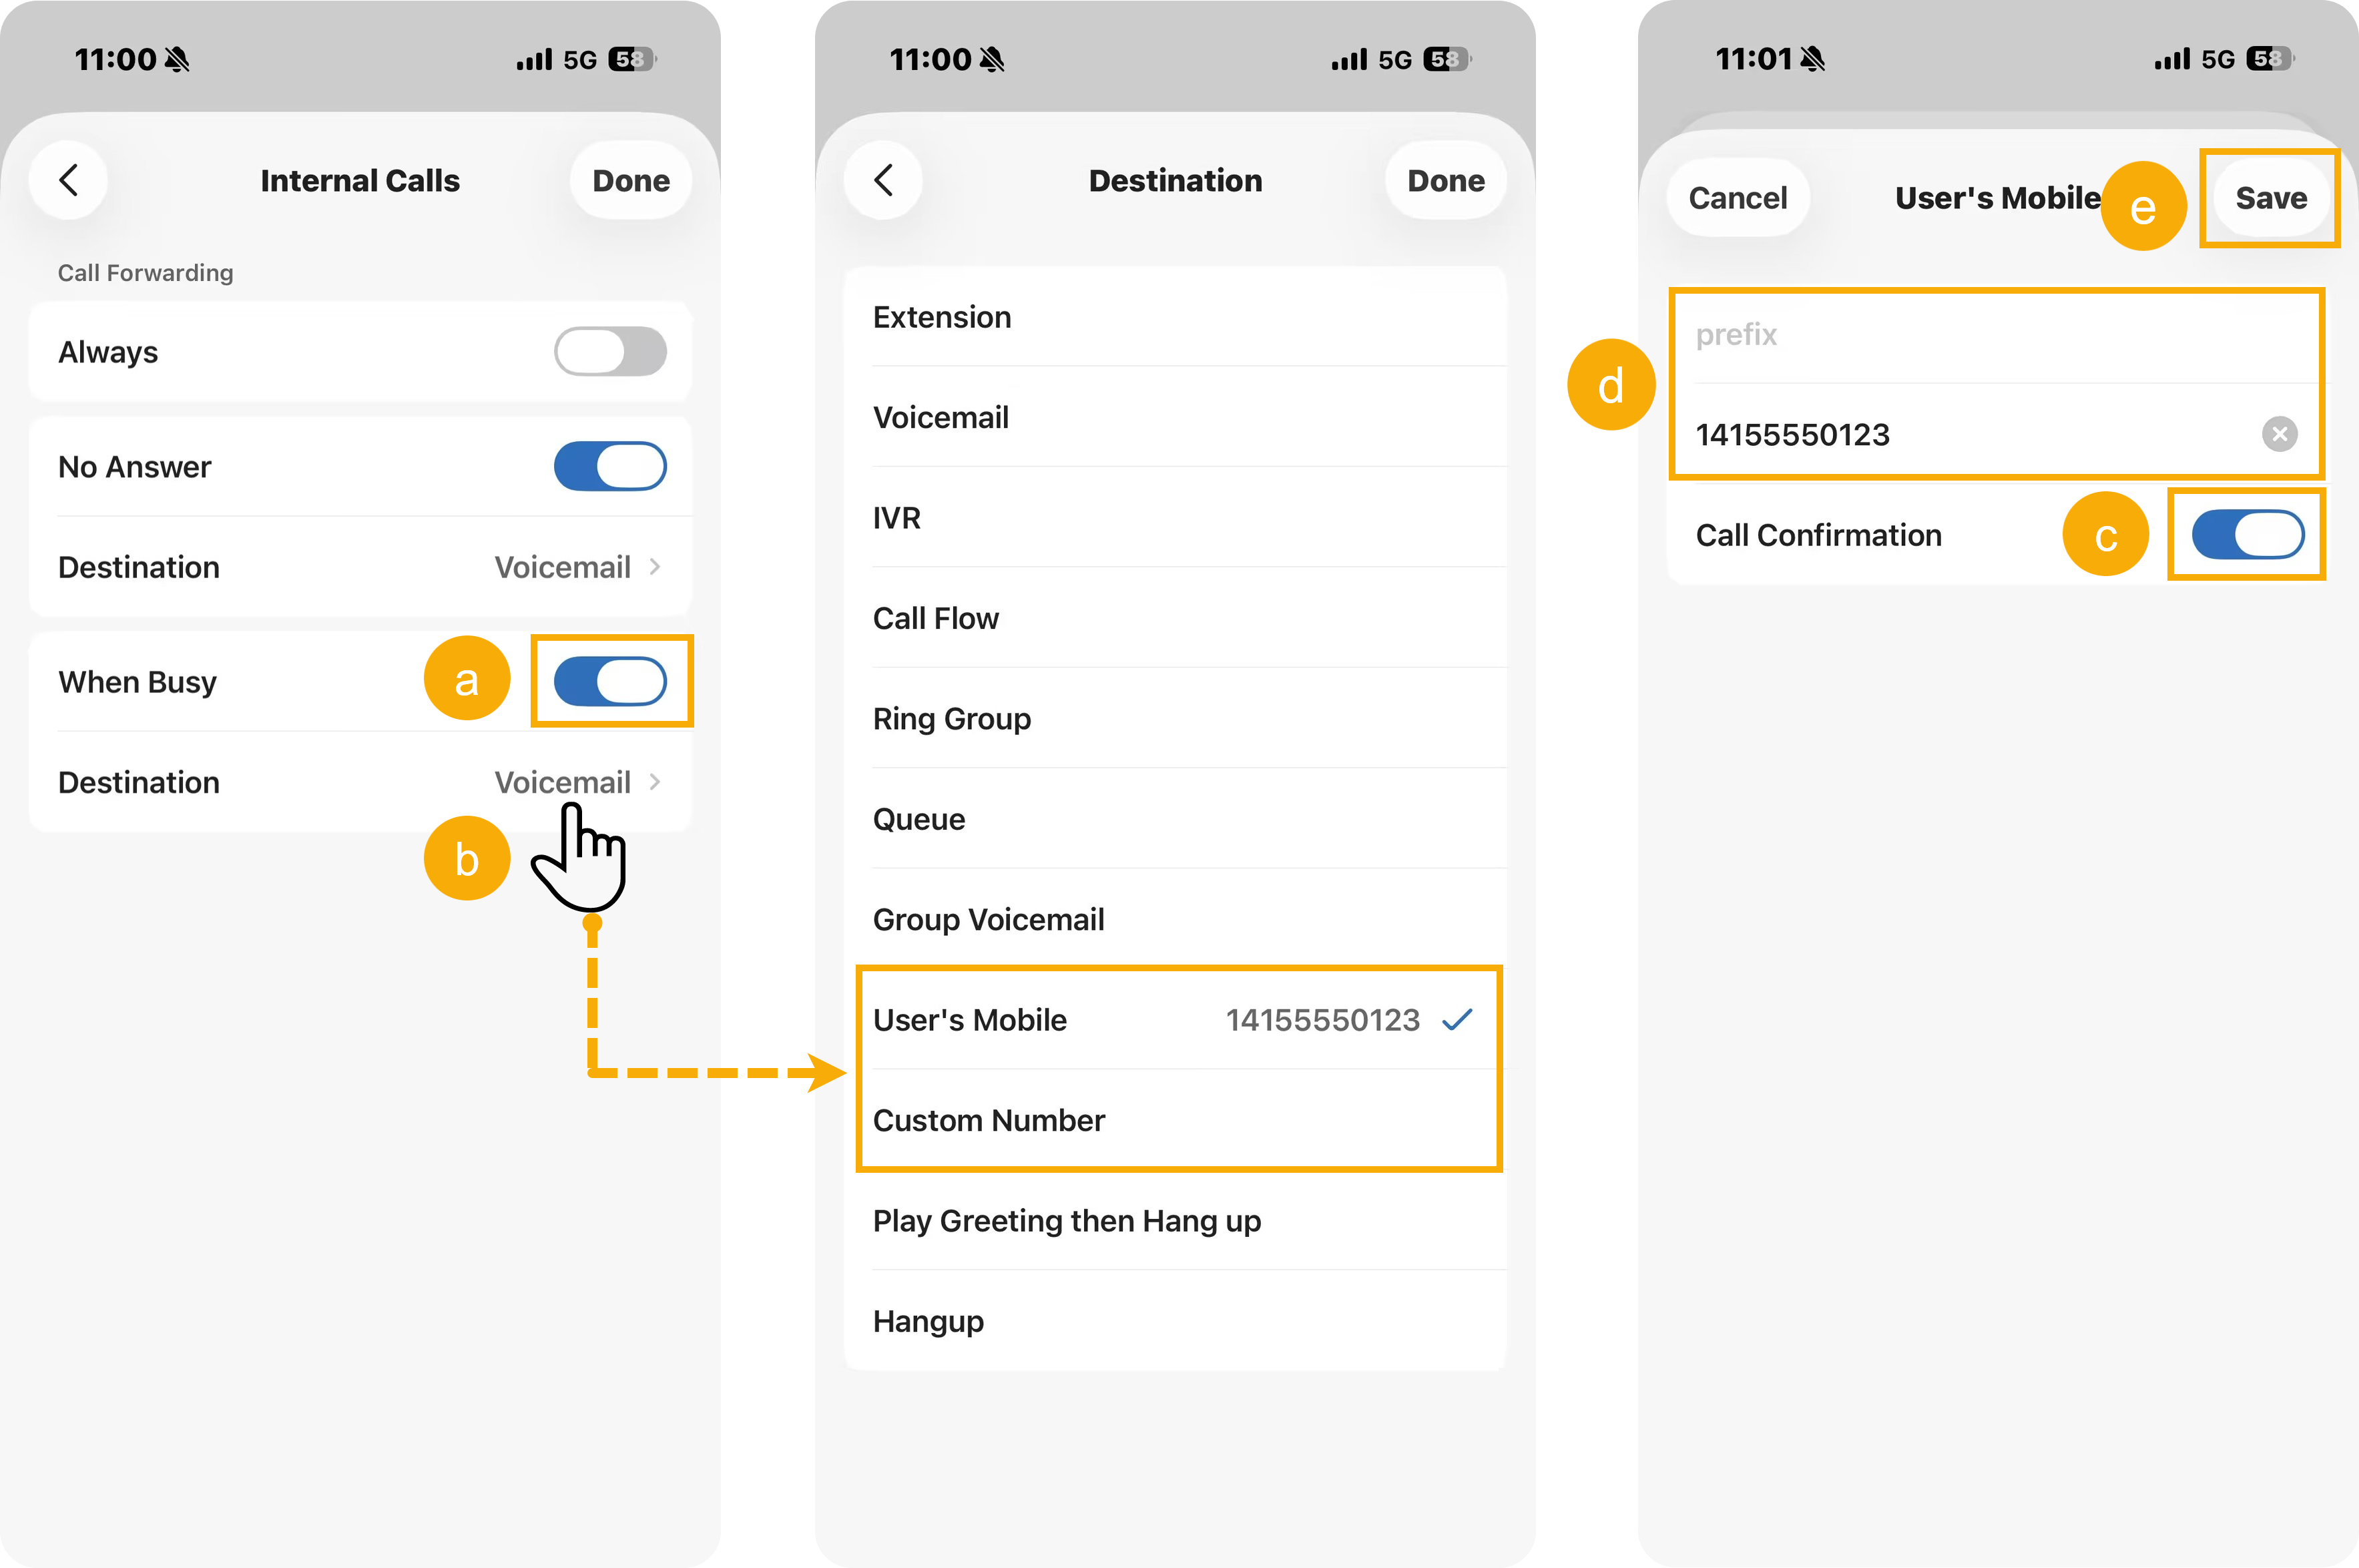
- Turn on the switch of a forwarding condition.
- Always: Forward all incoming calls to the designated destination.
- No Answer: Only forward unanswered calls to the designated destination.
- When Busy: Only
forward the calls that come in while you are talking on
the phone to the designated destination.Note: Do Not Disturb presence only supports the option Always.
- Set the destination to User's Mobile or Custom Number.
- Configure prefix and number.
- Turn on the switch of Call Confirmation.
- Tap Save.
- Turn on the switch of a forwarding condition.
- At the top-right corner, tap Done.
- Result
- Upon receiving a forwarded call, the external recipient will hear a prompt
asking them to press a key to accept or decline the call.
- Press 1 (Accept): The call will be connected successfully.
- Press # (Decline): The call will be dropped and routed to your extension's voicemail.
Configure call confirmation for simultaneous ringing
- Procedure
-
- At the top-left corner of the Calls page, tap your account.
- Go to Current Presence,
then tap beside the desired presence.
- Scroll down to the Other Settings
section, then complete the following settings.
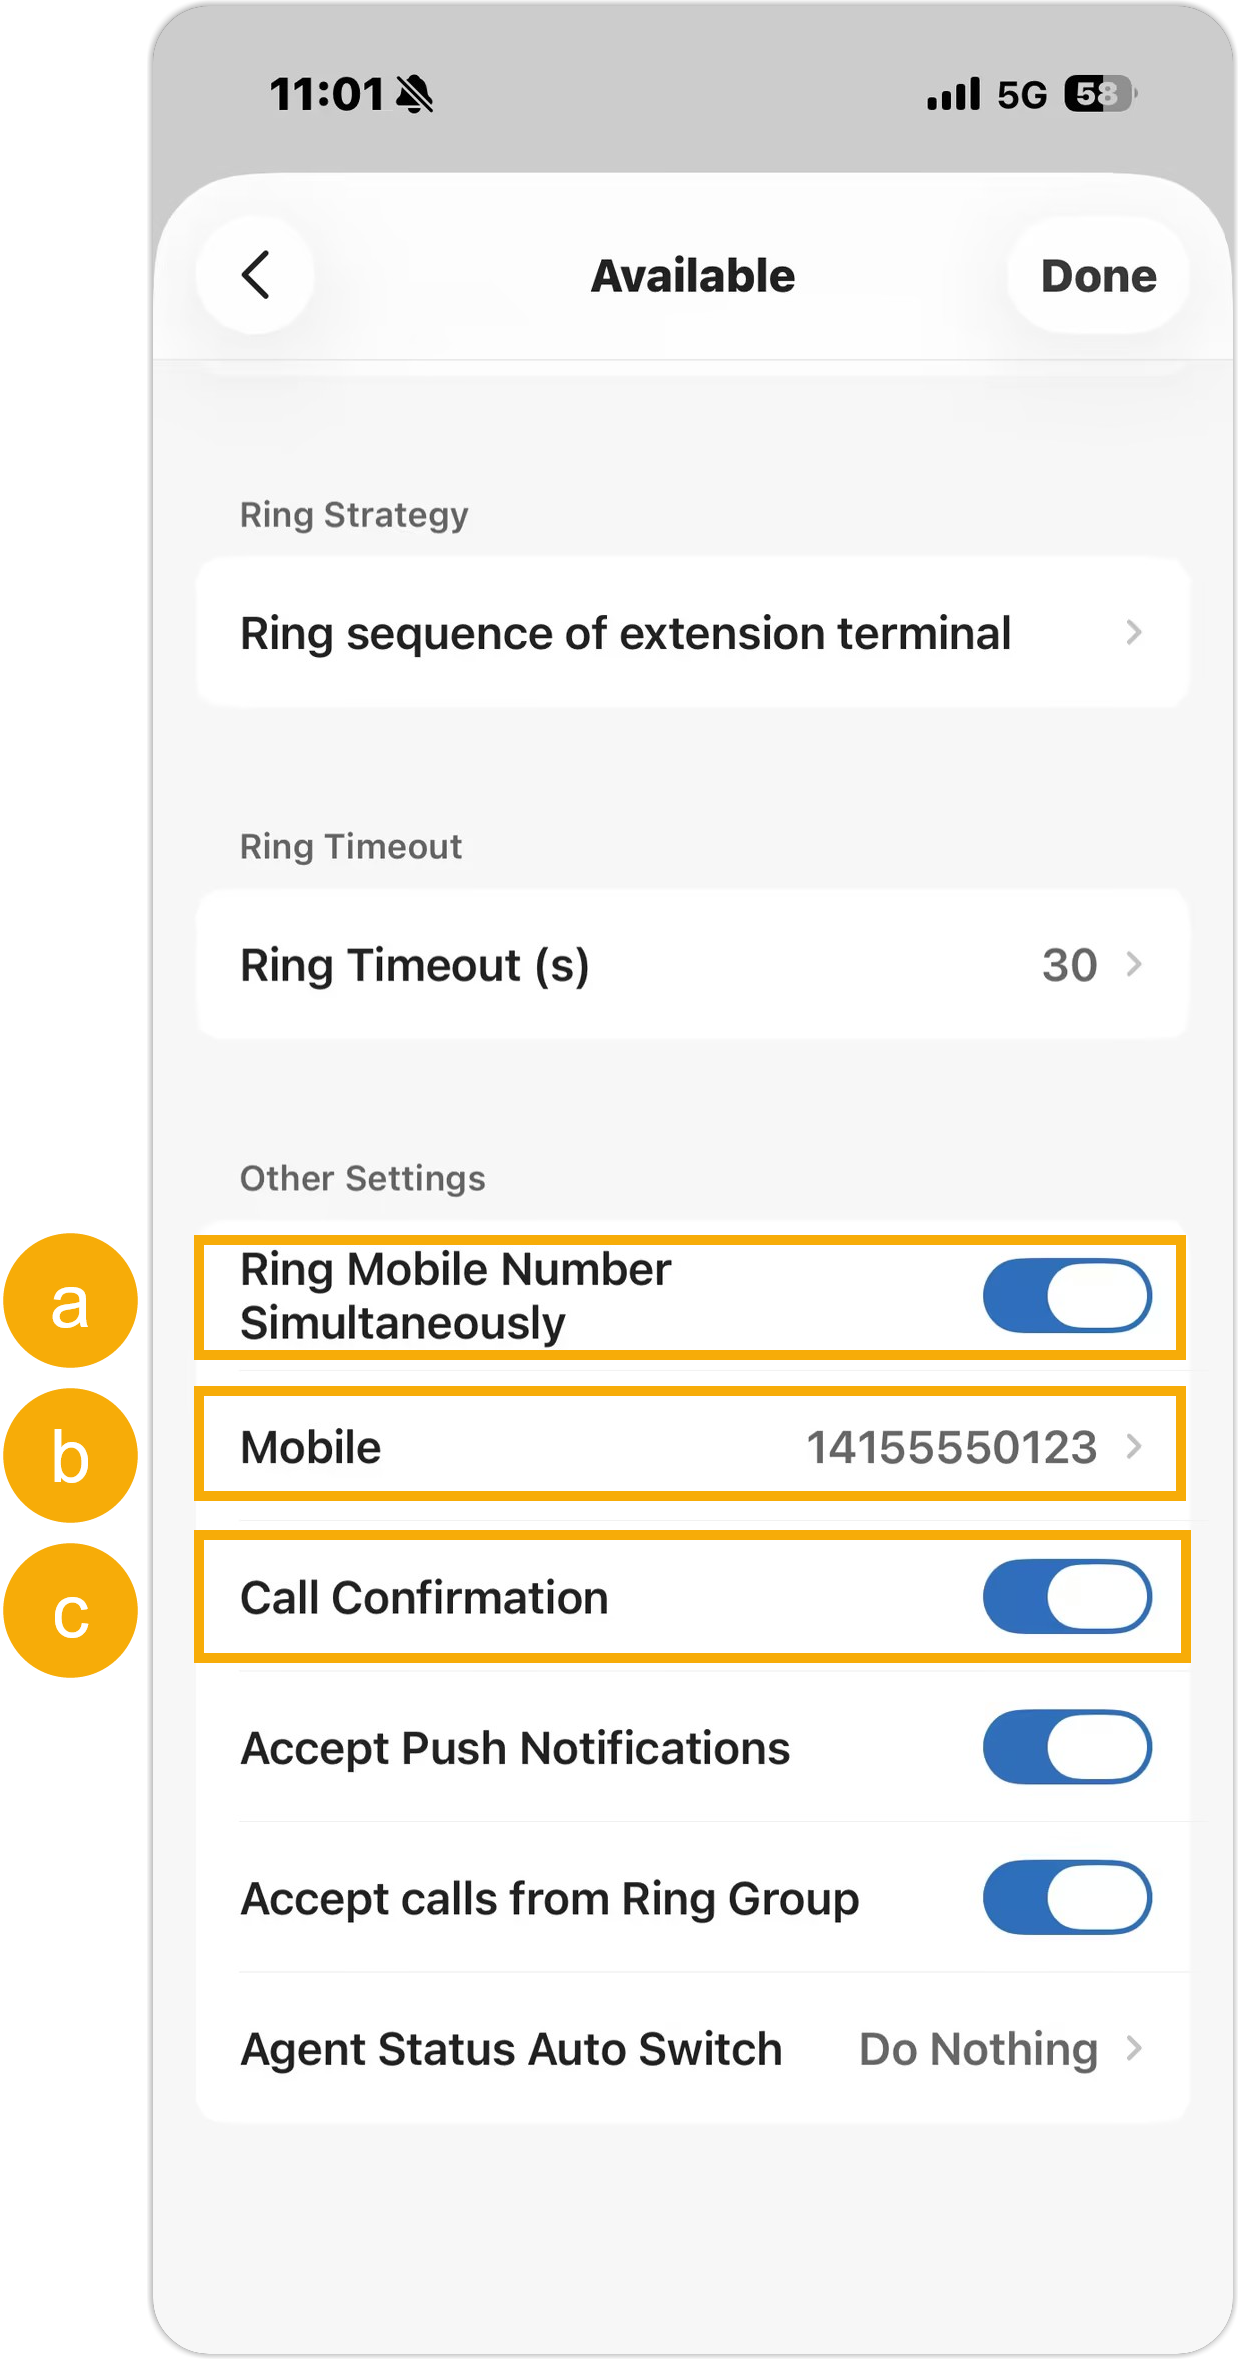
- Turn on the switch of Ring Mobile Number Simultaneously.
- In the Mobile field, check or edit your mobile number.
- Turn on the switch of Call Confirmation.
- At the top-right corner, tap Done.
- Result
- Upon receiving a simultaneous ringing call, the external recipient will
hear a prompt asking them to press a key to accept or decline the
call.
- Press 1 (Accept): The call is connected successfully.
- Press # (Decline): The call is dropped and routed to your extension's No Answer call forwarding destination under the corresponding presence.