Create Subnets for Servers
A subnet is a range of IP addresses in your VPC. You need to create subnets in the VPC, so that you can launch AWS resources, such as instances and gateways, in the related subnets. This topic describes how to create subnets for servers in a basic deployment architecture of Yeastar P-Series Cloud PBX.
Background information
When you create a subnet, you must specify a range of IPv4 addresses for the VPC in
the form of CIDR block (for example, 10.0.0.0/24). Any AWS
instances launched within the subnet will communicate over IPv4 only.
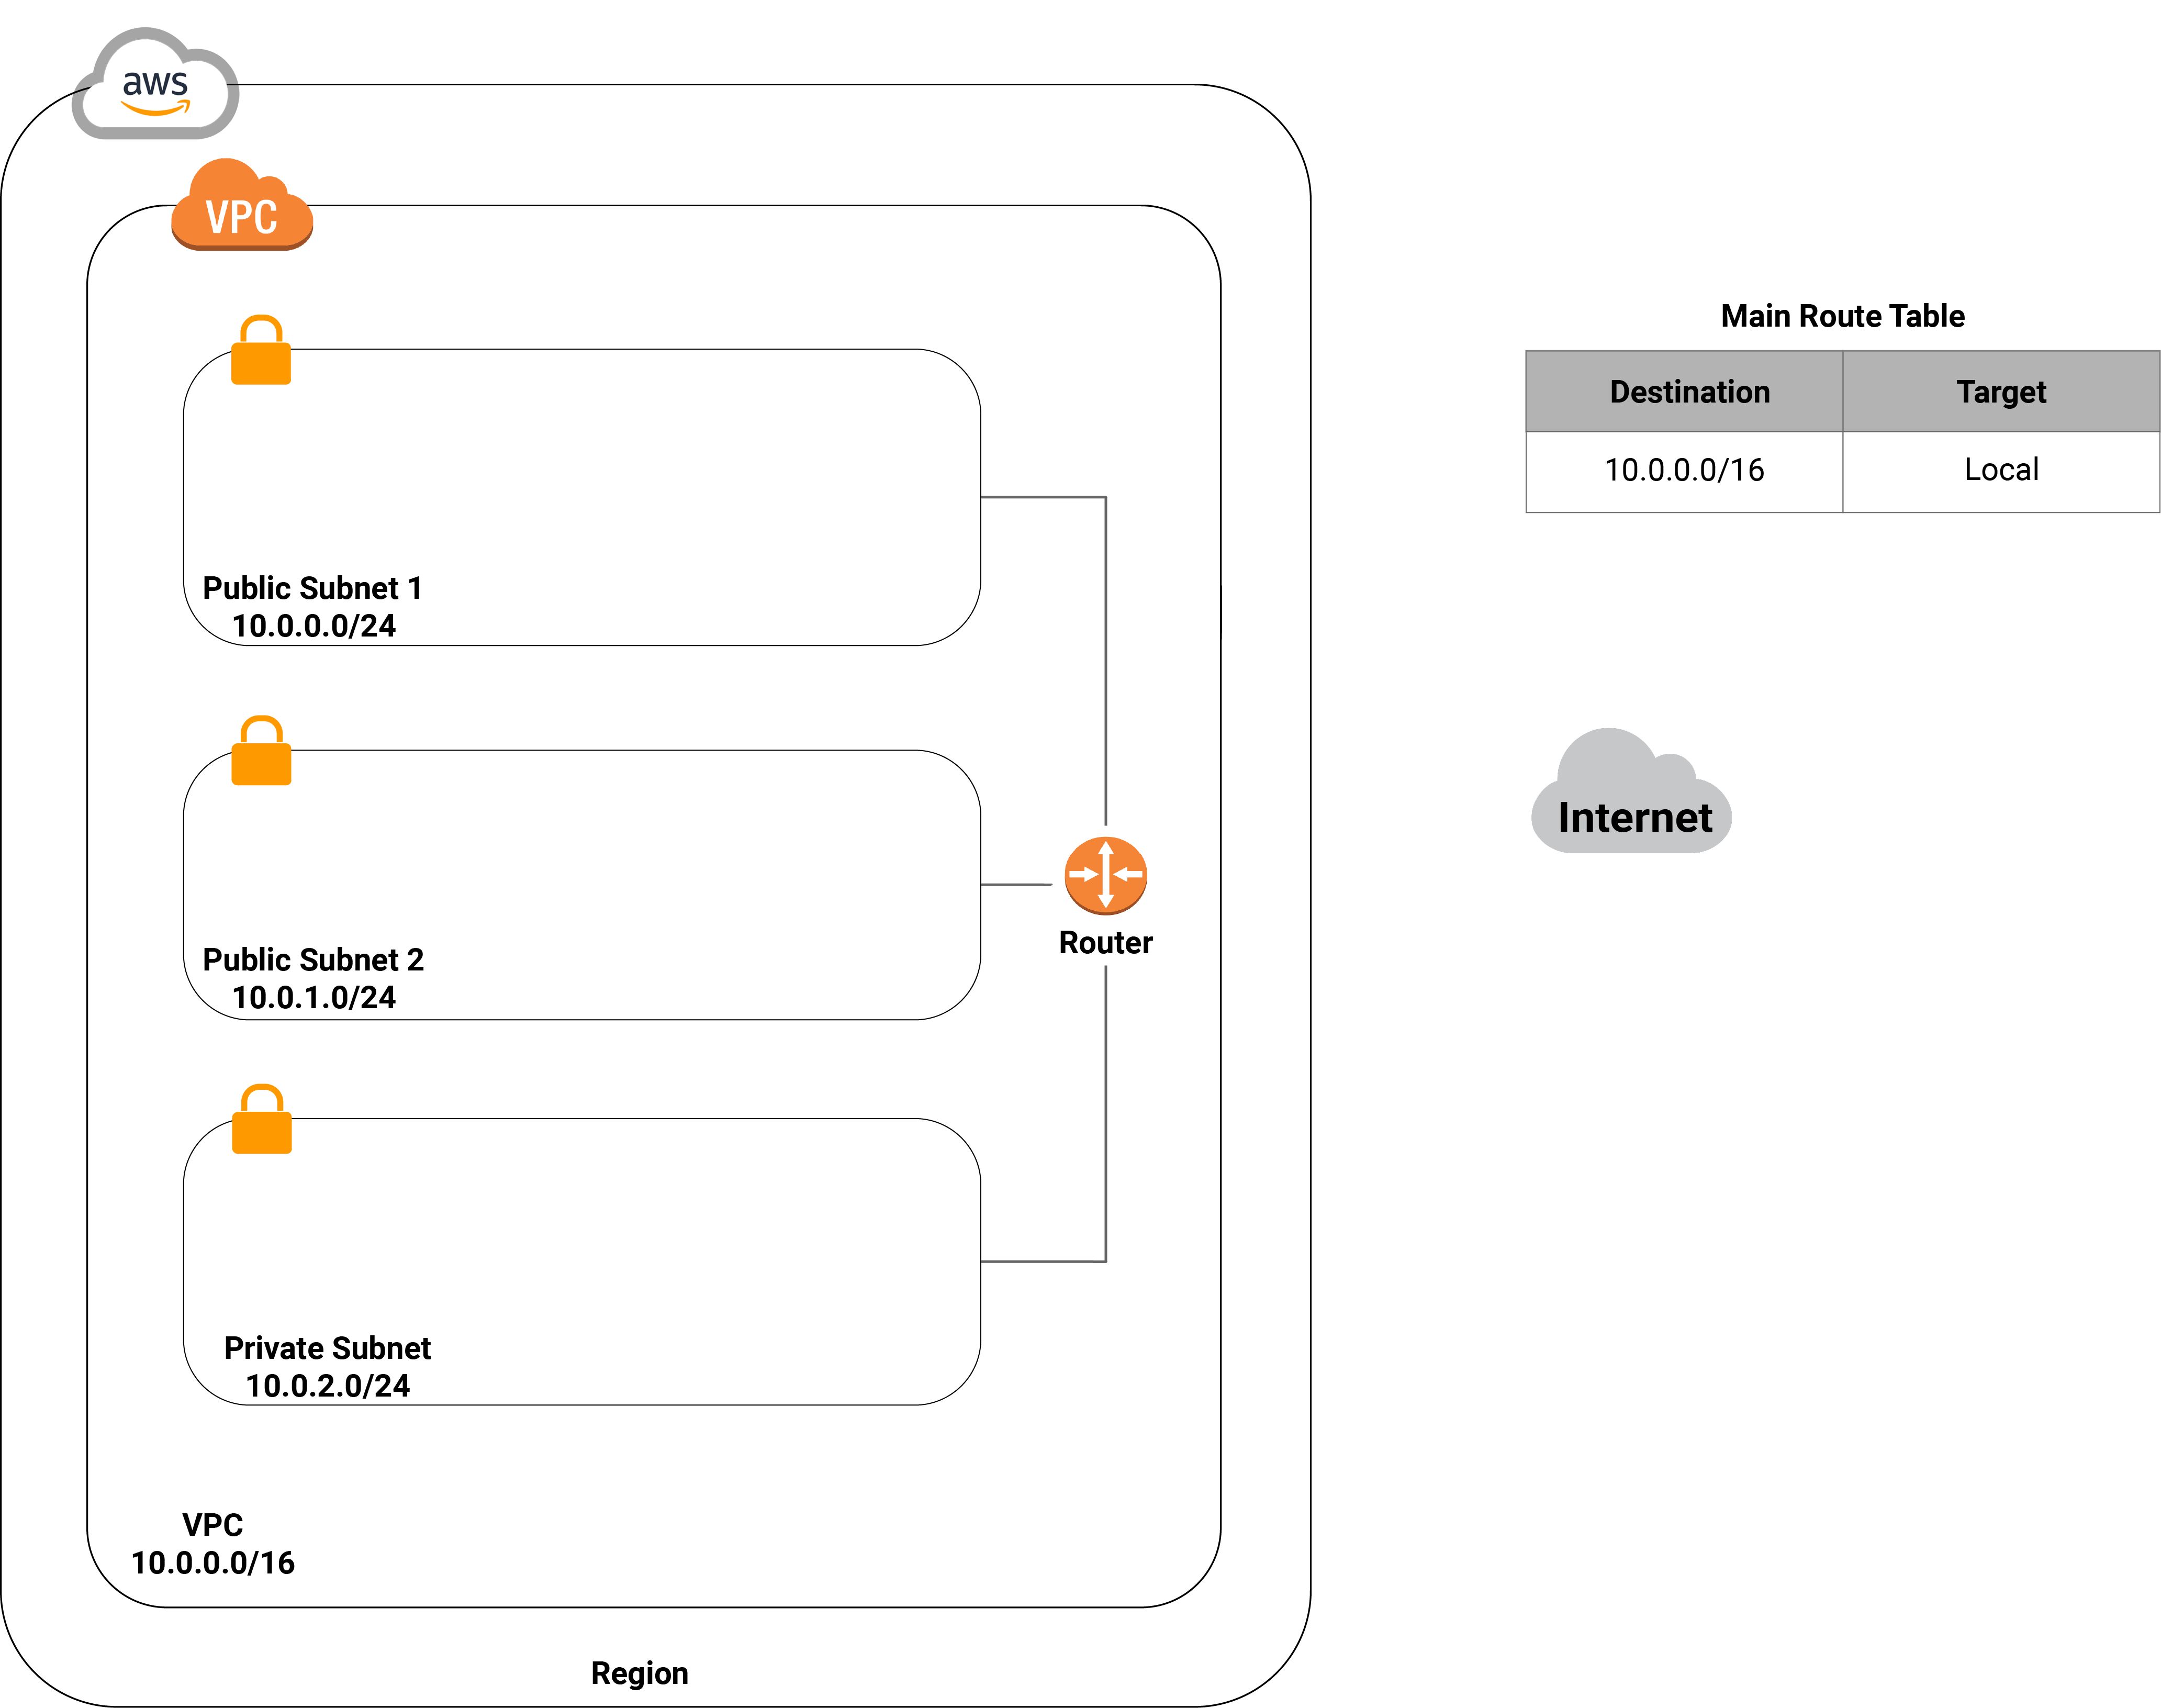
In a basic architecture deployment of Yeastar P-Series Cloud PBX, you need to create three subnets in the VPC. For different purposes, the three subnets are defined as below.
| Subnet | IPv4 CIDR block | Description |
|---|---|---|
| Public Subnet 1 | 10.0.0.0/24 |
In this subnet, you will later launch instances for the following servers:
|
| Public Subnet 2 | 10.0.1.0/24 | In this subnet, you will later create a NAT gateway. |
| Private Subnet | 10.0.2.0/24 | In this subnet, you will later launch an instance for PBXHub Server |
The following diagram shows the architecture of your VPC after you complete this step.
Procedure
- Log in to Amazon VPC Console.
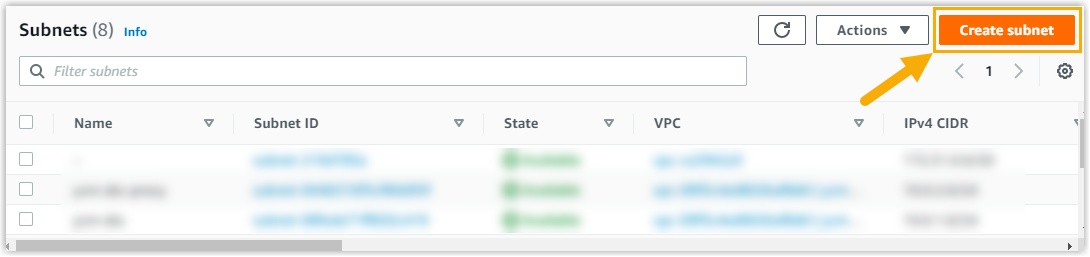
- On the left navigation pane, click Subnets,
then click Create subnet.
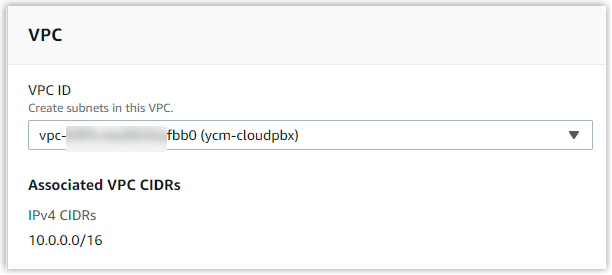
- In the VPC ID drop-down list, select the VPC
you've created for the Cloud PBX. In this example, select
ycm-cloudpbx.The associated IPv4 CIDRs is displayed under the VPC ID.
- In the Subnet settings section, complete the
following settings:

- Set up the subnet.
- Subnet name: Enter a name to help you identify the subnet. In this example, enter ycm-public-subnet1.
- Availability Zone: In the drop-down
list, select a desired Availability Zone or leave the
default setting to let Amazon choose an Availability Zone
for you.
The subnet will be created in the selected Availability Zone.
- IPv4 CIDR block: Specify an IPv4 CIDR block for the subnet. In this example, enter 10.0.0.0/24.
- Click Add new subnet to and follow the Step 4 to set up another two subnets.
- Set up the subnet.
- Click Create subnet.
The new created subnets are listed in the Subnets list.