Create a VPC
This topic describes how to create a Virtual Private Cloud (VPC), so as to provision a logically isolated section of the AWS.
Background information
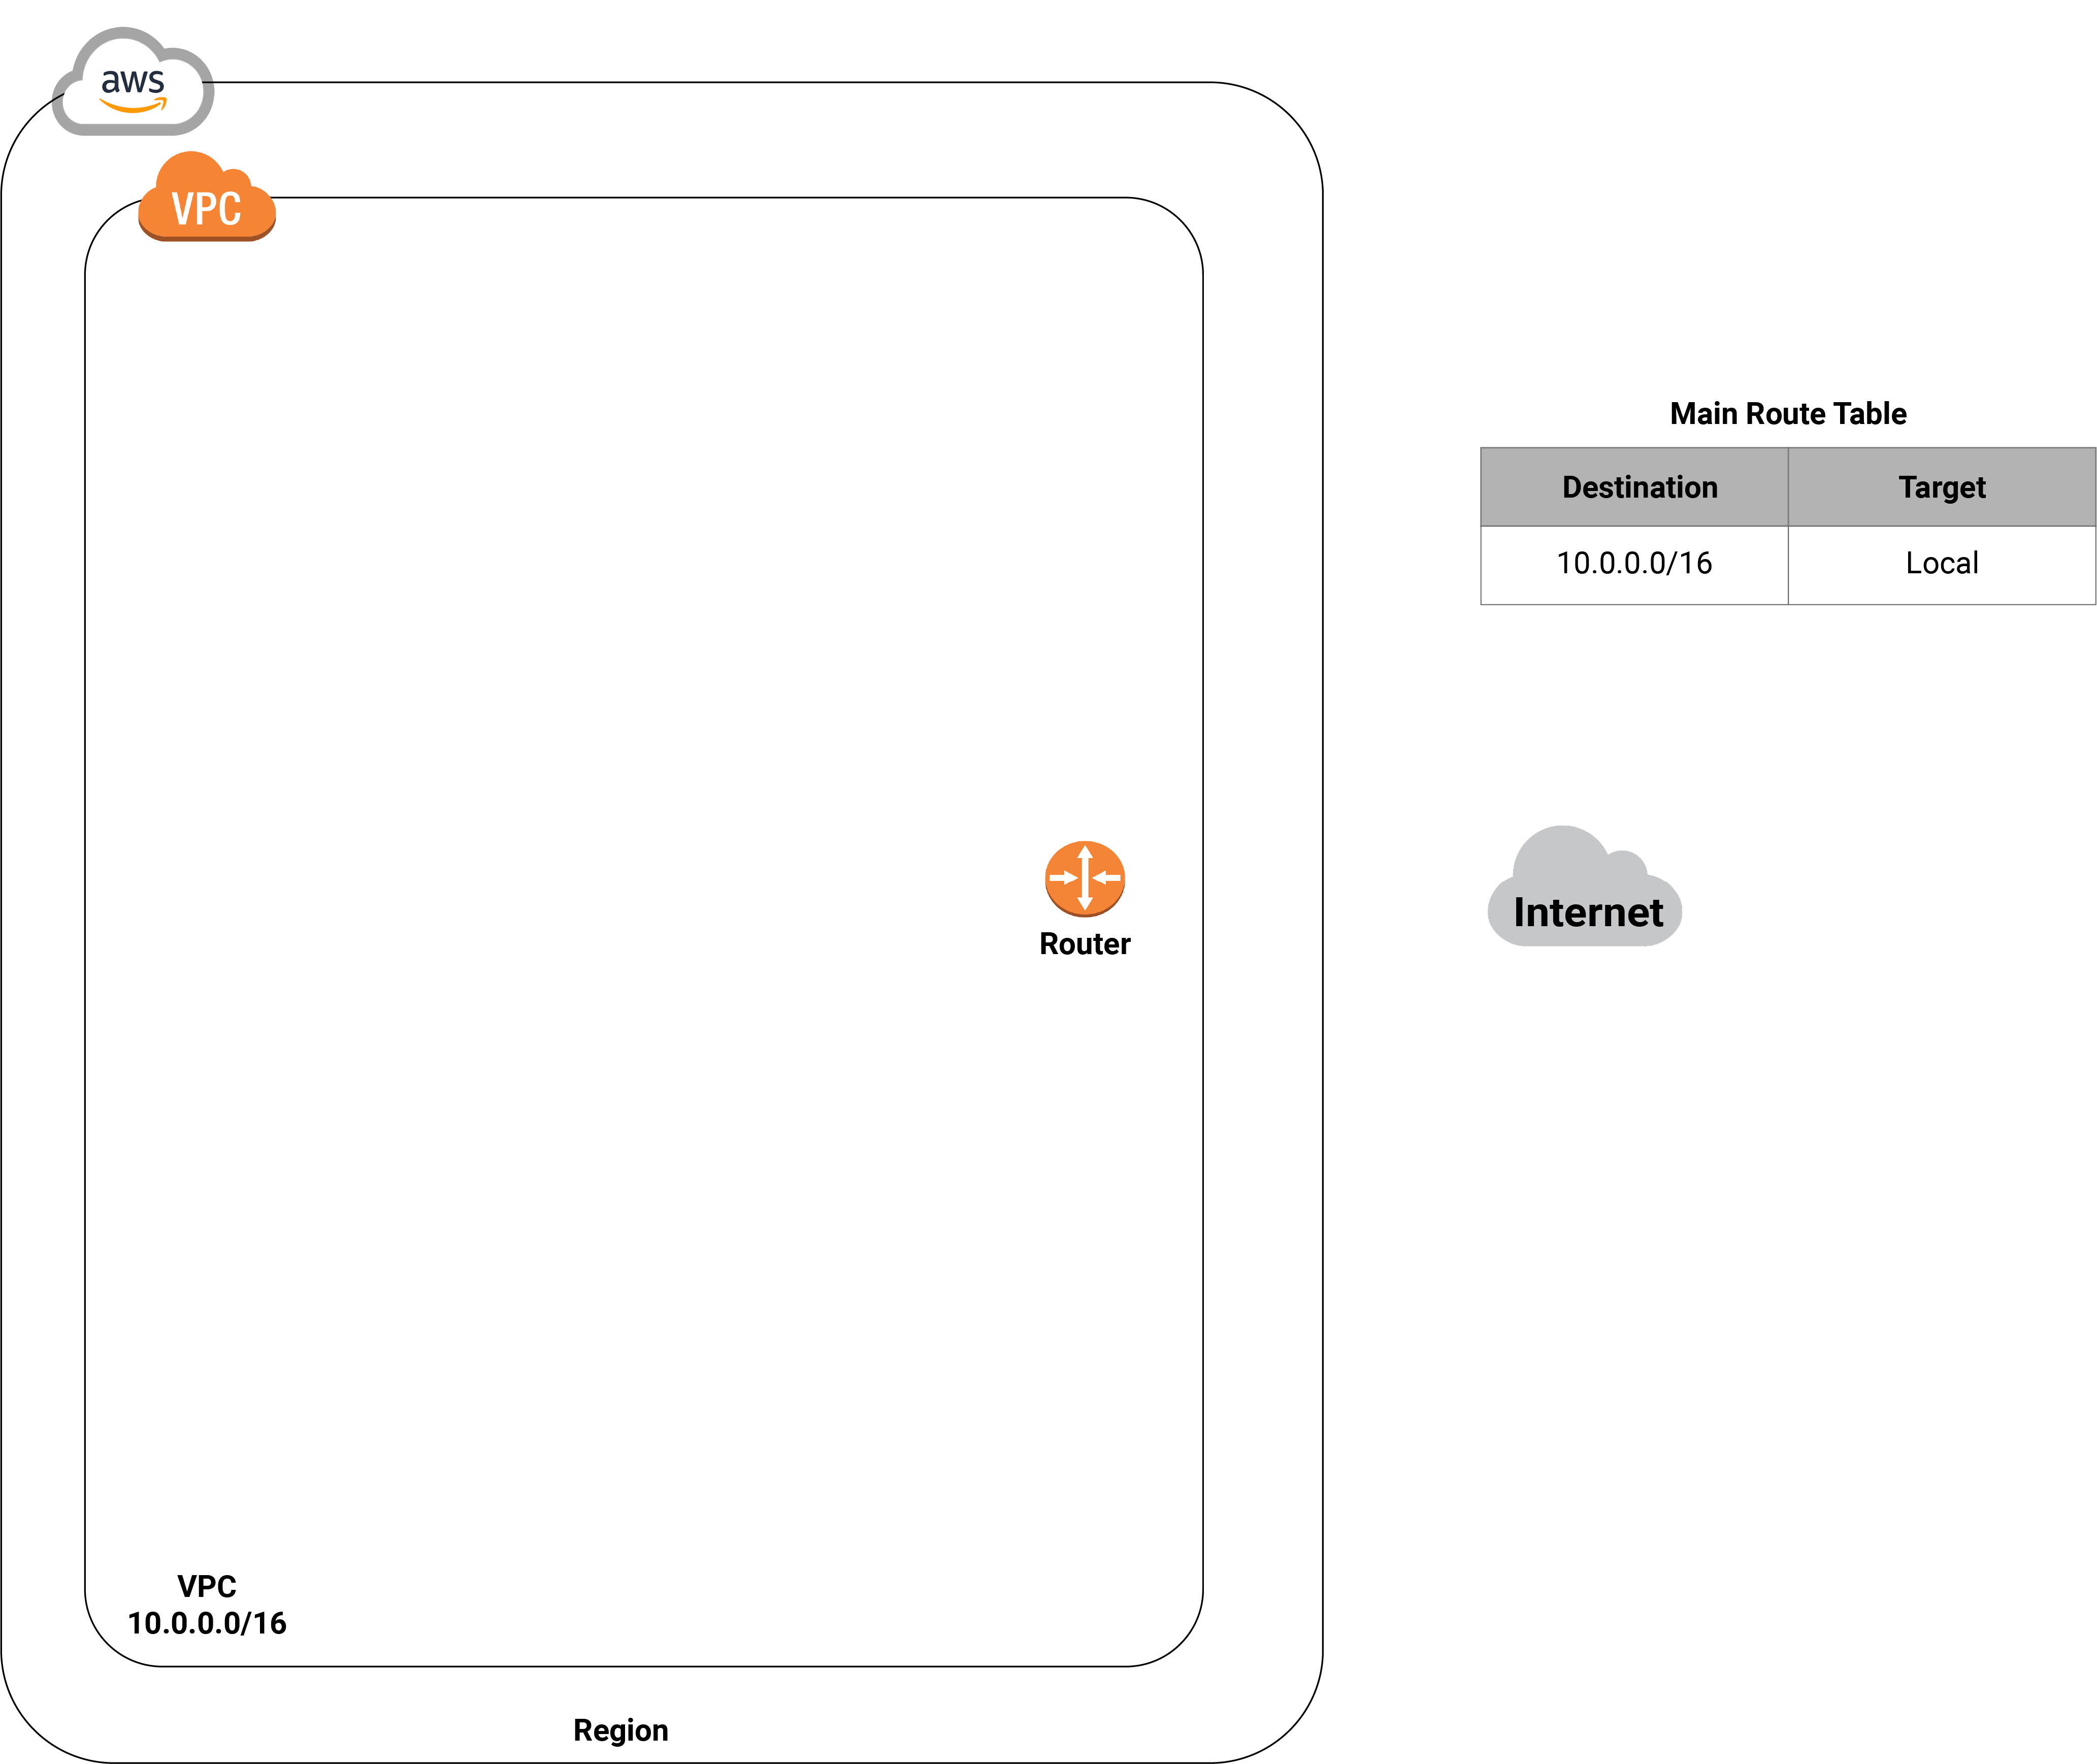
When you create a VPC, you must specify a range of IPv4 addresses for the VPC in the
form of CIDR block (for example, 10.0.0.0/16).
After the VPC is created, a Main route table automatically comes with the VPC. The Main route table controls the routing for all subnets that are not explicitly associated with other route tables.
The following diagram shows the architecture of your VPC after you complete this step.
Procedure
- Log in to Amazon VPC Console.
- On the left navigation pane, click Your
VPCs, then click Create VPC.

- Select VPC only, then complete the following VPC
settings:
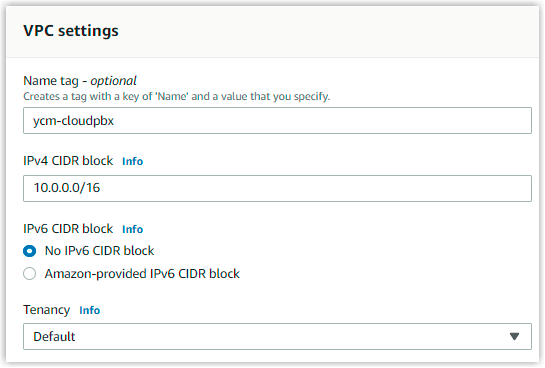
- Name tag: Optional. Enter a name to help you identify the VPC. In this example, enter ycm-cloudpbx.
- IPv4 CIDR block: Specify an IPv4 CIDR block for the VPC. In this example, select IPv4 CIDR manual input, and enter 10.0.0.0/16 in the IPV4 CIDR field.
- IPv6 CIDR block: Select No IPv6 CIDR block.
- Retain other default settings.
- Click Create VPC.
Result
- The newly created VPC is displayed on the Your VPCs
list with the state displayed as Available.

- A Main route table is generated automatically for the VPC. You can check the
Main route table on Route Tables.Tip: You can edit the name tag for the Main route table to help you identify it.
