Allocate and Associate Elastic IP Addresses
After launching instances, you need to associate Elastic IP addresses with the servers in public subnets.
Background information
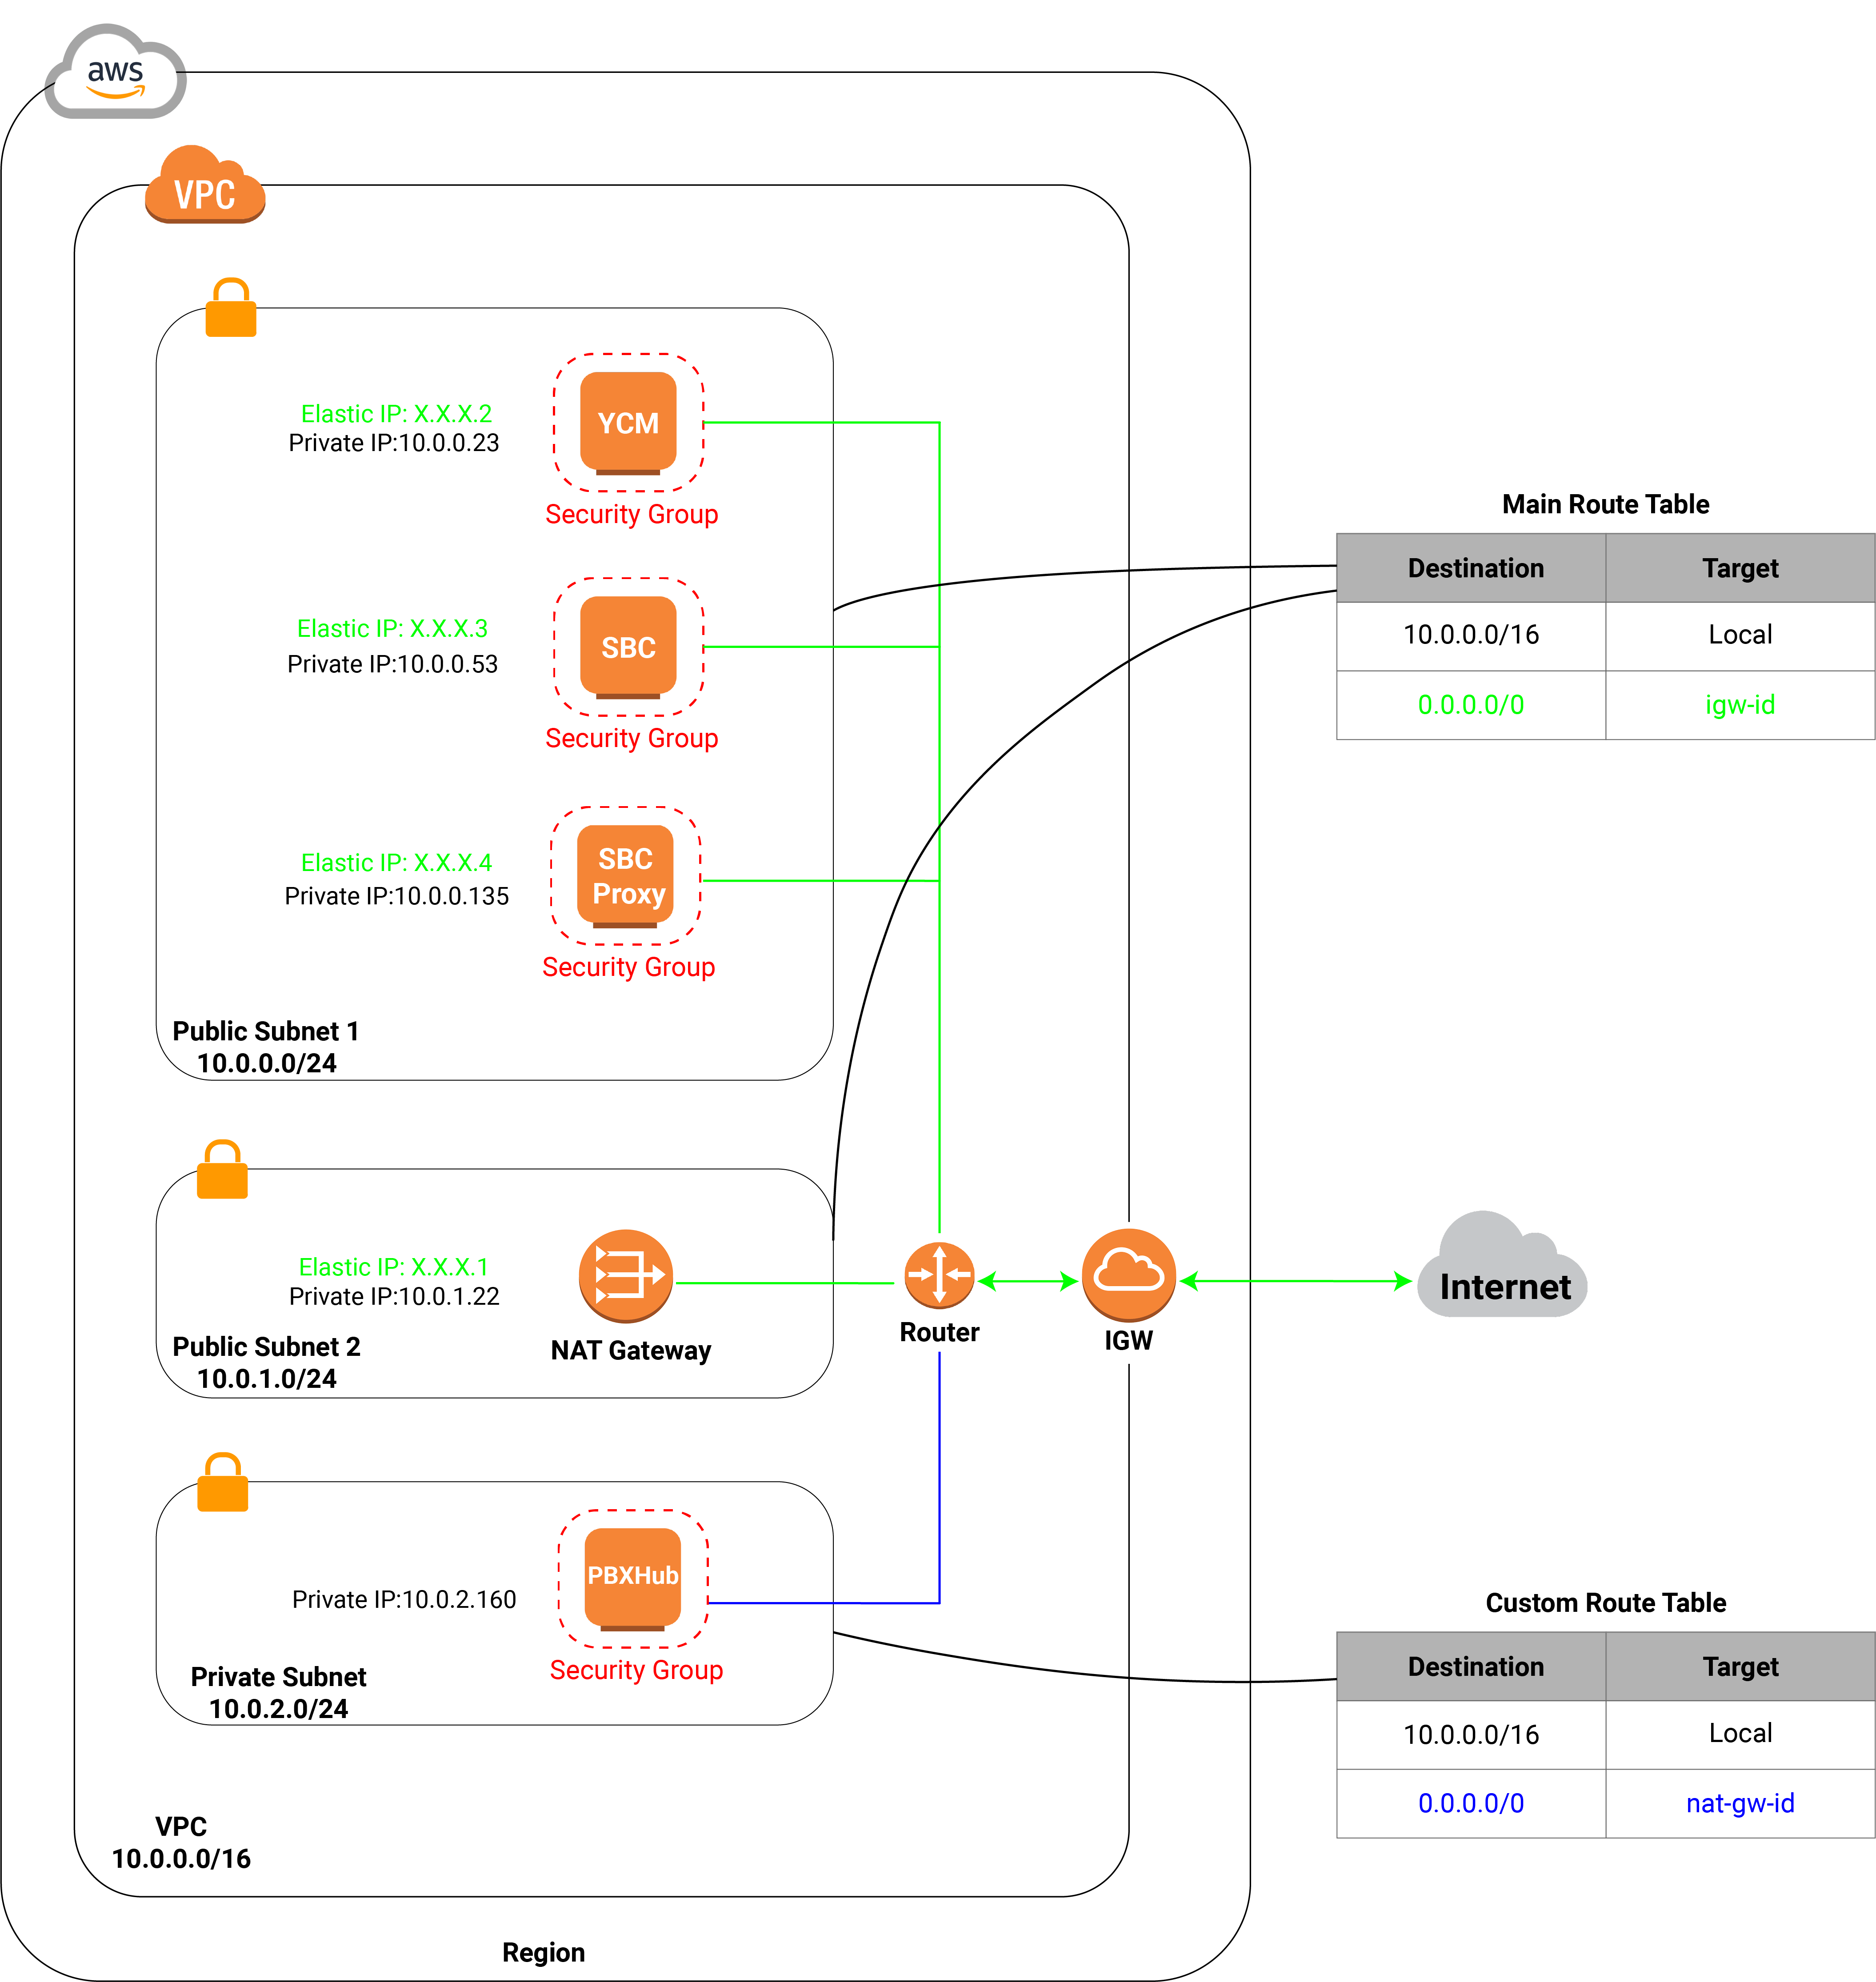
An Elastic IP address is a public IPv4 address, which is reachable from the internet. To enable communication with the internet, you can associate an Elastic IP address with your instances.
- YCM Server
- SBC Server
- SBC Proxy Server
The following diagram shows the architecture of your VPC after you complete this step.
Procedure
Allocate and tag Elastic IP addresses
Before the EIP association, you need to allocate three Elastic IP addresses from Amazon's pool of public IPv4 addresses.
- Log in to Amazon EC2 Console.
- On the left navigation pane, go to .
- At the top-right corner, click Allocate Elastic IP
address.

- In the Public IPv4 address pool section, select Amazon's pool of IPv4 addresses.
- In the Tags section, add a name tag for the allocated
Elastic IP address.

- Click Add new tag.
- In the Key field, enter Name.
- In the Value field, enter a name for the Elastic IP address to help you identify it. In this example, enter ycm-sbc.
- Click Allocate.
A new Elastic IP address is allocated and displayed on the Elastic IP addresses list.
- Repeat Step 3 - 6 to assign Elastic IP addresses for YCM Server and SBC Proxy Server.
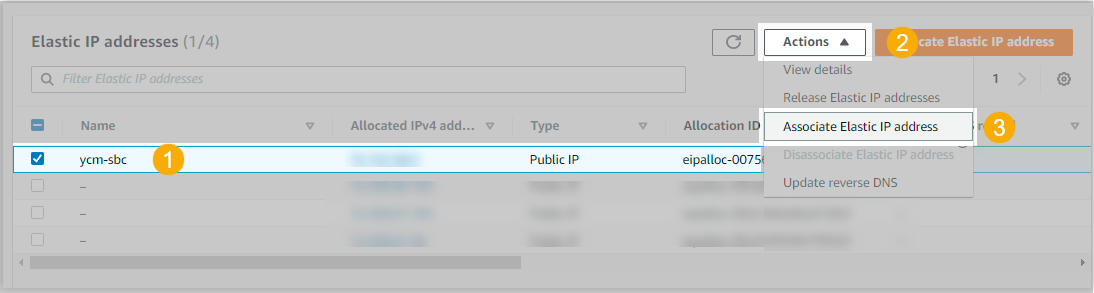
Associate an Elastic IP address with each instance
- Log in to Amazon EC2 Console.
- On the left navigation pane, go to .
- In the Elastic IP addresses list, select the
desired IP address, and click .
- On the configuration page, complete the following settings.
- Resource type: Select Instance.
- Instance: Select the desired
instance.

- Private IP address: Select the private IP address of the server with which to associate the Elastic IP address.
- Click Associate.
The Elastic IP address is successfully associated with the instance.

- Repeat Step 3 - 5 to associate Elastic IP addresses with YCM Server and SBC Proxy Server.
What to do next
Send your information of the deployment environment to Yeastar.