Integrate Yeastar P-Series Cloud Edition with IXICA Fax
By integrating Yeastar P-Series Cloud Edition with IXICA Fax, employees within your organization can send and receive faxes instantly and securely over the Internet - directly from their own Linkus Desktop or Web Client.
Introduction
Yeastar P-Series Cloud Edition supports the integration with IXICA to enable Internet-based faxing, allowing PBX extension users to send and receive faxes through IXICA's reliable communications network.
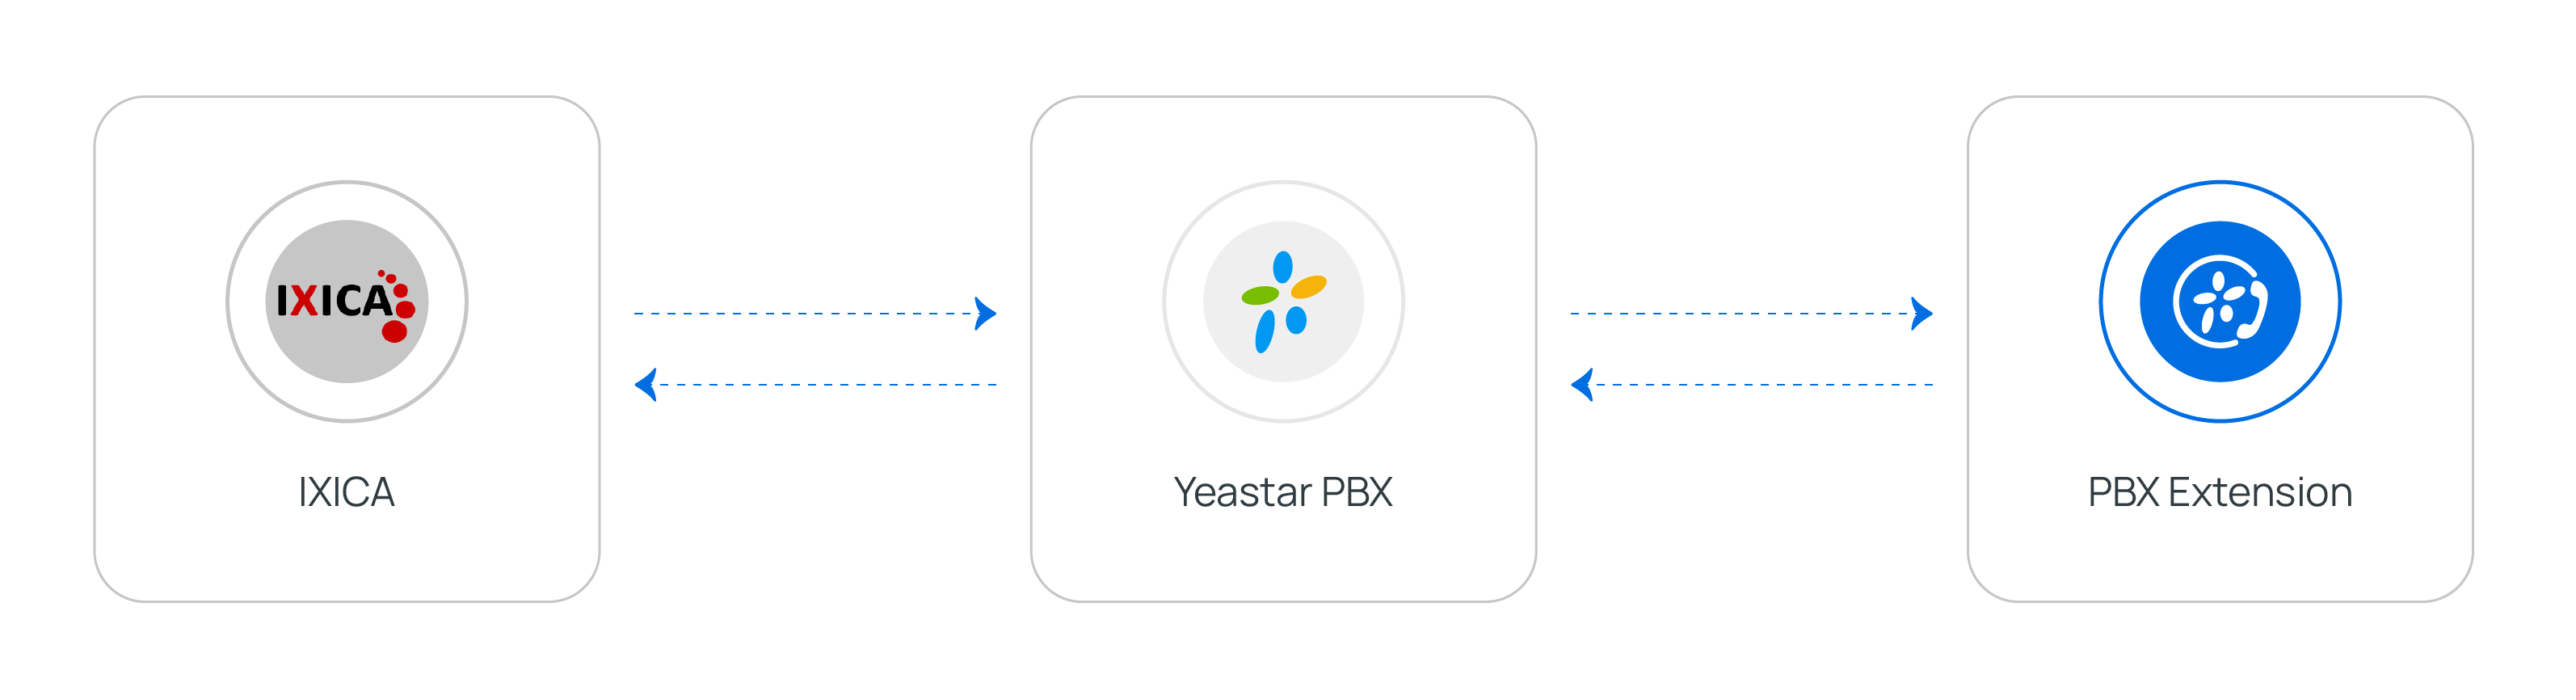
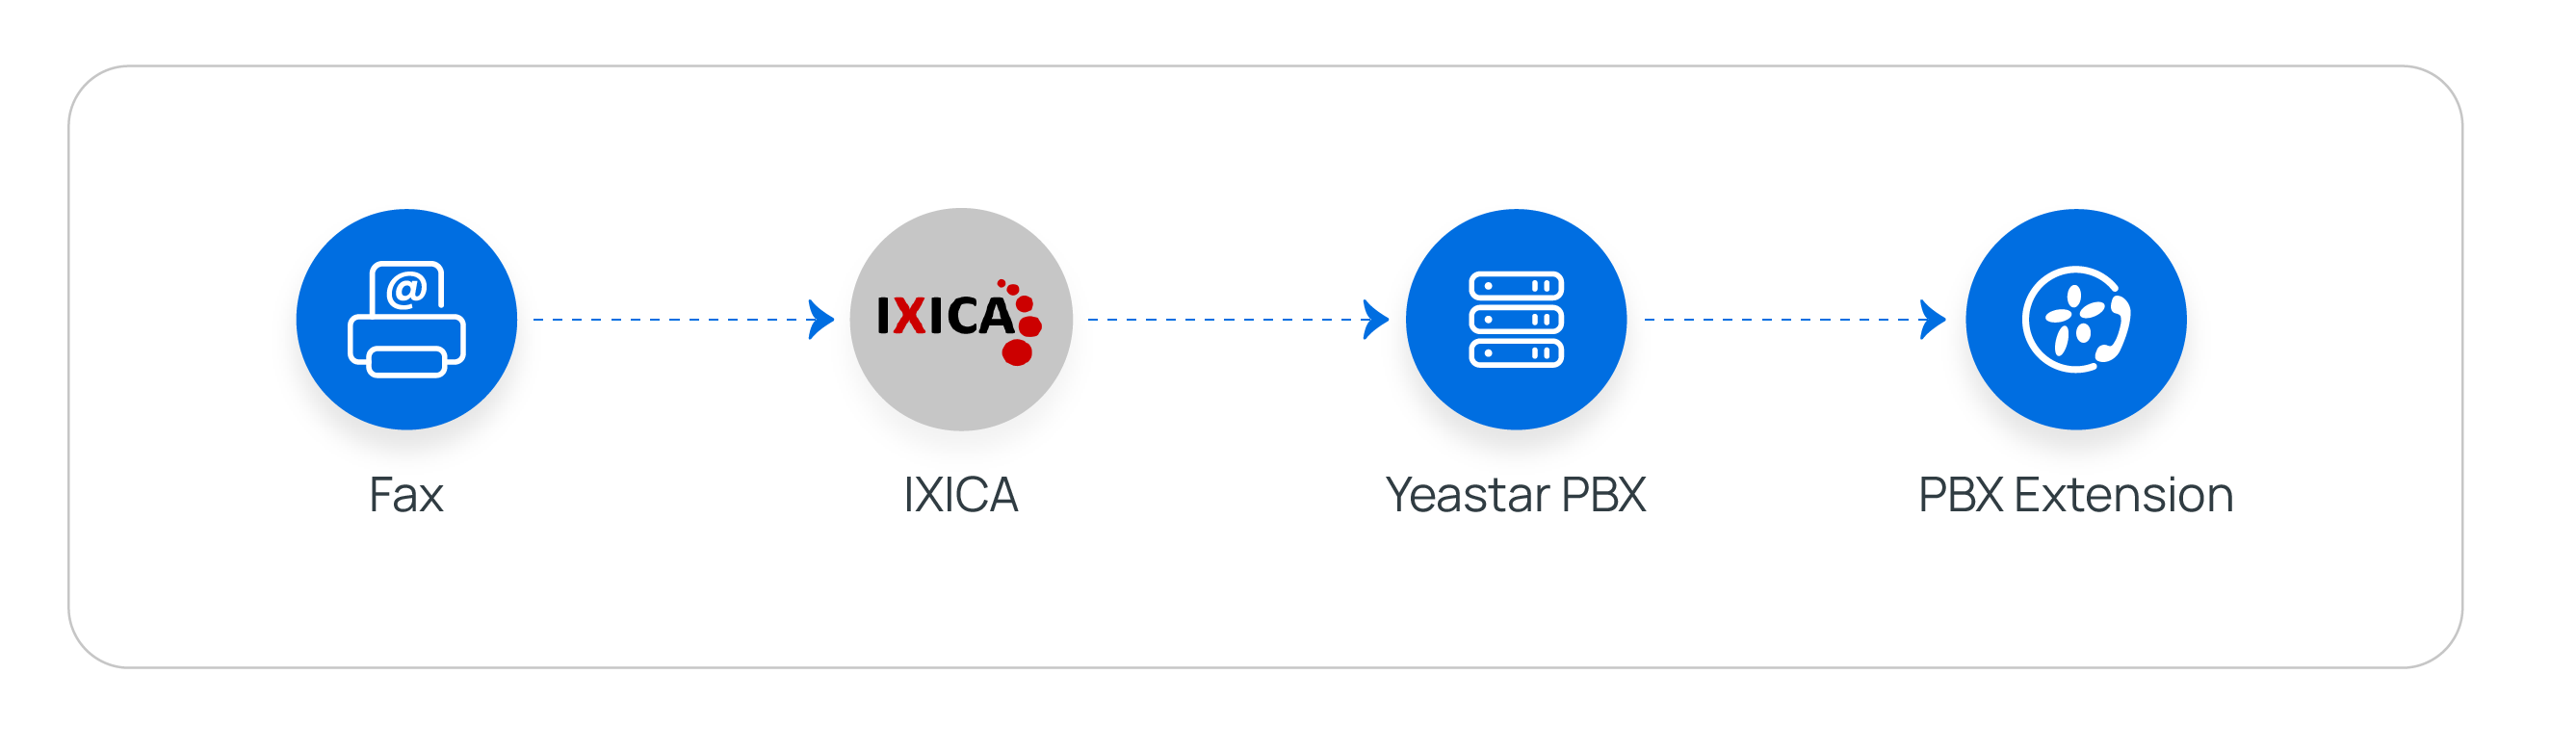
- When an extension user sends a fax from Linkus, Yeastar PBX calls IXICA API
to submit the fax for delivery.
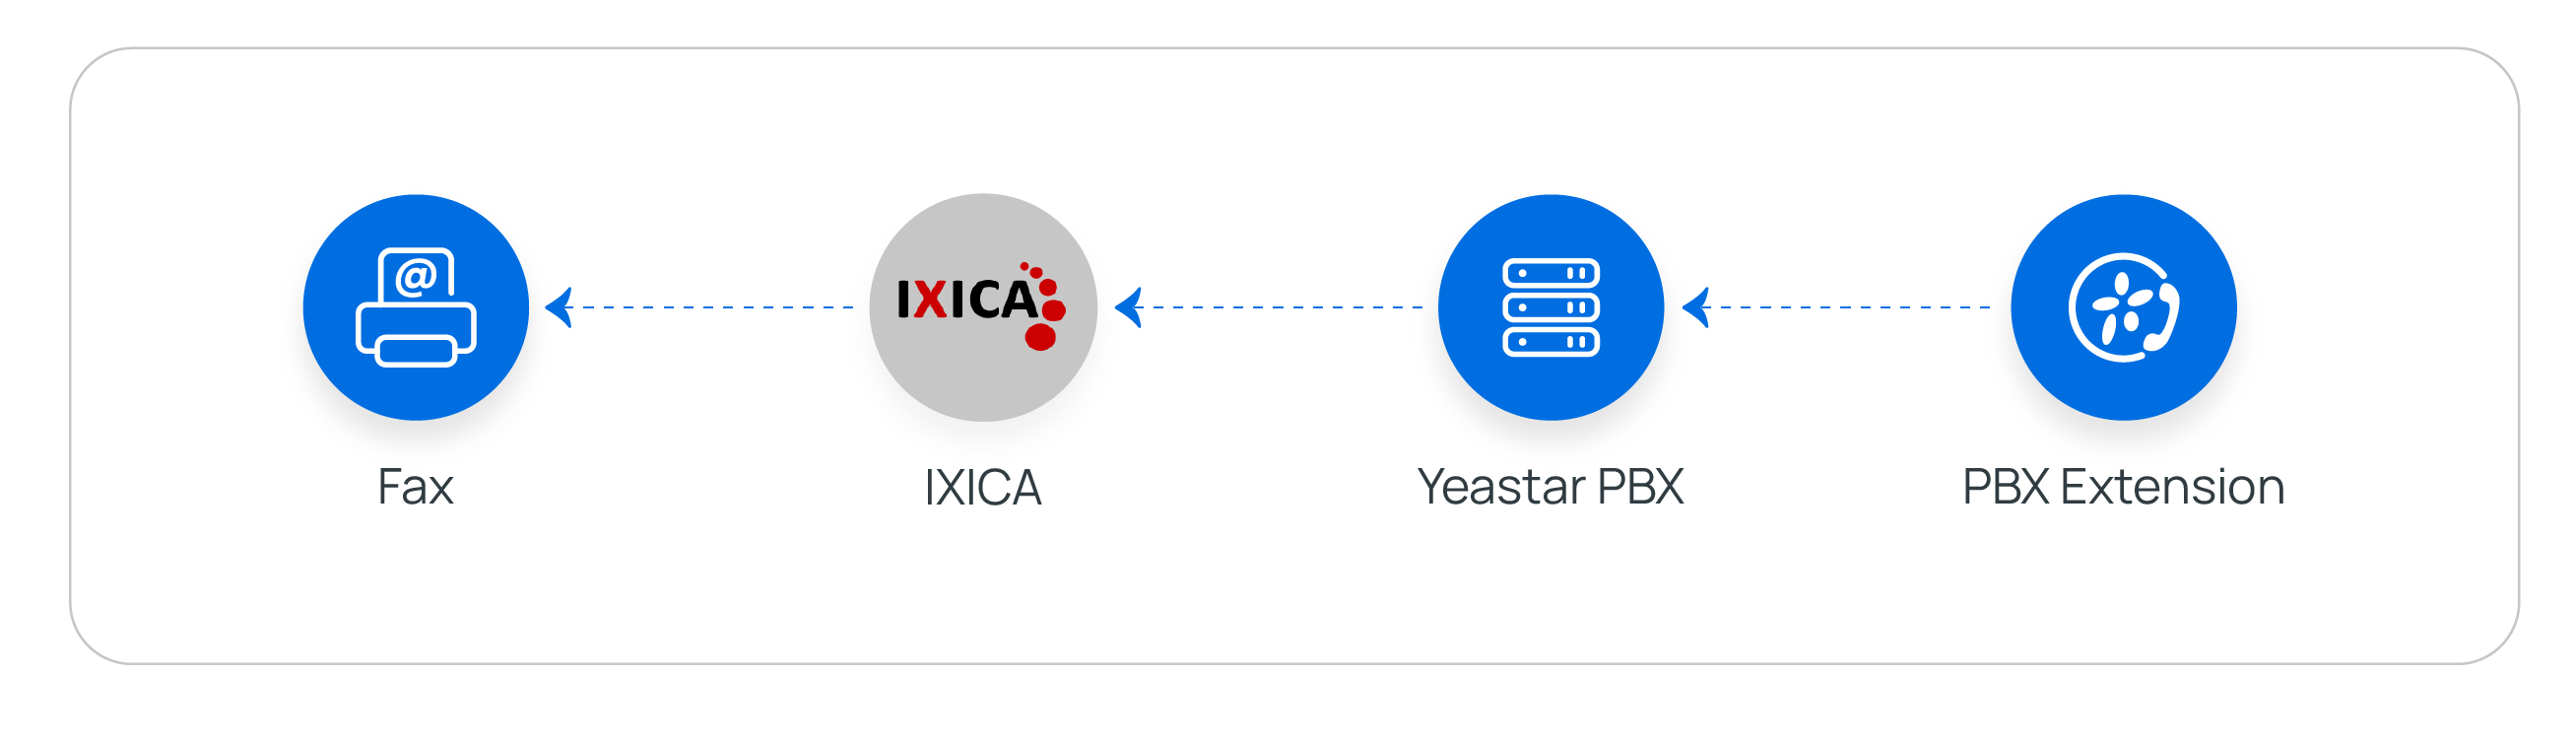
- When a fax arrives at IXICA fax number, IXICA sends a webhook notification
to Yeastar PBX. PBX then retrieves the fax file via API and delivers it to
the designated extension users' Linkus.
You can easily set up the integration by following the instructions below:
- Obtain Webhook URL from Yeastar PBX.
- Create the necessary resources and obtain the required credentials from
IXICA.
- A Fax-enabled Phone Number for sending and receiving faxes.
- An API Key to authenticate your account and access IXICA API endpoints.
- Fill in the obtained credentials in Yeastar PBX, then configure fax-related settings.
Requirements
- Firmware: Version 84.21.0.117 or later
- Plan: Enterprise Plan or Ultimate Plan
Prerequisites
You have purchased fax number(s) from IXICA.
Step 1. Obtain Webhook URL from Yeastar PBX
Obtain a Webhook URL from Yeastar PBX first, which is required when you set up webhook notification on IXICA.
- Go to the fax integration page.
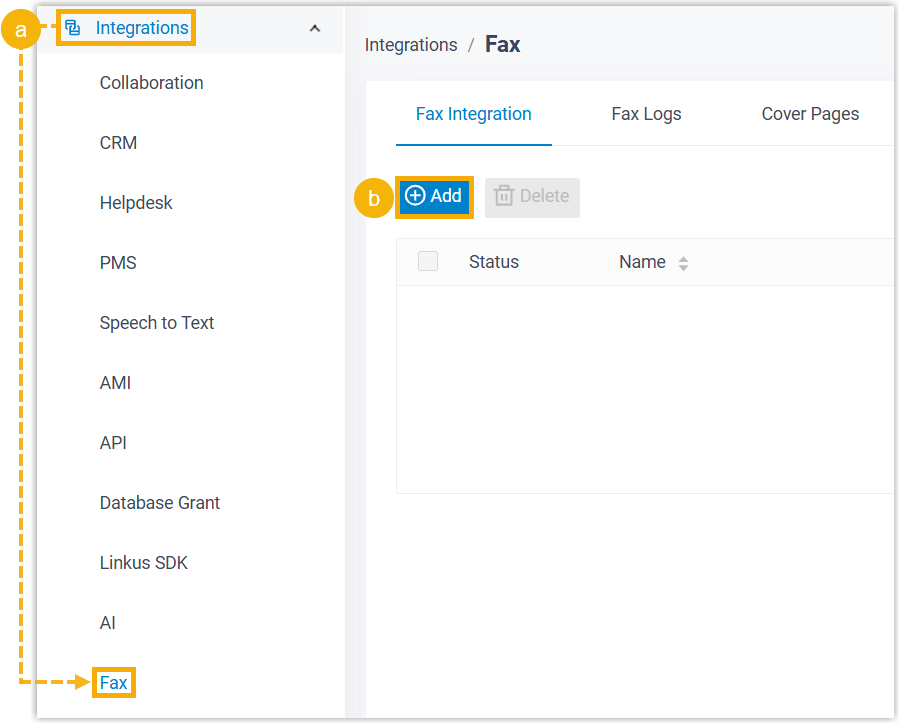
- Log in to PBX web portal, go to .
- Under Fax Integration tab, click Add.
- Obtain the Webhook URL for IXICA Fax.Important: The URL will change once you leave the current page, please make sure you use the latest Webhook URL for the configuration on the service provider's customer portal.
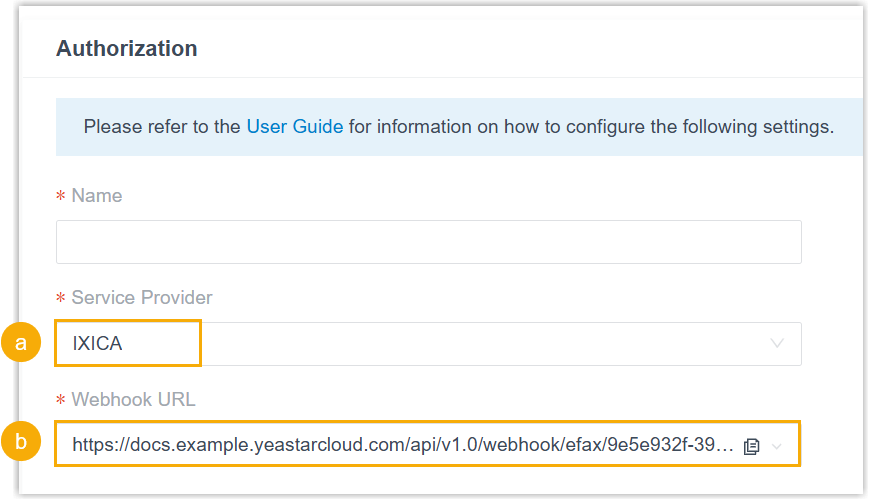
- In the Service Provider drop-down list, select IXICA.
- In the Webhook URL field, click
 to copy the URL and save it for later use.
Step 2. Obtain credentials from IXICA
Obtain the required credential from IXICA, so as to authenticate and authorize interactions between Yeastar PBX and IXICA.
- 1. Create an API key
-
- Access the account details page.
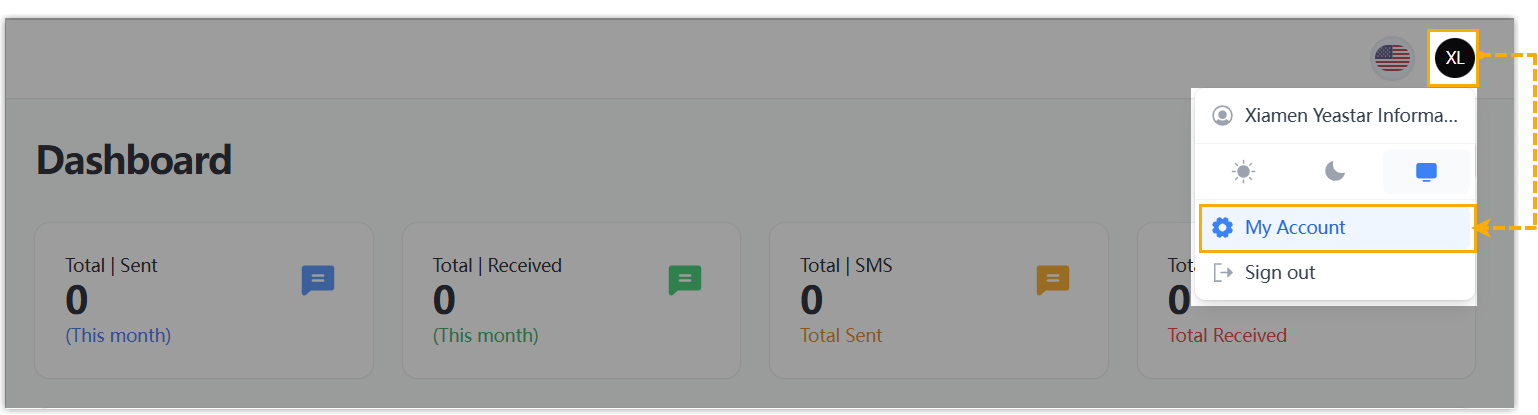
- Log in to IXICA portal.
- At the top-right corner of the webpage, click your account, then select My Account.
- Create an API key.
- Click Generate New above the
API Key field.

A new API key is generated and displayed.
- Copy the API key and save it for later
use.

- Click Generate New above the
API Key field.
- Access the account details page.
- 2. Configure webhook for Yeastar PBX
-
- On the account details page, configure the webhook
type.
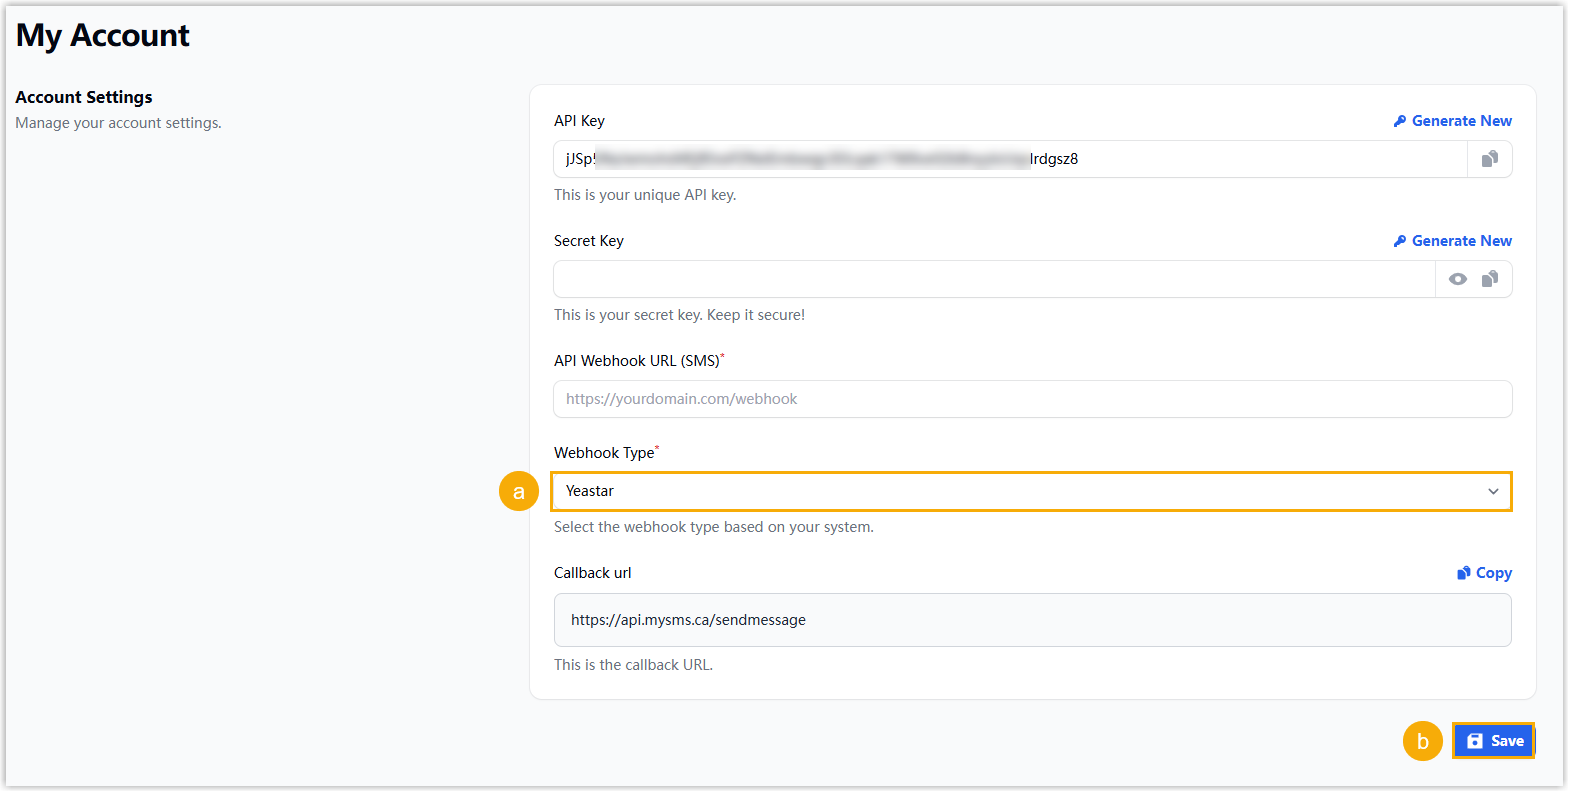
- In the Webhook Type drop-down list, select Yeastar.
- Click Save.
- Configure webhook URL for fax number.
- On the left navigation bar, go to , then click Manage Fax
DID beside the desired number.
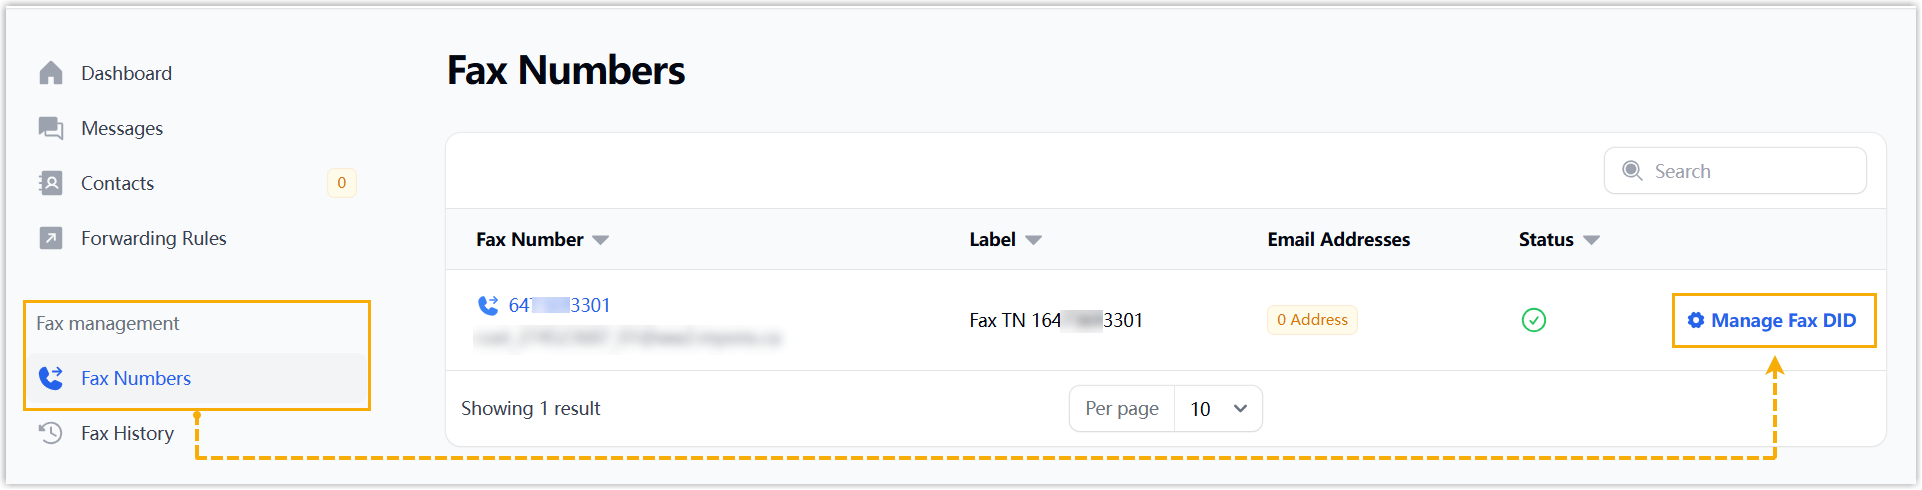
- On the number management page, scroll down to the Fax API Settings section.
- In the Customer Fax Webhook URL
field, enter the webhook URL obtained from
Yeastar PBX.
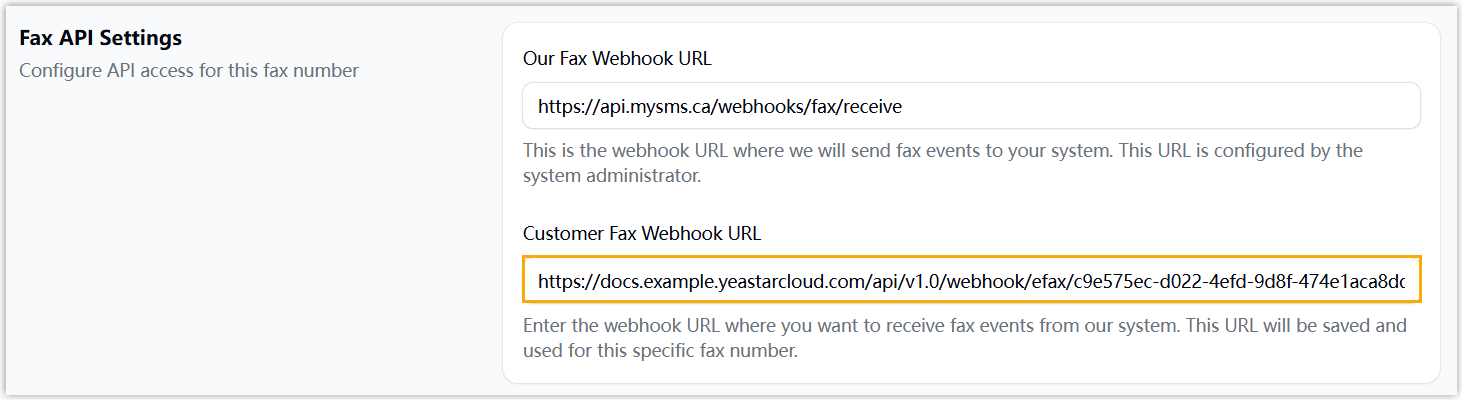
- Click Save changes.
- On the left navigation bar, go to , then click Manage Fax
DID beside the desired number.
- On the account details page, configure the webhook
type.
Step 3. Fill in credentials and configure fax settings on Yeastar PBX
On Yeastar PBX, fill in the credentials obtained from IXICA, then configure the fax-related settings to complete the fax integration.
- Go to the fax integration page.
- Log in to PBX web portal, go to .
- Under Fax Integration tab, click Add.
- In the Authorization section, complete the
authorization settings.
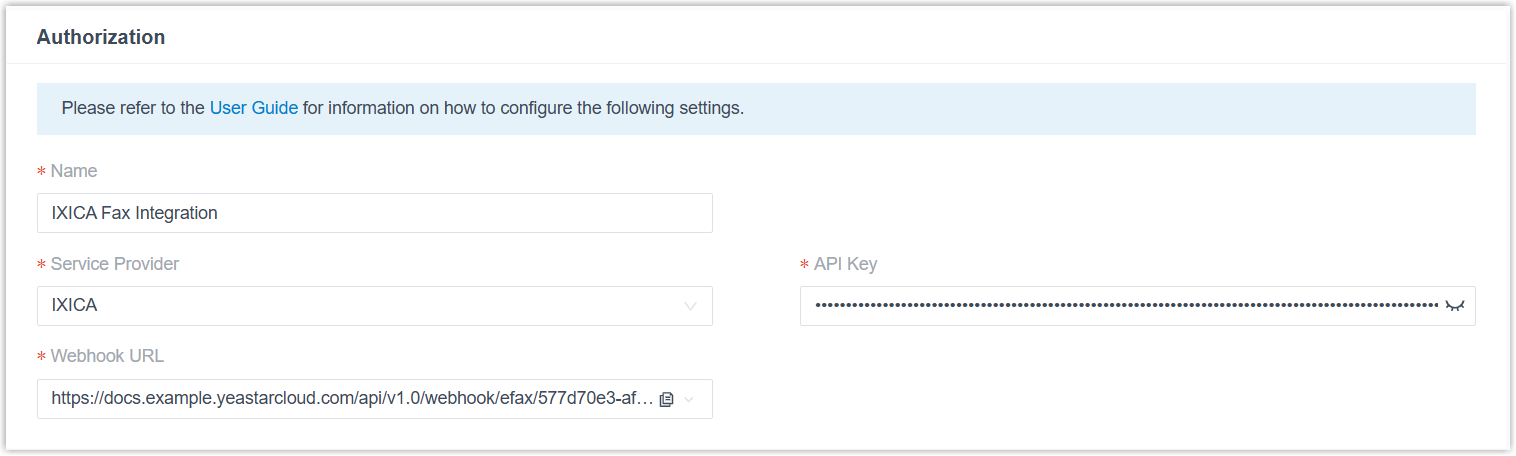
Setting Description Name Enter a name to help you identify the integration. Service Provider Select IXICA. API Key Paste the API key obtained from IXICA. - Optional: To forward inbound faxes as email
attachments to designated addresses, perform the following
operations.
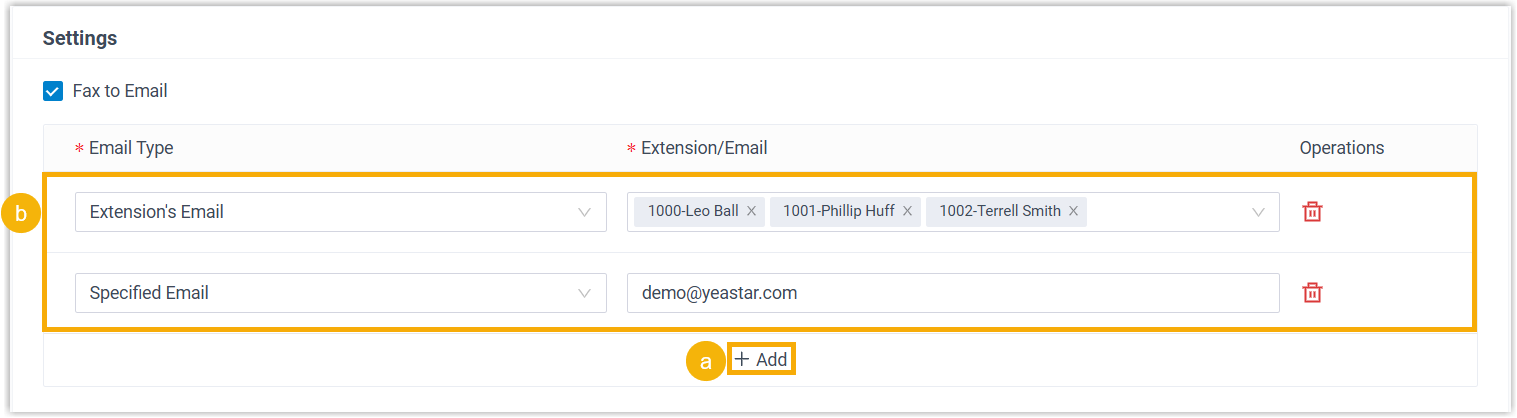
- In the Settings section, click
Add.Note: You can add up to 5 email entries.
- In the Email Type drop-down list, select the
type of email address and complete the corresponding settings.
- Extension's Email: Send the inbound
faxes as email attachments to extension users'
mailboxes.If you choose this option, select the desired extensions from the Extension/Email drop-down list.Note: Ensure the selected extensions have valid email addresses configured. Otherwise, users will not receive the emails.
- Specified Email: Send the inbound
faxes as email attachments to a specified email
address.
If you choose this option, enter a custom email address in the Extension/Email field.
- Extension's Email: Send the inbound
faxes as email attachments to extension users'
mailboxes.
- In the Settings section, click
Add.
- Set fax number(s) and specify which extension users are authorized to send
and receive faxes.
- In the Fax Number section, click Add.
- In the pop-up window, configure the following settings, then
click Save.
Setting Description Fax Number Enter fax number. Example: 12498037994Important: Do not include a character+before the fax number, otherwise the fax delivery will fail.Fax Reception Destination Select extensions or extension groups that can receive inbound faxes. The designated users can view inbound faxes from Linkus Desktop or Web Client (Path: ).
Extensions Allowed to Send Fax Select extensions or extension groups that can send faxes. The designated users can send faxes from Linkus Desktop or Web Client (Path: ).
- To add more fax numbers, repeat steps a-b.
- Click Save.
Result
The Status displays ![]() , indicating the integration with IXICA Fax
has been set up successfully.
, indicating the integration with IXICA Fax
has been set up successfully.

What to do next
- (Optional) Customize cover pages, which will be accessible to extension
users when they send faxes.
For more information, see Add a Fax Cover Page.
- Instruct extension users on how to send faxes and check inbound faxes from
their Linkus Desktop or Web Client.For more information, see the following topics:
- Linkus Desktop Client: Send Faxes from Linkus Desktop Client and Check Faxes from Linkus Desktop Client.
- Linkus Web Client: Send Faxes from Linkus Web Client and Check Faxes from Linkus Web Client.