Set up a Message Flow from Template
Yeastar P-Series PBX System provides built-in templates that cover common use cases. You can use a ready-made template to build a custom message flow.
Introduction
Yeastar P-Series PBX System provides the following three templates.
| Template | Description | Screenshot |
|---|---|---|
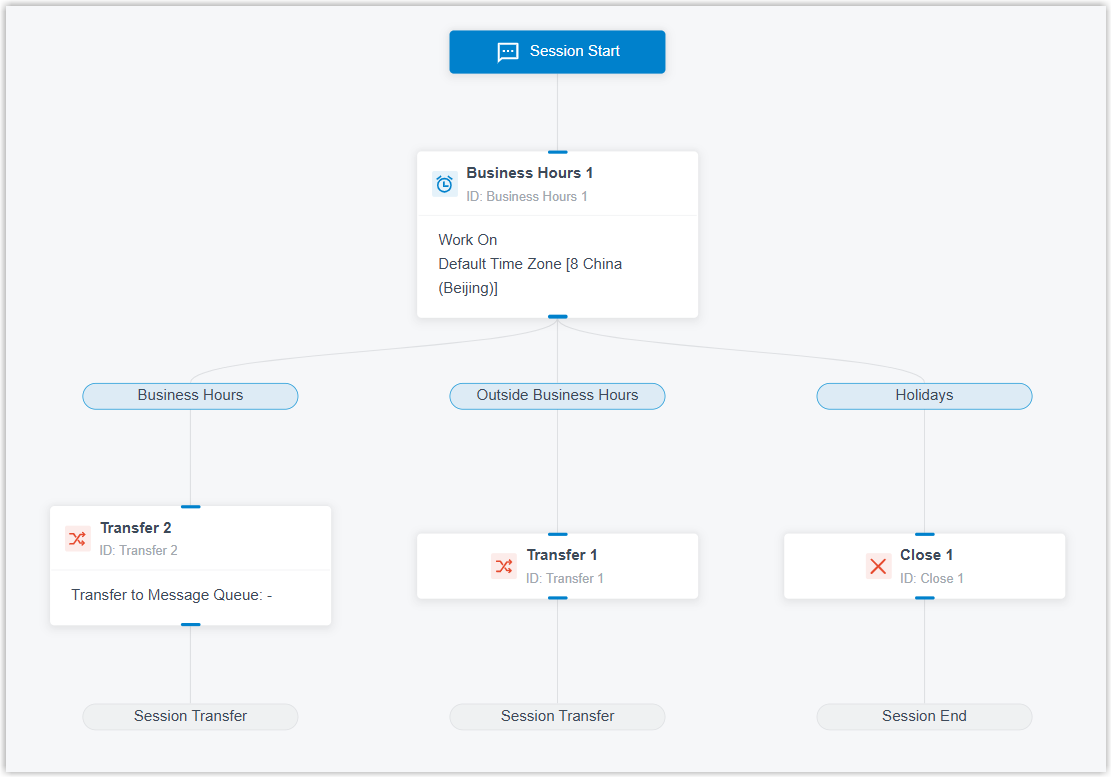
| Route Session by Time Template |
A message flow allows you to transfer inbound messages to different destinations based on the business hours configured for default time zone. |
 |
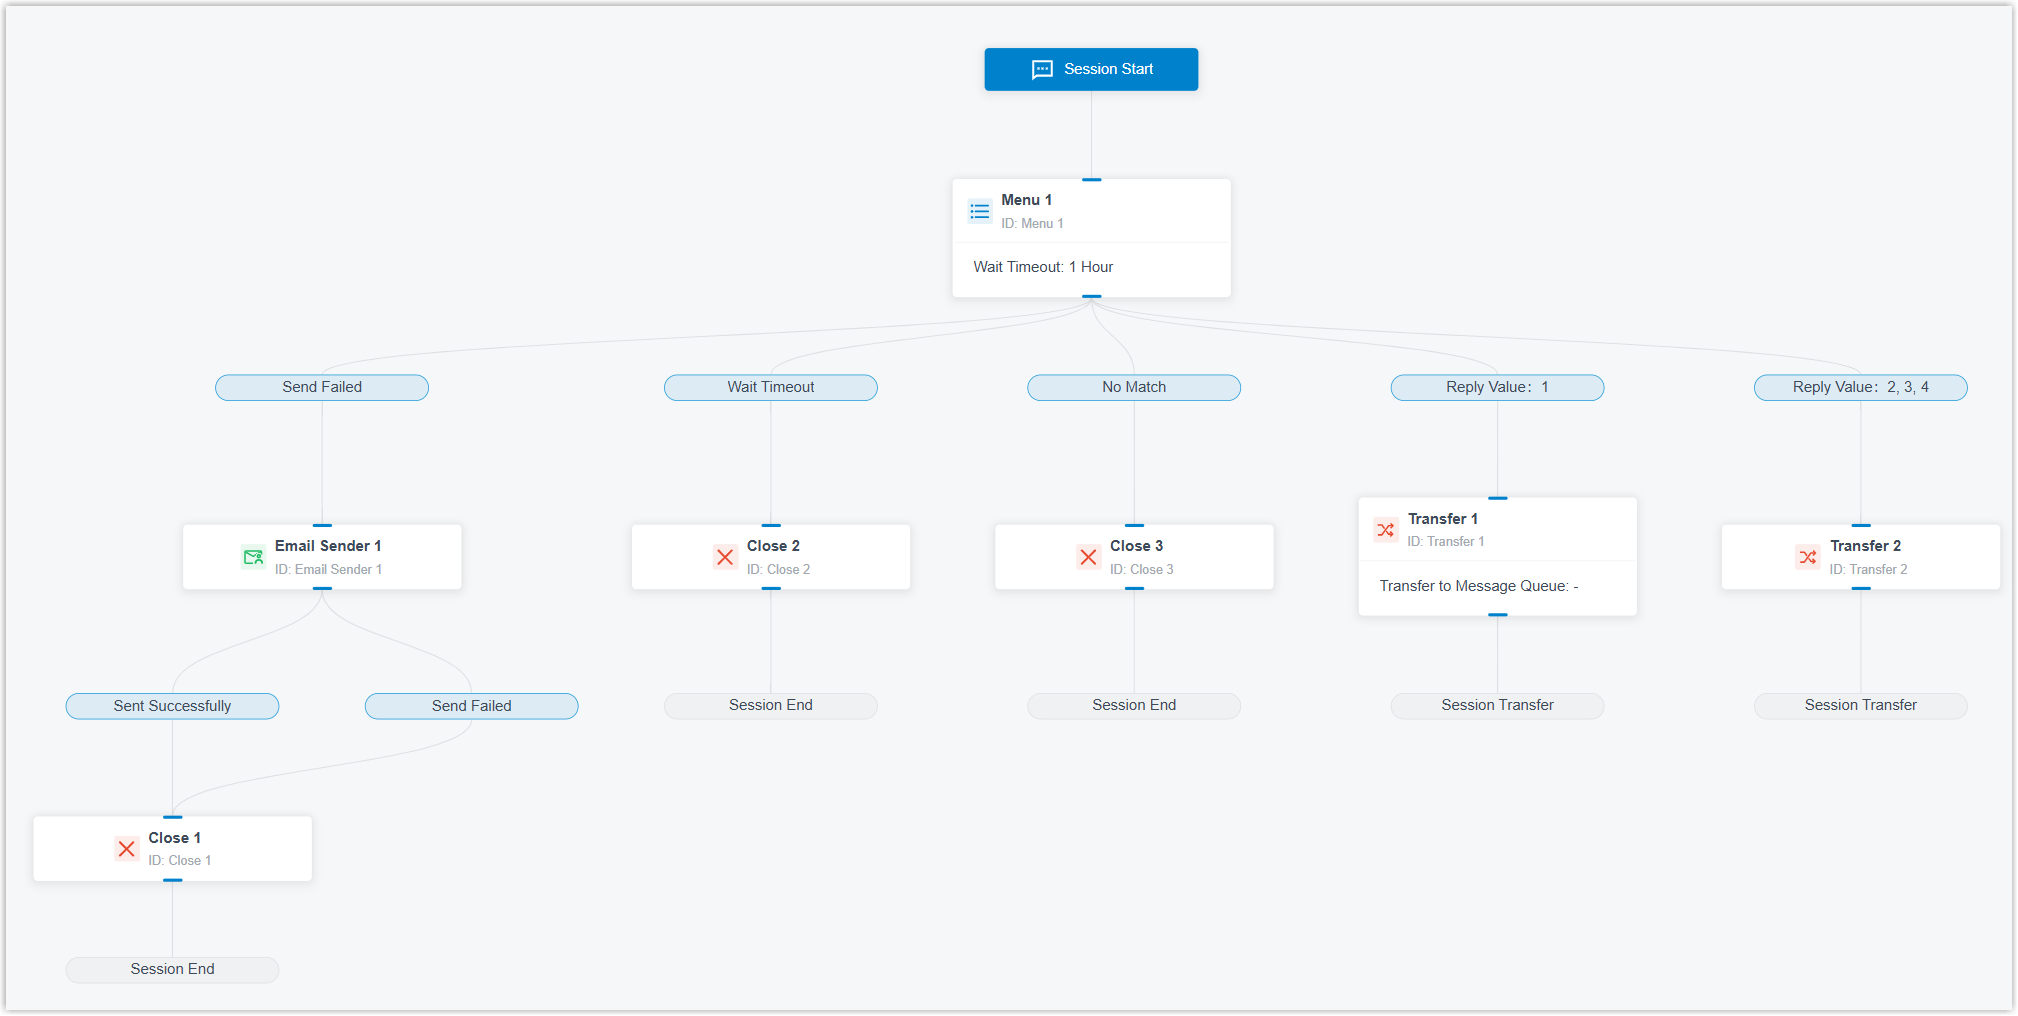
| Route Session by Conversation Content |
A message flow allows you to transfer inbound messages to different destinations based on the conversation content. |
 |
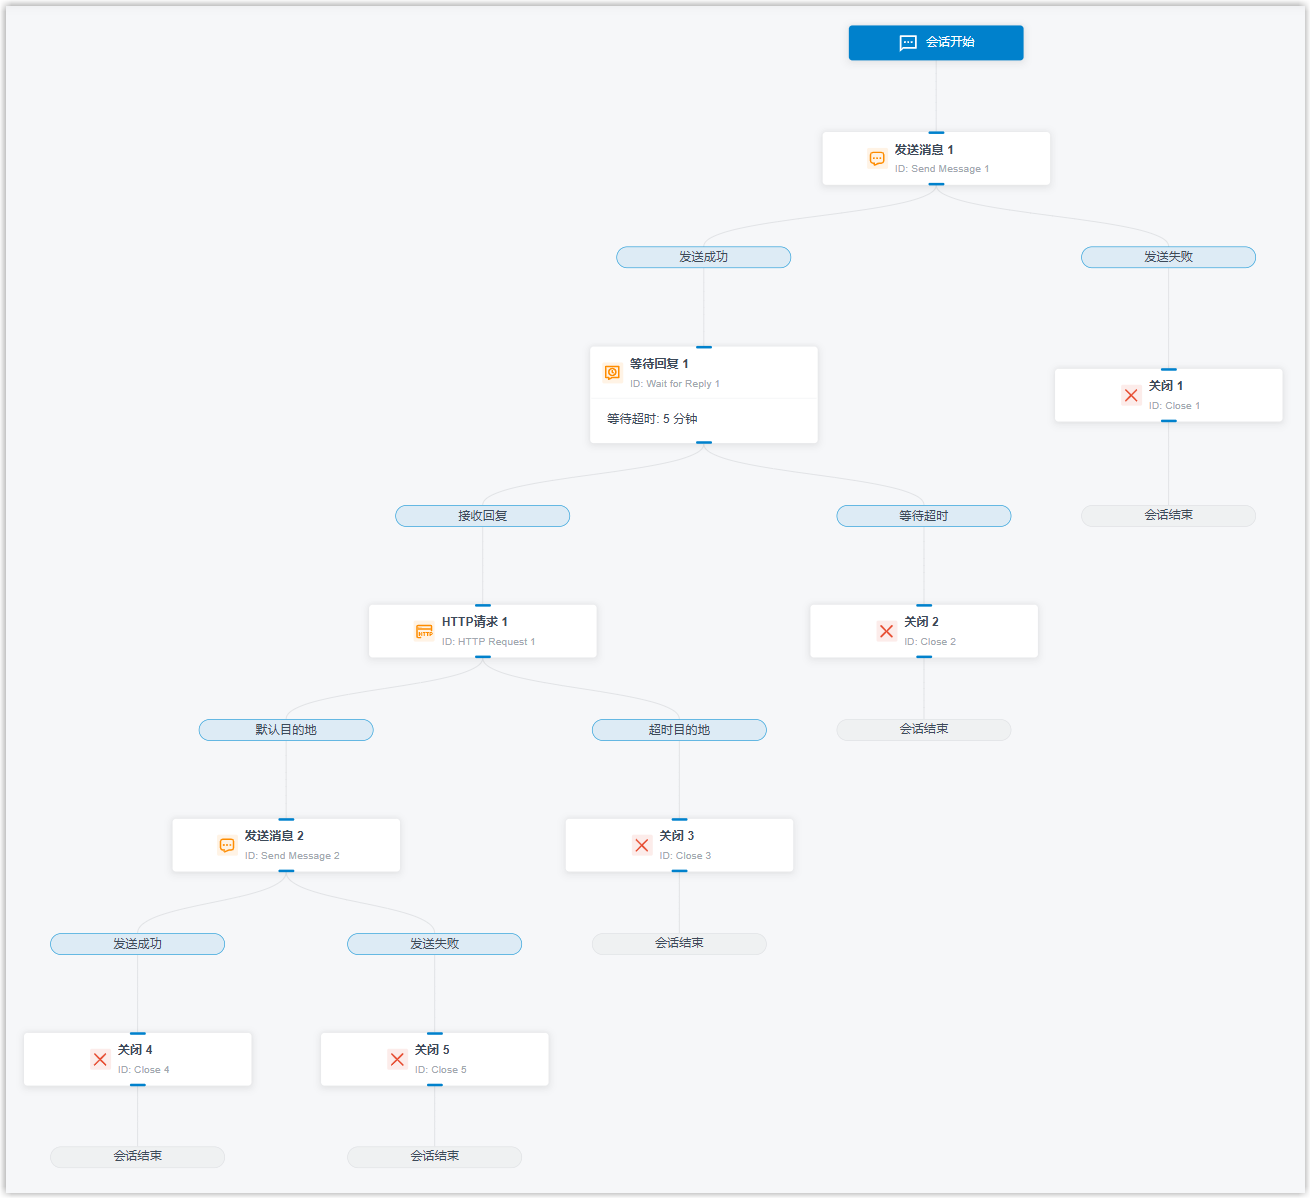
| Order Inquiry |
A message flow allows you to query customer order from external Web servers based on the content in inbound messages. |
 |
Procedure
Step 1. Create a message flow from template
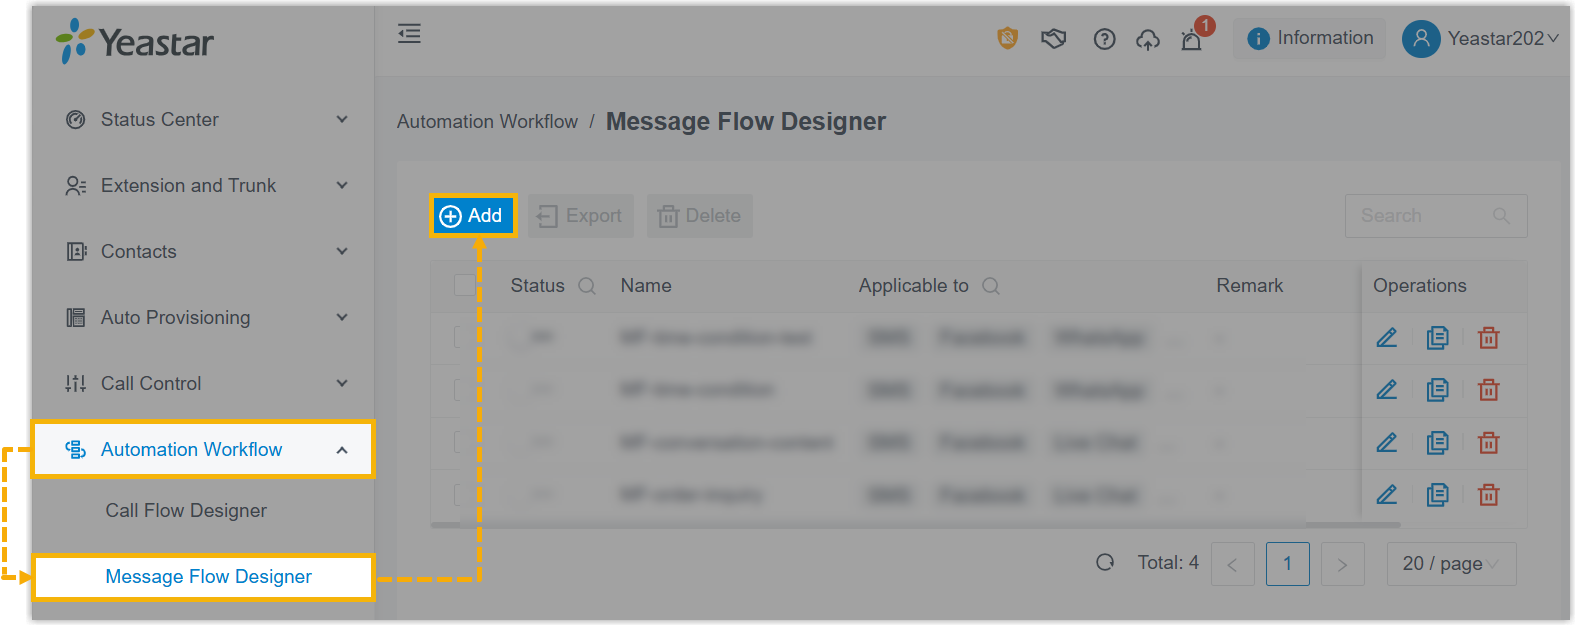
- Log in to PBX web portal, go to , then click Add.
- In the pop-up window, complete the following settings, then click
Save.
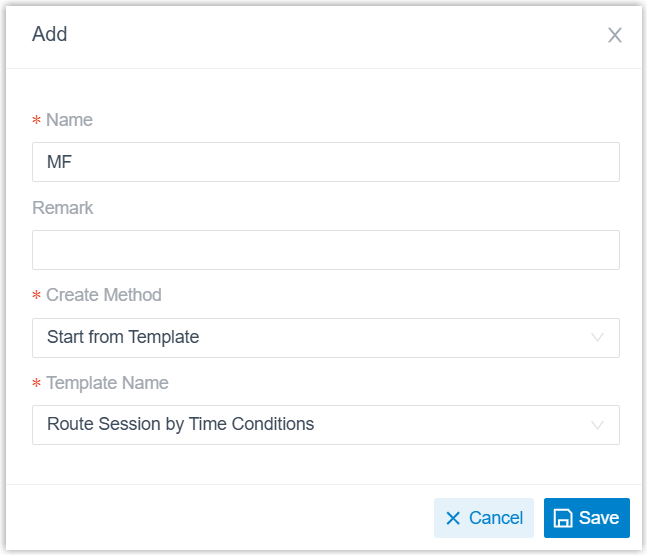
- Name: Enter a name to help you identify the message flow.
- Remark: Optional. Add a brief description.
- Create Method: Select Start from Template.
- Template Name: Select a template.
The message flow is created, and the webpage is redirected to the configuration page.Tip: If needed, you can click at the top of the configuration page to
modify the flow basic information, including name, remark, and the
applicable channel types.
at the top of the configuration page to
modify the flow basic information, including name, remark, and the
applicable channel types.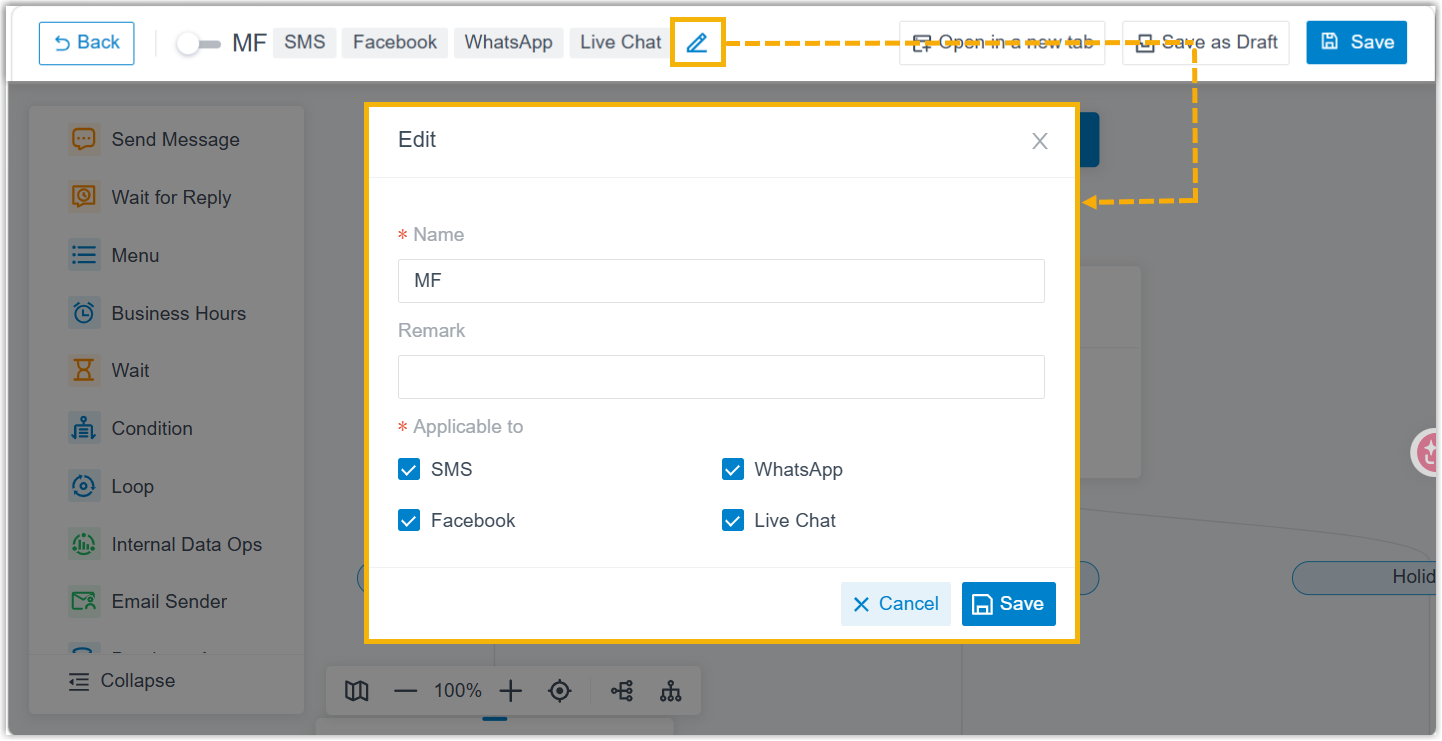
Step 2. Edit components
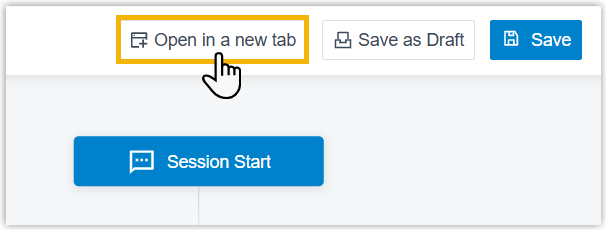
- Click component to edit its settings.Note: To add more components, click
 on the desired branch, then select a
component.
on the desired branch, then select a
component.Refer to the table below for introduction and instruction on each component.
Component Description Session Start Session Start component is the entry point of a message flow. This component is uneditable.
Send Message Send Message component enables the system to automatically send messages to customers. For more information, see Send Message.
Send WhatsApp Template Message Send WhatsApp Template Message component enables the system to automatically send messages to customers using specified WhatsApp message templates. Important: This component is available only when the message flow is only applicable to WhatsApp channel type.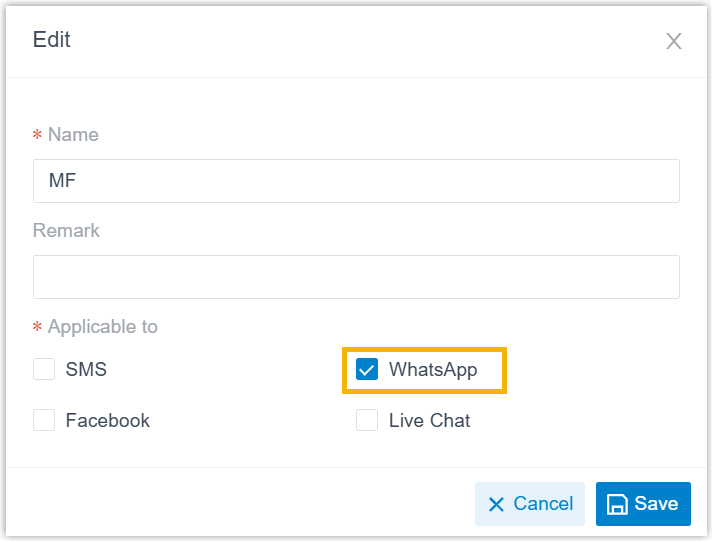
For more information, see Send WhatsApp Template Message.
Wait for Reply Wait for Reply component allows you to set the reply timeout and route the message session depending on whether a reply is received. For more information, see Wait for Reply.
Menu Menu component allows you to present the customer with a set of menu options, and route the message session based on the value that they reply. For more information, see Menu.
Business Hours Business Hours component allows you to route the message session to different destinations based on the time of day.
For more information, see Business Hours.
Wait Wait component enables the system to automatically route the message session to the connected component upon reply timeout. For more information, see Wait.
Condition Condition component allows routing the message session based on logical expressions. For more information, see Condition.
Loop Loop component allows a group of components to be executed repeatedly based on the loop strategy. For more information, see Loop.
Internal Data Ops Internal Data Ops component allows you to query data from PBX-native database. For more information, see the following topics:Email Sender Email Sender component enables the system to automatically send emails to a recipient via configured email server and record the send logs, enabling real-time notifications. For more information, see Email Sender.
Database Access Database Access component allows you to interact with database during a message flow. You can execute SQL operations to retrieve or update data as needed. For more information, see Database Access.
HTTP Request HTTP Request component allows you to send HTTP requests to external web servers, enabling data exchange with third-party services. For more information, see HTTP Request.
Transfer Transfer component allows you to transfer the message session to a specific destination to terminate the current message flow.
For more information, see Transfer.
Close Close component enables the system to automatically disconnect the message session to terminate the current message flow. For more information, see Close.
- At the top-right corner, click Save.
Step 3. Enable the message flow
On the message flow list, turn on the switch of the desired message flow and click OK in the pop-up window.
What to do next
Go to , and set the message flow as the destination for message channels matching the flow's applicable channel type.
After configuration, inbound messages received via the channels will enter the message flow directly, and the system will automatically perform the routing strategy in the flow.