Business Hours
This topic provides an overview of the Business Hours component, and describes its configuration as well as supported connections.
Component introduction
Business Hours component allows you to route the message session to different destinations based on the time of day. A variety of time-based modes listed in the table below are available to flexibly define office hours and implement time-based message routing.
| Type | Description |
|---|---|
| Business Hours Configured for Time Zone |
Use pre-configured business hours for a specific time zone. Note: This requires you to
configure business hours in advance. To configure
this, go to .
|
| Custom Business Hours |
Create custom business hours based on a specific time zone to specify uniform or varied schedule through the week, or full time (24x7) schedule. |
| Custom Time Periods |
Create custom time periods based on a specific time zone to accommodate granular scheduling needs. |
Component configuration
- 将Business Hours component to a message flow,
click Business Hours component to proceed with the
configuration.
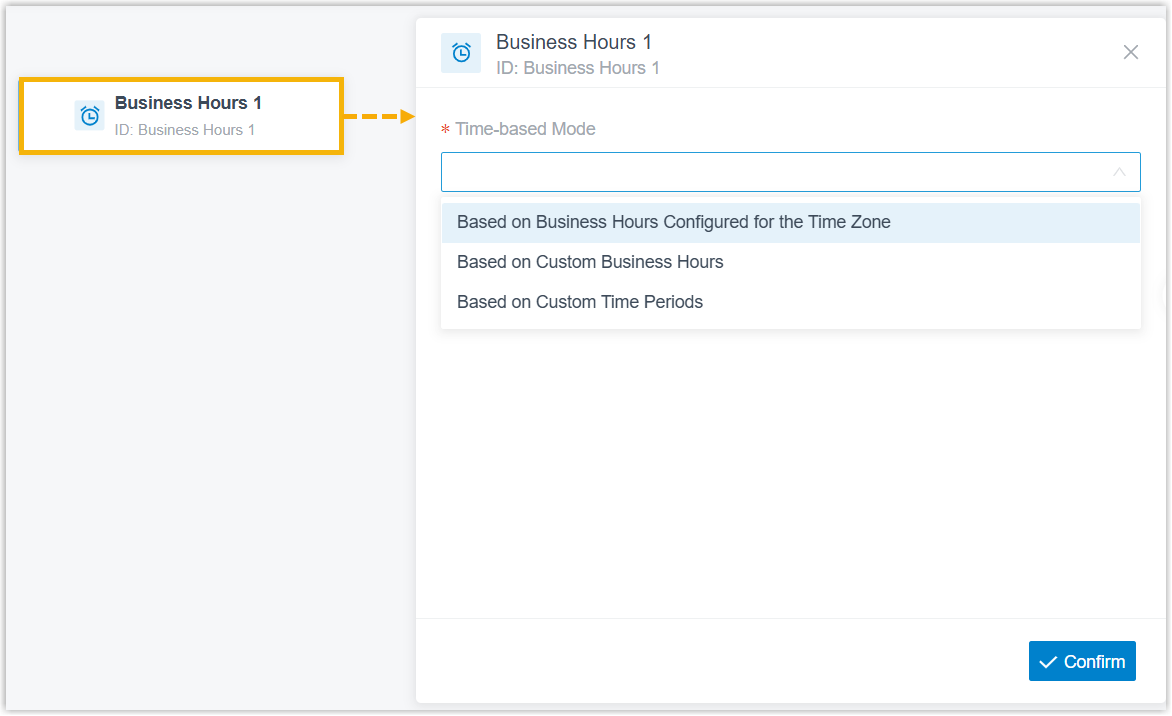
- In the pop-up wight panel, select a time-based mode according to your business
schedule, then configure its related settings.
Scenario Instruction Use Business Hours Configured for Time Zone 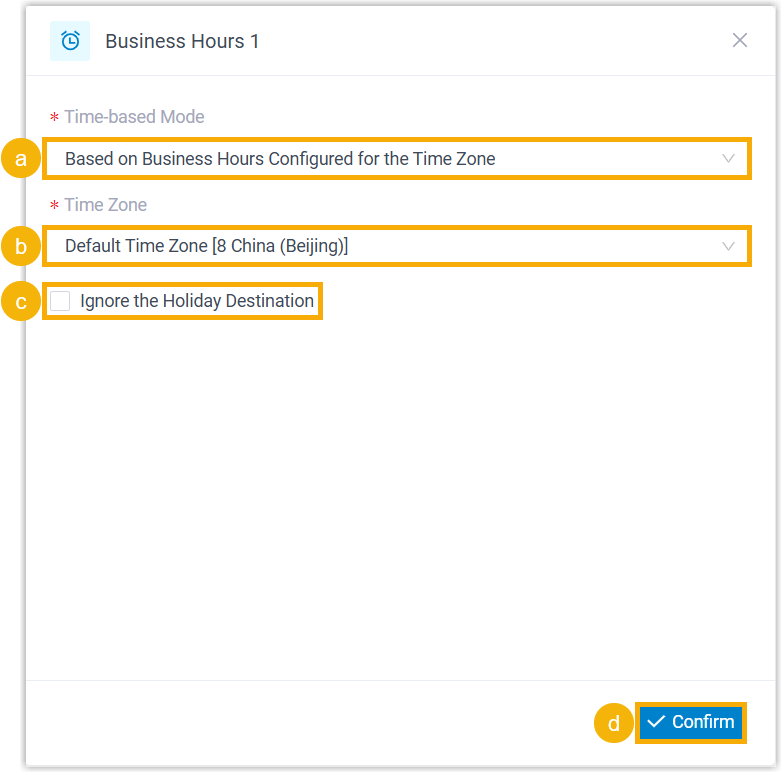
- In the Time-based Mode drop-down list, select Based on Business Hours Configured for the Time Zone.
- In the Time Zone drop-down list, select a time zone.
- Optional: To prevent the session from
being distributed to the holiday destination,
select the checkbox of Ignore the
Holiday Destination.Note: If enabled, incoming sessions during holidays will be routed to the destination defined for Business Hours or Outside Business Hours.
- At the bottom-right corner, click
Confirm.
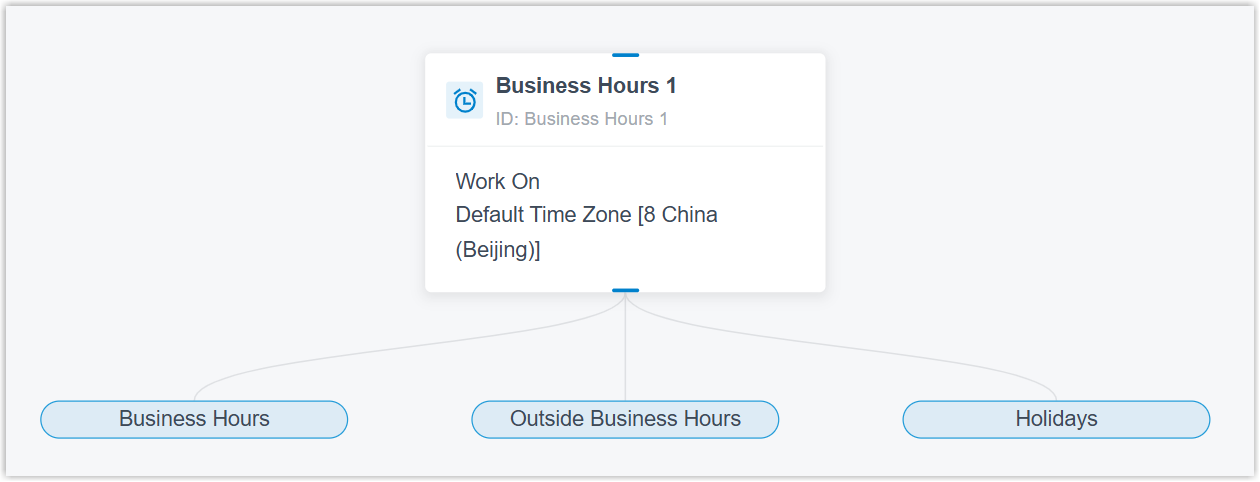
The selected time zone appears on the component and multiple associated time branches are automatically created.
Use Custom Business Hours 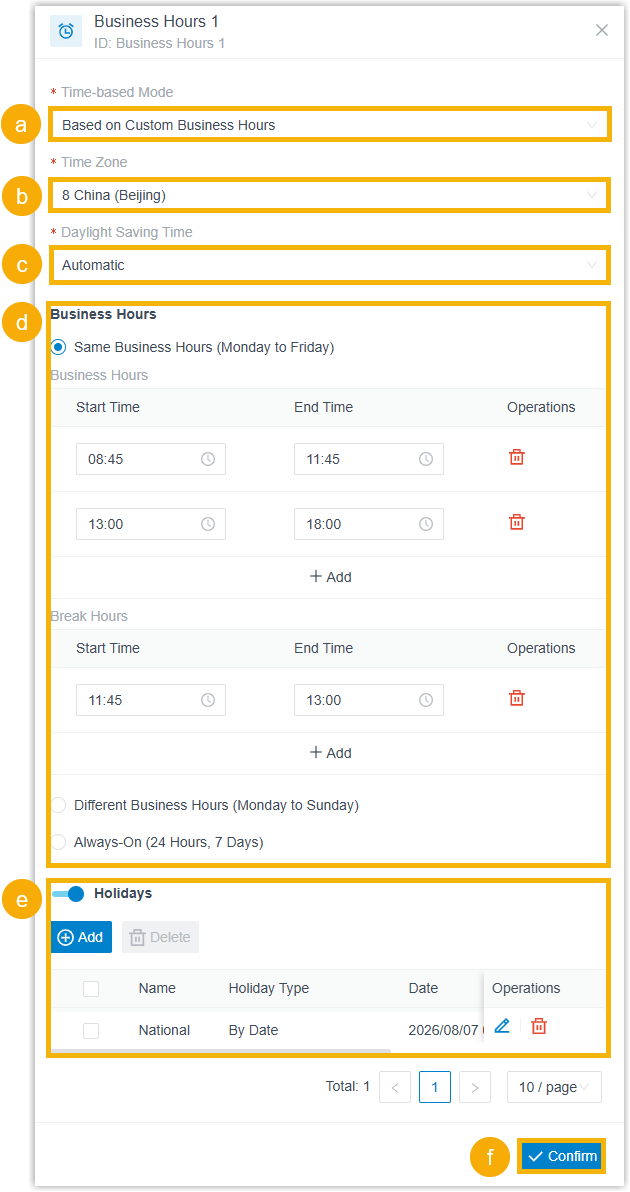
- In the Time-based Mode drop-down list, select Based on Custom Business Hours.
- In the Time Zone drop-down list, select a time zone.
- In the Daylight Saving Time drop-down list, select an option to enable or disable the feature.
- Select a business hour type, then configure its
related settings to customize business hours.Note: Up to 20 time periods are supported for business hours and break hours respectively.
- Optional: Turn on the switch
of Holidays, then add holidays.Note: Up to 50 holidays are supported.
- At the bottom-right corner, click
Confirm.
The custom business hours appear on the component and multiple associated time branches are automatically created.
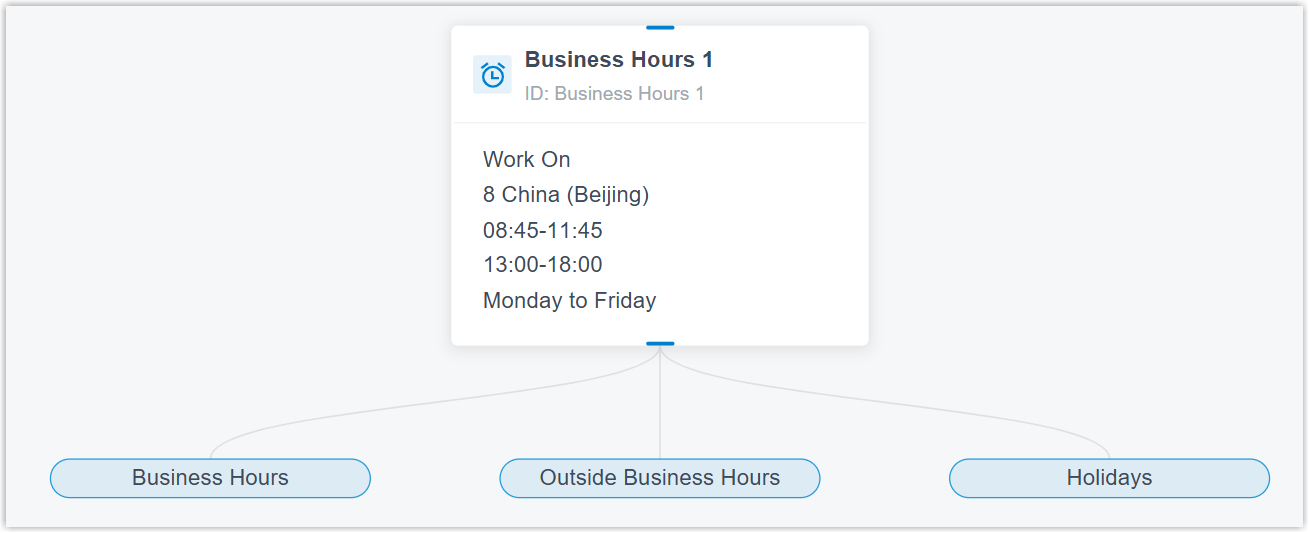
Use Custom Time Periods 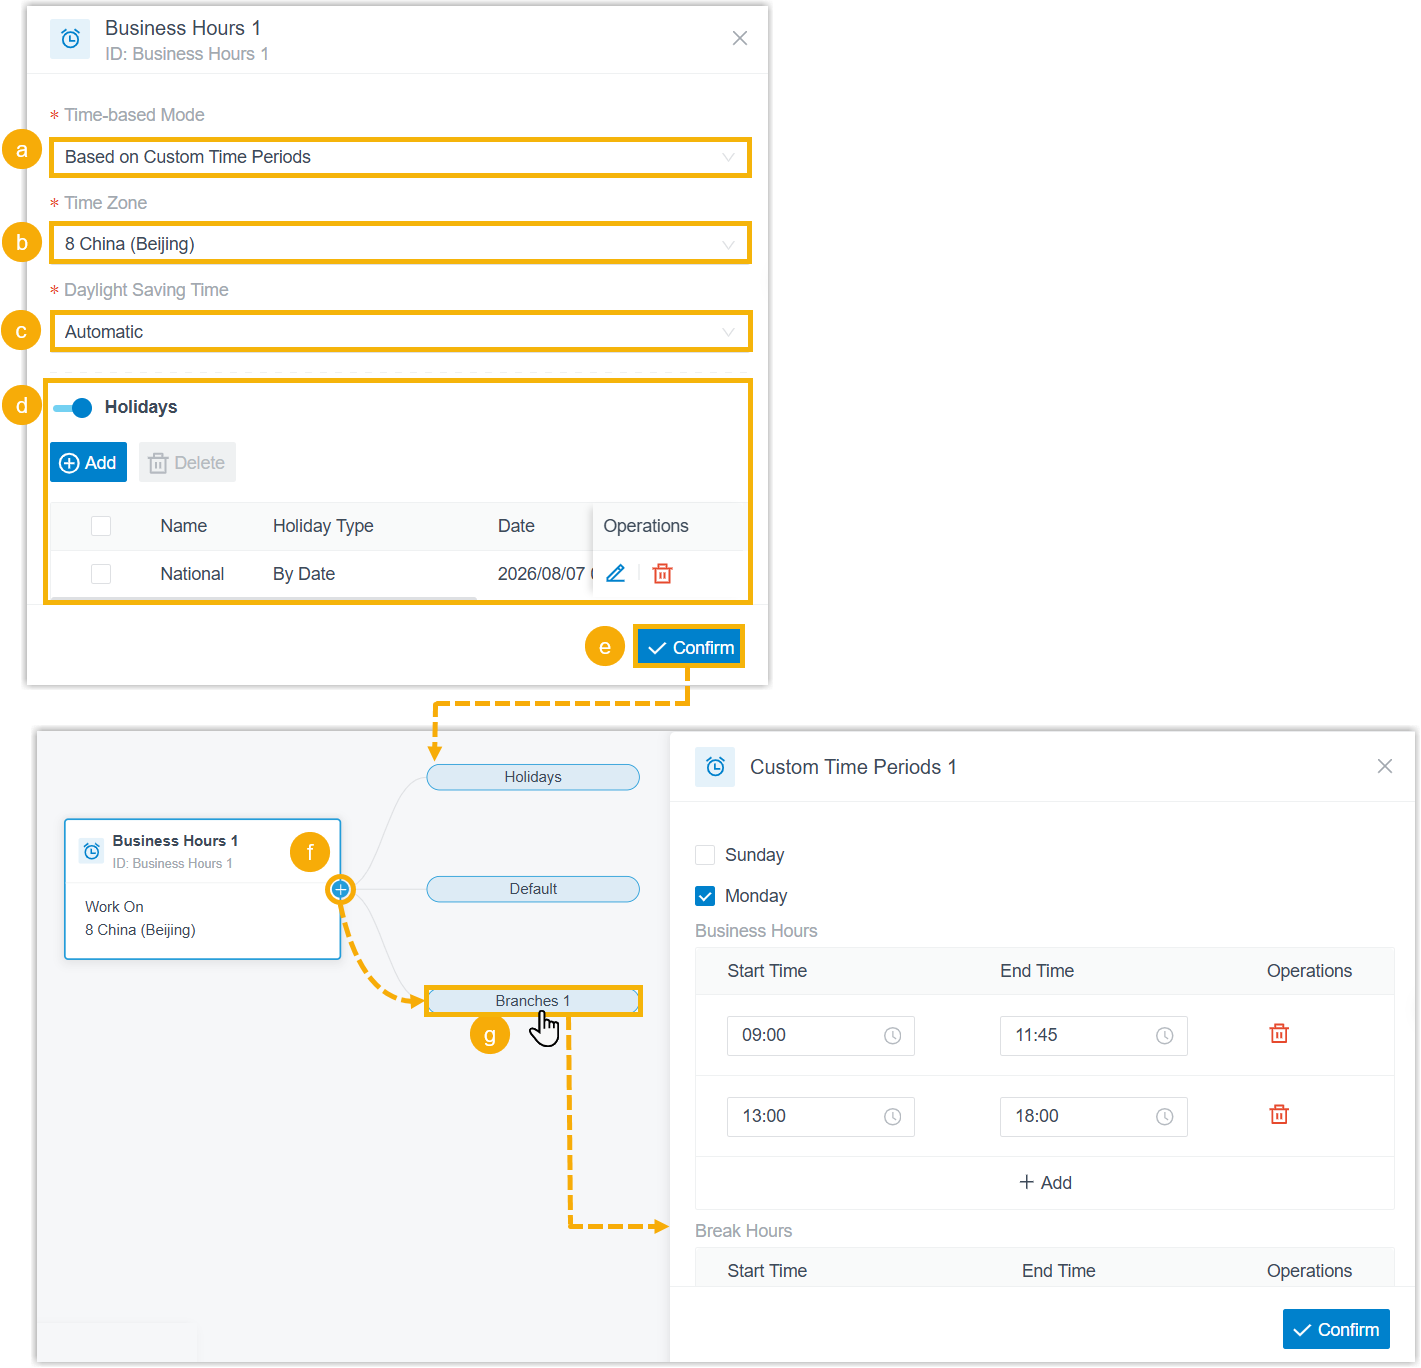
- In the Time-based Mode drop-down list, select Based on Custom Time Periods.
- In the Time Zone drop-down list, select a time zone.
- In the Daylight Saving Time drop-down list, select an option to enable or disable the feature.
- Optional: Turn on the switch
of Holidays, then add holidays.Note: Up to 50 holidays are supported.
- At the bottom-right corner, click Confirm.
- Hover over component and click
 to add and
configure custom time periods.Note: Up to 50 custom time periods are supported.
to add and
configure custom time periods.Note: Up to 50 custom time periods are supported.The time zone and multiple time branches will appear on the component.
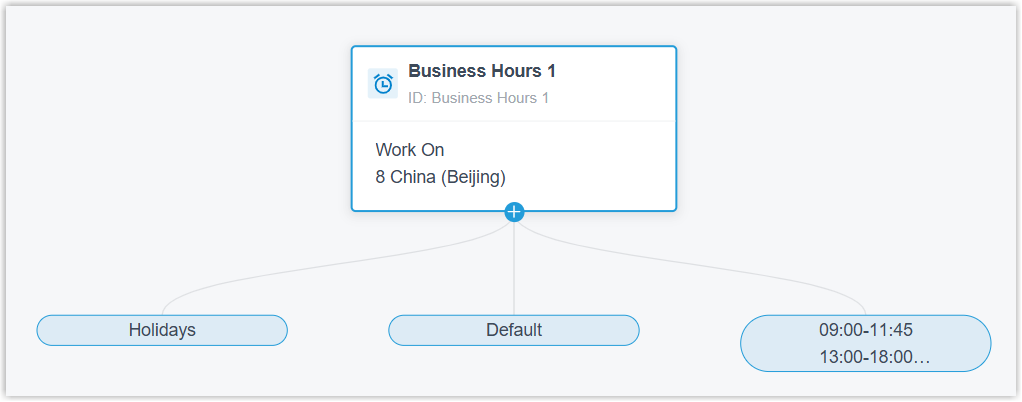 Note: Default branch indicates the failover destination for the message session that don't match any configured time conditions.
-
Optional: To route the message session or trigger other actions when the component's branch conditions are met, hover over the desired branch and click
to add the next component.For more information about components that support to be connected, see Component connections.
Component connections
Business Hours component comes with built-in time branches, such as Business Hours, Outside Business Hours, and Holidays. Each branch can be connected to one component, which can be any of the components listed below.
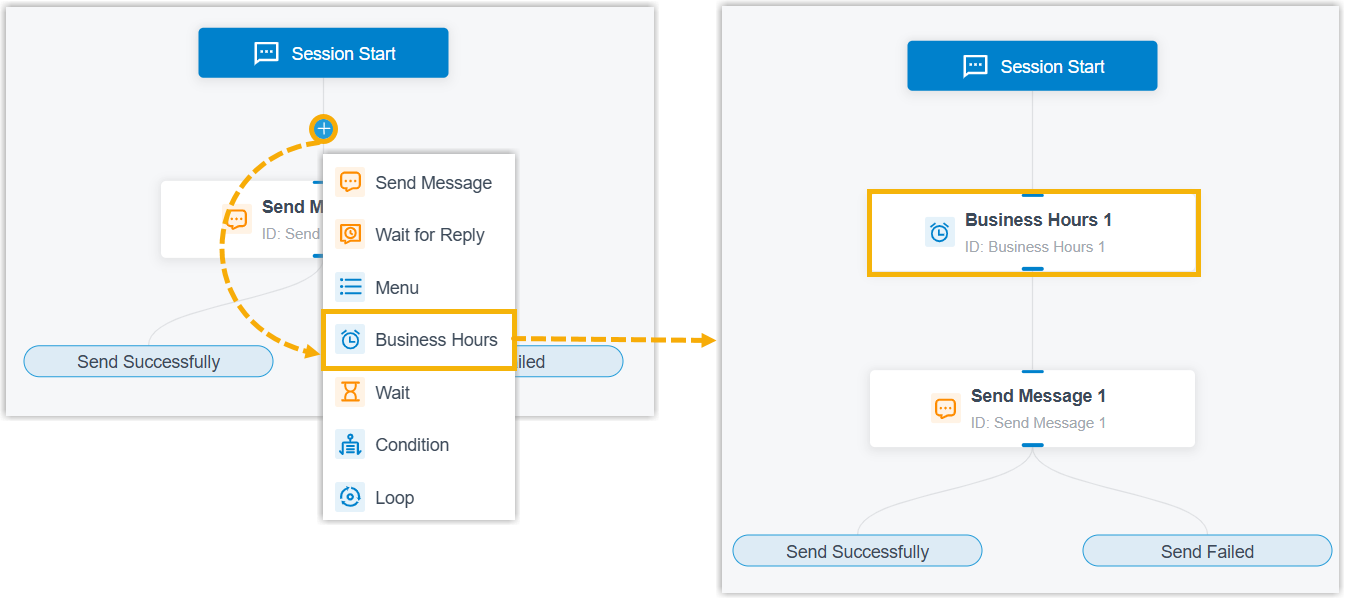
and select the target component. The
selected component is inserted between them with connections auto-established on
both ends, without the need to delete the connection, add the component and
reconnect manually.End components Transfer and Close are unavailable for this insertion method.
| Component | Description |
|---|---|
| Send Message | Send Message component enables the
system to automatically send messages to customers. For more information, see Send Message. |
| Send WhatsApp Template Message | Send WhatsApp Template Message
component enables the system to automatically send messages to
customers using specified WhatsApp message templates. Important: This component is
available only when the message flow is only applicable to
WhatsApp channel type.
For more information, see Send WhatsApp Template Message. |
| Wait for Reply | Wait for Reply component allows you to
set the reply timeout and route the message session depending on
whether a reply is received. For more information, see Wait for Reply. |
| Menu | Menu component allows you to present
the customer with a set of menu options, and route the message
session based on the value that they reply. For more information, see Menu. |
| Business Hours |
Business Hours component allows you to route the message session to different destinations based on the time of day. For more information, see Business Hours. |
| Wait | Wait component enables the system to automatically
route the message session to the connected component upon reply
timeout. For more information, see Wait. |
| Condition | Condition component allows routing the message session
based on logical expressions. For more information, see Condition. |
| Loop | Loop component allows a group of
components to be executed repeatedly based on the loop
strategy. For more information, see Loop. |
| Internal Data Ops | Internal Data Ops component allows you
to query data from PBX-native database. For more information,
see the following topics: |
| Email Sender | Email Sender component enables the
system to automatically send emails to a recipient via
configured email server and record the send logs, enabling
real-time notifications. For more information, see Email Sender. |
| Database Access | Database Access component allows you
to interact with database during a message flow. You can execute
SQL operations to retrieve or update data as needed. For more information, see Database Access. |
| HTTP Request | HTTP Request component allows you to
send HTTP requests to external web servers, enabling data
exchange with third-party services. For more information, see HTTP Request. |
| Transfer |
Transfer component allows you to transfer the message session to a specific destination to terminate the current message flow. For more information, see Transfer. |
| Close | Close component enables the system to
automatically disconnect the message session to terminate the
current message flow. For more information, see Close. |