Send Message
This topic provides an overview of the Send Message component, and describes its configuration as well as supported connections.
Component introduction
Send Message component enables the system to automatically send messages to the customer once the message session is routed to the component.
Component configuration
- After adding Send Message component to a message
flow, click the component to proceed with the configuration.
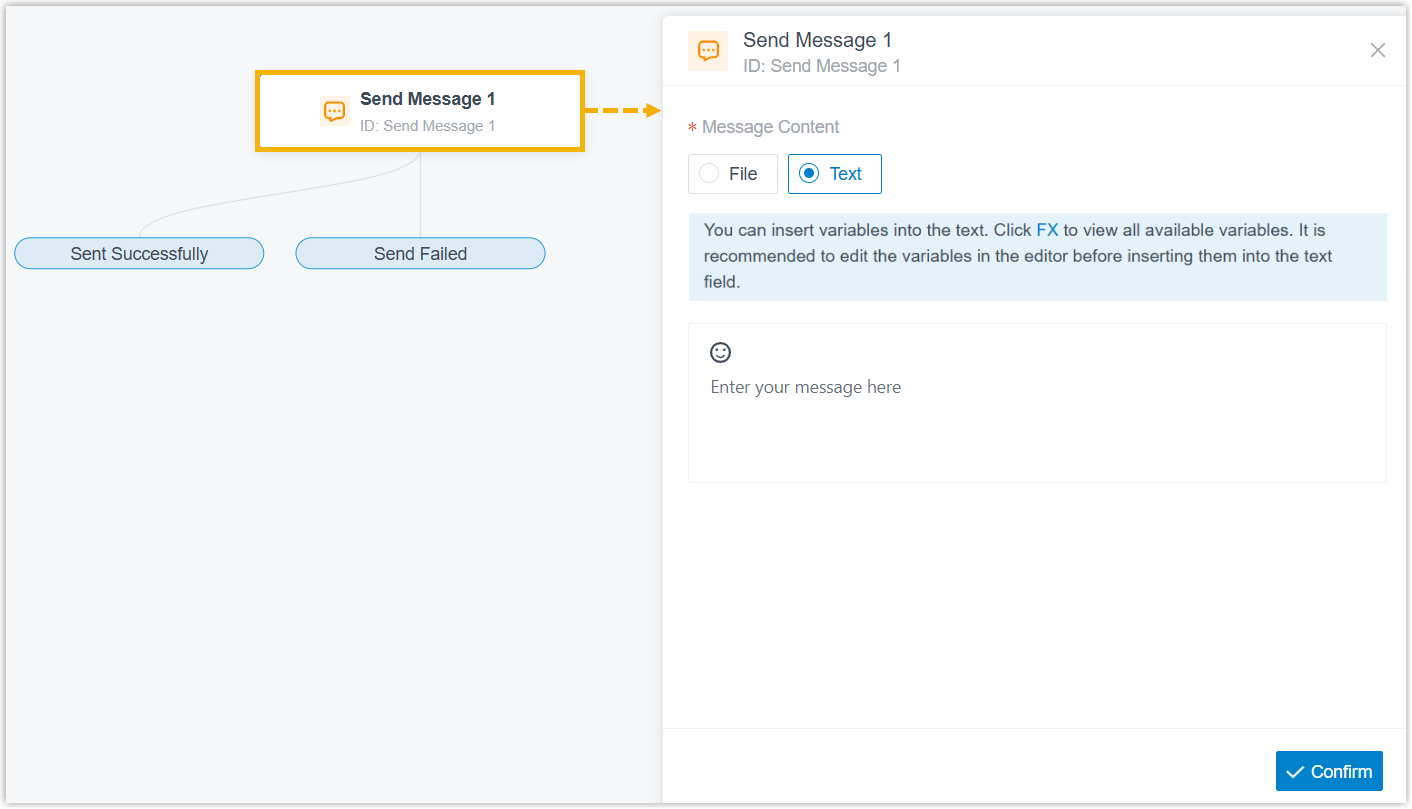
- In the pop-up right panel, complete the following settings.
- Fill in the message content to be sent to the customer using one of
the following methods.
Method Instruction File upload Click File and upload a file that includes the content to be sent. Note: The file must not exceed 100 MB.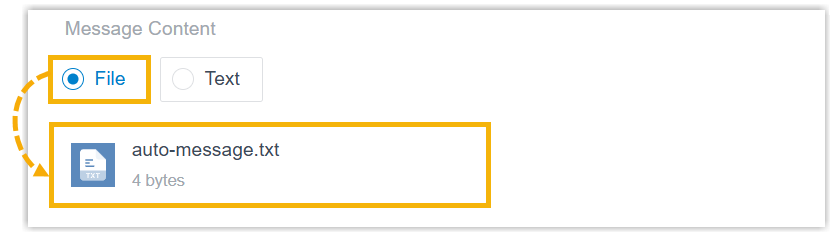
Text input Click Text and fill in the content to be sent in the text field. - To insert fixed text, enter plain text and emojis directly.
- To insert
expression, click
 , enter an
expression and click Save.Note:
, enter an
expression and click Save.Note:An expression may include variables, constants, and functions. You can enter
FXto view and select system‑supported functions, and enter$to view and select variables already stored in the current message flow.For more information about functions and variables, see Variables and Functions in Yeastar Expression.
The expression added in the editor is automatically filled in the text filed.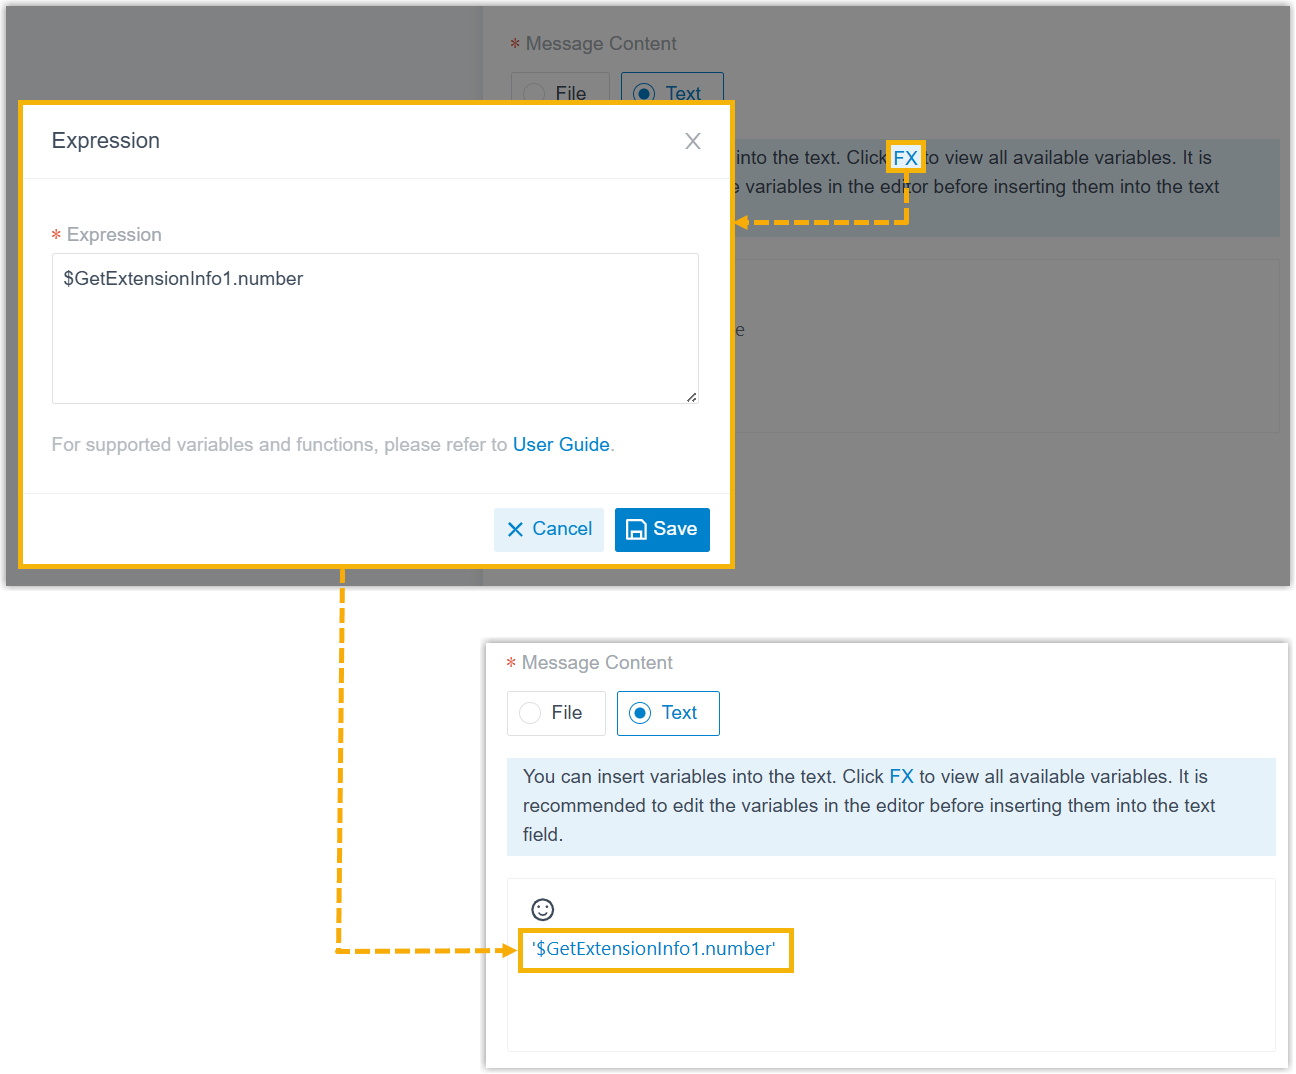
- Click Confirm.
The configured content appears on the component.
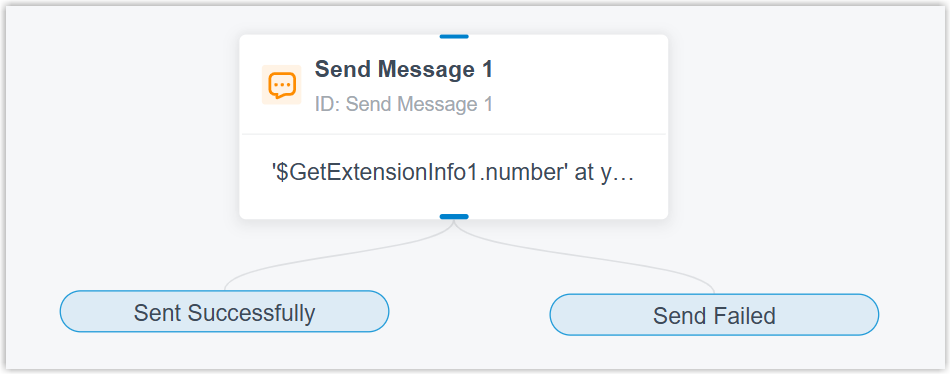
- Fill in the message content to be sent to the customer using one of
the following methods.
Optional: To route the message session or trigger other actions when the component's branch conditions are met, hover over the desired branch and click
 to add the next component.
For more information about components that support to be connected, see Component connections.
Component connections
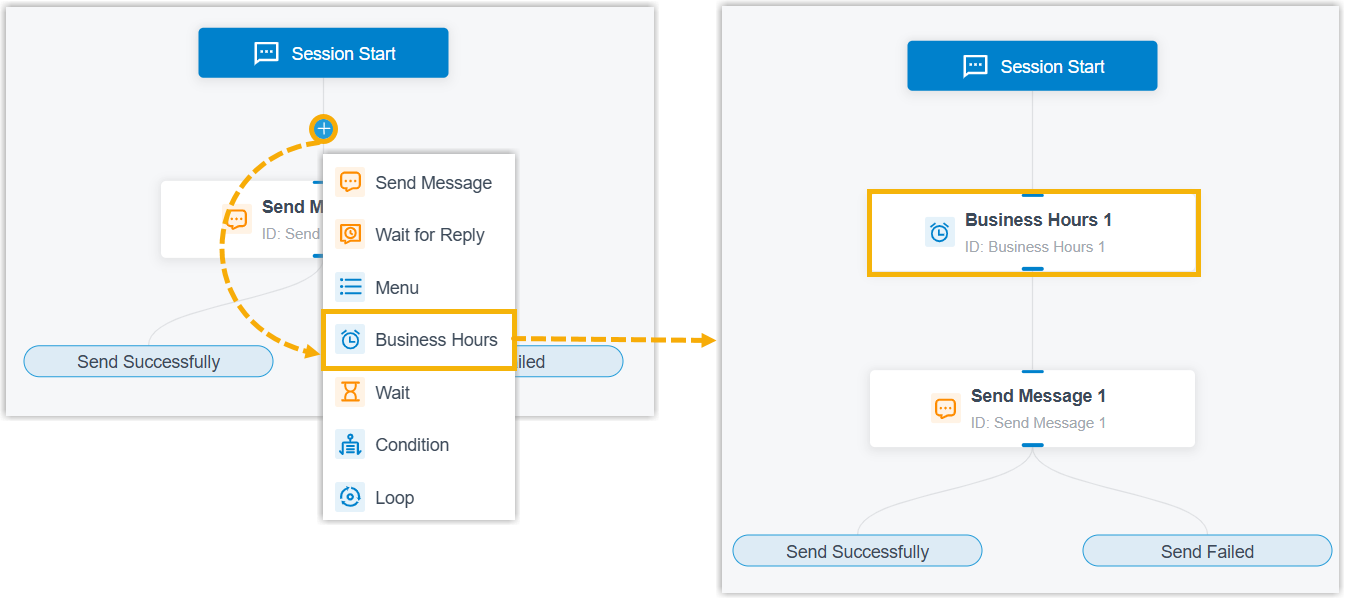
and select the target component. The
selected component is inserted between them with connections auto-established on
both ends, without the need to delete the connection, add the component and
reconnect manually.End components Transfer and Close are unavailable for this insertion method.
| Component | Description |
|---|---|
| Send Message | Send Message component enables the
system to automatically send messages to customers. For more information, see Send Message. |
| Send WhatsApp Template Message | Send WhatsApp Template Message
component enables the system to automatically send messages to
customers using specified WhatsApp message templates. Important: This component is
available only when the message flow is only applicable to
WhatsApp channel type.
For more information, see Send WhatsApp Template Message. |
| Wait for Reply | Wait for Reply component allows you to
set the reply timeout and route the message session depending on
whether a reply is received. For more information, see Wait for Reply. |
| Menu | Menu component allows you to present
the customer with a set of menu options, and route the message
session based on the value that they reply. For more information, see Menu. |
| Business Hours |
Business Hours component allows you to route the message session to different destinations based on the time of day. For more information, see Business Hours. |
| Wait | Wait component enables the system to automatically
route the message session to the connected component upon reply
timeout. For more information, see Wait. |
| Condition | Condition component allows routing the message session
based on logical expressions. For more information, see Condition. |
| Loop | Loop component allows a group of
components to be executed repeatedly based on the loop
strategy. For more information, see Loop. |
| Internal Data Ops | Internal Data Ops component allows you
to query data from PBX-native database. For more information,
see the following topics: |
| Email Sender | Email Sender component enables the
system to automatically send emails to a recipient via
configured email server and record the send logs, enabling
real-time notifications. For more information, see Email Sender. |
| Database Access | Database Access component allows you
to interact with database during a message flow. You can execute
SQL operations to retrieve or update data as needed. For more information, see Database Access. |
| HTTP Request | HTTP Request component allows you to
send HTTP requests to external web servers, enabling data
exchange with third-party services. For more information, see HTTP Request. |
| Transfer |
Transfer component allows you to transfer the message session to a specific destination to terminate the current message flow. For more information, see Transfer. |
| Close | Close component enables the system to
automatically disconnect the message session to terminate the
current message flow. For more information, see Close. |