Manage Hikvision Devices on iVMS-4200 Client
iVMS-4200 Client is a versatile device management software for Hikvision devices, which is designed to configure and manage the devices in a unified and intuitive manner.
Step 1. Install Hikvision iVMS-4200 Client
Download iVMS-4200 Client Software and install it on your local PC for Hikvision device management.
Step 2. Register and log in to Hikvision iVMS-4200 Client
- Run iVMS-4200 Client.
- Create a super user account.
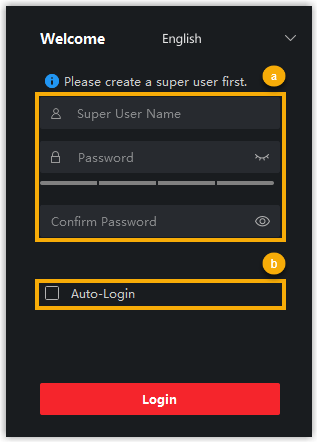
- Set the user name and password for the account.
- Optional: Select the checkbox of Auto-Login if needed.
- Click Login.The super user account is created and logged in.Note: Enter the user name and password next time you want to access iVMS-4200 Client.
Step 3. Activate intercom video devices
You need to activate Hikvision door station and indoor station first by setting a strong password for them to ensure the devices can work properly.
Note: Make sure the devices to be activated is in the same network as the
PC running the client.
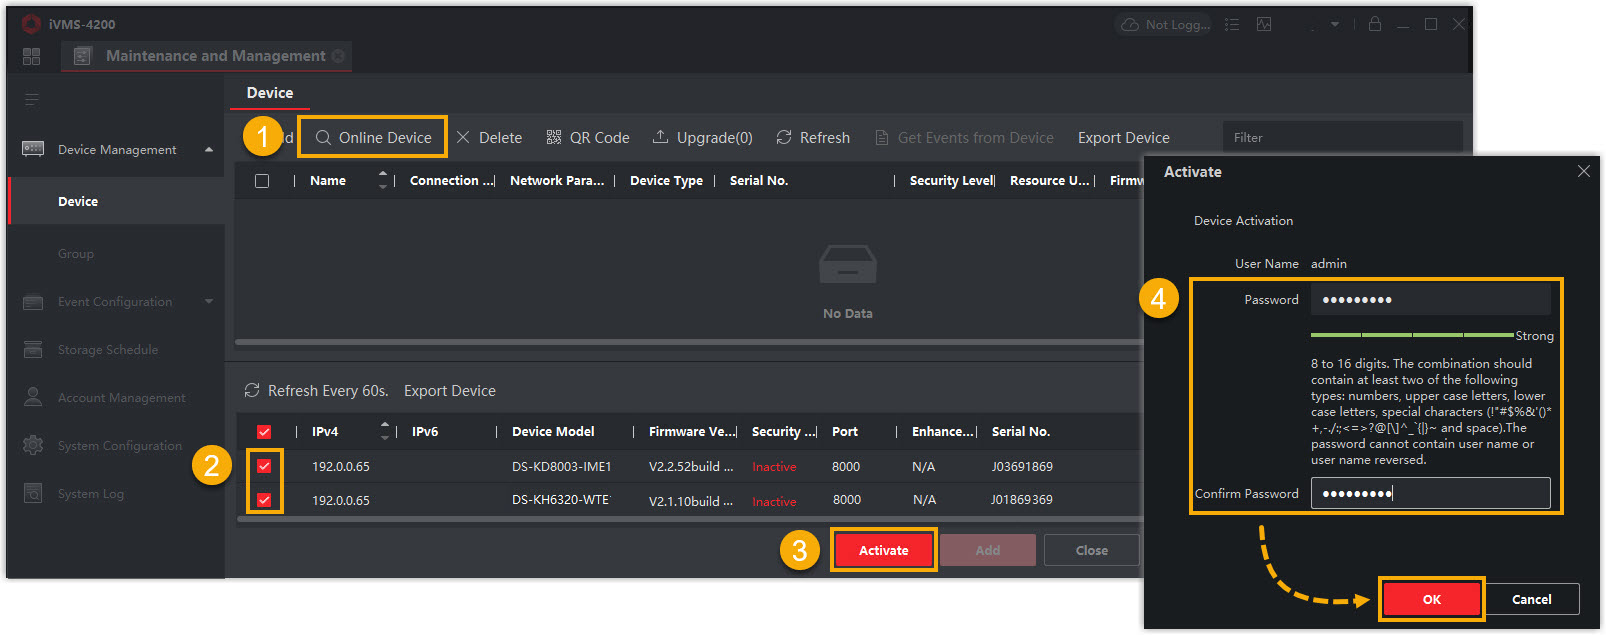
- On , click Online Device.
The detected online devices are displayed at the bottom of the page.
- Check device status (shown on Security Level column) and select Inactive devices.
- Click Activate.
- In the activation window, set a password for the device and click OK to activate it.
Step 4. Add devices to iVMS-4200 Client
After the devices are activated, you can add them to the client for device management.
- Configure the IP addresses for Hikvision devices.
- Click
 on the
Operation column beside the detected
devices.
on the
Operation column beside the detected
devices.
- Configure the IP address and gateway of the devices to ensure they
are on the same network segment as the PC running the iVMS-4200
client.In this example, the PC's IP address is 192.168.66.25, and the devices' IP addresses are set as follows:
- Door station: 192.168.66.42
- Indoor station: 192.168.66.43
- Click OK.
- Click
- Select the activated devices and click Add on the
bottom right.

- In the pop-up window, fill in the required information.
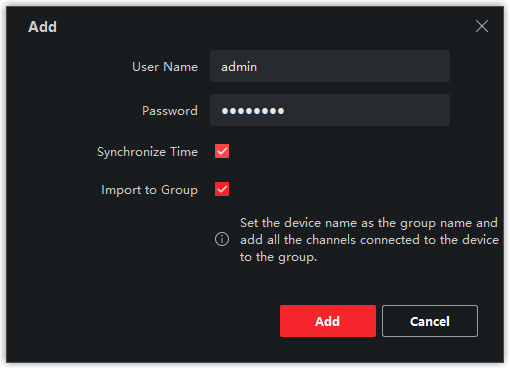
- User Name: Enter the user name of your account. In this example, enter admin.
- Password: Enter the device password.
- Synchronize Time: Check the option to synchronize the device time with the PC running the client.
- Import to Group: Check the option to create a group by the device name, and import all the channels of the device to this group.
- Click Add.
What to do next
Register Hikvision devices to Yeastar P-Series PBX System.