Connect Yeastar P-Series PBX System to an SQL Database Using Data Connector
This topic describes how to configure data connector on Yeastar P-Series PBX System to export PBX data to a third-party SQL database.
Requirements
The firmware version of Yeastar P-Series PBX System is 37.23.0.83 or later.
Prerequisites
- You have set up one of the following database systems:
- PostgreSQL
- MySQL
- Microsoft SQL
- You have created a database to store the PBX data to be synced.
Procedure
- Log in to PBX web portal, go to .
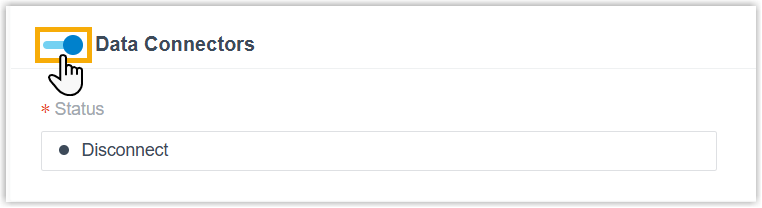
- Turn on the switch of Data Connectors.
- In the Database section, configure the connection to
a third-party database.
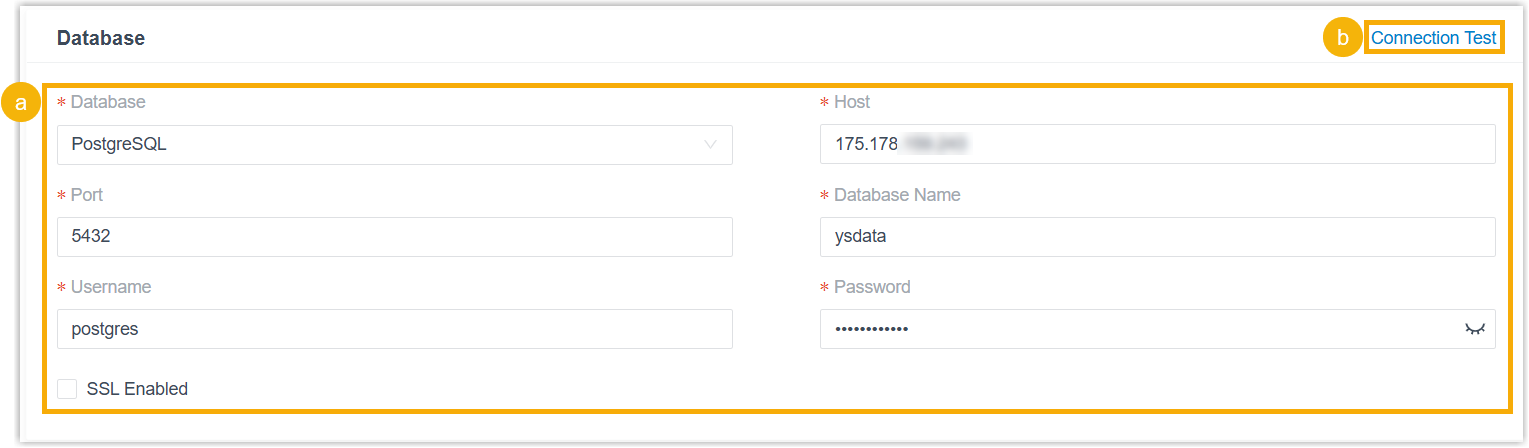
- Complete the following settings to establish the database connection.
Item Description Database Select a database type. - PostgreSQL
- MySQL
- Microsoft SQL
Host Enter the IP address or domain name of the host on which the database is installed. Port Enter the database port. Database Name Enter the name of the database. Username Enter the username used to connect to the database. Password Enter the password used to connect to the database. SSL Enabled Enable or disable SSL certificate verification. If enabled, click Browse to select and upload the SSL certificate.
- Optional: Click Connection Test to
verify that the PBX can connect to the database successfully.
If "Connection test successful" is displayed, it indicates the connection to database is successful.
- Complete the following settings to establish the database connection.
- In the Data Range section, select the data to
synchronize to the third-party database.
Data Description CDR Synchronize CDR list, call leg, and timeline data. Recording Logs Synchronize recording logs. Note: Recording files will not be synchronized.System Metric Synchronize the following system metrics displayed on the Dashboard. - Active Calls
- CPU Utilization
- Memory Usage
- Local Storage Usage
- Registered Extensions
- SIP Trunks Available
- Linkus Client Logins
Note: The system synchronizes the data captured at the time of synchronization.Call Notes Synchronize call disposition and remark content. Report Data Synchronize call report data. - In the Sync Configuration section, configure the
synchronization frequency and data cleanup policy.
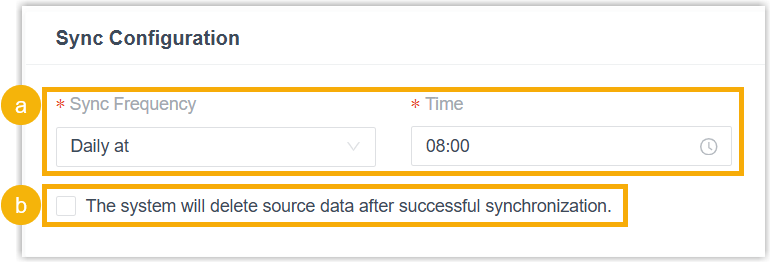
- In the Sync Frequency drop-down list, select
how often data will be synchronized to the third-party
database.Note: The system synchronizes data at the selected interval based on the default time zone.
- Optional: To delete the synced data from PBX once
synchronization is complete, select the checkbox of The
system will delete source data after successful
synchronization.Note: If source CDR is deleted, you can NO LONGER access the associated call records from PBX.
- In the Sync Frequency drop-down list, select
how often data will be synchronized to the third-party
database.
- Perform the initial data synchronization to the third-party database.
- Click Sync Now.
- In the pop-up window, click OK, then click
Confirm.
Wait for the data synchronization to complete.
Result
The integration status is displayed as Connected, indicating that the connection to the third-party database is established and one-way data synchronization to the database is working properly.