How to enable uaCSTA feature of Fanvil IP phones?
Requirements
To perform all the supported control operations for Fanvil phones, make sure that
the following requirements are met:
- Your Fanvil phone model and firmware version work for Yeastar CTI.
- uaCSTA feature is enabled on the PBX.
Enable uaCSTA feature by Auto Provisioning
If the administrator uses PBX's Auto Provisioning to configure a phone, the phone's
uaCSTA feature will be automatically enabled.
Note: We recommend that
you use Auto Provisioning to configure phones.
- Log in to the PBX web page, and go to Auto Provisioning.
- Click Device List tab.
- Select a phone, and click
 .
. - Optional: Configure phone settings according to your needs.
- Click Save.
The uaCSTA feature of Fanvil IP phone will be automatically enabled.
Enable uaCSTA feature on Phone page
The administrator can log in to phone page to manually enable uaCSTA feature.
We take Fanvil X7 as an example to show you how to enable uaCSTA feature on Fanvil IP phone.
- Open web browser, enter the IP phone's IP address.
- On the pop-up window, enter username and password to access the IP phone.
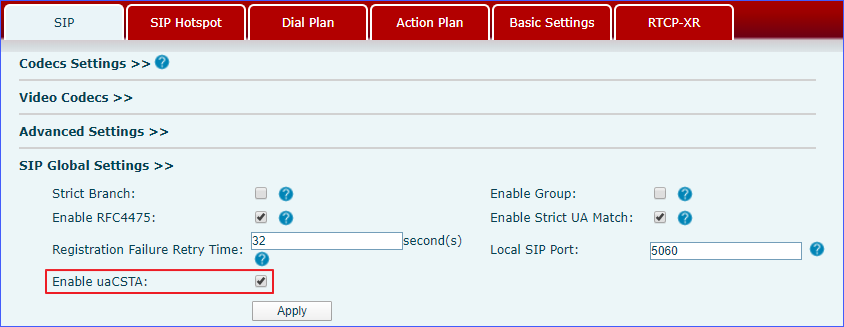
- Enable uaCSTA feature of Fanvil IP phone.
- Go to .
- Select the checkbox of Enable uaCSTA.
- Click Apply.
- Configure uaCSTA feature on Fanvil IP phone.
- Go to .
- In the Specific Server Type field, choose COMMON.
- In the textbox of uaCSTA Number, enter the
extension number which will be applied in CTI mode.

- Click Apply.