Add DID Numbers to a Trunk
This topic describes how to add DID numbers to a SIP trunk on Yeastar Central Management to ensure proper routing of inbound calls.
Prerequisites
- You have purchased DID numbers from your ITSP.
- You have created shared trunks on Yeastar Central Management. For more information, see the following topics:
Supported methods
You can add DID numbers to a trunk via either of the following methods:
- To add a single DID number or a range of DID numbers, you can add them directly from the web portal. For more information, see Add DID numbers from web portal.
- To add multiple non-sequential DID numbers, you can add the numbers in a XLS or XLSX file and import it into the system for improved efficiency. For more information, see Add DID numbers via file import.
Add DID numbers from web portal
- Log in to Yeastar Central Management, go to .
- Click Add.
- Add DID number(s) according to your need.
- To add a single DID number, do as follows:
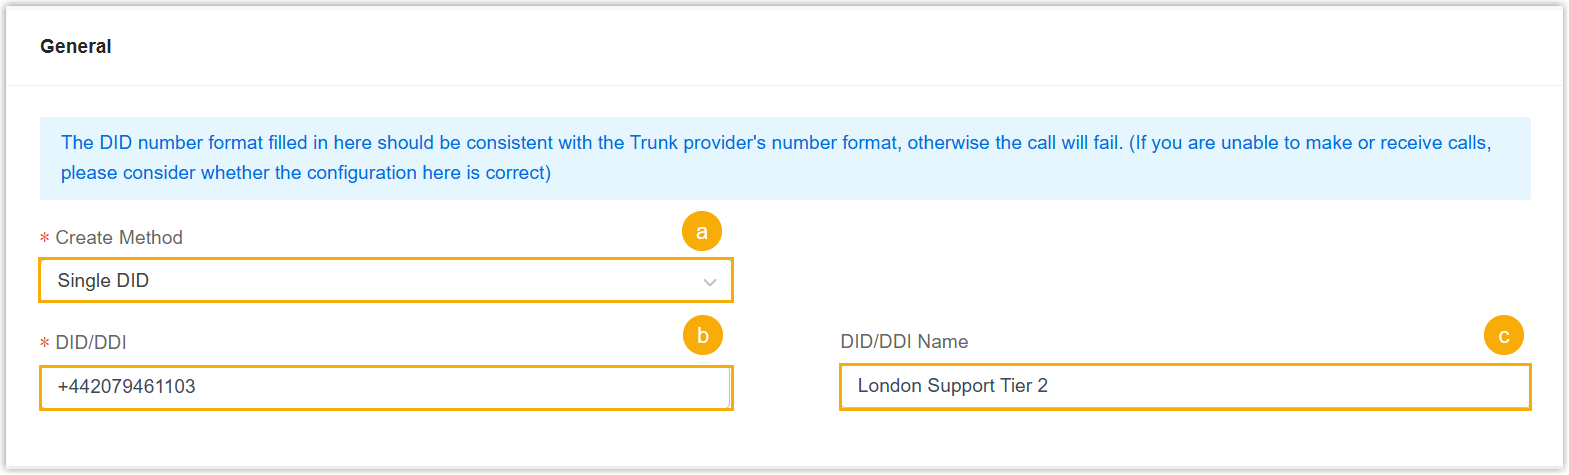
- In the Create Method drop-down list, select Single DID.
- In the DID/DDI field, enter the DID
number in the format of
+xxxorxxx.Important: The DID number format you enter must be consistent with the format provided by your ITSP, otherwise calls will fail. - Optional: In the DID/DDI
Name field, enter a name to distinguish
inbound calls by DID numbers.
When the DID number is dialed, the name will be displayed on the called party's device.
- To add a range of DID numbers, do as follows:
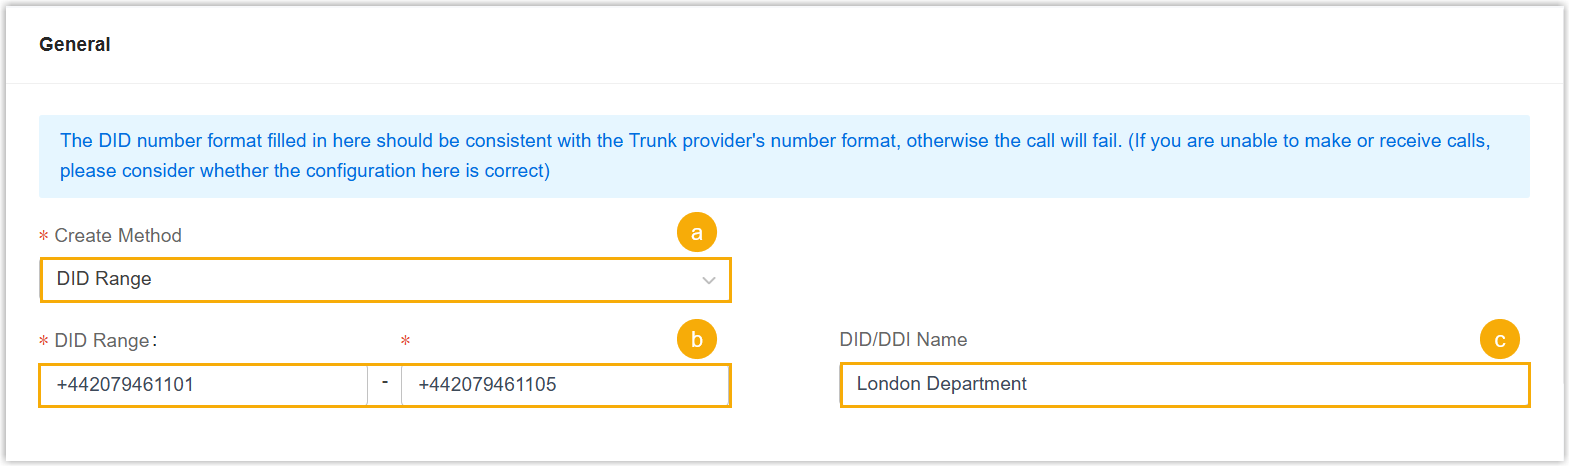
- In the Create Method drop-down list, select DID Range.
- In the DID Range fields, enter the
start number and end number of the DID range.Important: The DID number format you enter must be consistent with the format provided by your ITSP, otherwise calls will fail.
- Optional: In the DID/DDI
Name field, enter a name to distinguish
inbound calls by DID numbers.
When the DID number is dialed, the name will be displayed on the called party's device.
- To add a single DID number, do as follows:
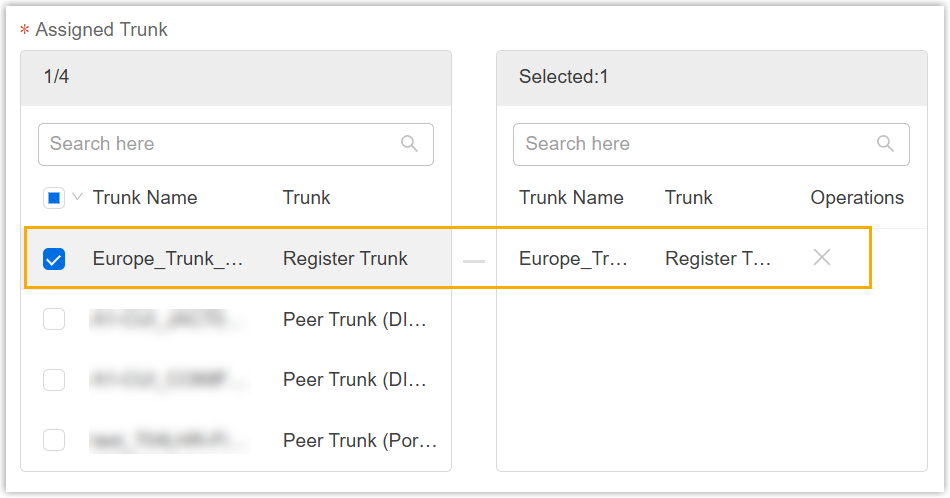
- In the DID Routing section, select the desired
trunk(s) from the Assigned Trunk box to associate
them with the DID number(s).
- Click Save.
Add DID numbers via file import
- Log in to Yeastar Central Management, go to .
- At the top of the list, click Import.
- In the pop-up window, click Download Template
File.
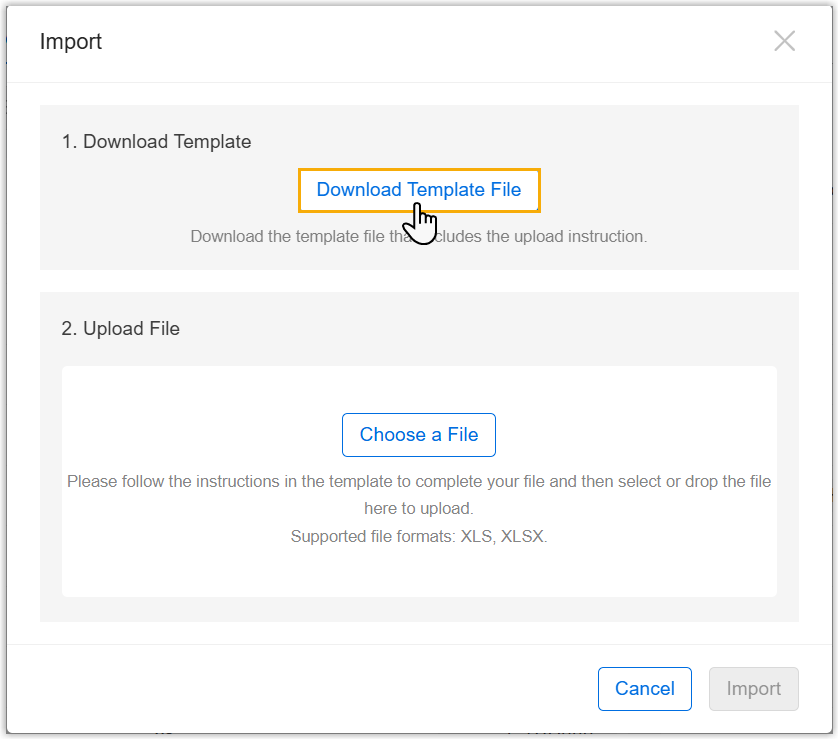
A XLSX file is downloaded to your computer.
- Refer to the table below to add your DID numbers and assign trunks in the
template file.Important:
- If the number needs to include a
+character, set the cell format to Text before entering the number. - After editing, make sure to delete the annotation rows; otherwise, the import will fail.
Parameter Required Description DID Yes Enter the DID number in the format of +xxxorxxx. Only numbers and the "+" character are allowed.Important: The DID number format you enter must be consistent with the format provided by your ITSP, otherwise calls will fail.DID Name No Enter a name to distinguish the DID number. Note: The length of the name should not be greater than 127 characters.Assigned Trunk Yes Enter the name of the shared trunk to be associated with the DID number. Note: Use,to separate multiple trunks. - If the number needs to include a
- Import the template file.
- On Yeastar Central Management, go to .
- At the top of the list, click Import.
- In the pop-up window, click Choose a File,
then select the file to upload.
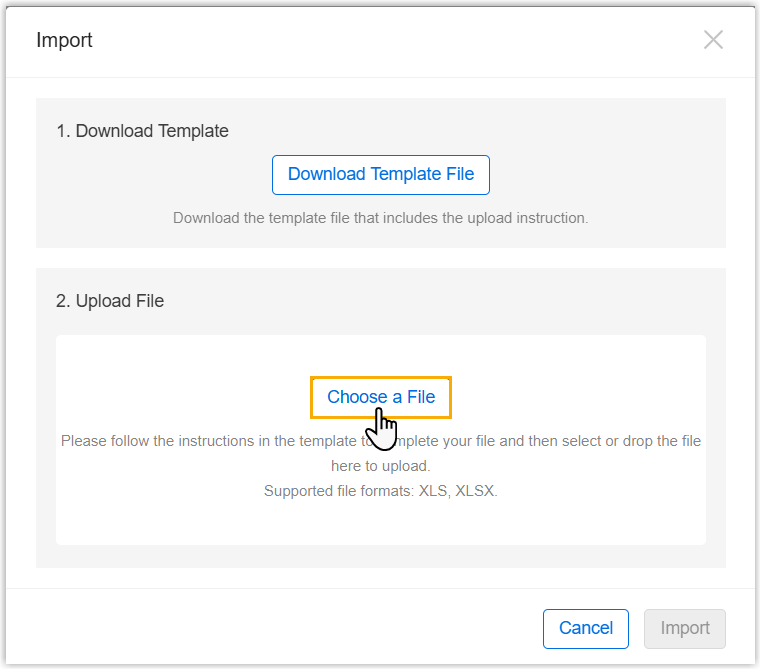
- Click Import.
The DID numbers in the template file will be displayed in the list.