Install Yeastar Visitor Screen DS7510
This topic describes the hardware overview of Yeastar Visitor Screen DS7510 and gives instructions on how to install, power on, and network a Yeastar Visitor Screen DS7510.
Package contents
Before you begin to install Yeastar Visitor Screen, make sure all of the following items are included in the product package.

Hardware overview
 |
|
Install Visitor Screen DS7510
 1. Plug an Ethernet cable into the Ethernet port of the Visitor Screen. Then lift the Visitor Screen and align its VESA holes with the VESA desktop stand. |
 2. Fix the Visitor Screen to the VESA desktop stand by tightening the screws. |
Power supply and network connection
Yeastar Visitor Screen DS7510 can be powered via a PoE injector, PoE switch, or a DC power adapter. Choose one of the following methods to power up the Visitor Screen and connect it to the Internet.
- PoE injector power supply and network connection
- PoE switch power supply and network connection
- DC power adapter power supply and network connection
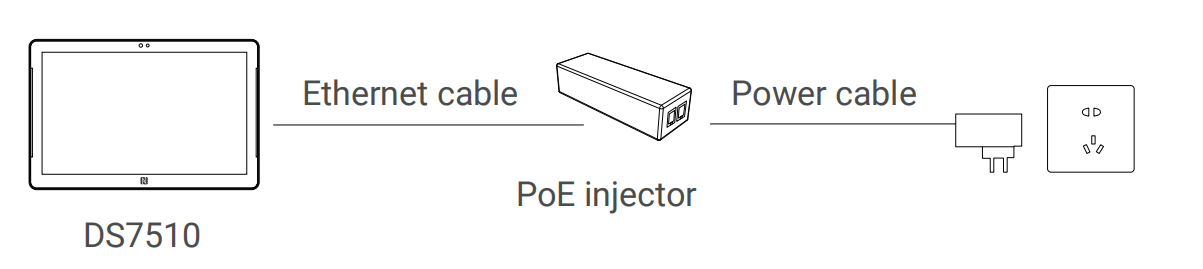
- PoE injector power supply and network connection
-
- Powere on the device via a PoE injector.
-
Connect the Ethernet cable of the Visitor Screen to the Data+Power port of the PoE injector.
-
Plug the power cable from PoE injector to a power outlet.
-
- Choose one of the following methods to
connect the device to the Internet.
- Wireless network connection:
-
After the Visitor Screen boots up, tap Configure the System Network on the screen.
-
Enable Wi-Fi and connect the device to a Wi-Fi network.
-
- Wired network connection: Plug an Ethernet cable into the DATA port of PoE injector and connect it to the switch.
- Wireless network connection:
- Powere on the device via a PoE injector.
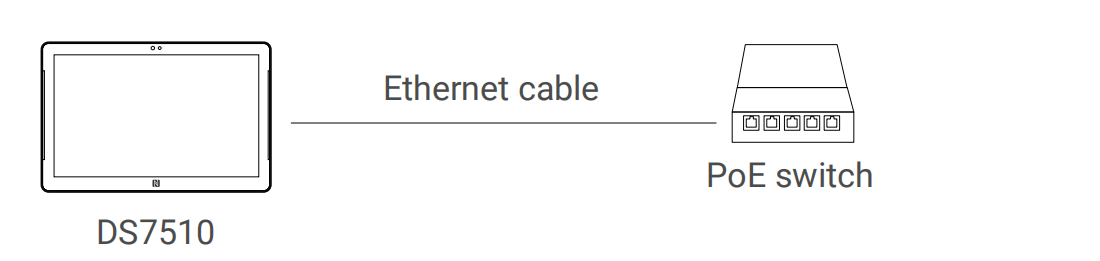
- PoE switch power supply and network connection
- Connect the Ethernet cable of the Visitor Screen to a PoE switch. The
Visitor Screen is powered on and connected to the Internet via the PoE
switch.
- DC power adapter power supply and network connection
-
- Connect the DC power jack of the Visitor Screen and the power outlet
with a DC power adapter (3.5 X 1.3 mm plug).
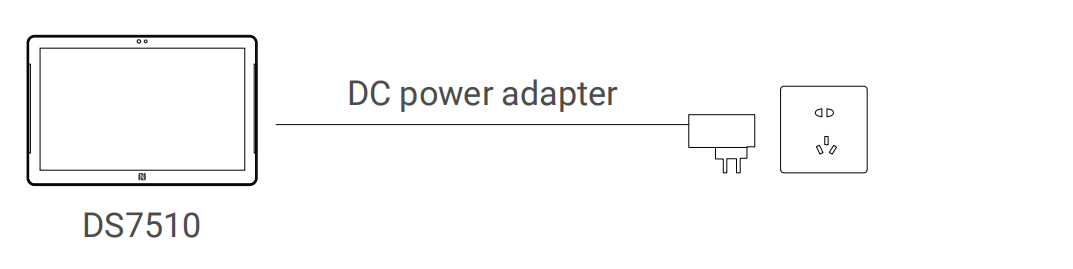
- Choose one of the following methods to connect the device to the
Internet.
- Wireless network connection:
- After the Visitor Screen boots up, tap Configure the System Network on the screen.
- Enable Wi-Fi and connect the device to a Wi-Fi network.
- Wired network connection: Connect the Ethernet cable of the Visitor Screen with a switch.
- Wireless network connection:
- Connect the DC power jack of the Visitor Screen and the power outlet
with a DC power adapter (3.5 X 1.3 mm plug).