Register Algo 8201 SIP Intercom with Yeastar S-Series VoIP PBX
This guide describes the configuration steps required for Algo 8201 SIP Intercom to interoperate with Yeastar S-Series VoIP PBX.
Below is a guideline of how to register an extension on Algo 8201 SIP Intercom. You may need to configure the other settings of the Algo 8201 SIP Intercom depending on your VoIP solution.
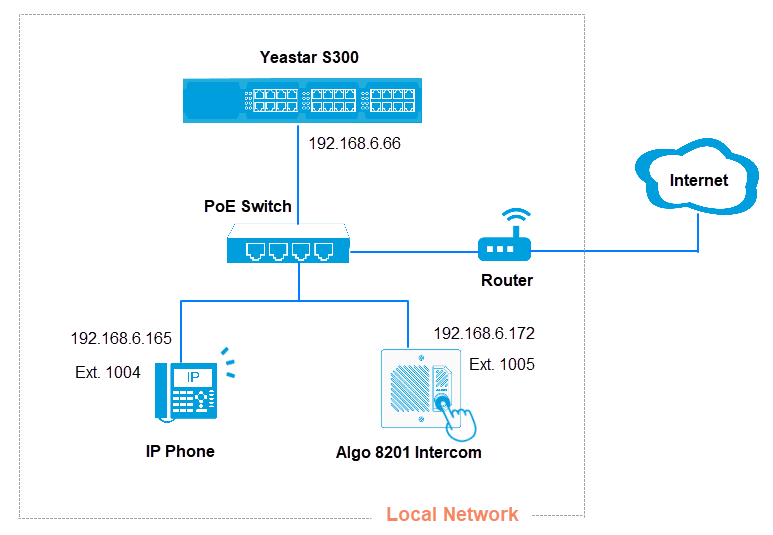
Network Topology
The following diagram shows how the testing network is configured for reference.
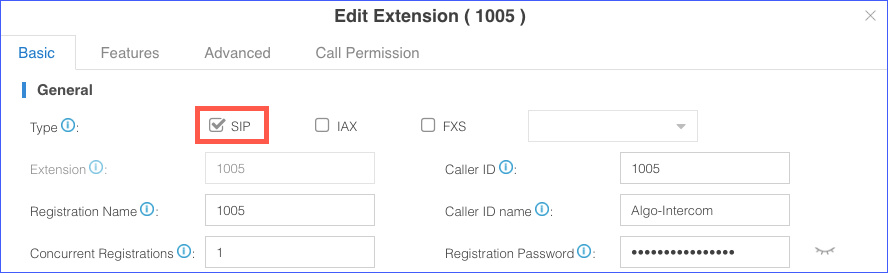
Yeastar S300 configuration
Add a SIP extension on Yeastar S300, and provide the extension details in Algo 8201 web page.
- Log in Yeastar S300 web interface, go to .
- Add an extension, this extension will be registered as the Algo Ring extension.
- Click Add.
- Leave the default settings or change the General settings according to your needs.
- Click Save and
Apply.
Algo 8201 SIP Intercom configuration
- Access the Algo 8201 web interface, enter the password, and click
Login.
The default password is algo.
- Go to Basic Settings, enter the following
settings:
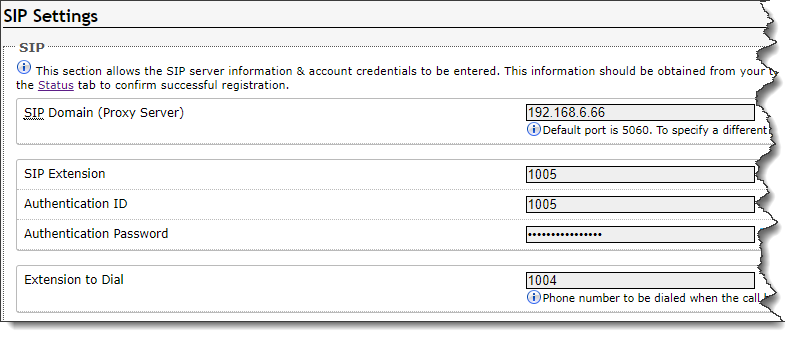
- SIP Domain (Proxy Server): Enter the IP address of Yeastar S-Series VoIP PBX.
-
SIP Extension: Enter the extension number.
-
Authentication ID: Enter the extension's Registration Name.
-
Authentication Password: Enter the extension's Registration Password.
- Extension to Dial: Enter an extension of Yeastar S-Series VoIP PBX. When a visitor presses the blue call button on Algo 8201, the extension will be dialed.
- Click Save.
- Go to to check the registration status.
If the extension is registered successfully, the status will display "Successful".

Result:
- When a visitor presses the blue call button on the Algo 8201 SIP Intercom, the extension 1004 will ring.