Register Akuvox R20 Series Doorphone with Yeastar S-Series VoIP PBX
Akuvox R20 Series are SIP-compliant, hands-free video door phones, which can be connected with Akuvox indoor monitors for remote access controlling and monitoring. This topic describes how to register Akuvox R20 Series doorphone with Yeastar S-Series VoIP PBX in local network.
Procedure
Step1. Configure Yeastar S-Series VoIP PBXStep1. Configure Yeastar S-Series VoIP PBX
- Check the registration
information
of the desired extension.
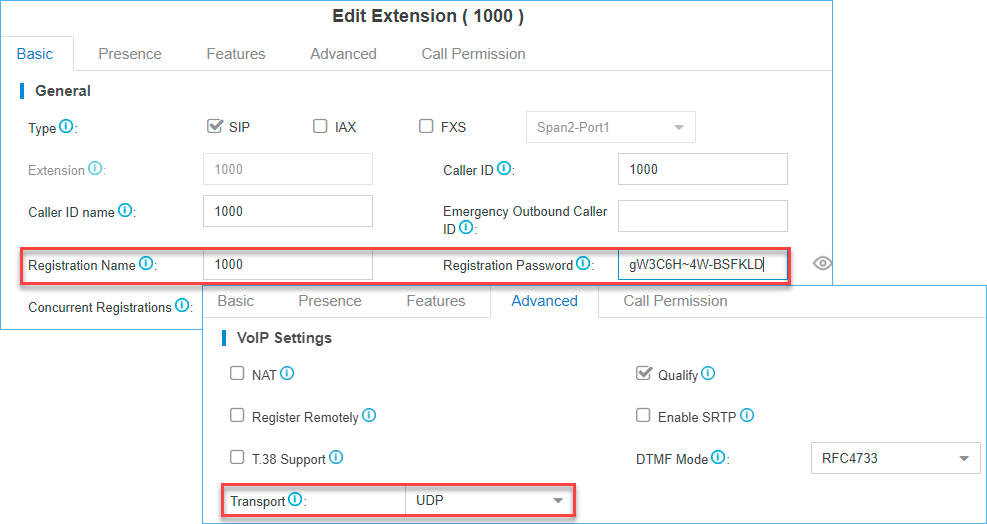
- Log in to the PBX web interface, go to .
- Click
 beside the desired extension to check detailed extension
information. In this example, the extension to be registered is
1000, whose detailed information is shown below:
beside the desired extension to check detailed extension
information. In this example, the extension to be registered is
1000, whose detailed information is shown below:
- Extension: 1000
- Registration Name: 1000
- Registration Password: gW3C6H~4W-BSFKLD
- Transport:
UDP
- Modify codec configuration of Yeastar S-Series VoIP PBX.
- Go to , select H264,
u-law, and
a-law from Available
box to Selected
box.
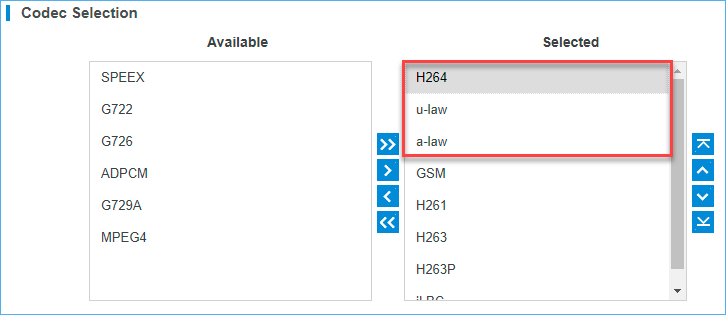
- Click Save and Apply.
- Go to , select H264,
u-law, and
a-law from Available
box to Selected
box.
Step2. Register Akuvox doorphone
- Connect
the doorphone to the same network as the PBX server's and then power
on.
The doorphone starts, and automatically obtains an IP address from the DHCP server.
- Long press the doorphone call button to check the IP address.
- Open a web browser, enter the doorphone IP address, then enter username and
password to log in.
- Username: admin
- Password: admin
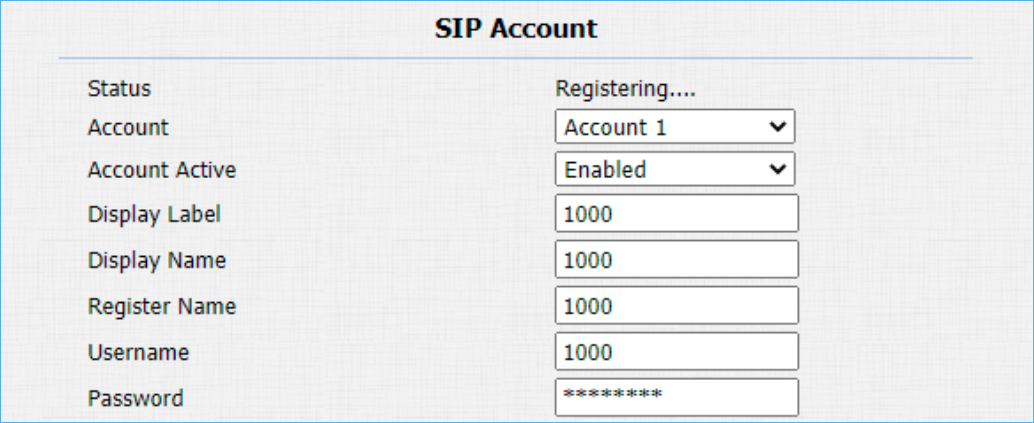
- Go to , configure the SIP account and SIP server parameters of the doorphone.
- Fill in the SIP account information.
- Account: Select the account to be configured from the drop-down list.
- Account Active: Select Enabled.
- Display Label: Optional. Enter the label to be displayed on the doorphone LCD screen.
- Display Name: Enter the name to be displayed when sending calls. In this example, enter 1000.
- Register Name: Enter the extension registration name. In this example, enter 1000.
- Username: Enter the extension number. In this example, enter 1000.
- Password: Enter
the
extension registration password. In this example, enter
gW3C6H~4W-BSFKLD.
- Fill in the server information.
- Server IP: Enter the IP address of the Yeastar S-Series VoIP PBX. In this example, enter 192.168.6.31.
- Port: Enter the SIP port of the
PBX server. The default port is 5060.Note: If you have changed the PBX SIP port, log in to the PBX web interface, go to to check the UDP port.
- Registration Period: The
registration will expire after a registration period. In
this case, the doorphone will try to re-register
automatically.

- Fill in the SIP account information.
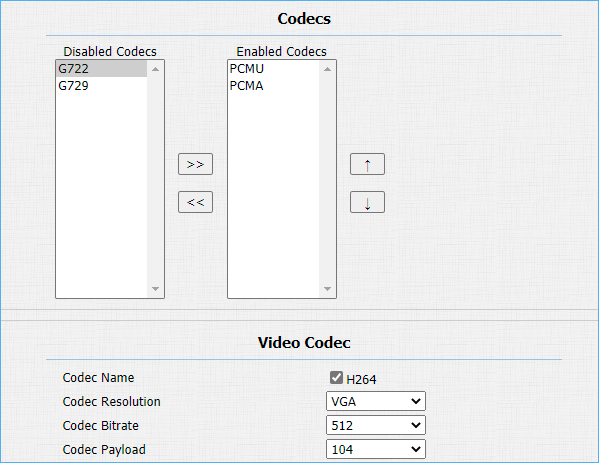
- Configure the audio
and
video codec of the doorphone.
- Go to .
- In the Codecs section, select PCMU and PCMA from Disabled Codecs to Enabled Codecs section.
- In the Video Codec section, select the checkbox of H264.
Note:- Make sure that the selected codecs of the doorphone are same as the PBX server's, otherwise there will be problems during communication.
- PCMU is also called u-law while PCMA is also called a-law.
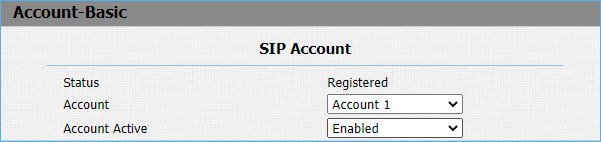
- Click Submit, check the doorphone registration
status.
If the doorphone has registered with Yeastar S-Series VoIP PBX successfully, the doorphone status will display "Registered".