Step 4. Auto Provision Phones
After migrating phones to Yeastar Phone System, you need to take further actions to make the phones provisioned. This topic takes Fanvil X4U (firmware: 2.4.13) as an example to introduce how to provision phones with Yeastar Phone System.
Supported devices
| Vendor | Model | Supported Auto Provisioning Method |
|---|---|---|
| Fanvil |
|
|
| GrandStream |
|
|
| Htek | UC902, UC902S, UC903, UC912, UC912E, UC912G, UC921, UC923, UC924, UC924E, UC926, UC926E |
|
| Polycom | VVX 101, VVX 150, VVX 201, VVX 250, VVX 301, VVX 310, VVX 311, VVX 350, VVX 401, VVX 410, VVX 411, VVX 450, VVX 501, VVX 601 |
|
| Snom |
|
|
| Yealink |
|
|
Prerequisites
The prerequisites vary based on your Yeastar Phone System.
- Software Edition
- The prerequisites vary depending on the phones' original provisioned method
on 3CX.
- For phones originally provisioned via Local LAN /
VPN method on 3CX, the device and network deployment
differs depending on whether the Prioritize Onsite Proxy for Auto Provisioning option
is enabled for migration, as the following table
shows:
Prioritize Onsite Proxy for Auto Provisioning Prerequisites Enabled - The Yeastar Onsite Proxy is deployed in the same subnet as the phones and connected to the Software Edition.
- The phones support PnP provisioning.
Disabled - The phones and the Software Edition must be in the same LAN subnet.
- The phones support PnP provisioning.
- For phones originally provisioned via SBC / Router
phone method on 3CX, the remote access settings
differ depending on your configured PBX network settings, as the following
table shows:
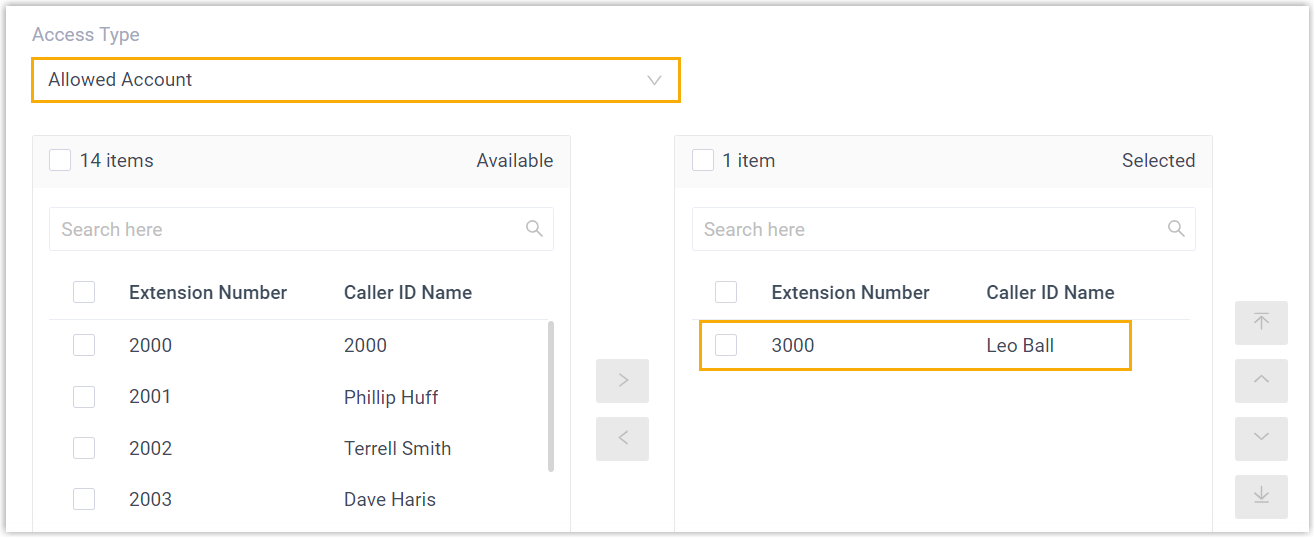
Network Prerequisites Yeastar FQDN - Grant remote SIP
access permission for the migrated extensions
associated with the phones, so that the
extension can be registered remotely via FQDN
(Path: ).
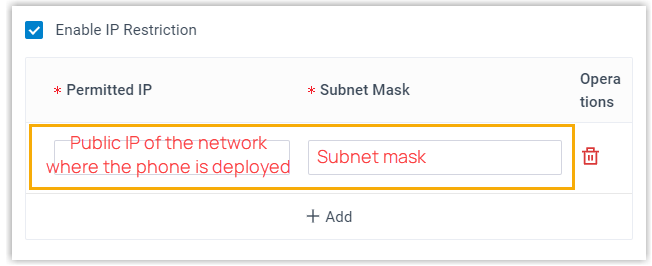
- If you have enabled IP
restriction for Yeastar FQDN remote Web
access, make sure that you have added the
phone's IP address to the permitted IP list.
(Path: ).
Public IP and Ports - Make sure RTP ports, SIP port, and Web Server port must be forwarded. For more information, see Configure Network for Remote Access by Public IP and Ports.
- Enable NAT for the migrated extensions
associated with the phones (Path: Extension and Trunk > Extension >
 > Advanced > VoIP Settings > NAT).
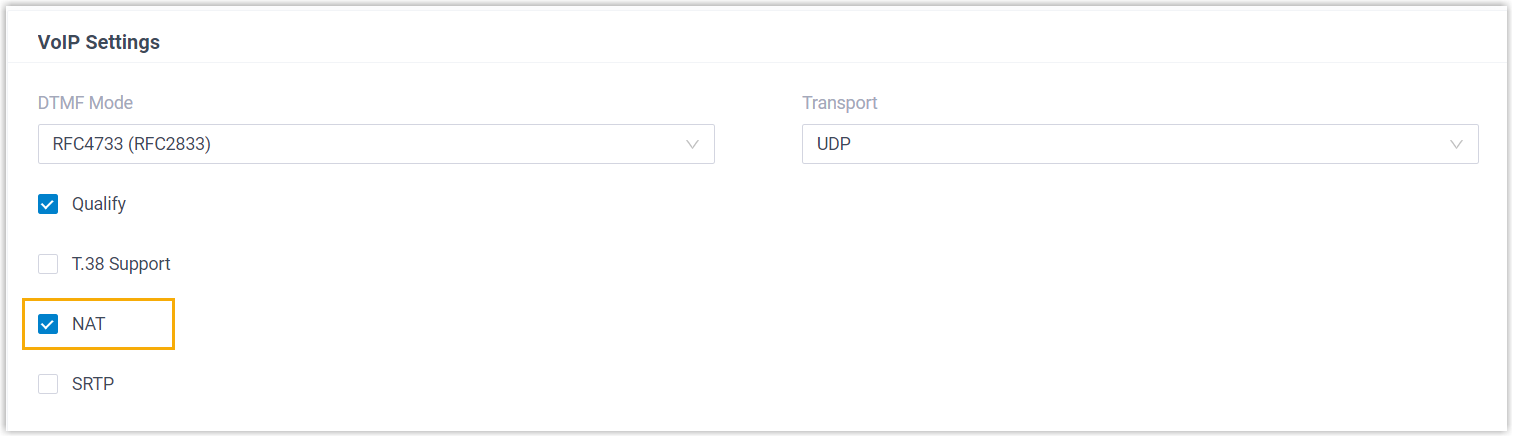
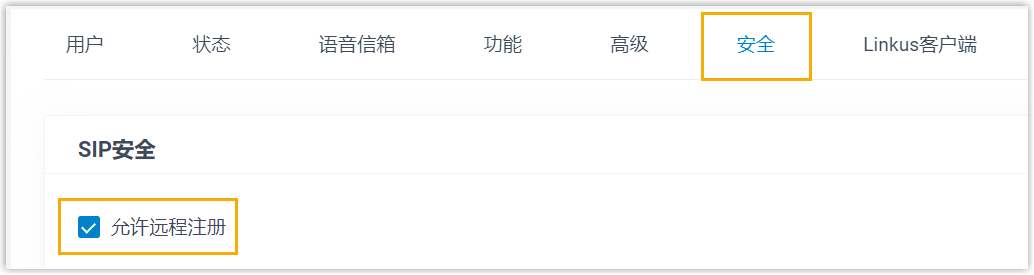
- Enable Remote Registration feature for the
migrated extensions associated with the phones
(Path: Extension and Trunk > Extension > > Security > SIP Security > Allow Remote Registration).
- Grant remote SIP
access permission for the migrated extensions
associated with the phones, so that the
extension can be registered remotely via FQDN
(Path: ).
- For phones originally provisioned via Local LAN /
VPN method on 3CX, the device and network deployment
differs depending on whether the Prioritize Onsite Proxy for Auto Provisioning option
is enabled for migration, as the following table
shows:
- Cloud Edition
-
Note: The following device and network deployment is required only if the Prioritize Onsite Proxy for Auto Provisioning option is enabled for migration.
- The Yeastar Onsite Proxy is deployed in the same subnet as the phones and connected to the Cloud Edition.
- The phones support PnP provisioning.
Procedure
1. Obtain provisioning link from Yeastar Phone System
Before migrating IP phones, obtain the provisioning link that will serve as the new provisioning server URL to be bound to the phones.
- Log into Yeastar Phone System, go to .
- Click
beside any phone.
- In the Provisioning
Link field, click
 to copy the provisioning link and save it for
later use.Note: The provisioning link is unique for each Yeastar Phone System.
to copy the provisioning link and save it for
later use.Note: The provisioning link is unique for each Yeastar Phone System.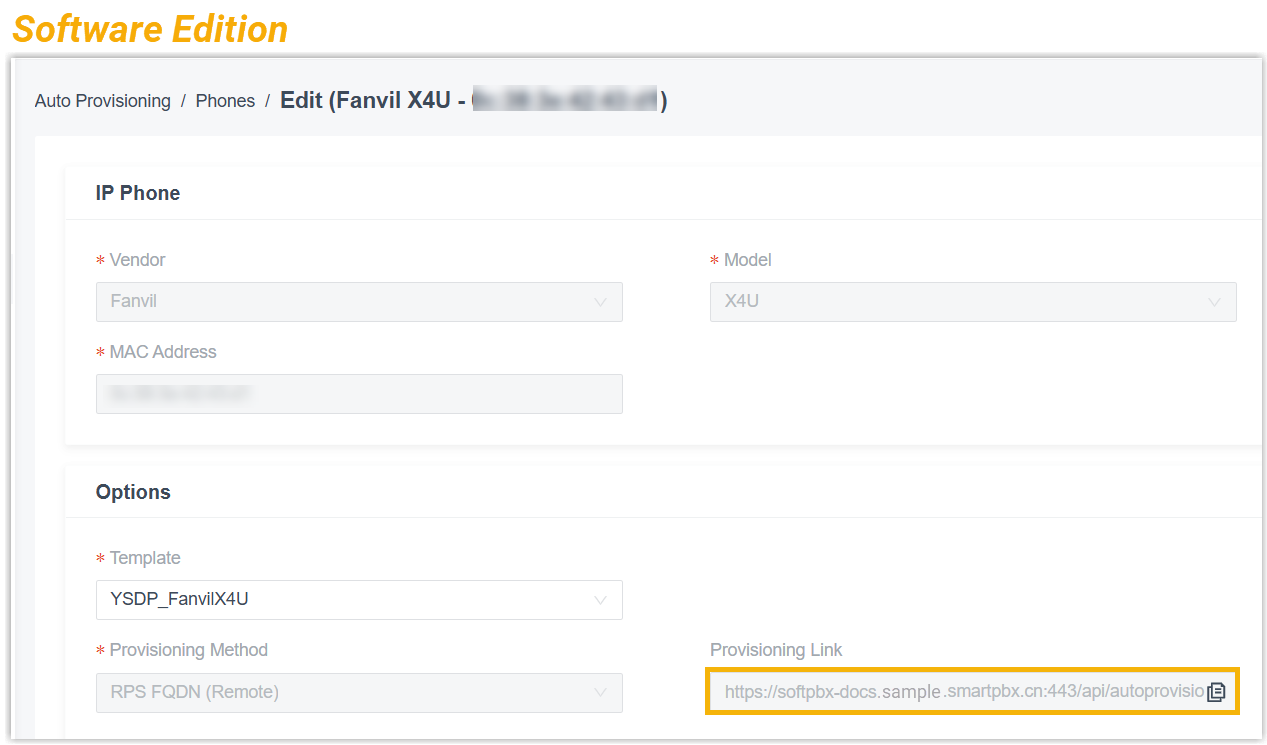

2. Migrate IP phones from 3CX to Yeastar Phone System
- If the phones are originally provisioned via a 3CX custom template, migrate them in bulk by modifying the template.
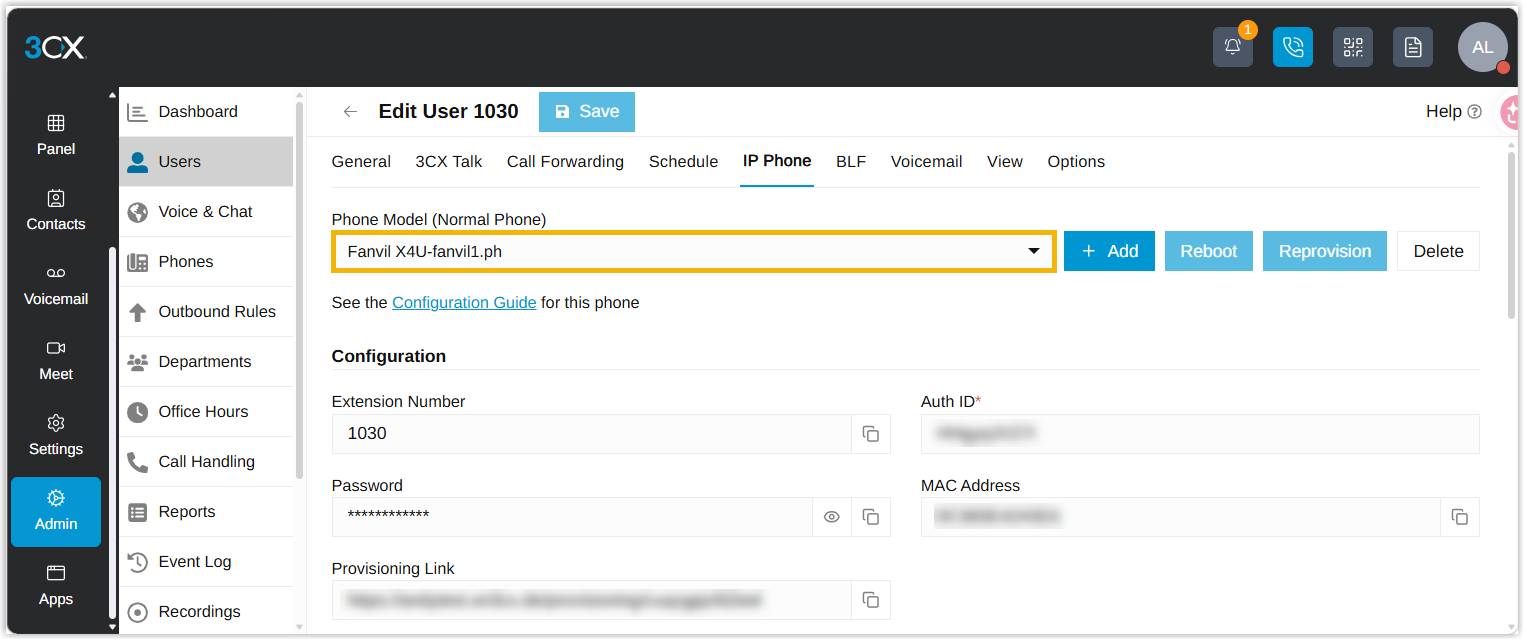
- If the phones are originally provisioned via a 3CX default template, migrate them one by one by configuring the provisioning server URL on each individual phone.
If the value displayed in Phone Model (Standard Phone) follows the format [Device Model]-[Custom Name].ph, this indicates the phone is provisioned via a custom template. Otherwise, it uses the default template.
- Reprovision phones originally provisioned via a 3CX custom provisioning template in bulk
-
- Log in to 3CX management console.
- Modify the desired custom provisioning template.
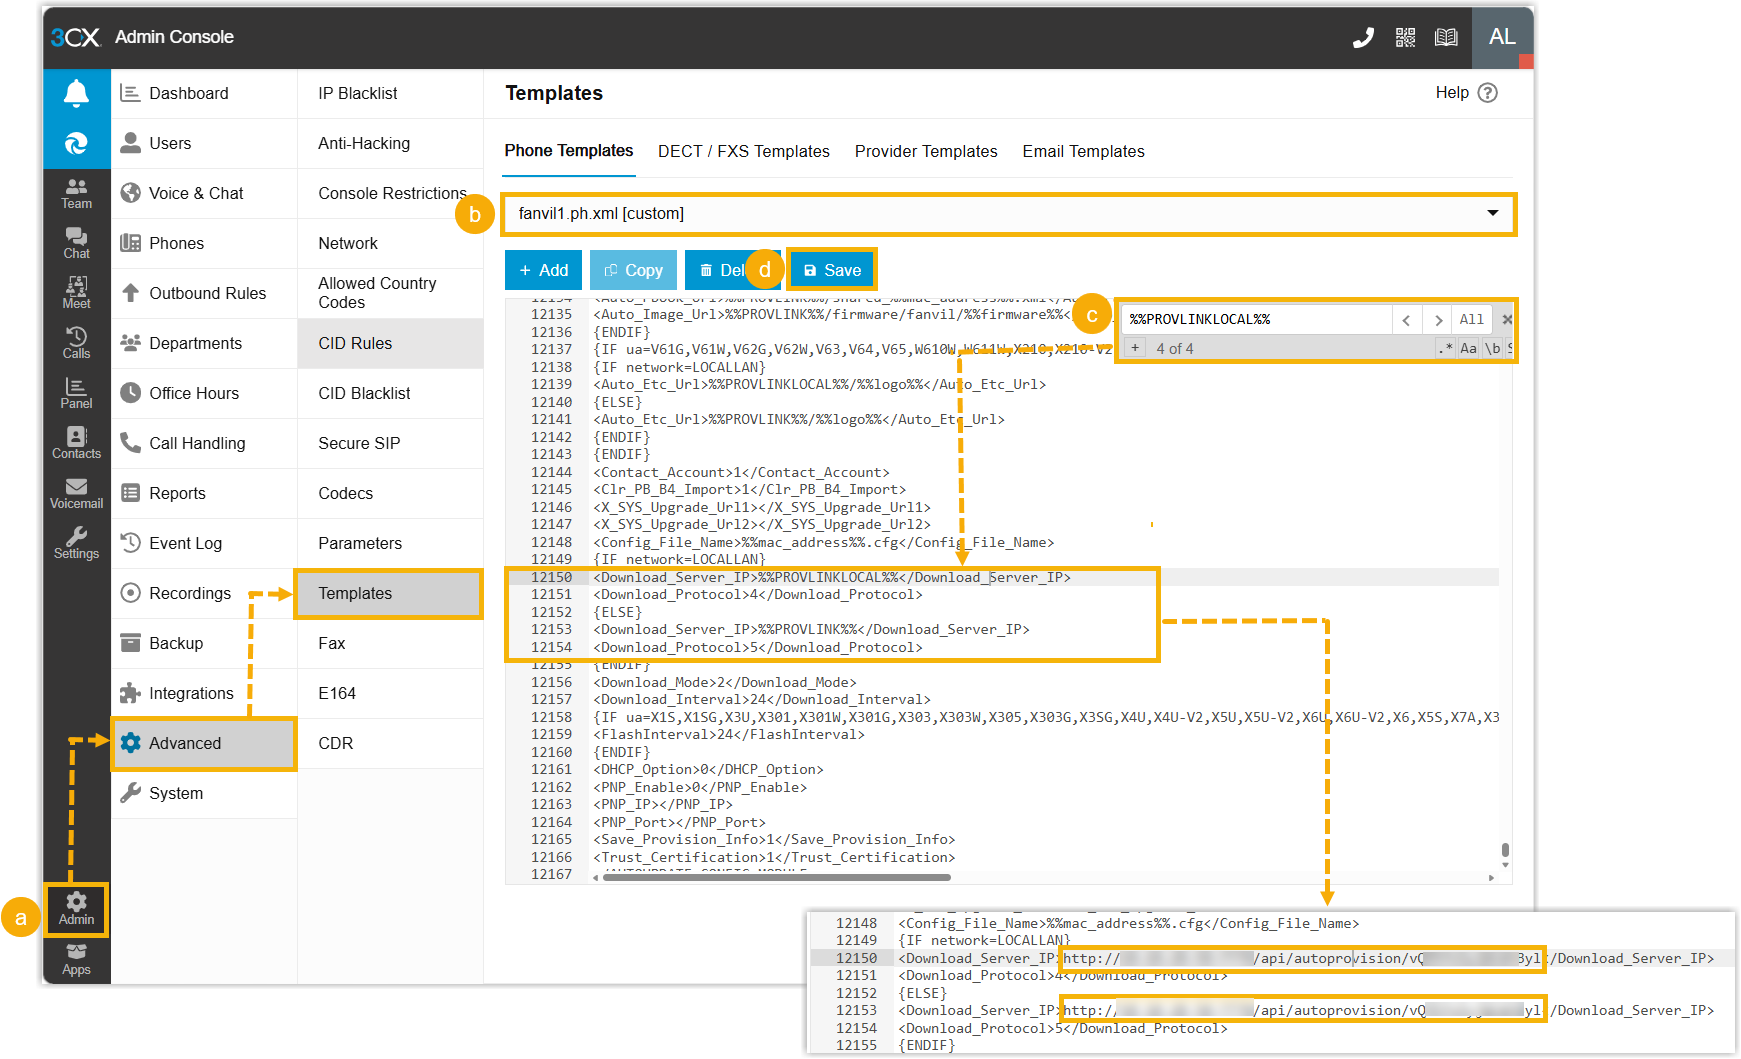
- Go to .
- In the Phone Templates drop-down list, select the custom provisioning template currently used by your phones.
- In the template editing text box,
locate the provisioning server URLs used to download
configuration files, and replace them with the provisioning link obtained from Yeastar Phone
System.In this example, search for "%%PROVLINKLOCAL%%" and "%%PROVLINK%%", replace them with provisioning link.Note: There may be multiple matching results in the template. Please identify and update the provisioning server URL accordingly.
- Click Save.
- Reprovision the phones.
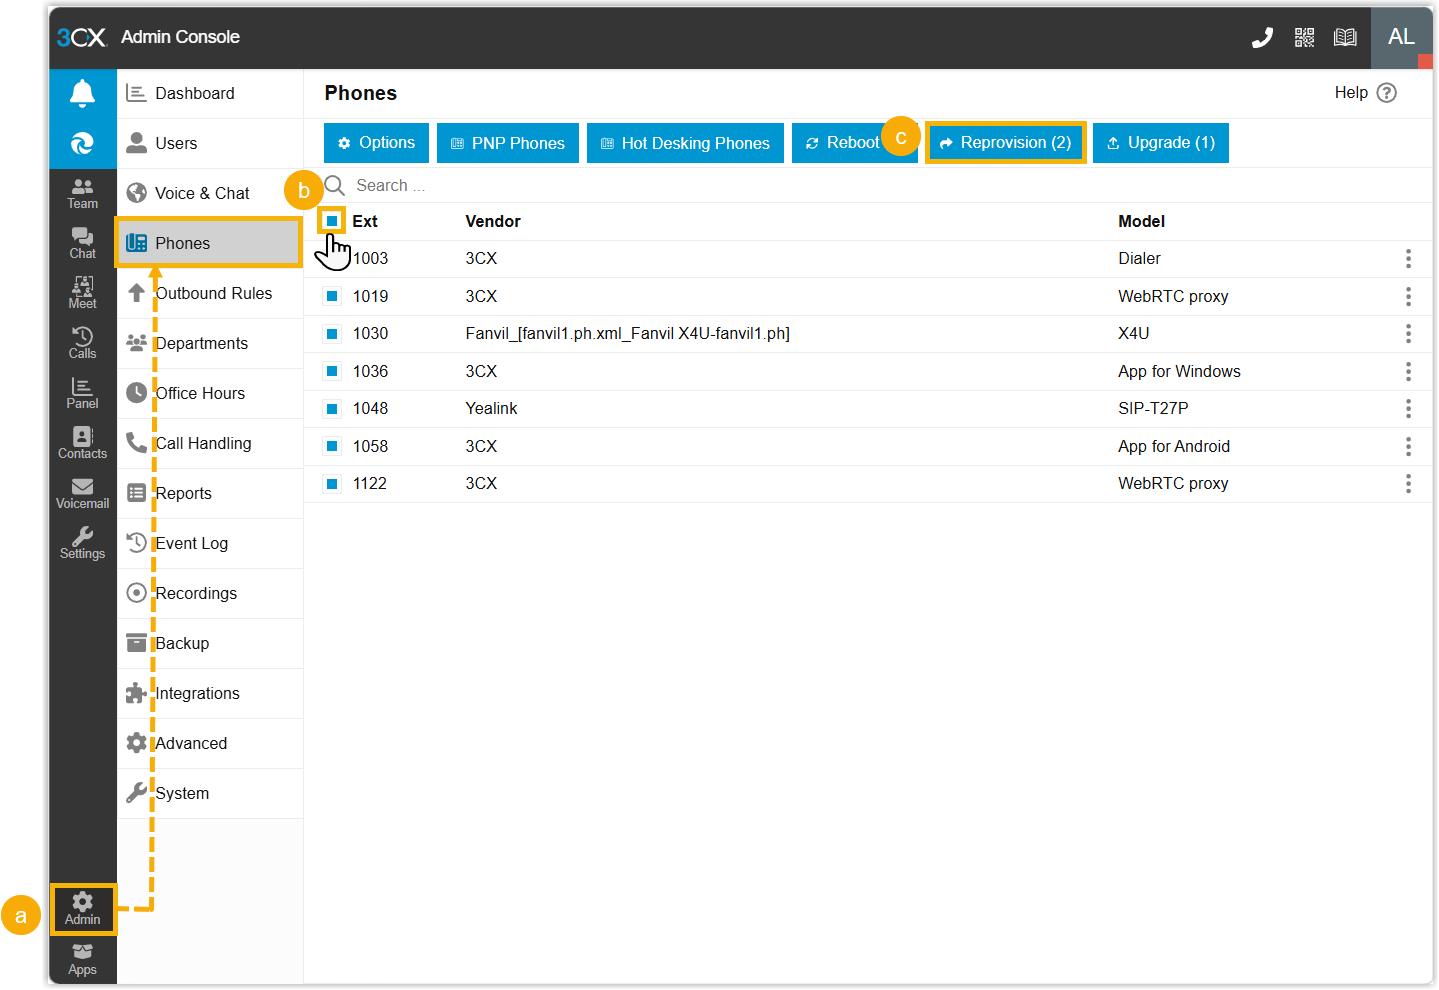
- Go to .
- Select all IP phones.
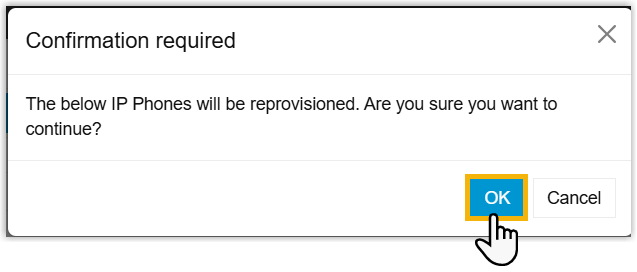
- Click Reprovision.
- In pop-up confirm window, click
OK.
- Reboot the phones.
- Reprovision an IP phone originally provisioned via a 3CX default provisioning template
-
- Log in to the web interface of the desired phone.
- Replace the provisioning server URL used to download configuration files.

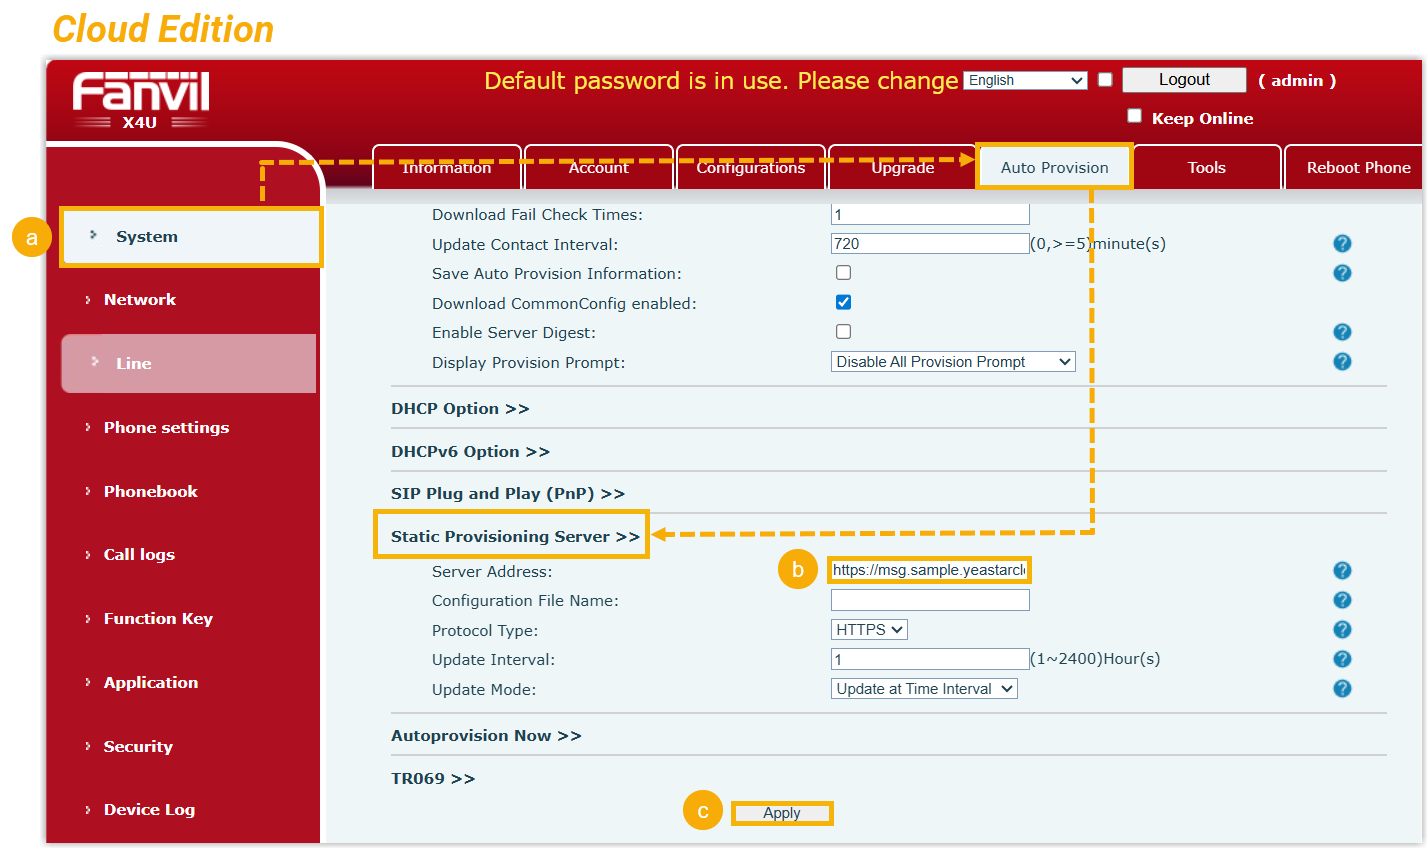
- Go to .
- In the Server Address field, replace the 3CX server IP address with the provisioning link obtained from Yeastar Phone System.
- Click Apply.
- Reprovision the phone using one of the
following methods.
- Click Autoprovision Now.

- Reboot the phone.
- Click Autoprovision Now.
- To reprovision other phones, repeat step 1 - 3.
Result
The phones automatically download configuration files from the provisioning server and apply the new settings.
You can check the phone status on Yeastar Phone System (Path: ).

- Check if the phone is provisioned by another PBX.
- Factory reset the phone, then reboot it.