Replicate Settings of IP Blacklist / Whitelist
This topic describes how to replicate the list of blocked or allowed IP addresses or IP address range from 3CX to Yeastar Phone System.
Procedure
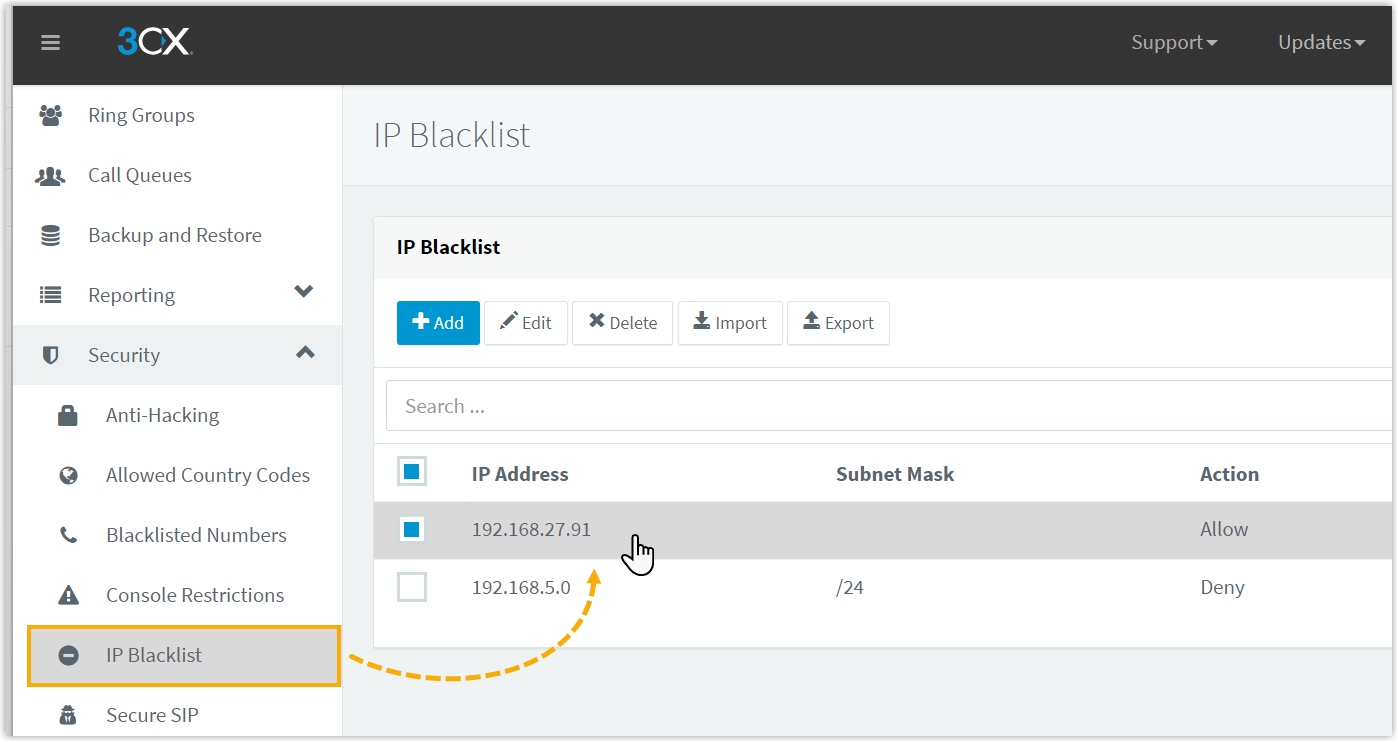
- View the existing settings on 3CX Management Console.

Go to and select a rule to view the existing blocked/allowed IP address or IP address range.
- Create a new blocked/ allowed IP address rule on Yeastar Management
Portal.

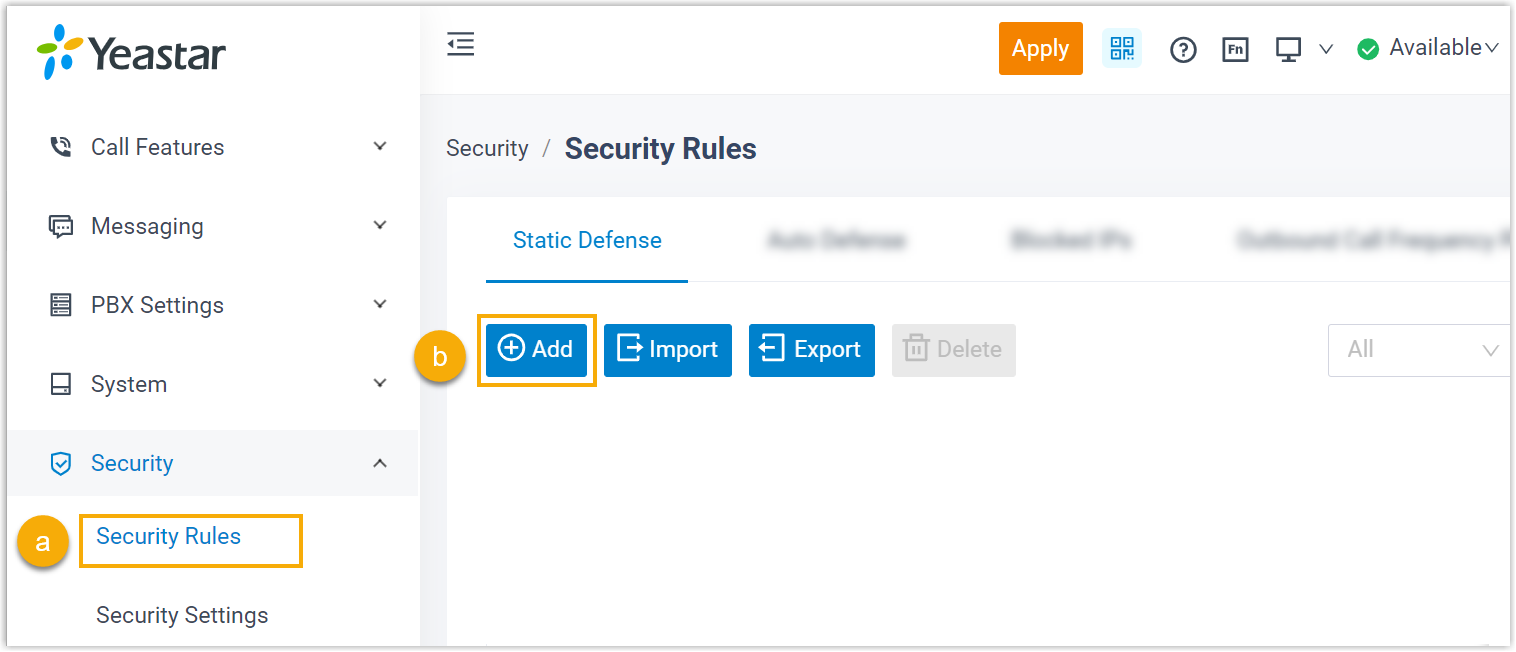
- Go to .
- In the Static Defense tab, click Add.
- On Yeastar Management Portal, replicate the settings from 3CX.
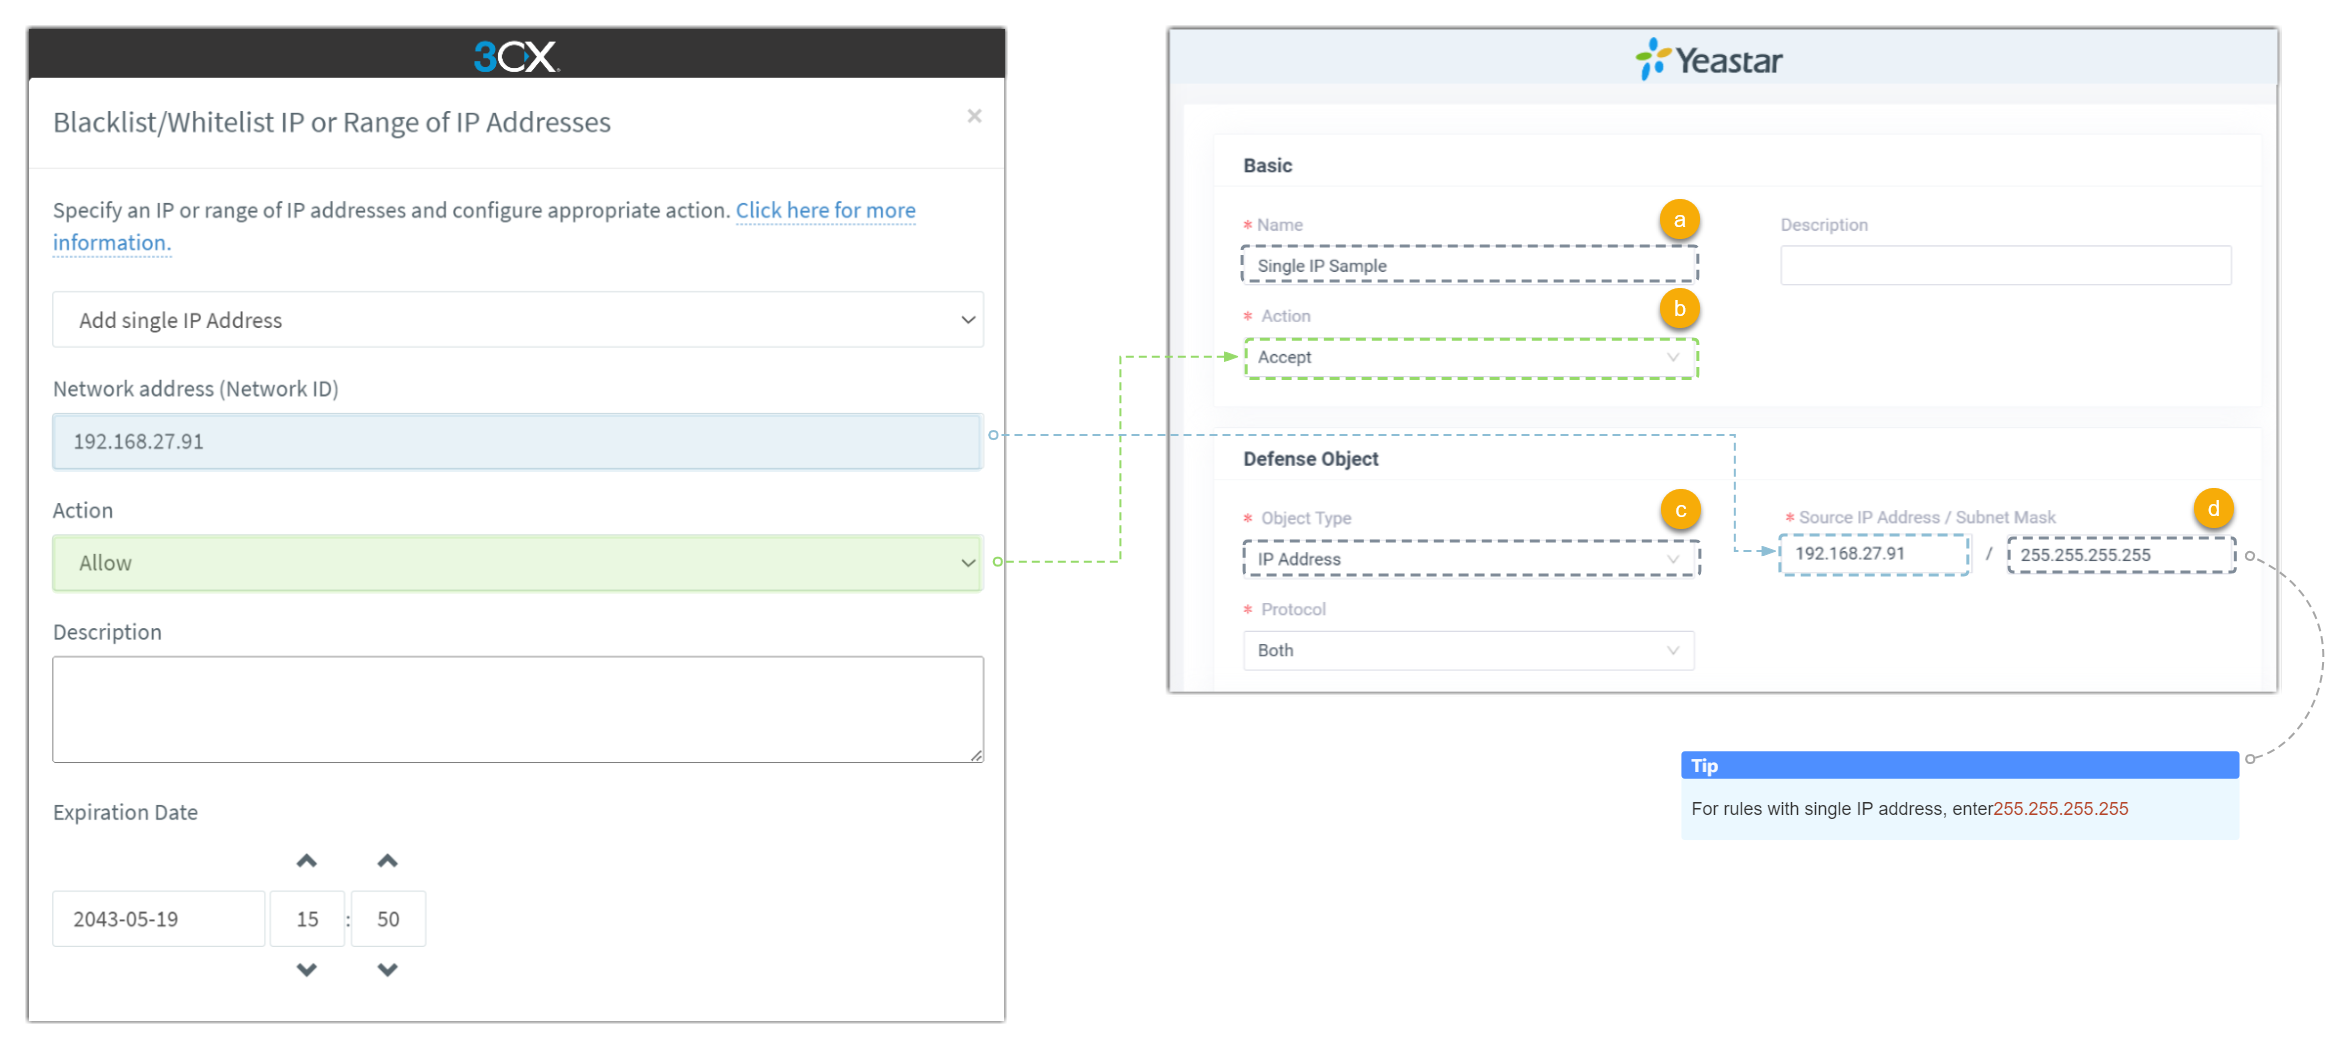
- For single IP address rules, do as follow:

- In the Name field, specify a name for this rule.
- In the Action drop-down list, select the action according to 3CX setting.
- In the Object Type drop-down list, select IP Address.
- In the Source IP Address / Subnet Mask/ field, copy the IP address and enter 255.255.255.255 as the subnet mask.
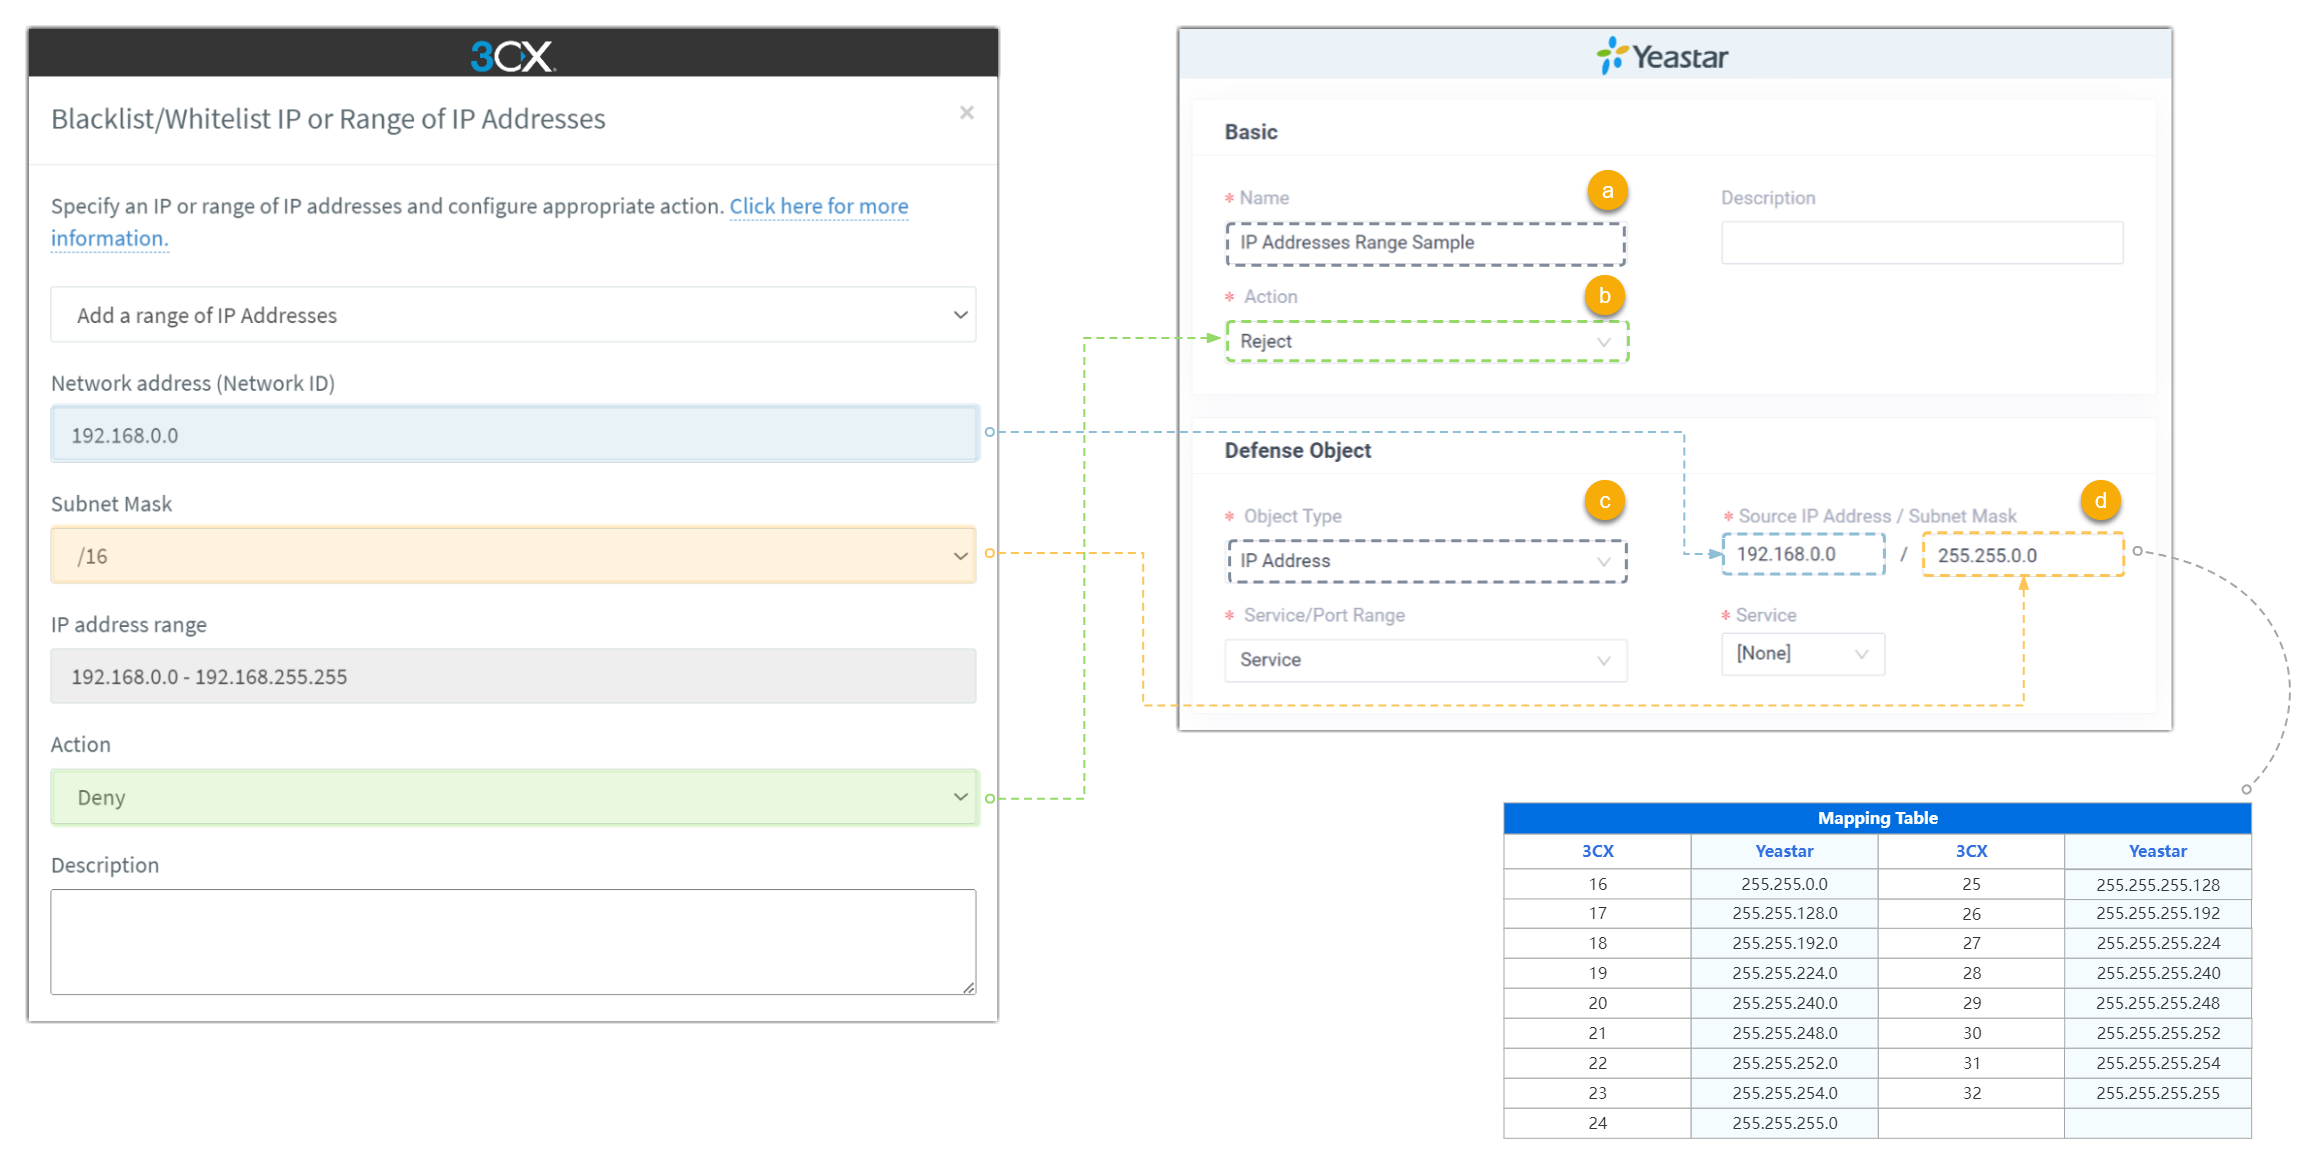
- For IP addresses range rules, do as follow:

- In the Name field, specify a name for this rule.
- In the Action drop-down list, select the action according to 3CX setting.
- In the Object Type drop-down list, select IP Address.
- In the Source IP Address / Subnet Mask/ field, copy the IP address from 3CX and enter the corresponding subnet mask.
- For single IP address rules, do as follow:
- If there are multiple IP blacklists or whitelists in 3CX, repeat step 2~3.