Migrate SIP Trunks
This topic describes how to migrate your SIP trunks from 3CX to Yeastar Phone System.
Important:
- Migrating SIP trunks will disrupt the 3CX system's ability to make or receive external calls. Confirm the migration timing with your clients before proceeding.
- To minimize business disruption, it's recommended to perform SIP trunk migration during non-business hours.
Prerequisites
If the SIP trunk provides for migration are NOT listed in Yeastar ITSP Partners, you need to gather the following information of
the SIP trunk provider for trunk registration.
- hostname /IP address
- Port
Procedure
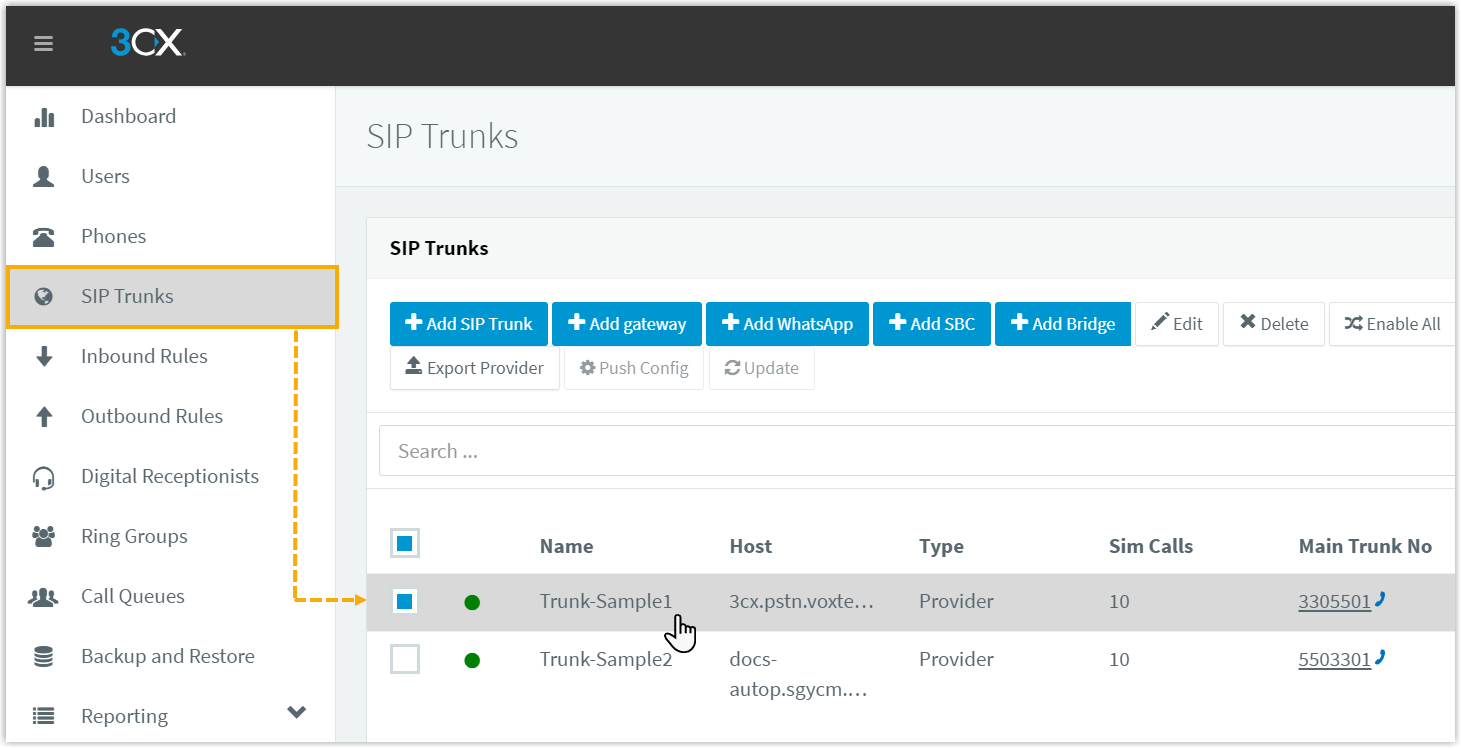
- View the existing SIP trunks on 3CX Management Console.
Go to SIP Trunks and select a trunk to view its details.

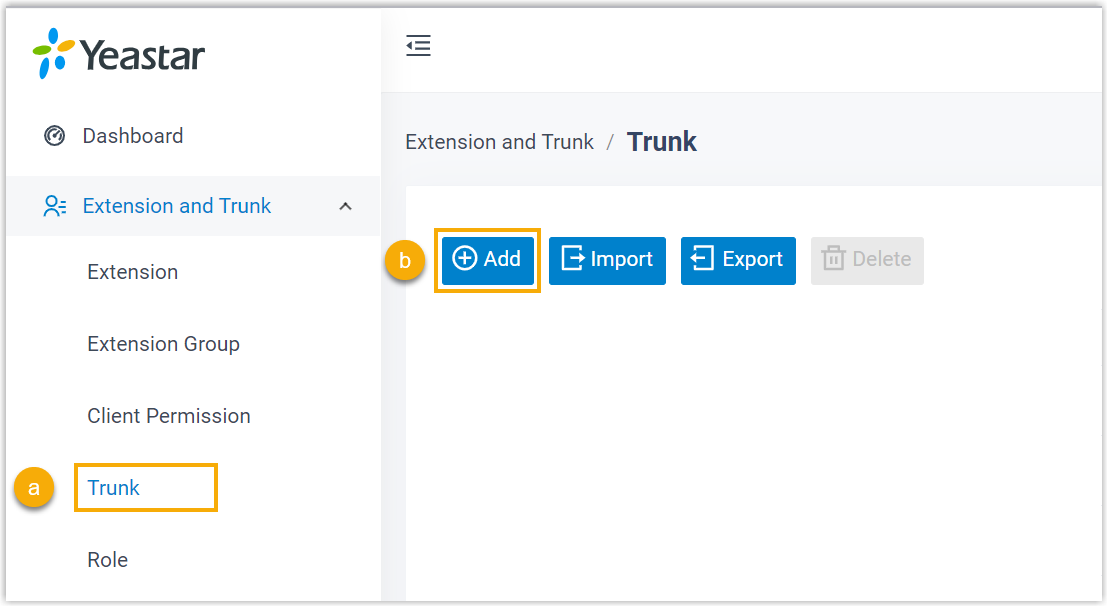
- Create a new SIP trunk on Yeastar Management Portal.

- Go to .
- Click Add.
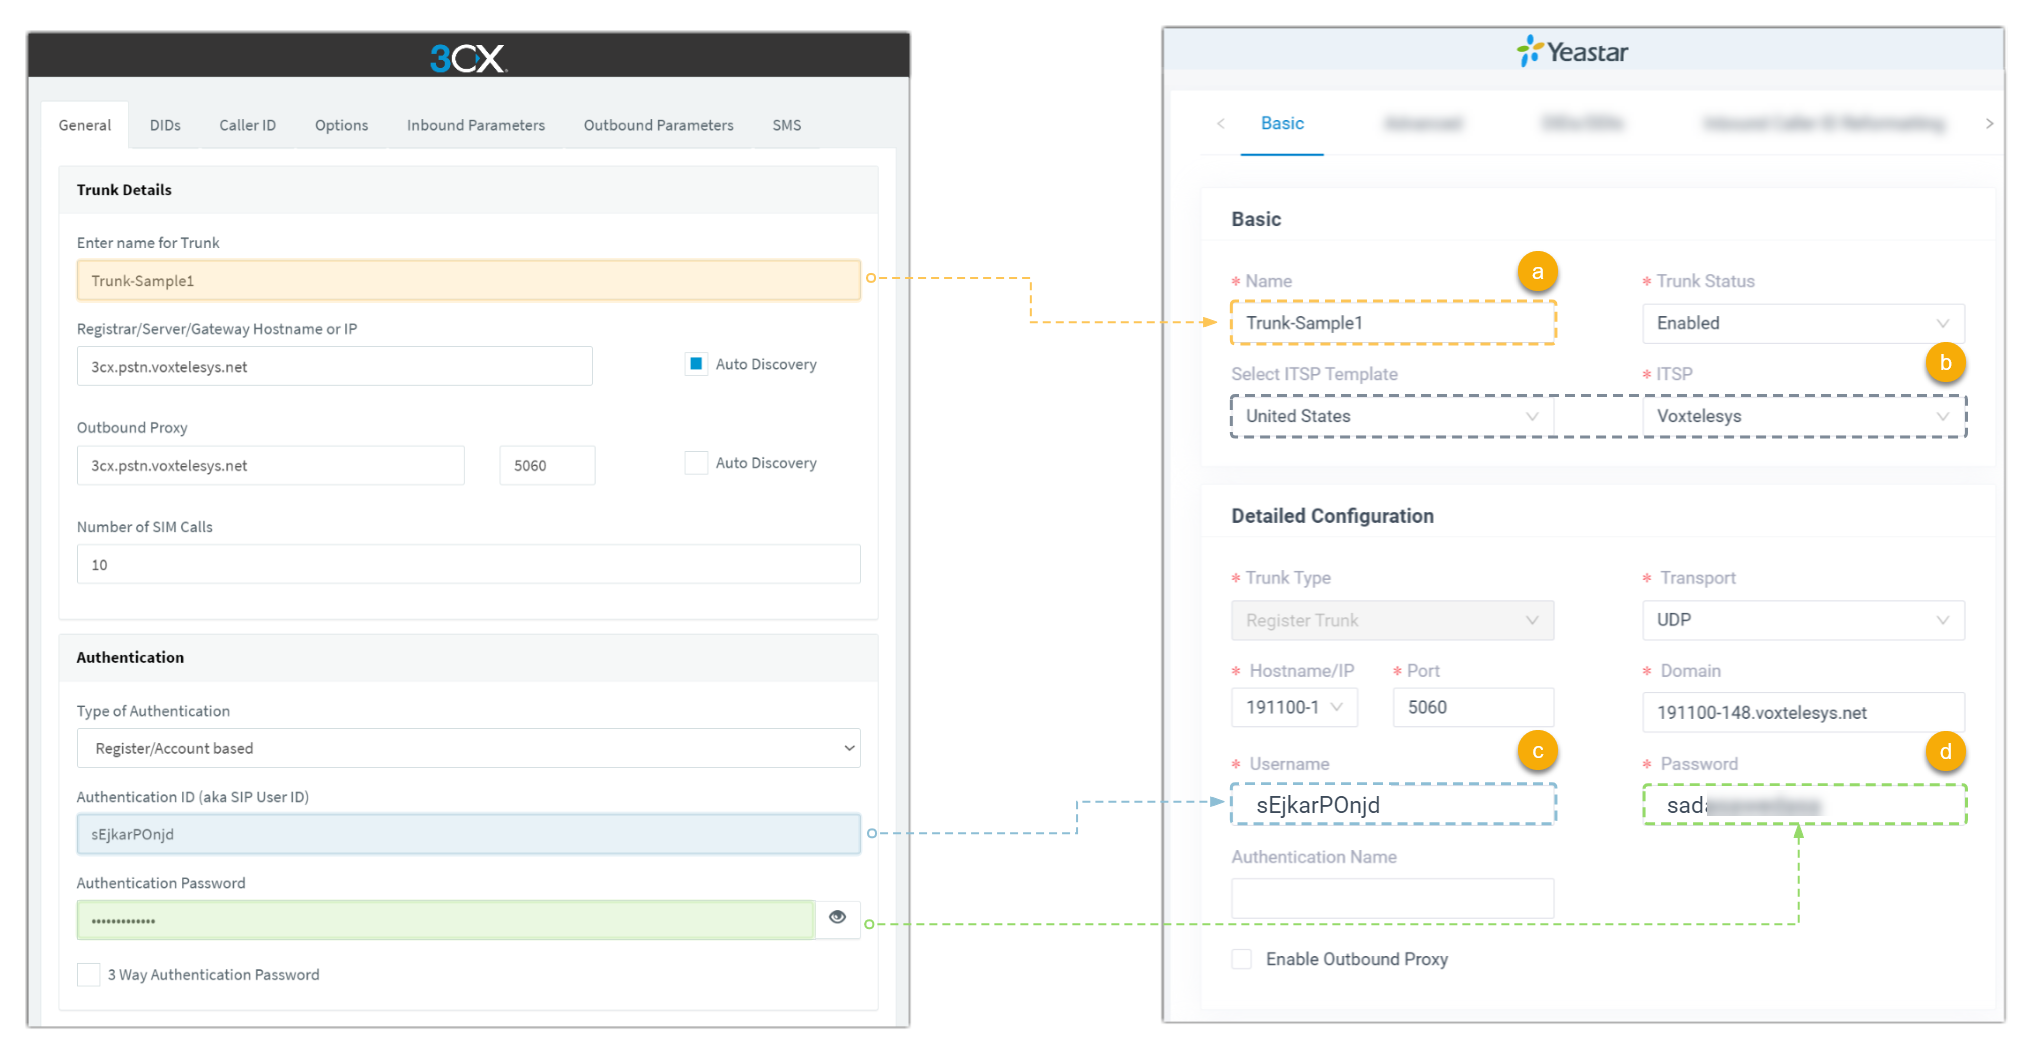
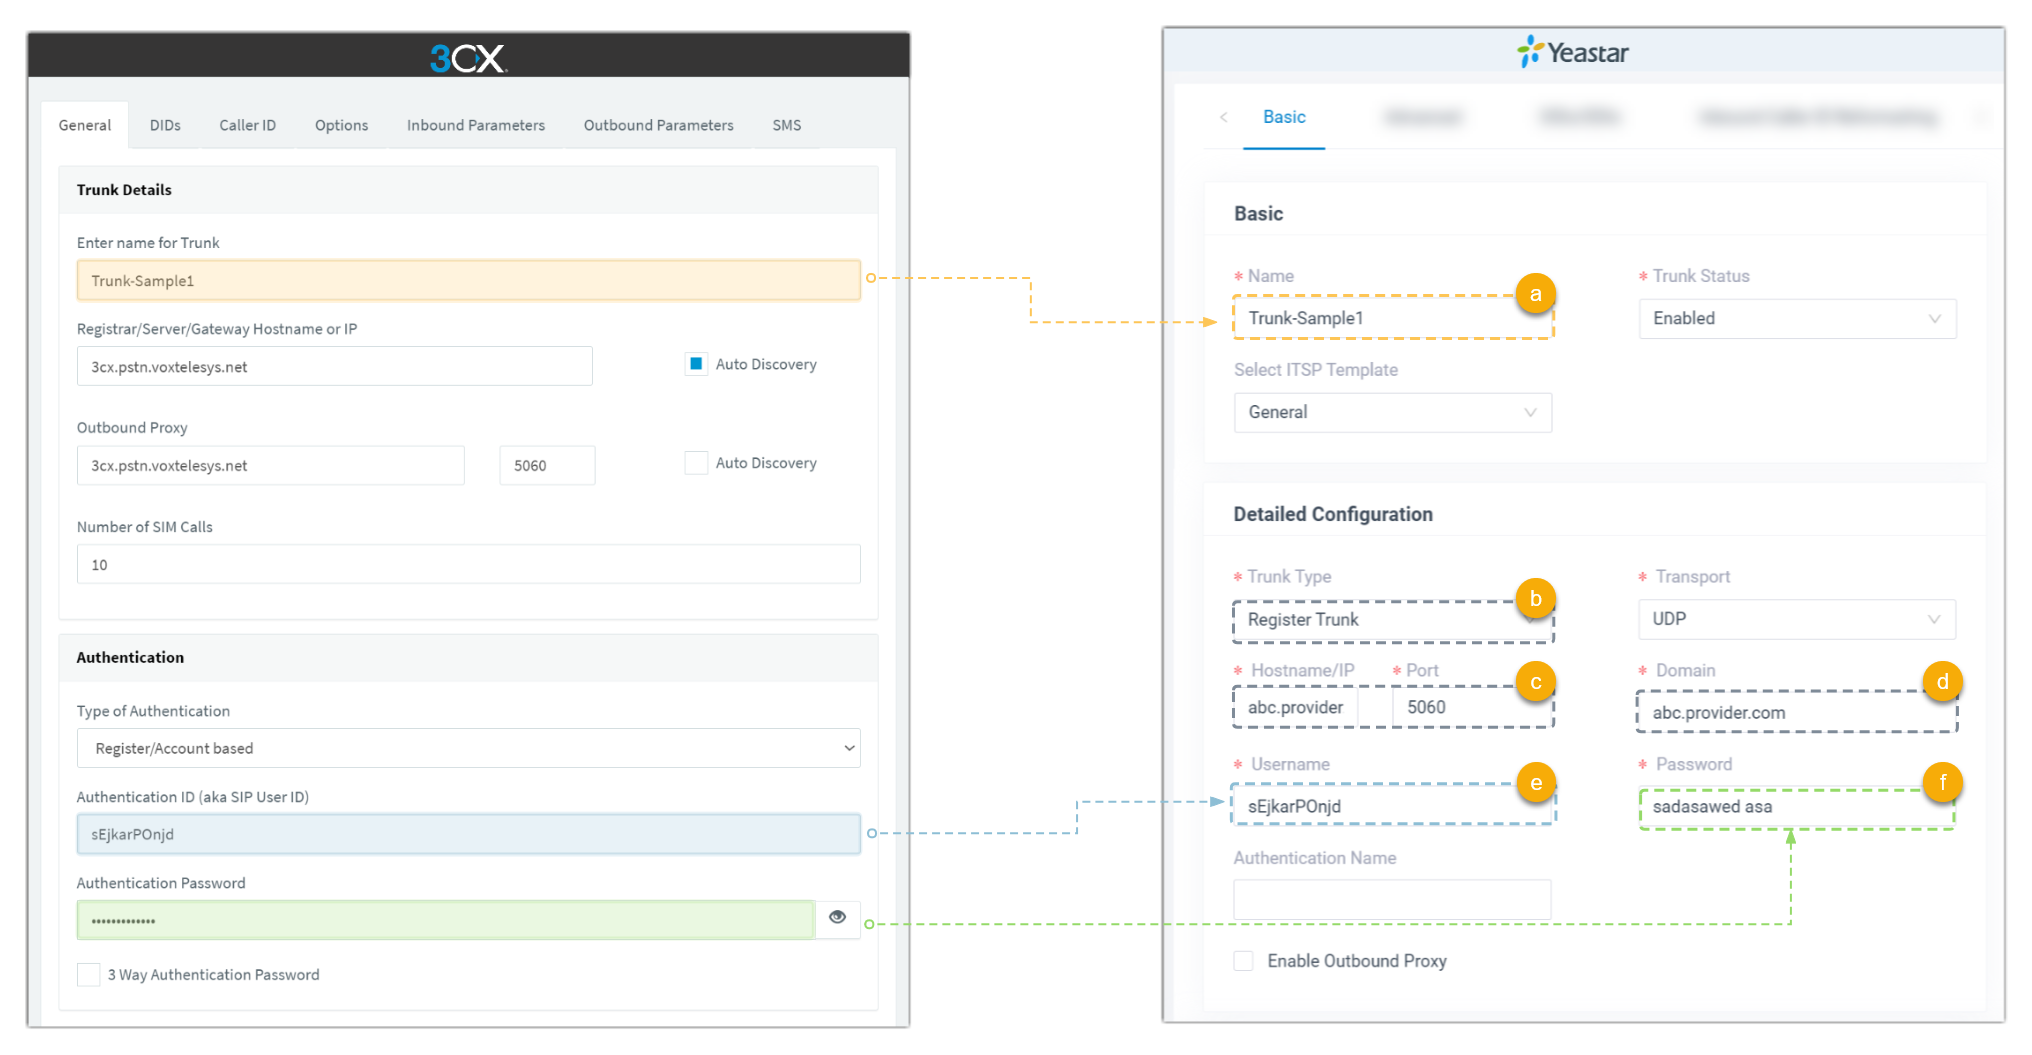
- On Yeastar Management Portal, replicate the SIP trunk settings from 3CX.
- If the SIP trunk provider is listed in Yeastar ITSP Partners, do as
follow:

- In the Name field, copy the trunk name from 3CX.
- In the Select ITSP Template drop-down list, select the country of your ITSP, then select the corresponding ITSP.
- In the Username field, copy the Authentication ID from 3CX.
- In the Password field, copy the Authentication Password from 3CX.
- If your SIP trunk provider is NOT listed in Yeastar ITSP Partners, do as
follow:

- In the Name field, copy the trunk name from 3CX.
- In the Trunk Type drop-down list, select Register Trunk.
- In the Hostname/IP and Port fields, enter the hostname or IP and port of your ITSP.
- In the Domain field, enter the hostname of your ITSP.
- In the Username field, copy the Authentication ID from 3CX.
- In the Password field, copy the Authentication Password from 3CX.
- If the SIP trunk provider is listed in Yeastar ITSP Partners, do as
follow:
- On Yeastar Management Portal, replicate the DID numbers from 3CX.

- Select DIDs/DDIs tab.
- Click Add to add a DID number.
- In the pop-up window, copy the DID number from 3CX.
- Click Confirm.
- If there are multiple DID numbers in 3CX, repeat step b~d.
- Click Save and Apply.
- If there are multiple trunks in 3CX, repeat step 2~5.
- Delete all the migrated SIP trunks on 3CX Management Console.