Extension Login Security
Endpoint Security is the third line of defense in multi-layered security strategy, preventing fraudsters from registering or logging in to extension accounts. Yeastar P-Series Cloud Edition has default rules to prevent malicious login to SIP extensions by monitoring Login Attempts, you can also enhance extension login security by utilizing the Single Sign-on (SSO), Two-factor Authentication (2FA), Login QR Code/Link, Password, User Role policies.
Account Lockout for Failed Login Attempts
- If an IP address reaches the defined number of failed login attempts within a specific time period, the IP address will be denied further attempts temporarily.
- If the IP address reaches the maximum number of failed login attempts, the IP address will be banned from logging into the account permanently. The PBX will block the IP address, display it in Blocked IPs, and send notifications of Web User Blocked Out or Linkus User Blocked Out to the specified contacts.
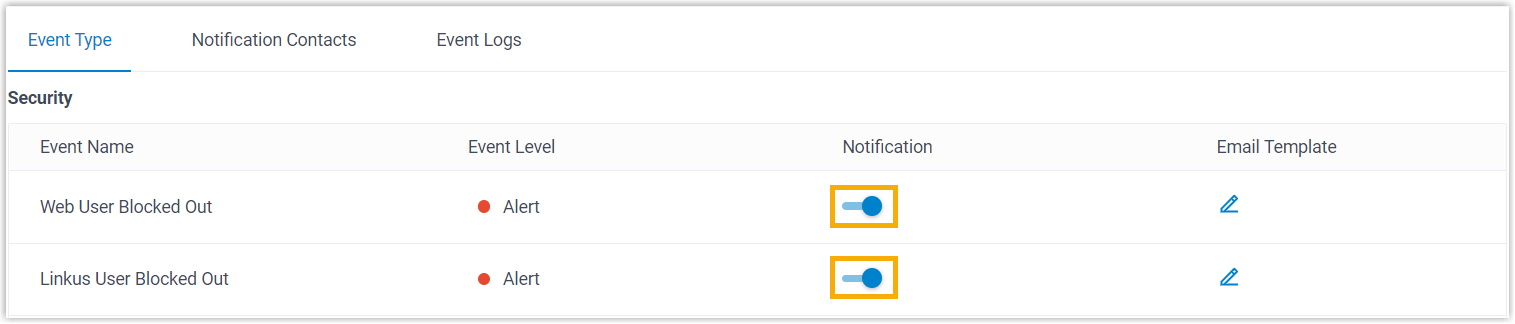
To ensure that you can be notified when an IP address is blocked, you need to enable the event notification and add contacts to receive notifications.
- Go to .
- Under Event Type tab, turn on the notification of
Web User Blocked Out and Linkus User
Blocked Out.
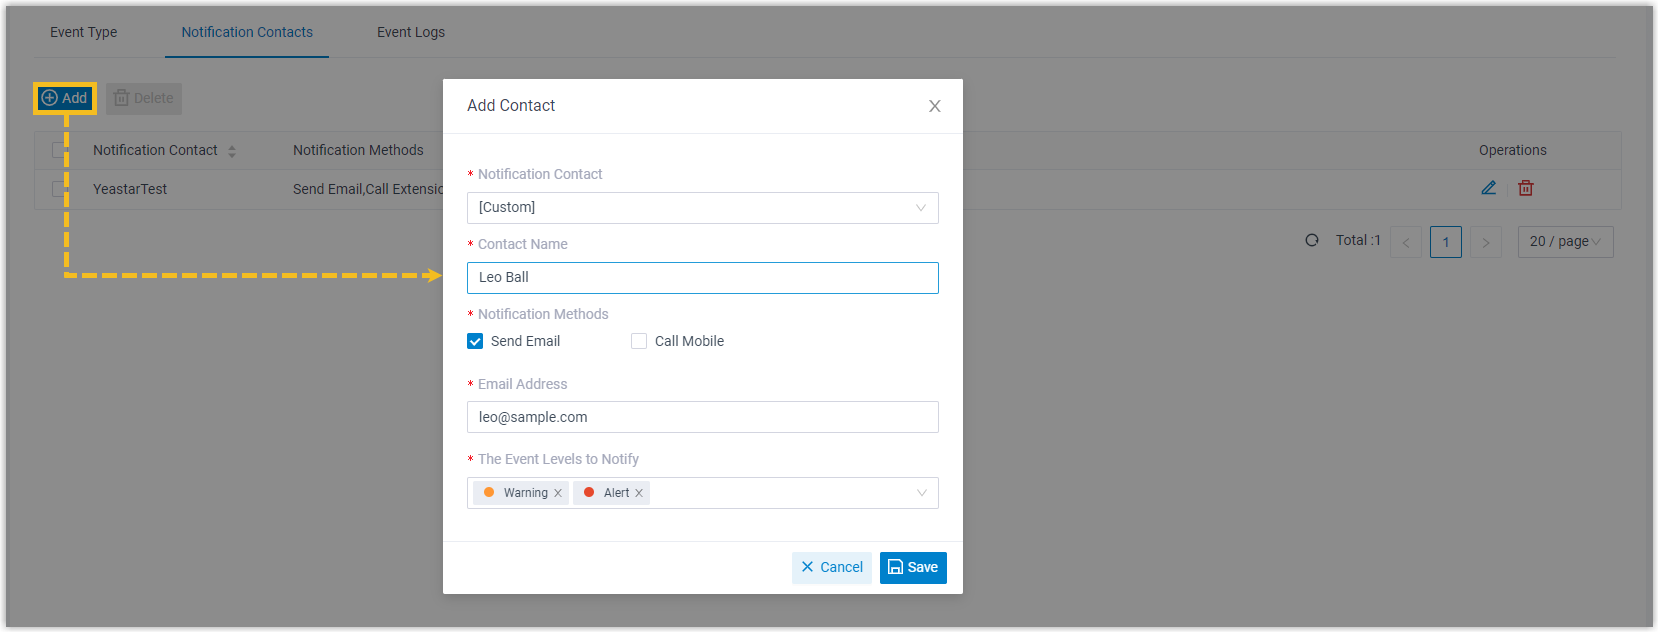
- Under Notification
Contacts tab, add contacts to receive event
notifications.

Single Sign-on (SSO) for Third-party Authentication
The integration between Yeastar P-Series Cloud Edition and Microsoft 365/Google Workspace/Red Hat SSO supports Single Sign-on (SSO) feature, which allows users to log in to Linkus UC Clients using their Microsoft/Google/Red Hat accounts, eliminating the need to remember multiple credentials while enhancing security by leveraging the security policies of third-party accounts.
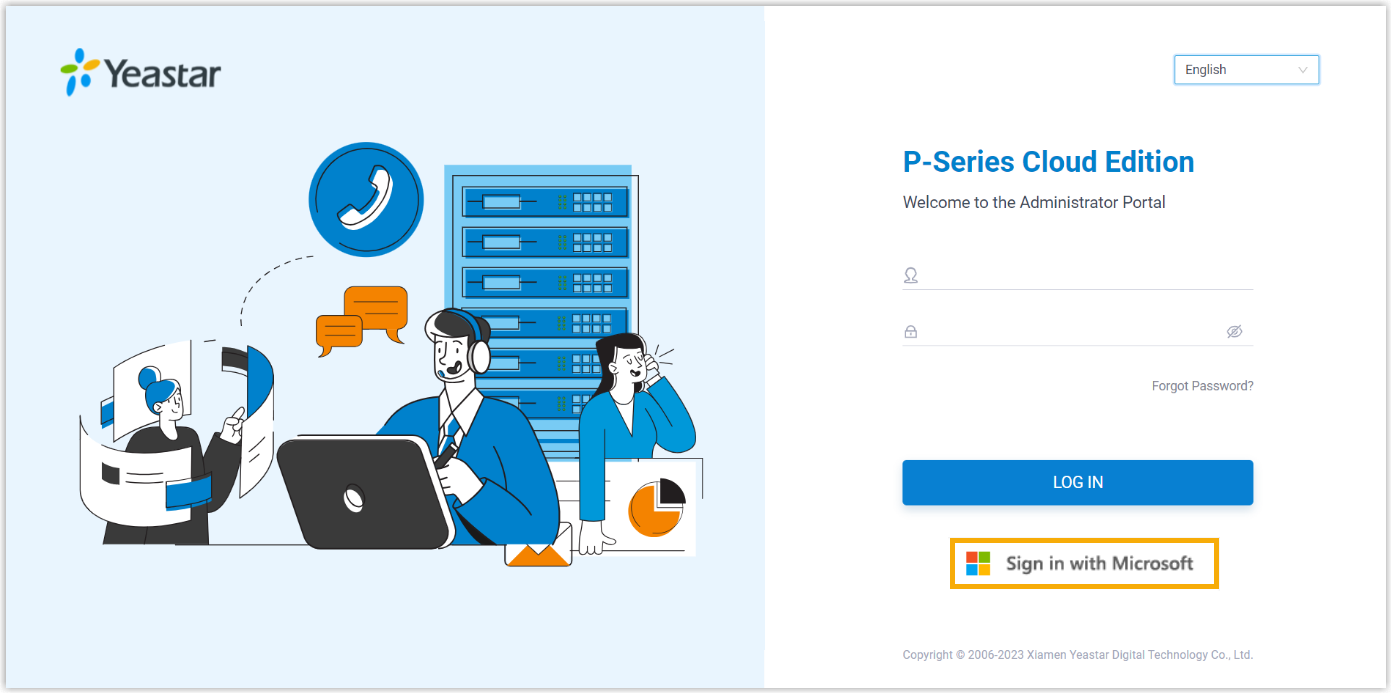
- To allow users to log in to Linkus UC Clients using their
Microsoft 365 accounts, you need to integrate the
PBX with Microsoft Entra ID (Azure Active Directory) or Active
Directory, and enable SSO.
For more information on how to set up the integration, see Microsoft Entra ID Integration Guide and Active Directory Integration Guide.
- To allow users to log in to Linkus UC Clients using their Google
accounts, you need to integrate the PBX with Google Workspace, and
enable SSO.
For more information on how to set up the integration, see Google Workspace Integration Guide.
- To allow users to log in to Linkus UC Clients using their Red Hat
accounts, you need to integrate the PBX with Red Hat SSO, and enable
SSO.
For more information on how to set up the integration, see Red Hat SSO Integration Guide.
Two-factor Authentication (2FA) for Enhanced Login Security
Two-factor Authentication (2FA) provides an extra layer of security to protect account by requiring two verification factors to log in. The first factor is the password that is used to log in to account, the second factor is a code that is sent to a specified device.
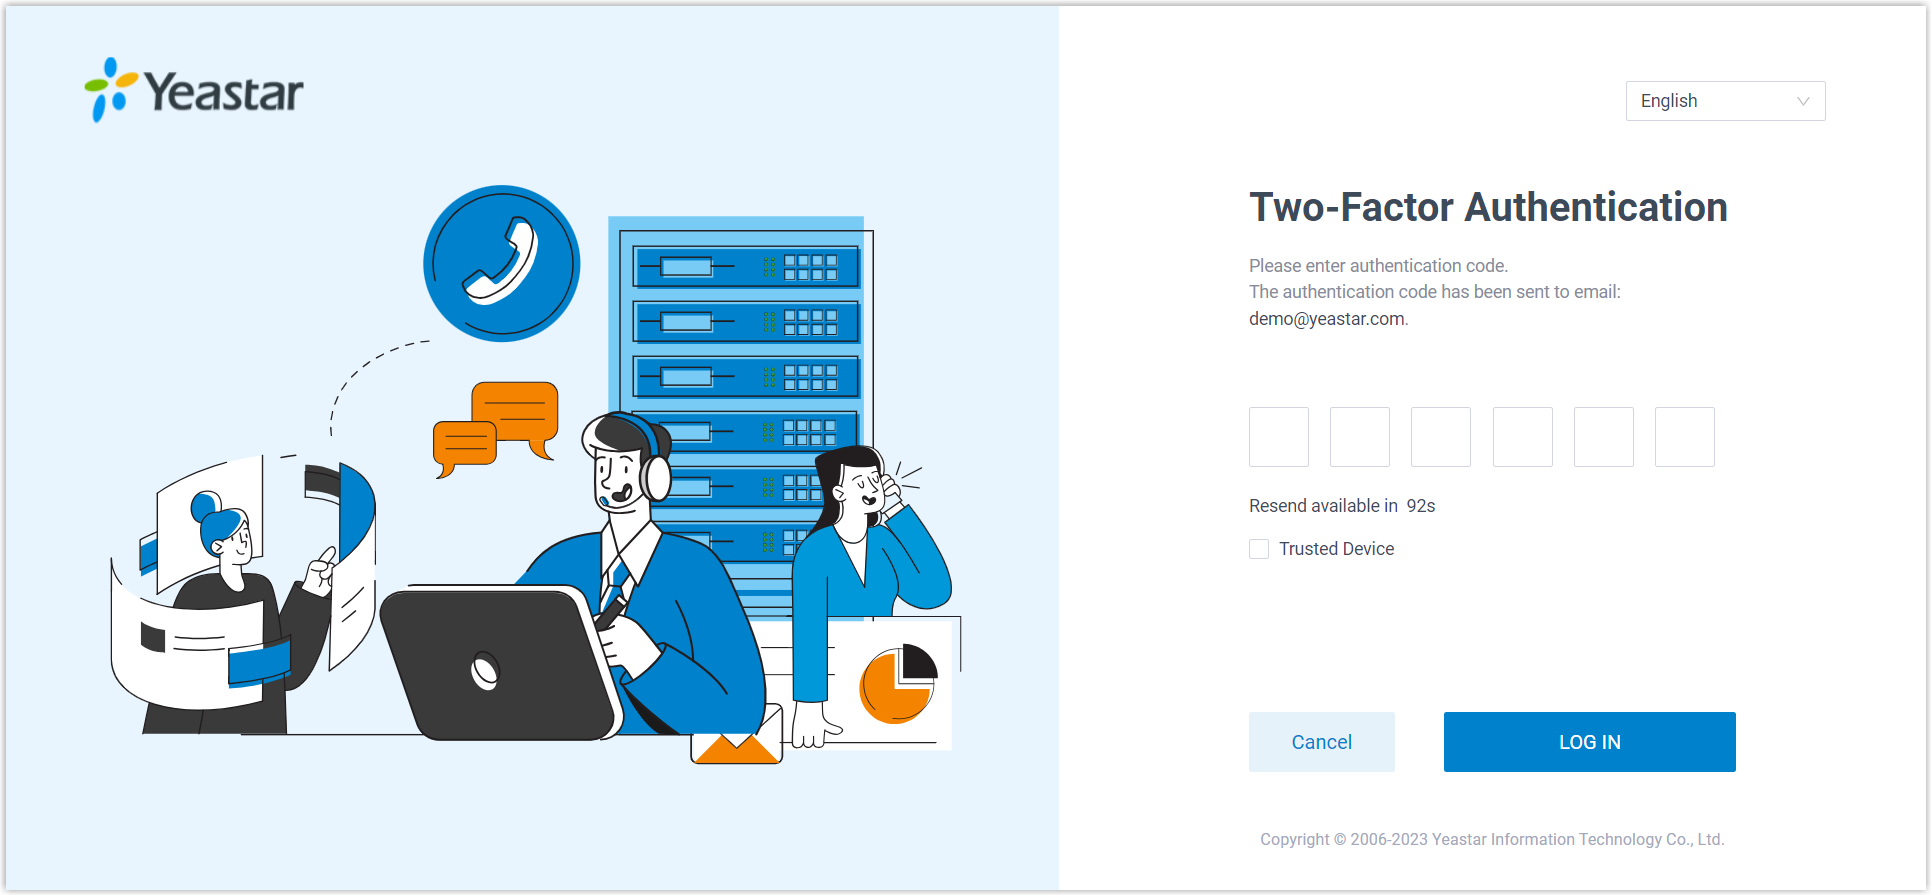
You can enforce 2FA for all extension users, ensuring that every user must provide both account password and an authentication code when logging in to their accounts.
- Go to .
- In the Two-Factor Authentication section, select the
checkbox of Make Two-Factor Authentication Mandatory for All
Extensions.

- Click Save and Apply.
QR Code/Link for Passwordless Login
QR Code Authentication and Link Authentication are more secure ways to log in to Linkus clients than traditional password login, as they are encrypted and can only be used ONCE.
You can send the Linkus login QR code/link to users in the following ways:
- Provide a single user with login QR code/link
-
- Go to , edit the desired extension.
- Under Linkus Clients tab, click
Login QR Code or Login
Link to copy the credential and send to
users.

- Provide multiple users with login QR code/link
-
- Go to .
- Select the desired extensions, then click Welcome
Email.

Strong Password for Manual Login
Weak passwords leave a potential security gap that fraudsters can readily exploit. You can mitigate the risk by enforcing system-wide password requirements and configuring strong passwords for extensions.
- Enforce password policies
-
- Go to .
- In the Extension Password Rules section,
specify the minimum character length of user password, and the
number of recently used passwords that cannot be reused.

- Click Save and Apply.
- Configure strong password for extension
-
- Go to , edit the desired extension.
- In the User Information section, set a strong
user password.
 Tip: Here are some tips for a strong password:
- Use a combination of uppercase letters, lowercase letters, and numbers.
- Avoid repeated or consecutive numbers.
- Avoid extension number or extension name.
- Click Save and Apply.
User Role for Granular Access Control
Role-based access control is a security approach that authorizes or restricts system access permissions to users based on their roles within the company. This allows users to access the administrative privileges they need to conduct their jobs, and minimizes the risk of unauthorized users accessing sensitive information or performing unauthorized tasks.
Yeastar P-Series Cloud Edition has built-in roles: Super Administrator, Administrator, Supervisor, Operator, Employee, Human Resource, Accounting, and Hotel Manager. You can use the built-in roles and assign them to employees without further configuration, or create your own custom roles with the exact set of permissions you need.
- Create a Custom Role
-
- Go to .
- Click Add to create a role from scratch,
or click Copy Role to create a role by
copying an existing role.

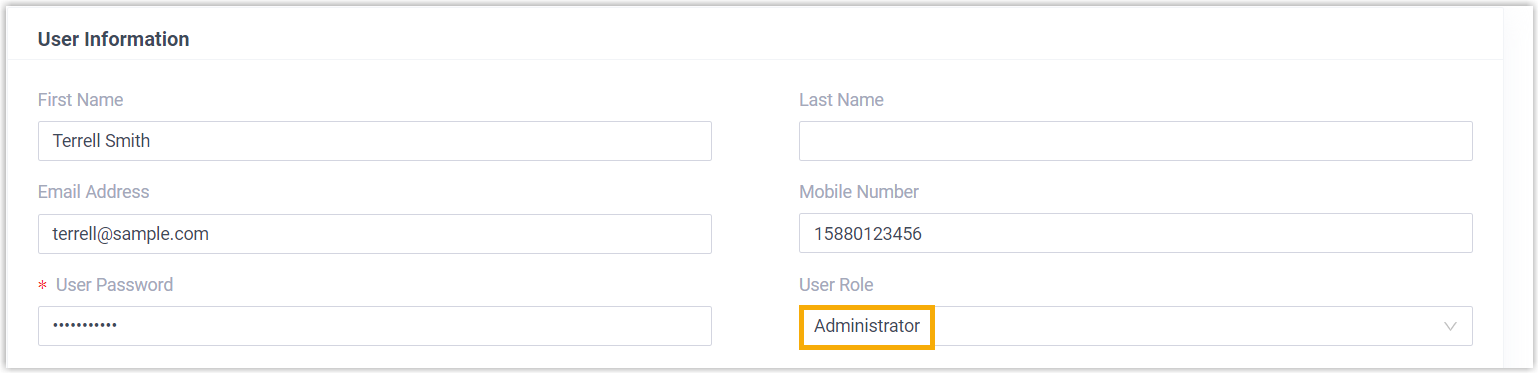
- Assign Roles to Users
-
- Go to , edit the desired extension.
- In the User Information section, select a
role from the drop-down list of User
Role.
- Click Save and Apply.