Manage SMS/WhatsApp Sent Logs
SMS/WhatsApp Sent Logs records all outbound messages sent via SMS and WhatsApp channels, including those sent within sessions and those triggered outside sessions (e.g., those triggered by sending message components added in a call flow). This topic describes how to manage the SMS/WhatsApp sent logs on Yeastar P-Series Cloud Edition.
Requirements
The firmware version of Yeastar P-Series Cloud Edition is 84.24.0.122 or later.
Supported operations
Refresh sent logs
Note: SMS/WhatsApp sent logs are not refreshed automatically, you need to manually
refresh to synchronize the latest records to Yeastar P-Series Cloud Edition.
- Log in to PBX web portal, go to .
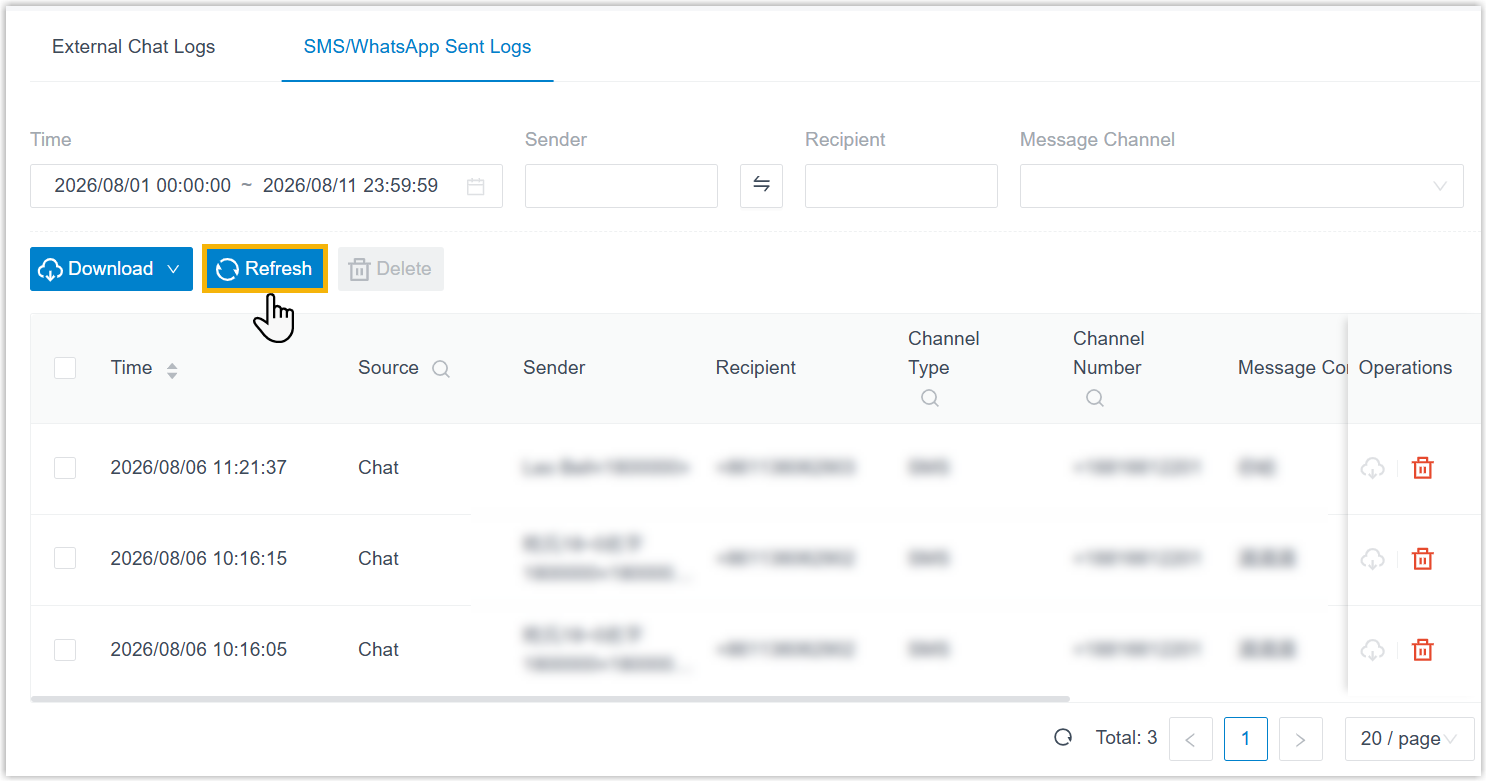
- At the top-left corner of the sent log list, click
Refresh.
Filter sent logs
- Log in to PBX web portal, go to .
- Filter sent logs.
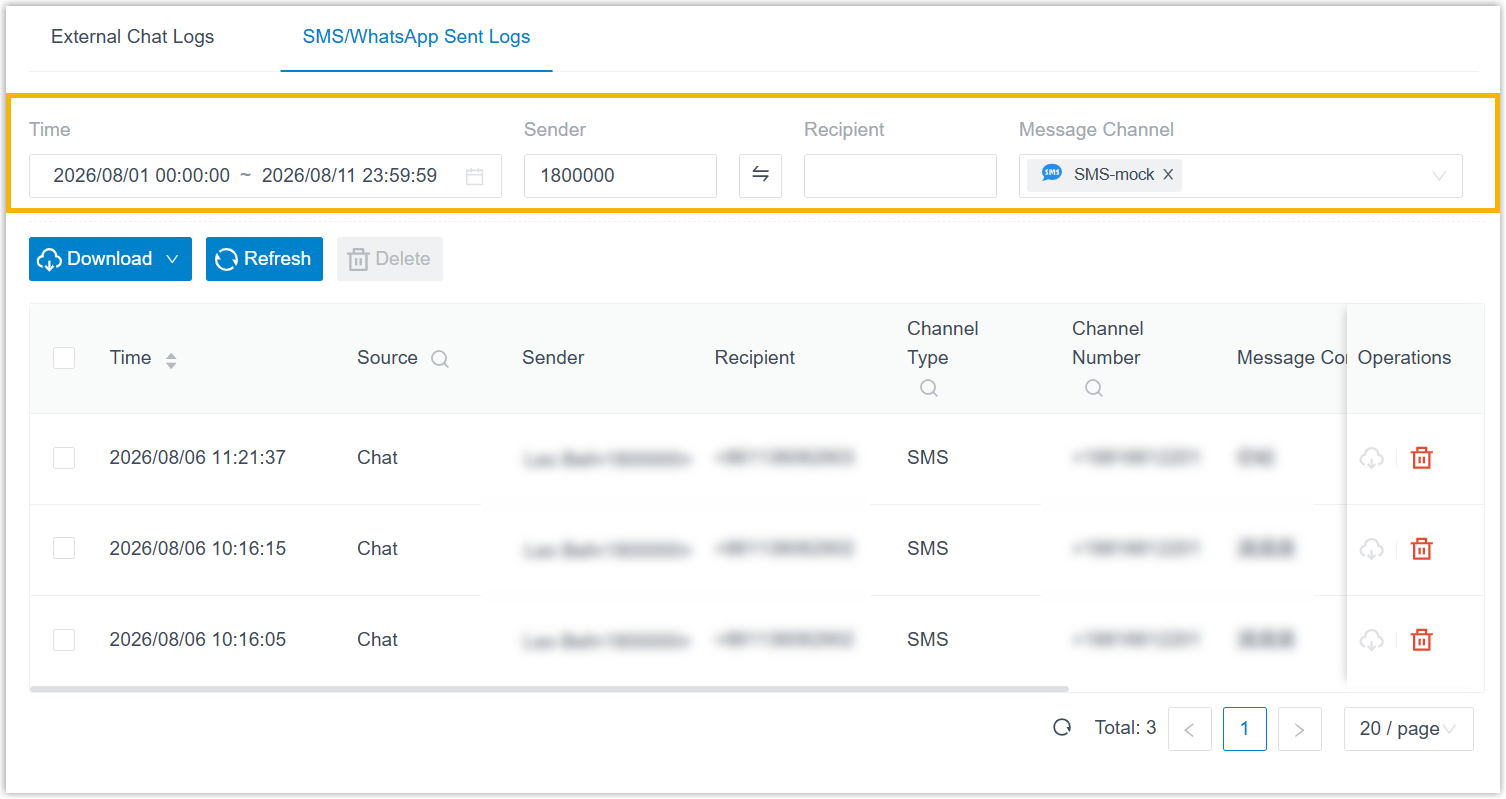
- At the top of the page, specify the time range, message sender,
message recipient or message channel.
- Click
 beside desired columns, select the
desired items and click Search.Note: To clear column filters, click again and click Reset.
beside desired columns, select the
desired items and click Search.Note: To clear column filters, click again and click Reset.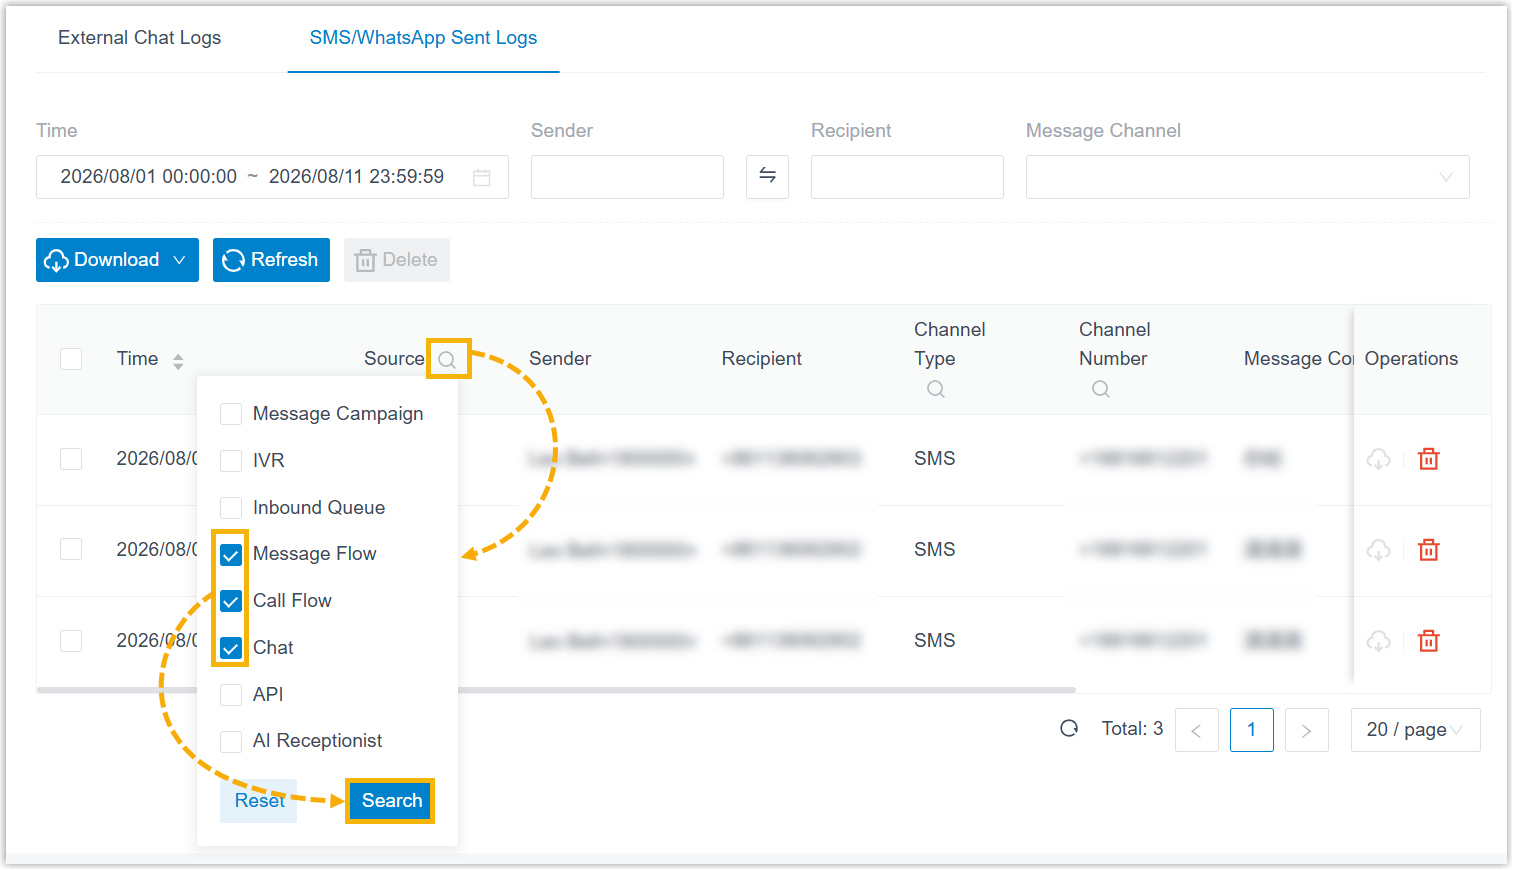
The filtered sent logs are displayed on the page.
- At the top of the page, specify the time range, message sender,
message recipient or message channel.
Delete sent logs
- Log in to PBX web portal, go to .
- Delete sent logs.
- To delete a single sent log, click
 beside the desired sent
log.
beside the desired sent
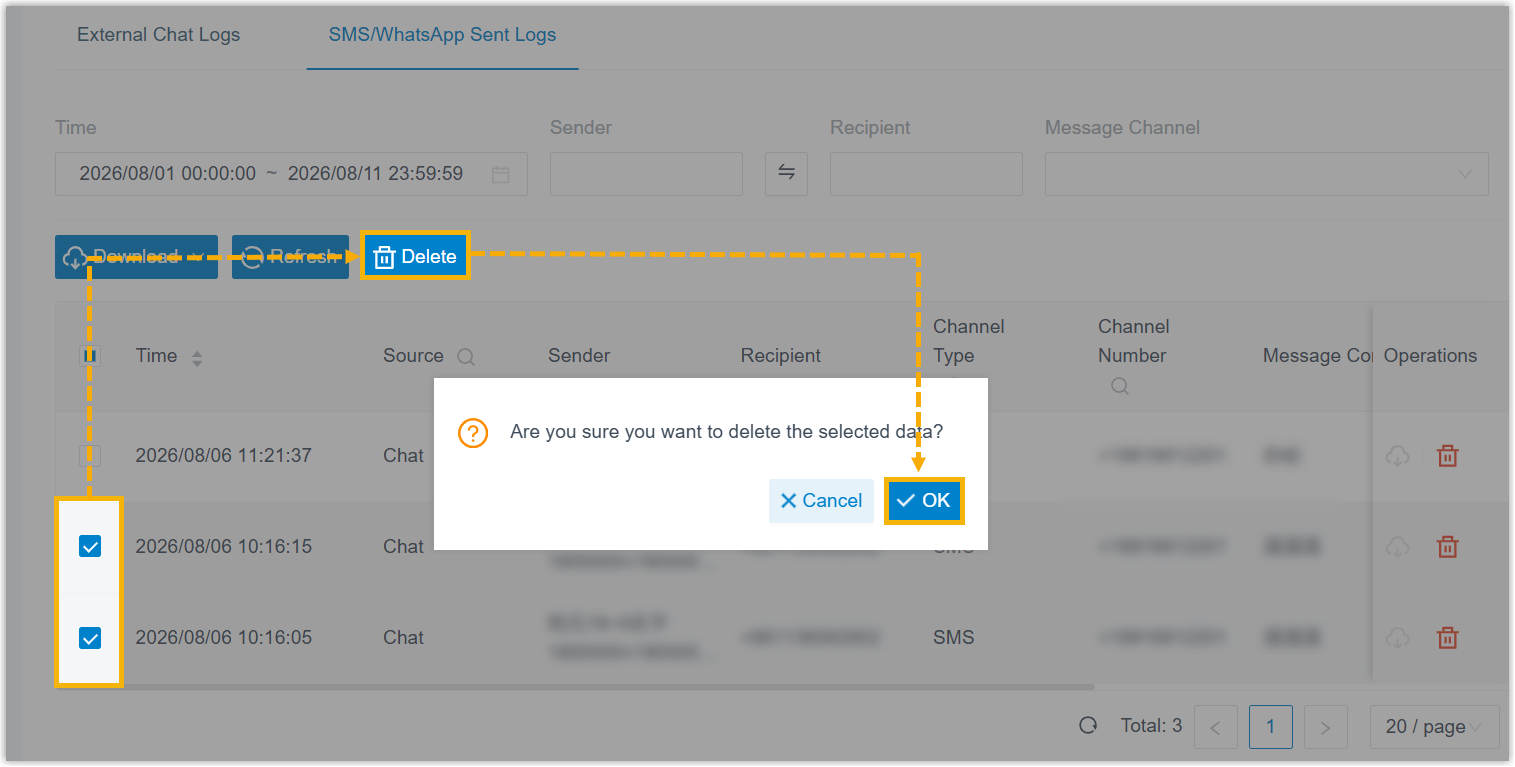
log. - To delete sent logs in bulk, select the desired sent logs, click
Delete at the top-left corner of the
list, and then click OK in the pop-up
window.
- To delete a single sent log, click
Download sent logs
Yeastar P-Series Cloud Edition allows you to download all sent logs or filtered sent logs.
- Download all sent logs
-
- Log in to PBX web portal, go to .
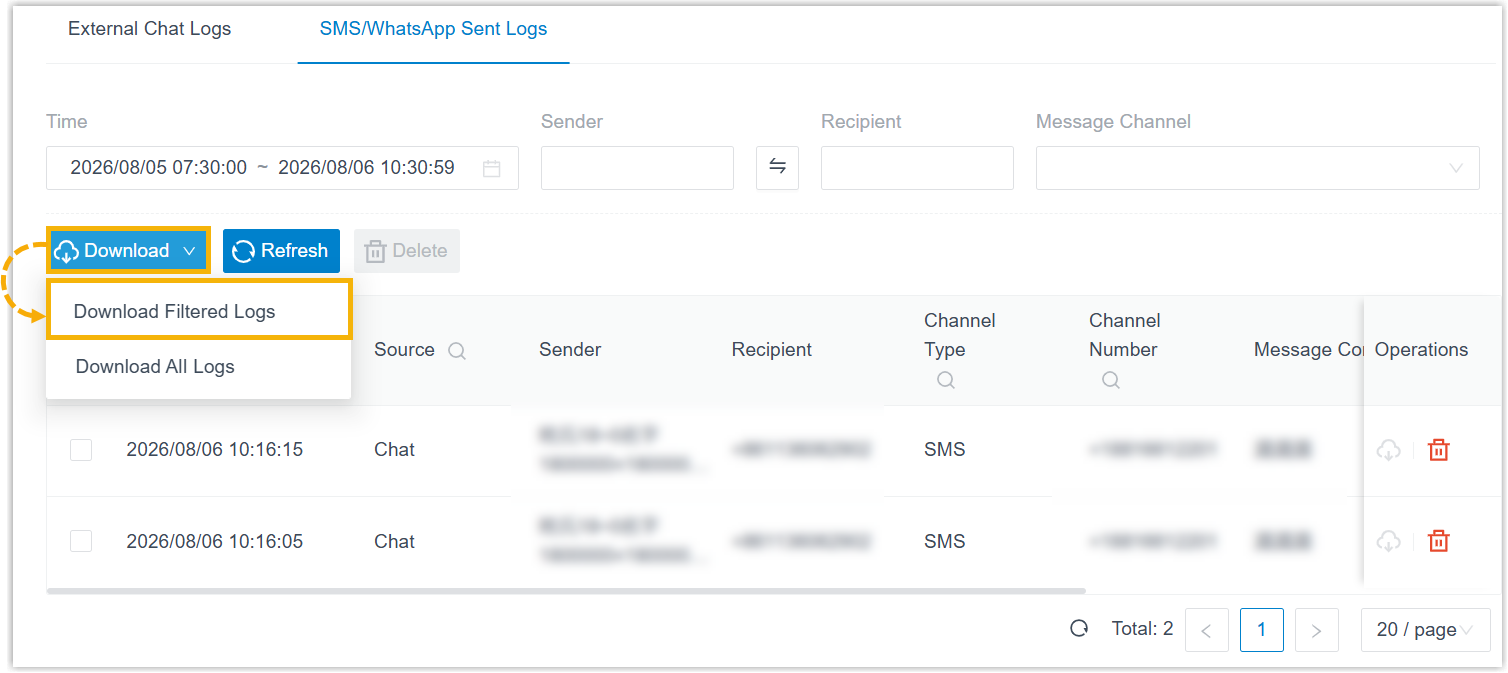
- At the top-left corner of the send log list, click
Download and select
Download All Logs.
All sent logs are downloaded to your computer in CSV format.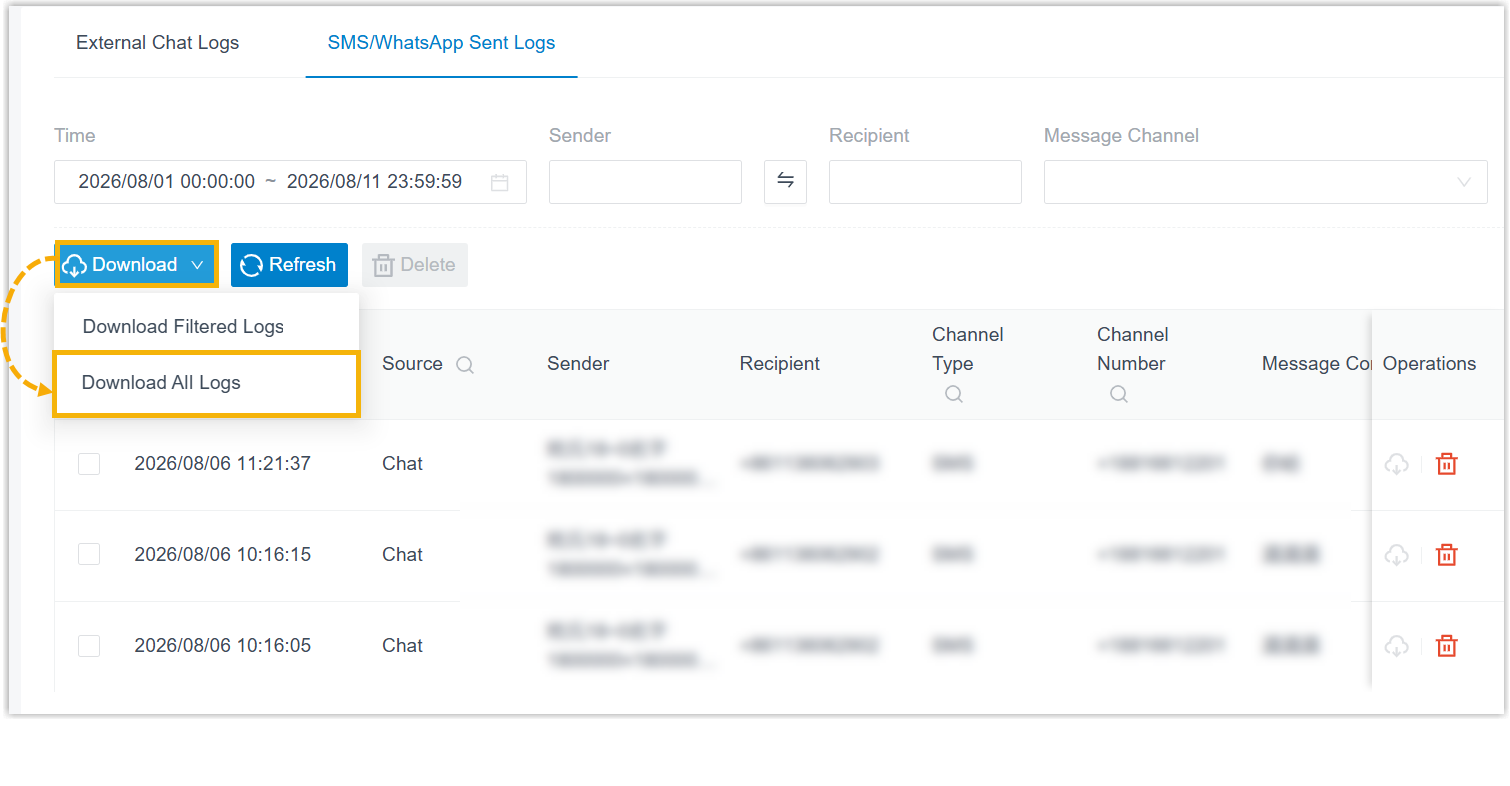
- Download filtered sent logs
-
- Log in to PBX web portal, go to .
- Filter sent logs.
- At the top of the page, specify the time range, message sender,
message recipient or message channel.
- Click beside desired columns, select the
desired items and click Search.Note: To clear column filters, click again and click Reset.
The filtered sent logs are displayed on the page.
- At the top of the page, specify the time range, message sender,
message recipient or message channel.
- At the top-left corner of the send log list, click
Download and select
Download Filtered Logs.
Filtered sent logs are downloaded to your computer in CSV format.