Integrate Yeastar P-Series PBX System with BlueFAX
By integrating Yeastar P-Series PBX System with blueFAX, employees within your organization can send and receive faxes instantly and securely over the Internet - directly from their own Linkus Desktop or Web Client.
Introduction
Yeastar P-Series PBX System supports the integration with blueFAX to enable Internet-based faxing, allowing PBX extension users to send and receive faxes through blueFAX's reliable communications network.
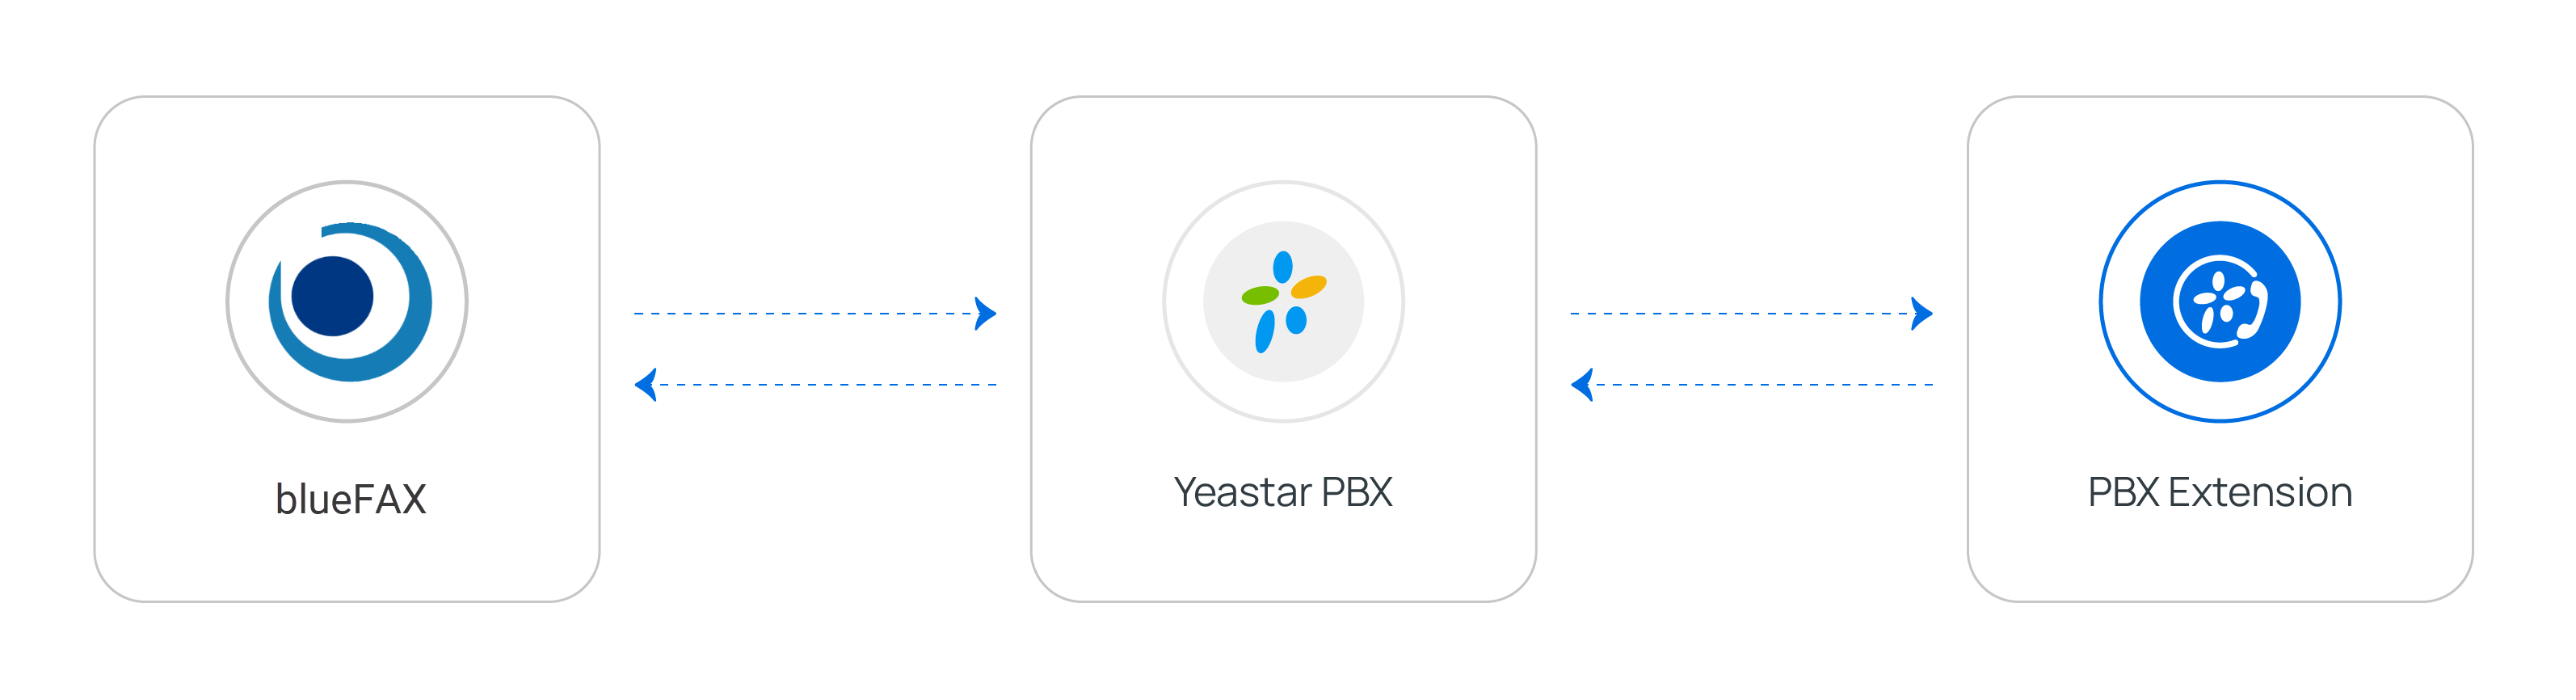
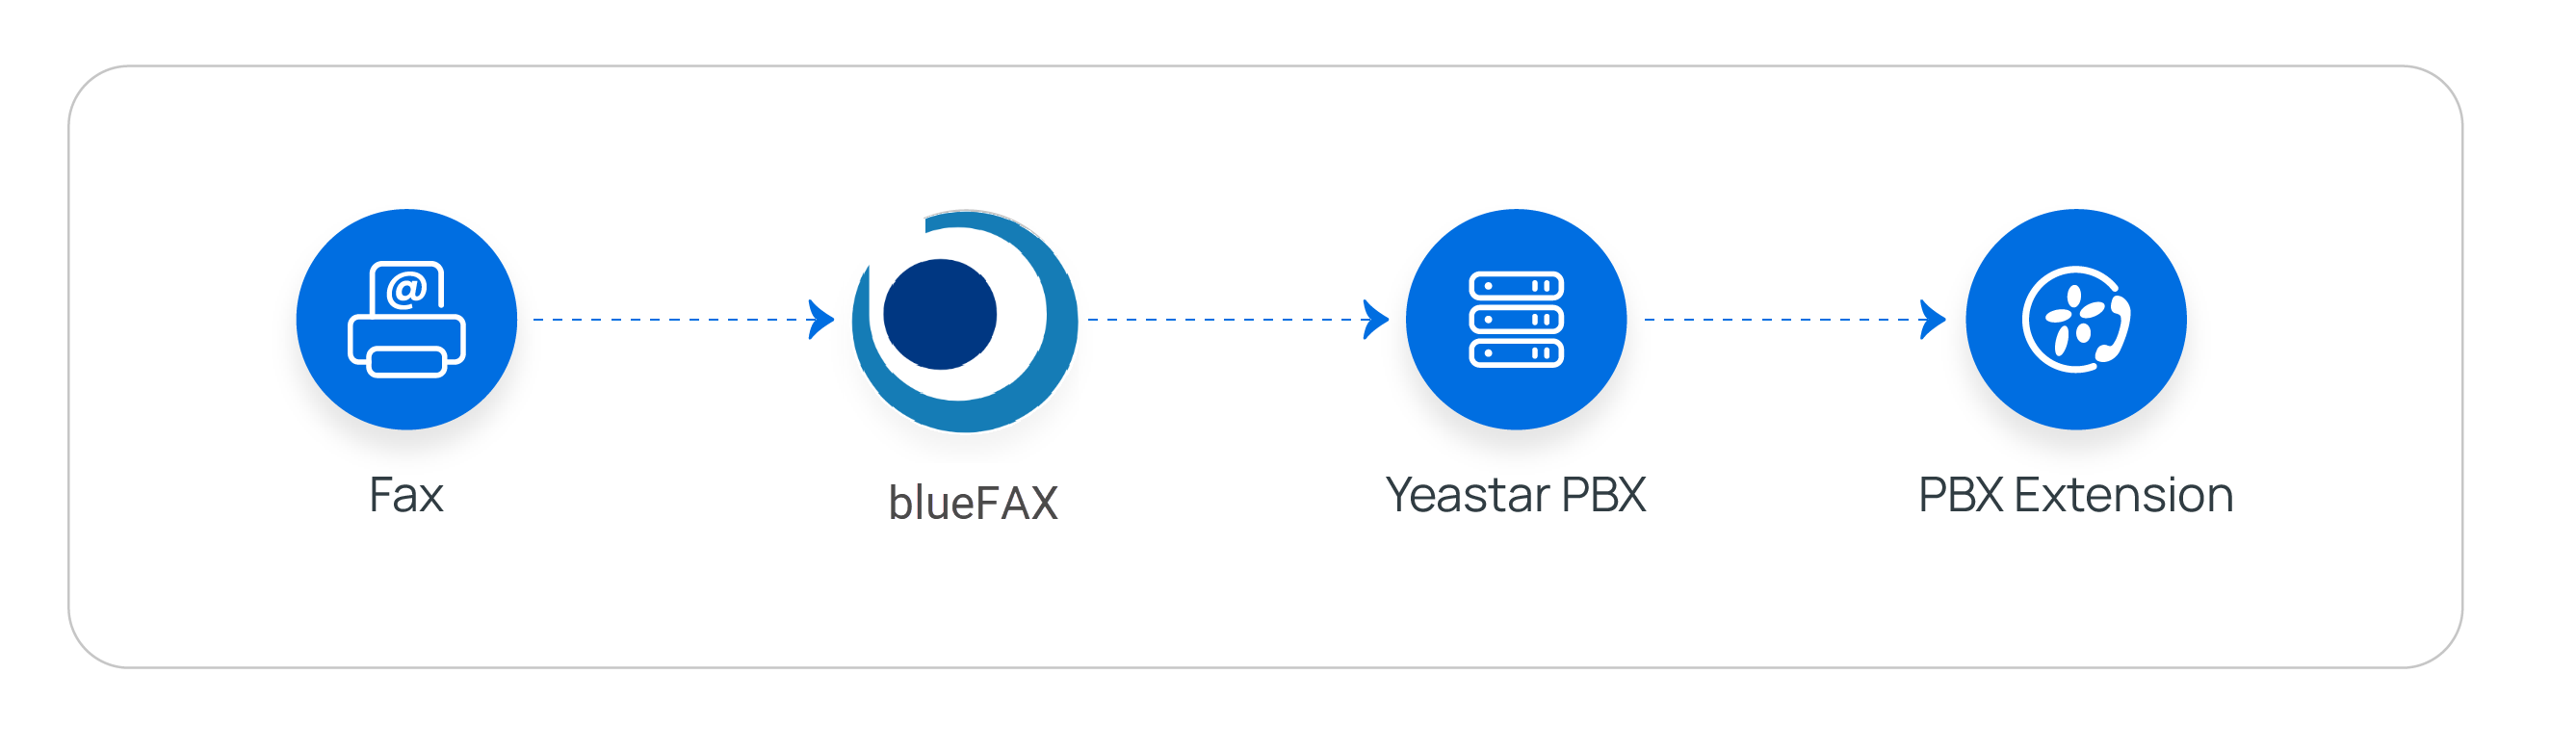
- When an extension user sends a fax from Linkus, Yeastar PBX calls blueFAX
API to submit the fax for delivery.
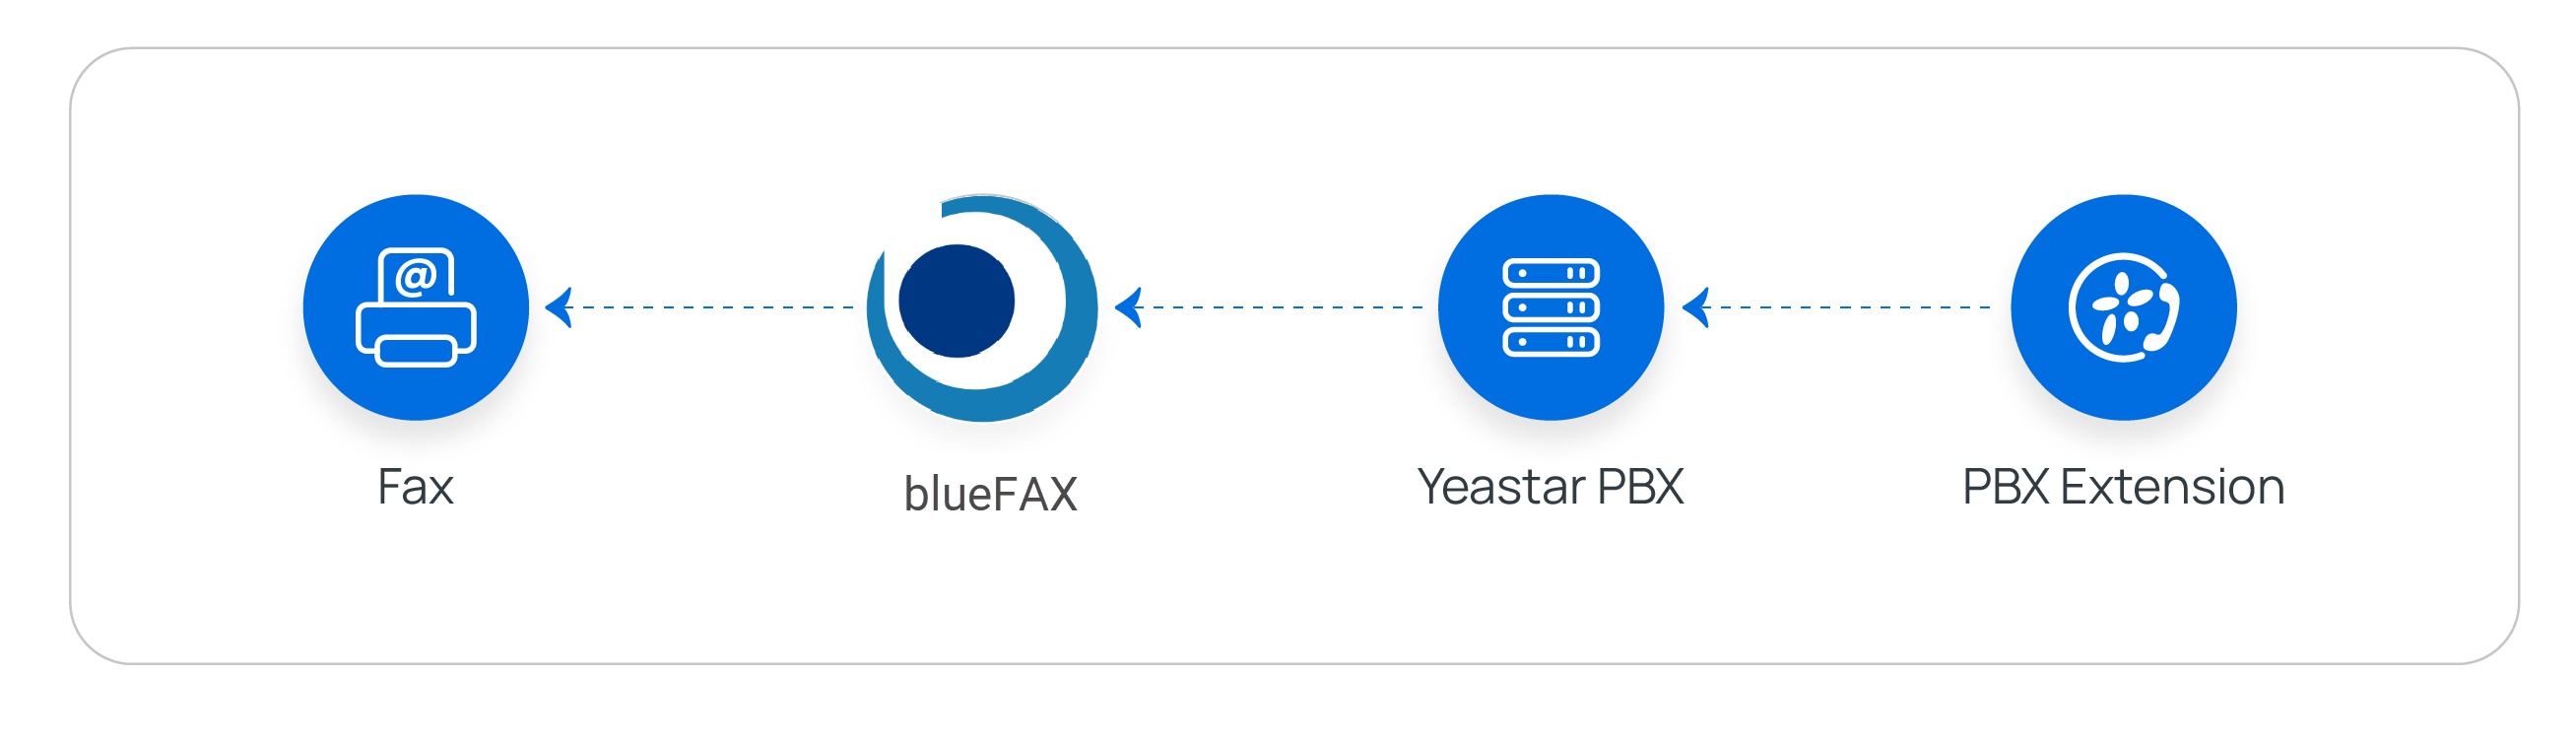
- When a fax arrives at blueFAX's fax number, blueFAX sends a Webhook
notification to Yeastar PBX. PBX then retrieves the fax file via API and
delivers it to the designated extension users' Linkus or emails.
You can easily set up the integration by following the instructions below:
- Obtain Webhook URL from Yeastar PBX.
- Configure Webhook URL and obtain the required credentials on blueFAX portal.
- Fill in the obtained credentials in Yeastar PBX, then configure fax-related settings.
Requirements
- Firmware: Version 37.22.0.138 or later
- Plan: Enterprise Plan or Ultimate Plan
- Network: Remotely accessible via a domain name or public IP.
Prerequisites
- Get account from blueFAX.
- Purchase fax number(s) for your account.
Step 1. Obtain Webhook URL from Yeastar PBX
On Yeastar PBX web portal, obtain a Webhook URL first, which is required when you set up Webhook notification on blueFAX.
- Go to the fax integration page.
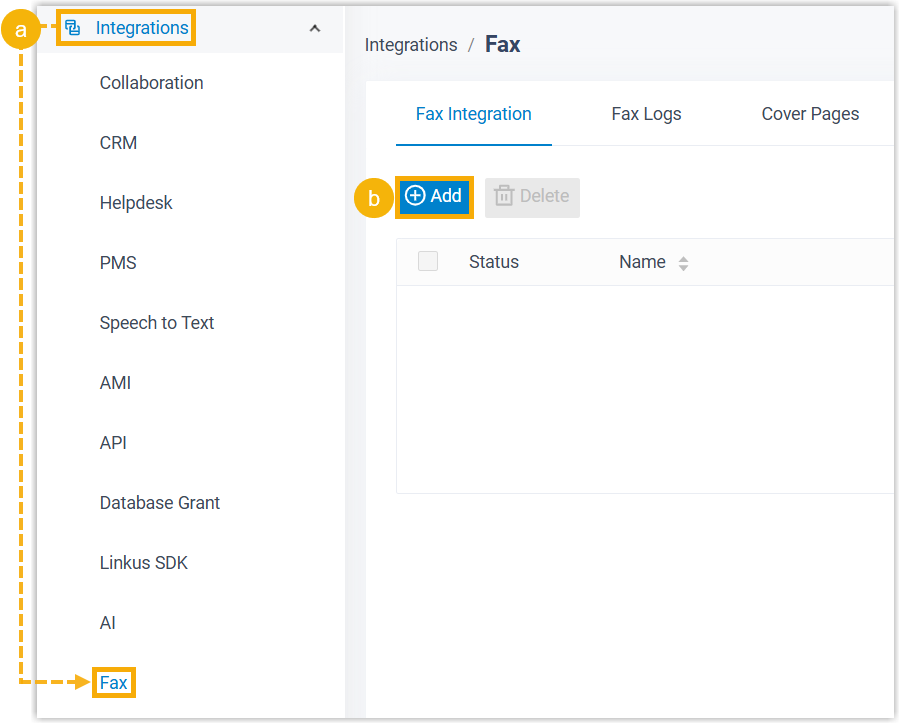
- Log in to PBX web portal, go to .
- Under Fax Integration tab, click Add.
- Obtain the Webhook URL for blueFAX.Important: The URL will change once you leave the current page. Please remain on this page until you have configured the Webhook URL and obtained credentials from blueFAX to complete the integration setup on this page.
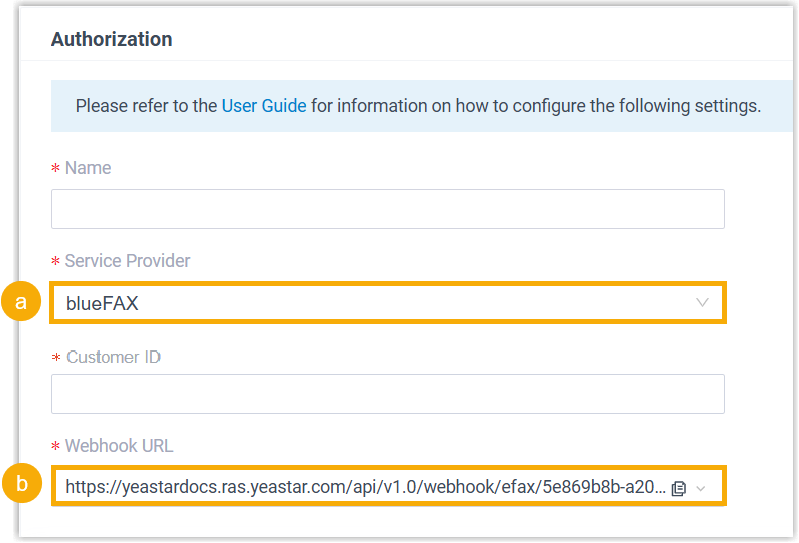
- In the Service Provider drop-down list, select blueFAX.
- In the Webhook URL field, click
 to copy the URL and save it for later use.
Step 2. Configure Webhook URL and obtain credentials on blueFAX portal
- 1. Configure Webhook URL
-
- Log in to the blueFAX portal using your account.
- In the top navigation bar, click the My Account tab.
- Go to , configure Webhook URL.
- Click Go
to setting page.

- In the Webhook-URL field, enter the Webhook URL obtained from
Yeastar PBX.
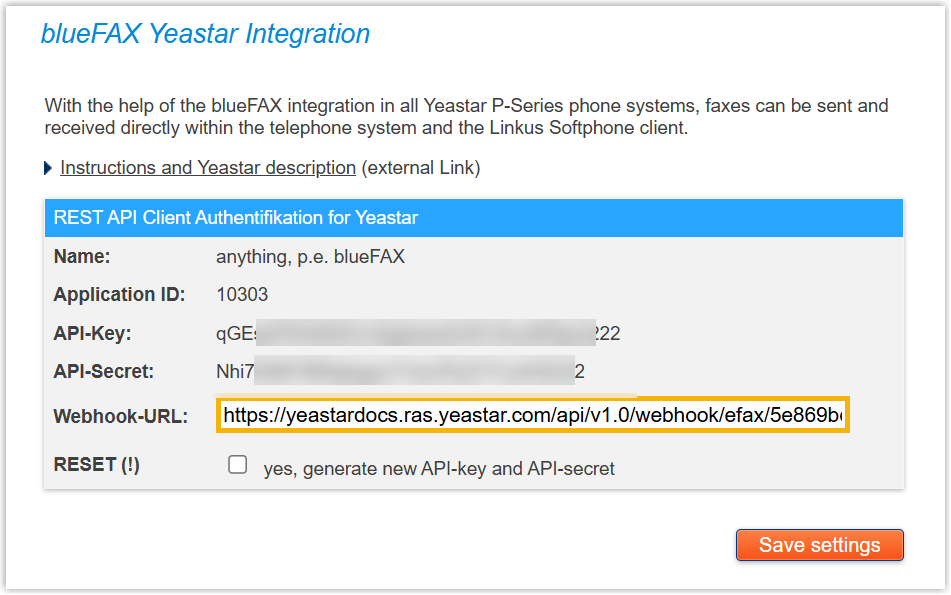
- At the bottom-right corner, click Save settings.
- Click Go
to setting page.
- 2. Obtain credentials from blueFAX
-
- At the top-right corner, copy the customer
ID next to your username and save it for later use.

-
Go to , do as follows to obtain API key and API secret.
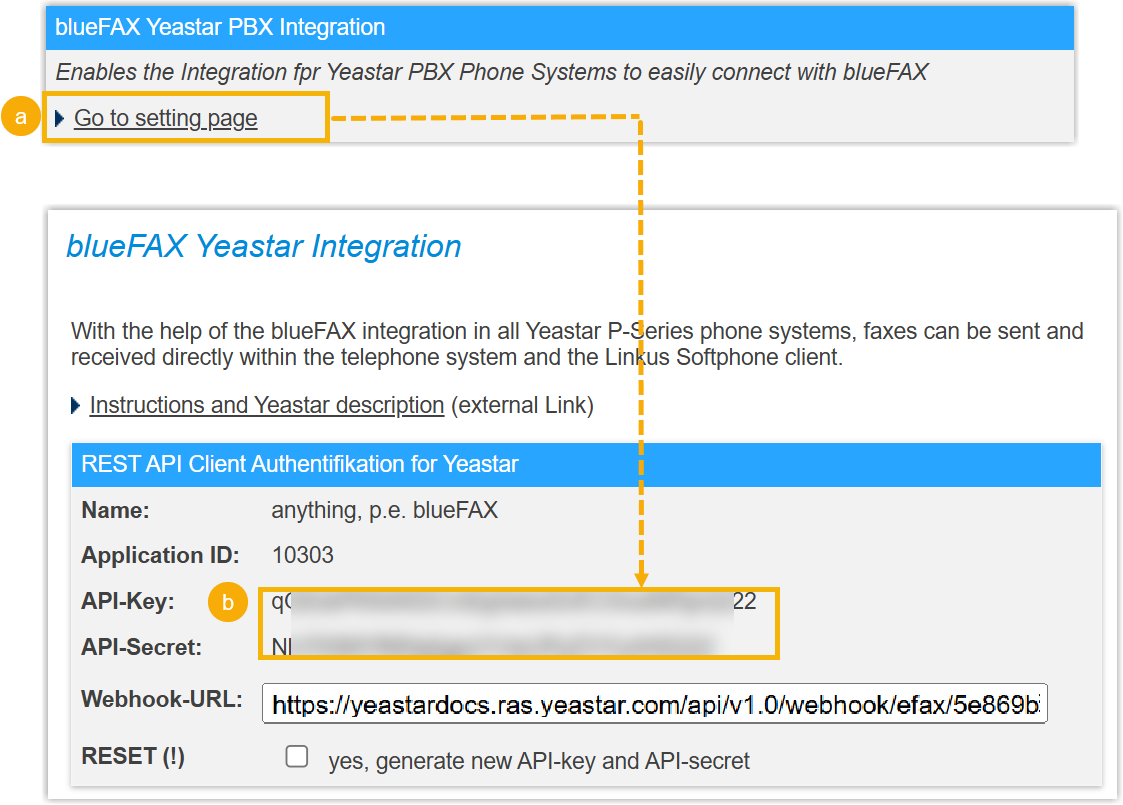
- Click Go to setting page.
-
In the REST API Client Authentication for Yeastar section, copy the API key and API secret, and save them for later use.
- Go to My Faxnumbers, copy the desired fax numbers and save them for later use.
- At the top-right corner, copy the customer
ID next to your username and save it for later use.
Step 3. Fill in credentials and configure fax settings on Yeastar PBX
On Yeastar PBX web portal, fill in the credentials obtained from blueFAX, then configure the fax-related settings to complete the fax integration.
- Go back to the previously opened fax adding page on the PBX web portal.
- In the Authorization section, complete the
authorization settings.
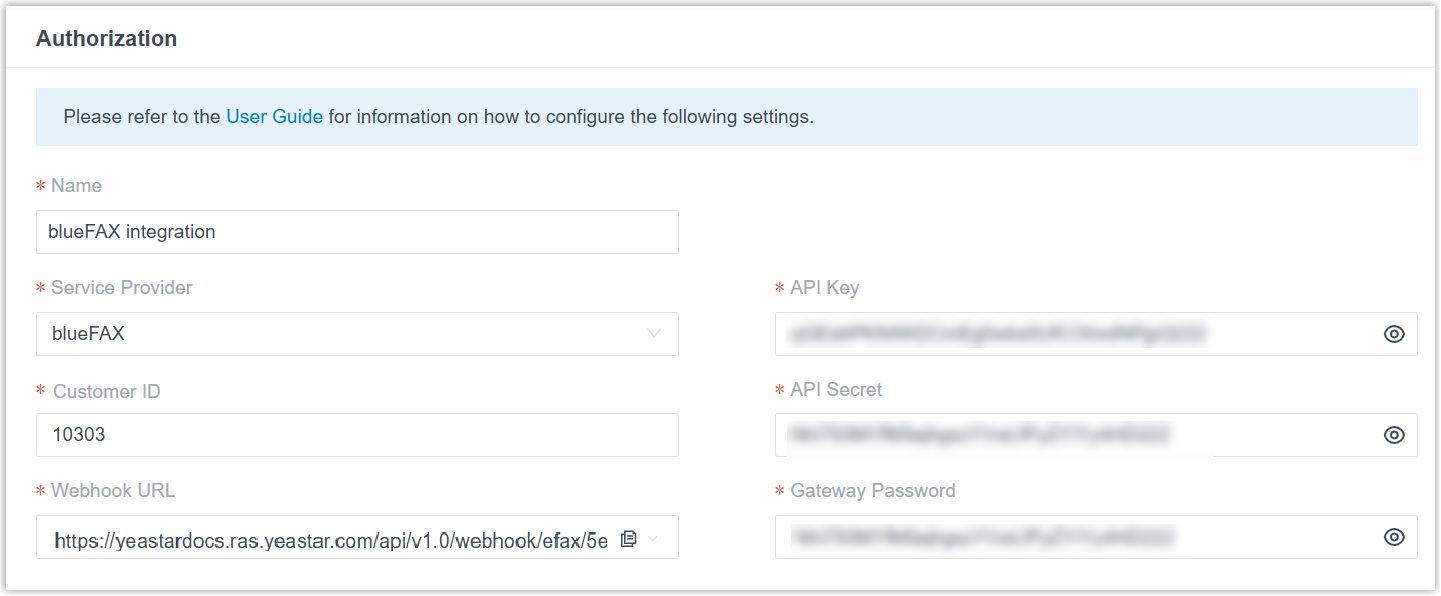
Setting Description Name Enter a name to help you identify the integration. Customer ID Paste the customer ID obtained from blueFAX. API Key Paste the API key obtained from blueFAX. API Secret Paste the API secret obtained from blueFAX. - Optional: To forward inbound faxes as email
attachments to designated addresses, perform the following
operations.
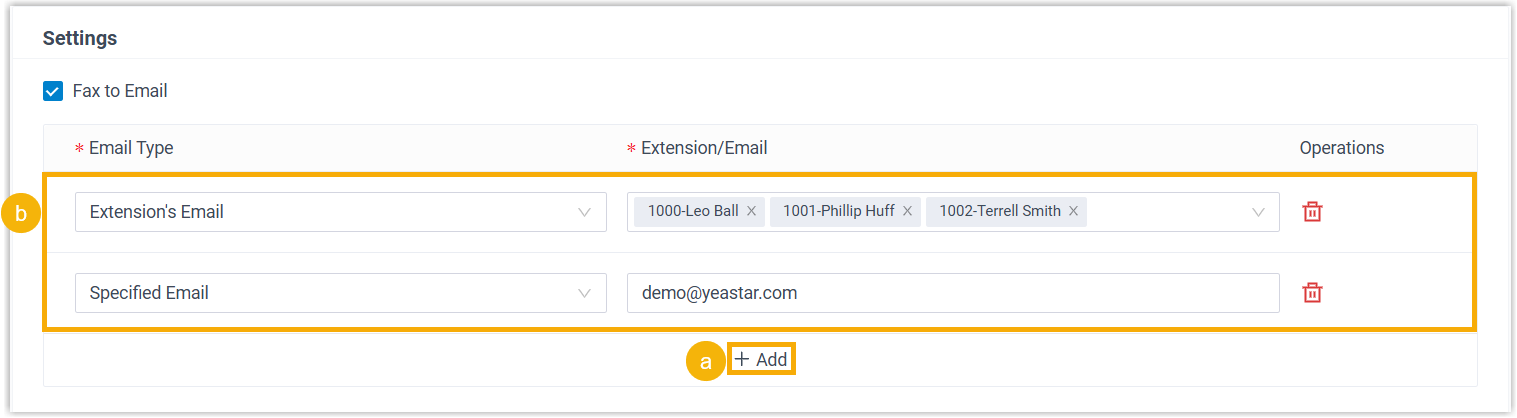
- In the Settings section, click
Add.Note: You can add up to 5 email entries.
- In the Email Type drop-down list, select the
type of email address and complete the corresponding settings.
- Extension's Email: Send the inbound
faxes as email attachments to extension users'
mailboxes.If you choose this option, select the desired extensions from the Extension/Email drop-down list.Note: Ensure the selected extensions have valid email addresses configured. Otherwise, users will not receive the emails.
- Specified Email: Send the inbound
faxes as email attachments to a specified email
address.
If you choose this option, enter a custom email address in the Extension/Email field.
- Extension's Email: Send the inbound
faxes as email attachments to extension users'
mailboxes.
- In the Settings section, click
Add.
- Set fax number(s) and specify which extension users are authorized to send
and receive faxes.
- In the Fax Number section, click Add.
- In the pop-up window, configure the following settings, then
click Save.
Setting Description Fax Number Enter the fax number obtained from blueFAX in E.164 format. For example, if the fax number is
089-41324038in Germany (country code:49), the field should be filled with+498941324038.Fax Reception Destination Select extensions or extension groups that can receive inbound faxes. The designated users can view inbound faxes from Linkus Desktop or Web Client (Path: ).
Extensions Allowed to Send Fax Select extensions or extension groups that can send faxes. The designated users can send faxes from Linkus Desktop or Web Client (Path: ).
- At the bottom-right corner, click Save.
- To add more fax numbers, repeat steps a-c.
- Click Save.
Result
-
The Status displays
 ,
indicating the integration with blueFAX has been set up
successfully.
,
indicating the integration with blueFAX has been set up
successfully.
- Authorized extension users can send and receive faxes via blueFAX directly from their own Linkus Desktop Client or Web Client.
What to do next
- (Optional) Customize cover pages, which will be accessible to extension
users when they send faxes.
For more information, see Add a Fax Cover Page.
- Instruct extension users on how to send faxes and check inbound faxes from
their Linkus Desktop or Web Client.For more information, see the following topics:
- Linkus Desktop Client: Send Faxes from Linkus Desktop Client and Check Faxes from Linkus Desktop Client.
- Linkus Web Client: Send Faxes from Linkus Web Client and Check Faxes from Linkus Web Client.