Set up Helpdesk Integration Features
This topic describes how to set up the integration features after you integrate the PBX with a custom Helpdesk, including contact synchronization, contact creation, call journal, etc.
Prerequisites
You have integrated the PBX with a custom Helpdesk via template.
Set up contact synchronization
- Log in to PBX web portal, go to .
- In the Synchronize Contacts Automatically section, turn on the switch.
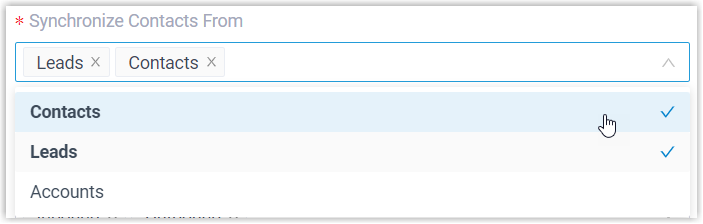
- In the Synchronize Contacts From drop-down list,
select the type(s) of contacts to be synchronized from Helpdesk.
-
In the Synchronize to Phonebook drop-down list, select an existing empty phonebook or create a new phonebook to store the contacts that will be synchronized from Helpdesk.
Note: The contacts can only be synchronized to an empty phonebook.
- On the Always Query Helpdesk option, decide whether
to search contacts in the Helpdesk real-time.

- If enabled, PBX will query Helpdesk in real time for contact information, and support real-time dial search for Helpdesk contacts in the Linkus clients of the associated extension users.
- If disabled, PBX will only query Helpdesk when there is no matching
information found in the PBX company contacts.Note:
- Enabling this feature will increase API usage, so make sure to monitor your quota accordingly.
- The real-time search is not supported when masked number is enabled.
- Click Save.
Set up contact creation
If this feature is enabled, a new contact can be created in the Helpdesk, automatically or manually depending on your settings, when the associated extensions call or receive calls from an unknown number.
- Log in to PBX web portal, go to .
- In the Create New Contact section, turn on the switch.
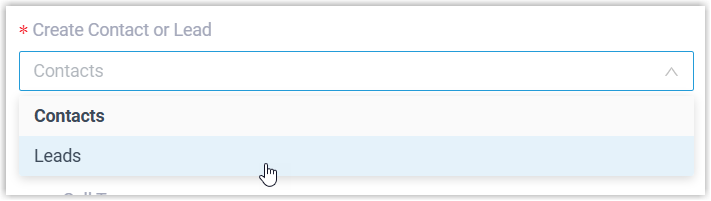
- In the Create Contact or Lead drop-down list, select
the desired type of contact.
- In the Create Method section, select the desired
creation method according to your needs.
- If you want the system to automatically create contacts in the
Helpdesk based on specified types of calls, do as follows:
- Select Automatically.
- In the Call Type drop-down list,
select when will a contact be automatically created in the
Helpdesk.
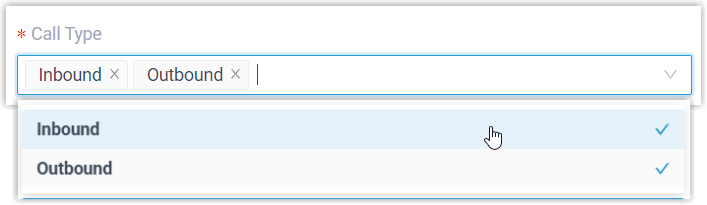
- Inbound: Inbound call from an unknown number that doesn't match a Contact already in the Helpdesk.
- Outbound: Outbound call to an unknown number that doesn't match a Contact already in the Helpdesk.
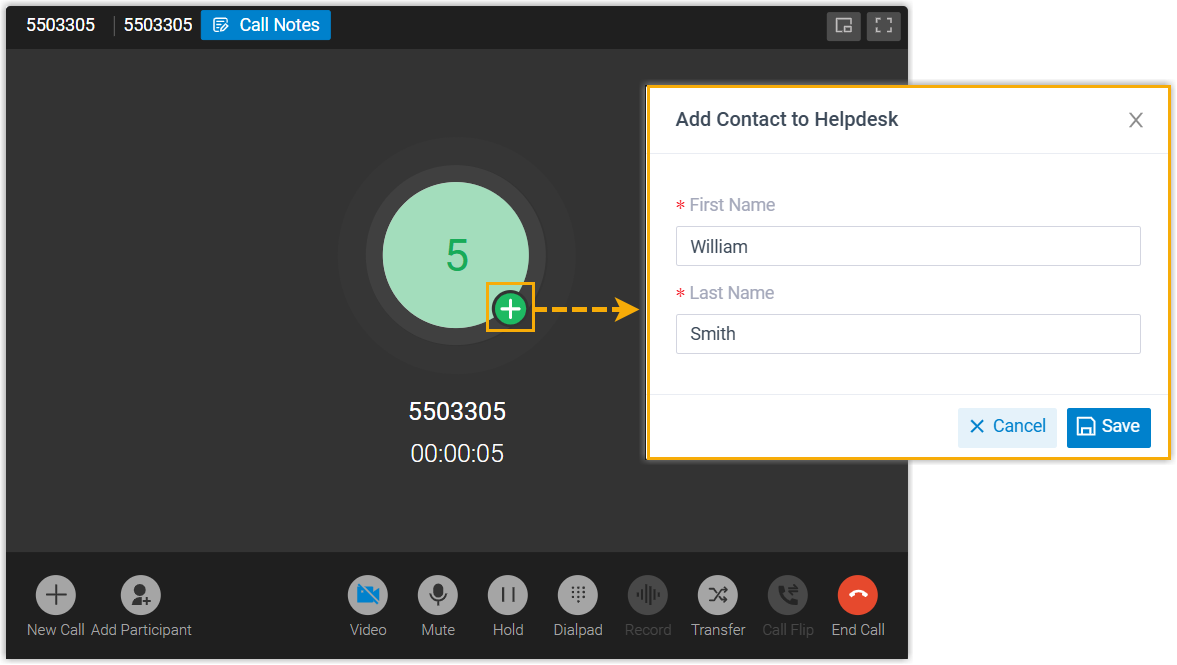
- If you want to allow associated extension users to manually create
contacts in the Helpdesk during a call, select
Manually.
During a call with an unknown number, users can add the contact to the Helpdesk directly on the call window.
- If you want the system to automatically create contacts in the
Helpdesk based on specified types of calls, do as follows:
- Click Save.
Set up call popup
- Log in to PBX web portal, go to .
- Click
 to edit the extension associated with a Helpdesk user.
 - In the Linkus Clients tab, scroll down to your desired Linkus client, then select the checkbox of Open Contact URL Using System-Integrated Helpdesk.
- In the Popup Method section, decide the method of
call popup.
- If you want the system to automatically open the Helpdesk
contact details page, do as follows:
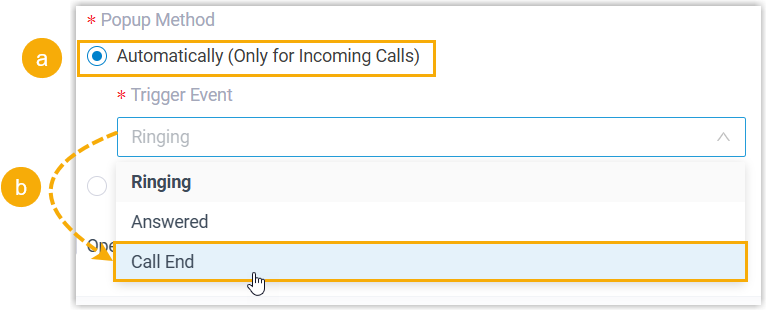
- Select Automatically (Only for Incoming Calls).
- In the Trigger Event drop-down
list, set when the call popup will be automatically
triggered.
- Ringing: A call popup will be triggered when a user receives an inbound call from a Helpdesk contact.
- Answered: A call popup will be triggered when a user answers an inbound call from a Helpdesk contact.
- Call End: A call popup will be triggered when a user finishes a call with a Helpdesk contact.
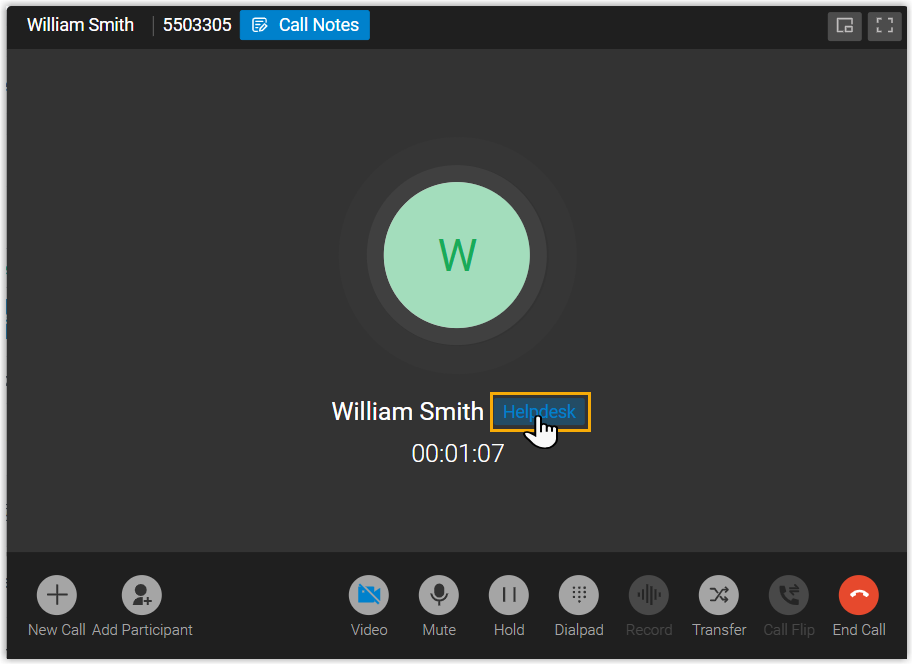
- If you want the associated extension user to manually open the
contact's URL during a call with a Helpdesk contact, select
Manually.
During a call with a Helpdesk contact, users can manually open the contact URL from the call window.
- If you want the system to automatically open the Helpdesk
contact details page, do as follows:
- Click Save.
Set up call journaling
If this feature is enabled, all outbound calls, incoming calls, and missed call records will be logged to Helpdesk automatically, which helps users to keep track of every conversation.
- Log in to PBX web portal, go to .
- In the Call Journal section, turn on the switch.
- Configure the following call log information according to your
needs.

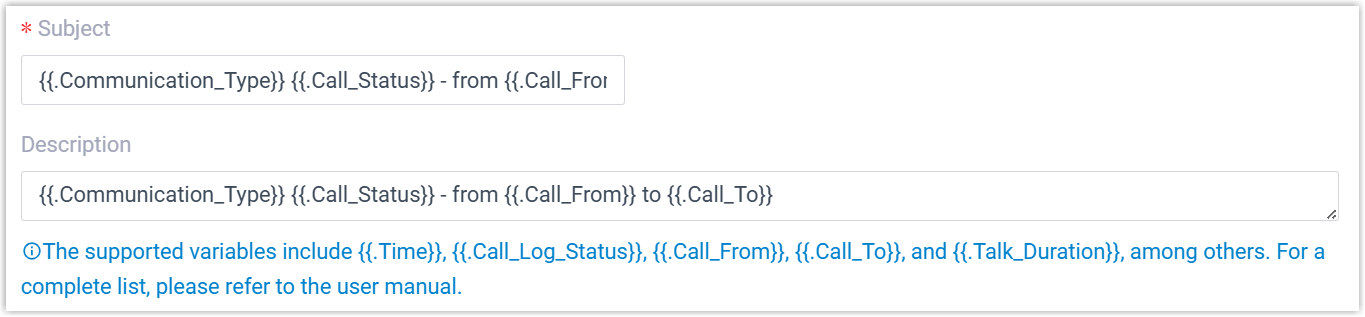
- Subject: The subject of the call log.
- Description: The description of the call log.
Note: The contents can be composed of variables. For the supported variables, see XML Description - supported variables. -
Configure the following settings according to your needs.
Setting Description Play Call Recording If enabled, the Helpdesk users who associated with extensions on PBX can directly view and play call recordings stored on the PBX within the Helpdesk system.
Note: When users click to play call recording in the Helpdesk, the system will request recording file from the PBX. For details on how the Helpdesk platform protects the privacy of recording data, please contact Helpdesk provider.Disable Display Missed Call Records in Unanswered Agents If enabled, for queue and ring group calls, the PBX will only synchronize the call logs to the Helpdesk of the agent who answers the call, while missed call logs for the same call are not synchronized to the Helpdesk of agents who did not answer. - Click Save.
Set up chat journaling
- Log in to PBX web portal, go to .
- On the Helpdesk integration page, turn on Chat Journal.
- In the Subject field, configure the subject for the
synchronized record according to your needs.
 Note: The contents can be composed of variables. For the supported variables, see XML Description - Chat Journal Scenario Variables.
 - Click Save.
Set up automatic ticket creation
- Log in to PBX web portal, go to .
- On the Helpdesk integration page, turn on Create New Ticket Automatically.
- Set up the time point and call type(s) of automatic ticket creation.
When to Create New Ticket Description Before the Call A ticket will be created in Helpdesk when the Helpdesk user receives an inbound call from, or places an outbound call to a Helpdesk contact. In the The Type of Call to Create Ticket drop-down list, select specific call type(s) based on which a new ticket will be created.
- Inbound: Inbound calls.
- Outbound: Outbound calls.
After the Call A ticket will be created in Helpdesk when the user ends the call with a Helpdesk contact. In the The Type of Call to Create Ticket drop-down list, select specific call type(s) based on which a new ticket will be created.
- Inbound Answered: Inbound calls that are answered.
- Inbound No Answer: Inbound calls that are missed.
- Outbound Answered: Outbound calls that are answered.
- Outbound No Answer: Outbound calls that are not answered.
- Configure the following ticket information according to your needs.
- Subject: The subject of the ticket.
- Description: The description of the ticket.
Note: The contents can be composed of variables. For the supported variables, see XML Description - supported variables. - Click Save.