Integrate Yeastar P-Series PBX System with Bitrix24 CRM
This topic describes how to integrate Yeastar P-Series PBX System with Bitrix24 CRM via Bitrix24 REST API (webhook).
Requirements
Before you begin, make sure that your Bitrix24 and Yeastar P-Series PBX System meet
the following requirements:
- Bitrix24
-
- Version: Use Bitrix24 Cloud Edition with any of
the following plans subscribed:
- Basic
- Standard
- Professional
- Enterprise
- Account: Use Main Administrator account for integration.
- Version: Use Bitrix24 Cloud Edition with any of
the following plans subscribed:
- PBX server
-
- Plan: Enterprise Plan (EP) or Ultimate Plan (UP)
- Firmware: Version 37.23.0.83 or later.
- Network Capability: Have access to the Internet.
Procedure
Step 1. Create an inbound webhook on Bitrix24
Create an inbound webhook on Bitrix24 to allow Yeastar P-Series PBX System to access your Bitrix24 via API.
- Log in to your Bitrix24 with Main Administrator account.
- On the left navigation bar, click .
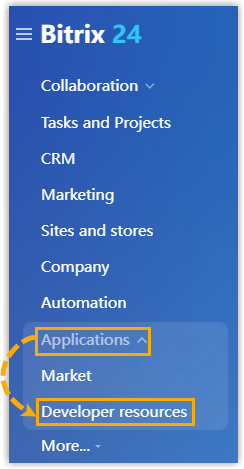
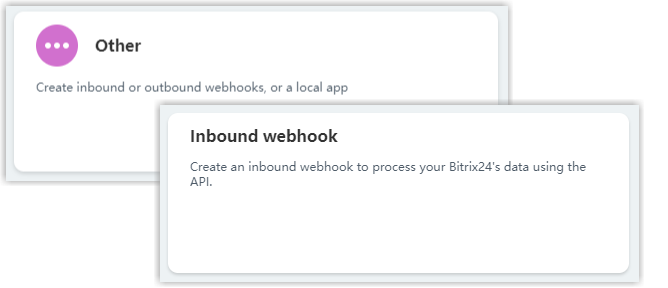
- Under Common use cases tab, click
Other, then click Inbound
webhook.
- On the configuration page, create an inbound webhook as follows:
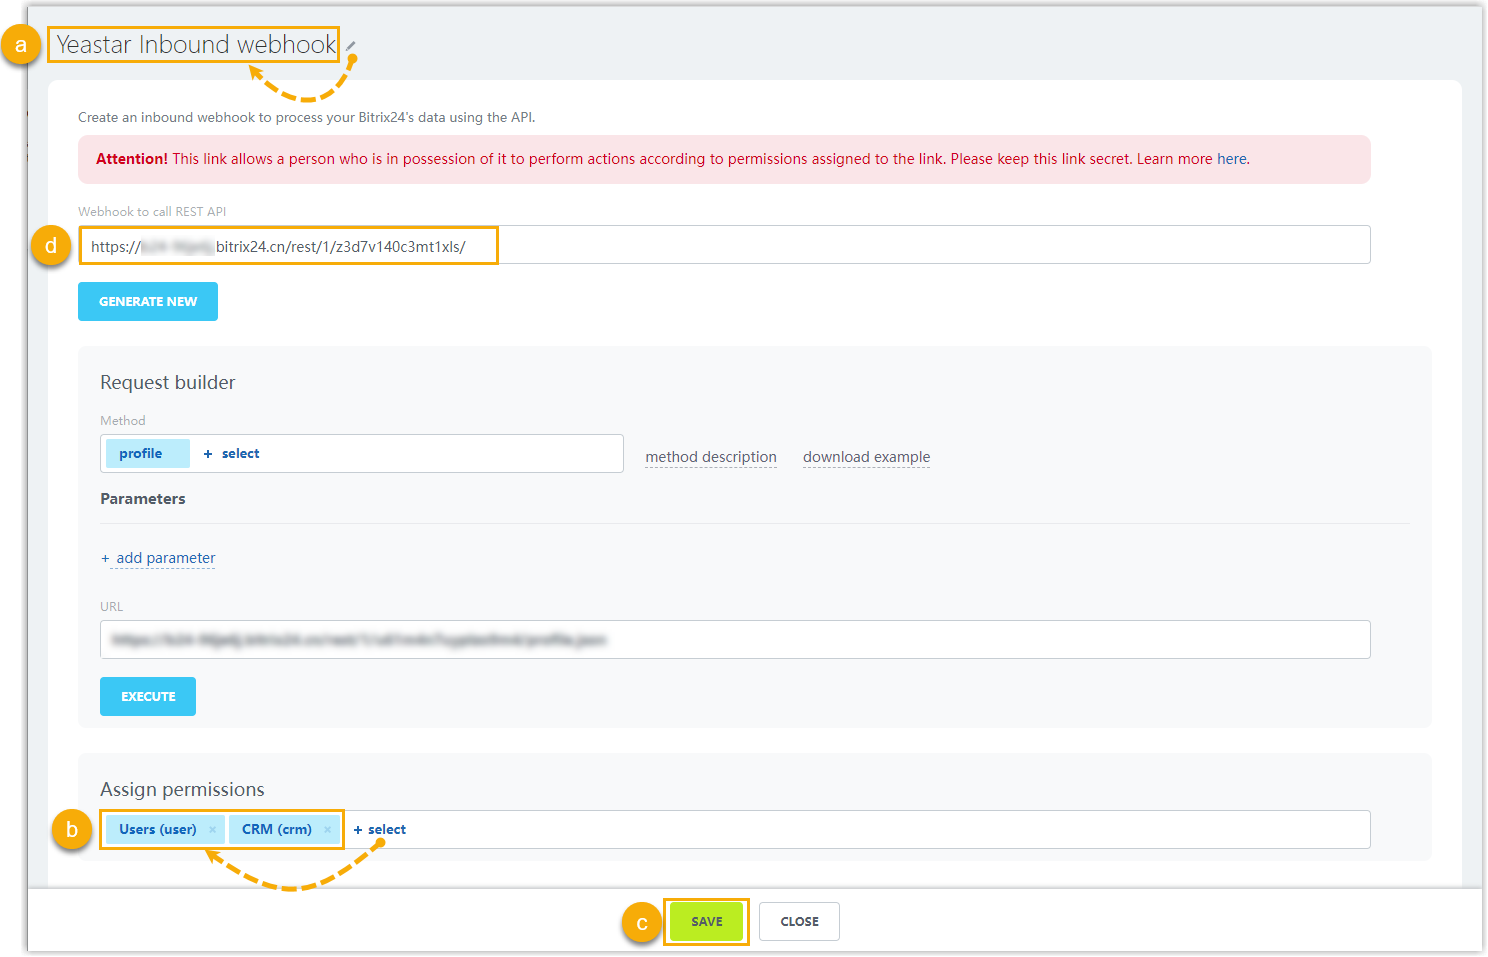
- Click
 to edit the inbound webhook
name. In this example, enter Yeastar Inbound
webhook.
to edit the inbound webhook
name. In this example, enter Yeastar Inbound
webhook. - In the Assign permissions section, click + select, then select Users (user) and CRM (crm).
- Click Save.
- Copy the URL in the Webhook to call REST
API field, which will be used on Yeastar PBX for the
integration.Tip: In future use, if you want to update the webhook, you can proceed on .
- Click
Step 2. Connect Yeastar P-Series PBX System and Bitrix24 CRM
On Yeastar P-Series PBX System, enter the domain name and inbound webhook URL obtained from Bitrix24 to connect to the CRM.
- Log in to PBX web portal, go to .
- Click Bitrix24.
- In the Inbound Webhook URL field, enter the URL that you have
obtained from Bitrix24.

- In the Your Bitrix24 Address field, enter the domain
name of your Bitrix24.

- Click Save.
If the authentication succeeds, a pop-up window will be shown as below.
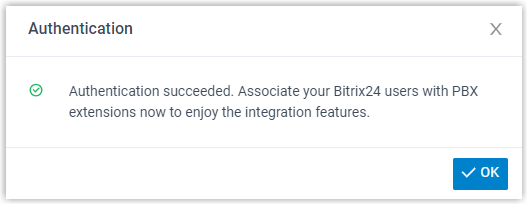
- Click OK to confirm.
The Status field displays Connected, indicating that Yeastar P-Series PBX System is connected to Bitrix24 CRM successfully.

Step 3. Associate Bitrix24 users with PBX extensions on Yeastar P-Series PBX System
- On the CRM integration page of PBX, click
 beside Bitrix24
User to obtain the latest list of Bitrix24 users.
beside Bitrix24
User to obtain the latest list of Bitrix24 users.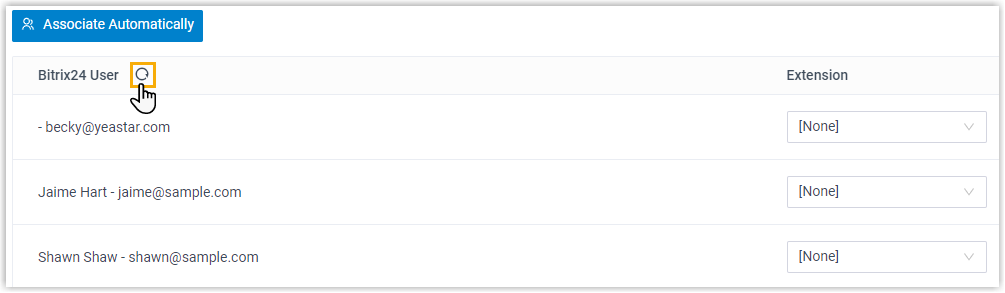
- Associate Bitrix24 users with PBX extensions.
- Associate automatically
- If users bind the same email address to their Bitrix24 accounts and PBX extensions, you can implement automatic association of their Bitrix24 accounts and PBX extensions as follows:
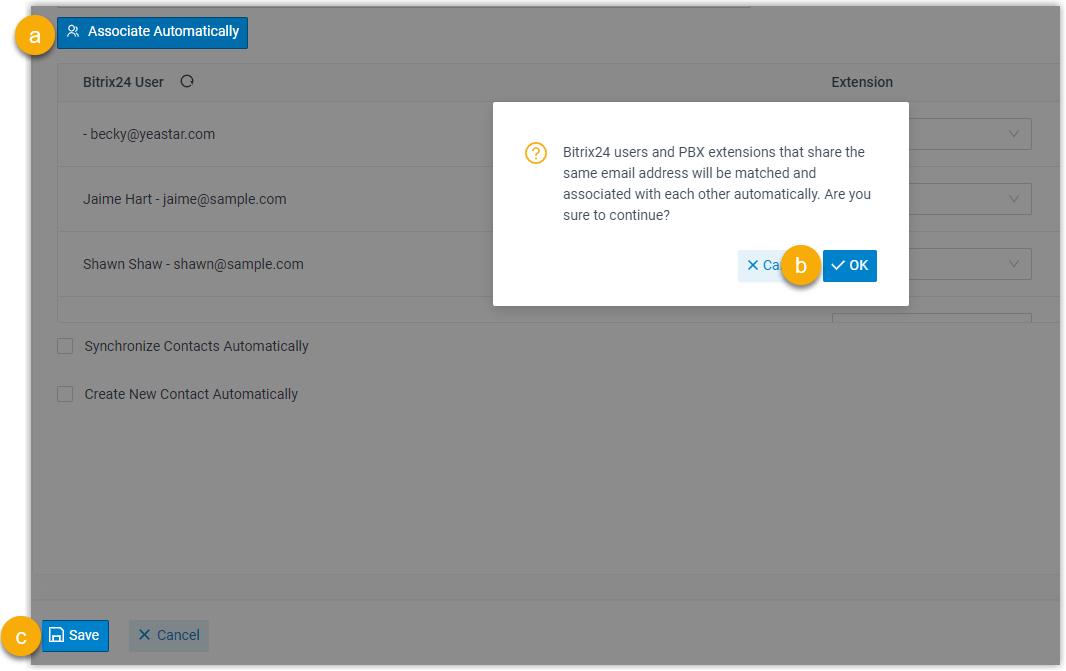
- Associate manually
- If users bind different email addresses to their Bitrix24 accounts and PBX extensions, you need to manually associate these users' Bitrix24 accounts and PBX extensions as follows.
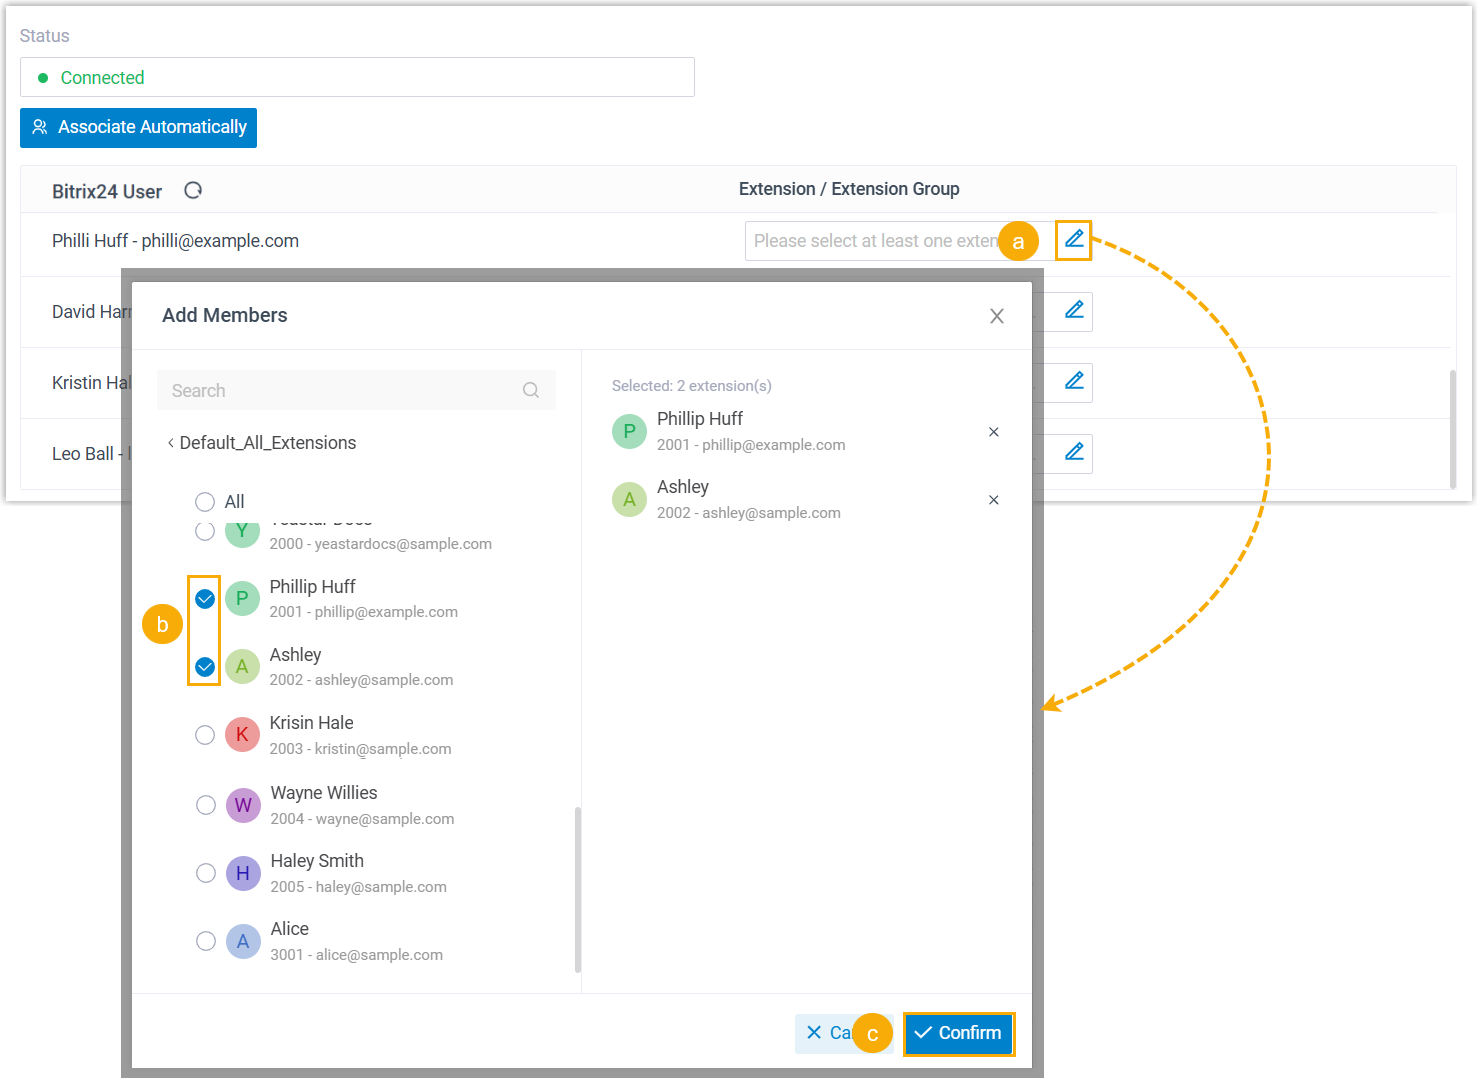
-
- In the Extension / Extension
Group field beside the Bitrix24 user,
click
 .
. - In the pop-up window, select the desired user's extension(s).
- Click Confirm.
- Click Save.
- In the Extension / Extension
Group field beside the Bitrix24 user,
click
Result
- The integration of Yeastar P-Series PBX System and Bitrix24 CRM is set up.
- The associated Bitrix24 users can make or receive calls with their PBX extensions.