Add a Tenant
A tenant is a dedicated instance of the services of NovoOne, and your organization data stored within a specific default location. You can create tenants when your subscribe to NovoOne service.
Procedure
- Log in to NovoOne Platform portal, go to Tenant.
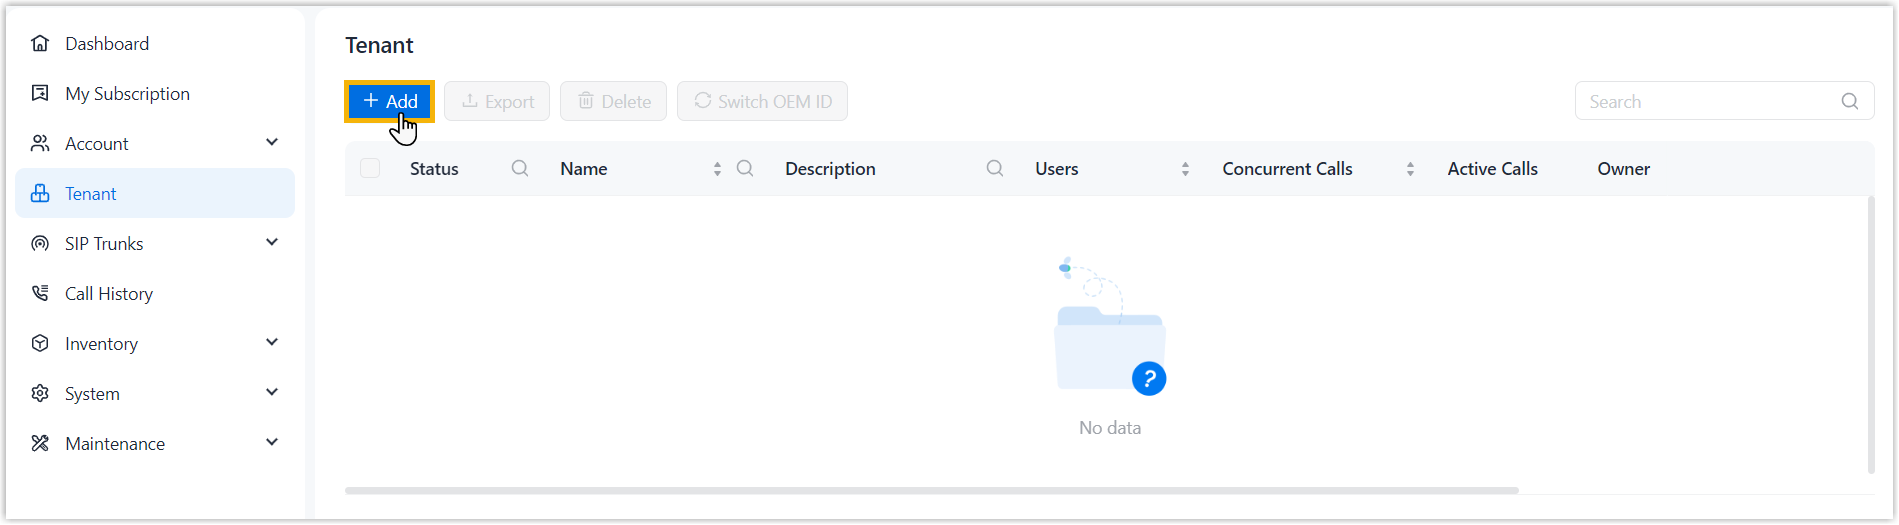
- At the top of the list, click Add.
- In the Basic tab, configure the basic settings.
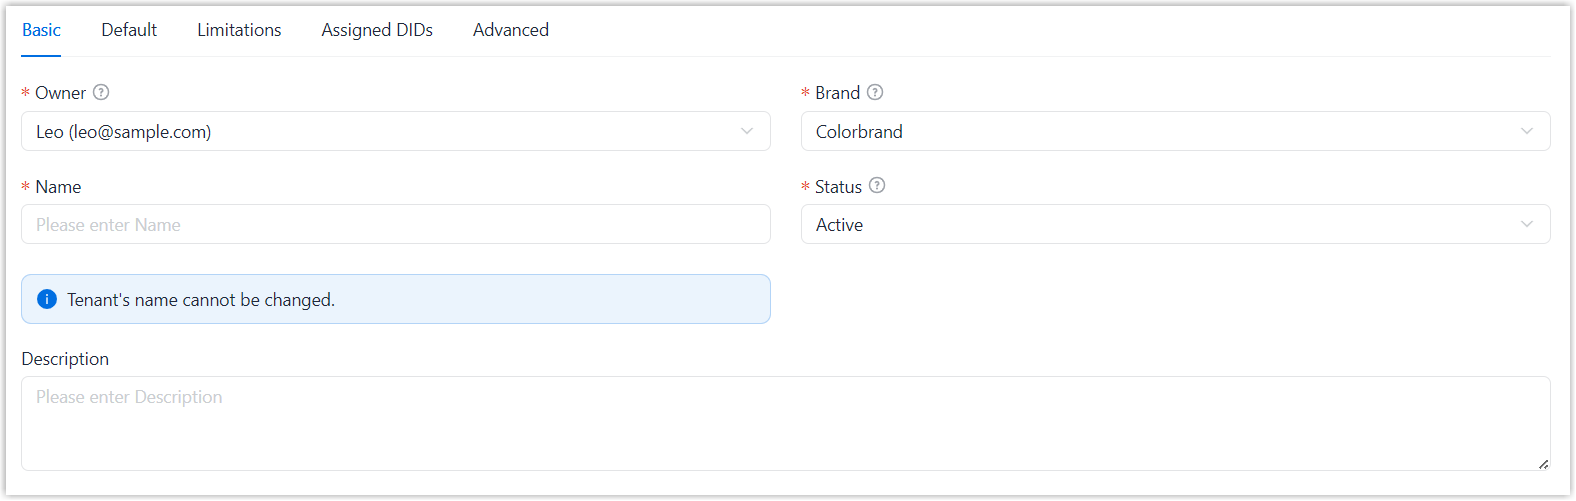
Setting Description Owner By default, your account is selected as the tenant owner. Resources configured for the tenant are allocated from your subscription resources, and tenant ownership is assigned to your company.
If you create the tenant for a subordinate user, select their account from the drop-down list. In this case, resources are allocated from their subscription resources, and tenant ownership is assigned to the reseller.
Brand Select a branding. Note:- This setting is available only when the selected tenant owner subscribes to White Label service. Available branding options are synchronized from .
- Brand information is displayed only when the tenant is accessed through a custom domain (configured in ).
Name Enter a name to help identify the tenant. Note: A company name or domain name is typically used. The name becomes part of the username format for users logging in to the tenant.Status Active is selected by default, indicating that the tenant is ready for use once it is set up. Note: In future use, you can change the tenant status to Suspended when its access needs to be temporarily disabled, such as when the customer does not renew their subscription. After suspension, the tenant portal becomes inaccessible and all calls are stopped.Description Enter a short description for the tenant. - In the Default tab, configure the default settings.
- General

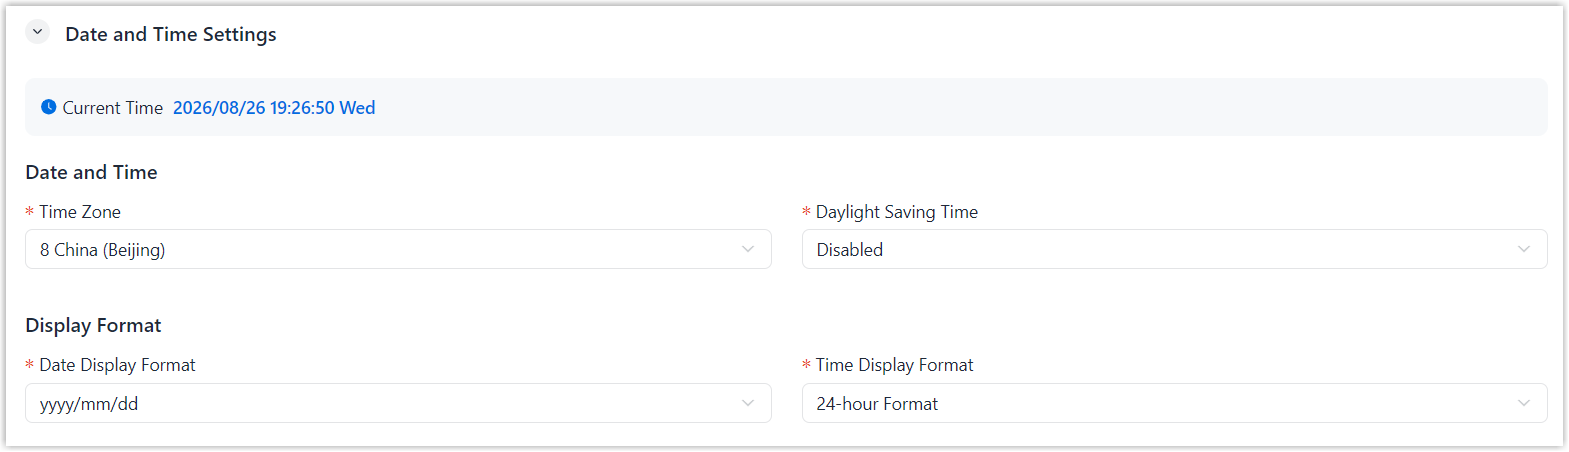
- Date and Time Settings
- Language

- In the Limitations tab, configure the resource limits.
Setting Description Max Users Set the maximum number of users that can be created. Max Concurrent Calls Set the maximum number of concurrent calls allowed. - Limited: Allow a limited number of concurrent
calls.
If selected, specify the maximum number of concurrent calls allowed in the subsequent field.
- Unlimited: Allow an unlimited number of concurrent calls. If selected, the actual limit is subject to your available subscription resources.
Max Call Duration (s) Set the maximum duration allowed for each call. When the specified duration is reached, calls will be automatically disconnected.
Note: This setting applies to all calls, including internal and external calls.Recording Users Click Add to configure recording quotas. - Recording Retention Time: Set the retention period for recordings.
- Recording Users: Set the maximum number of users whose recordings can be retained for the specified period.
Transcription Users Set the maximum number of users who can use transcription. Note: This setting is available only when the selected tenant owner subscribes to the corresponding service and has available quota.AI Receptionist (One-Time Capacity) Set the number of AI receptionist minutes allowed. Note:- This setting is available only when the selected tenant owner subscribes to the corresponding service and has available quota.
- Each tenant includes a one-time free capacity of 60 minutes.
AI Receptionist (Monthly Rolling Pack) Set the number of AI receptionist monthly rolling packs allowed. Note:- This setting is available only when the selected tenant owner subscribes to the corresponding service and has available quota.
- The quota will reset each month.
Max Queues Set the maximum number of queues allowed. Max Ring Groups Set the maximum number of ring groups allowed. Max IVRs Set the maximum number of IVRs allowed. Max Mobile Clients Set the maximum number of Mobile Clients that can be enabled for users. - Limited: Allow a limited number of Mobile
Clients.
If enabled, specify the maximum number allowed in the subsequent field.
- Unlimited: Allow Mobile Client to be enabled for all users.
Max Web Clients Set the maximum number of Web Clients that can be enabled for users. - Limited: Allow a limited number of Web
Clients.
If enabled, specify the maximum number allowed in the subsequent field.
- Unlimited: Allow Web Client to be enabled for all users.
Max Voicemail Duration (s) Set the maximum duration allowed for recording a voicemail. Once the limit is reached, the voicemail will be automatically saved.
Min Voicemail Duration (s) Set the minimum duration required for recording a voicemail. A voicemail shorter than this duration is considered invalid and will not be saved.
Max Voicemail Messages Set the maximum number of messages each voicemail box can store. Once the limit is reached, the system automatically deletes the earliest voicemails.
- Limited: Allow a limited number of concurrent
calls.
- In the Assigned DIDs tab, assign DIDs to the tenant and
configure the related settings.
- In the Assign DIDs section, click
Add to assign a trunk and configure the related
settings.
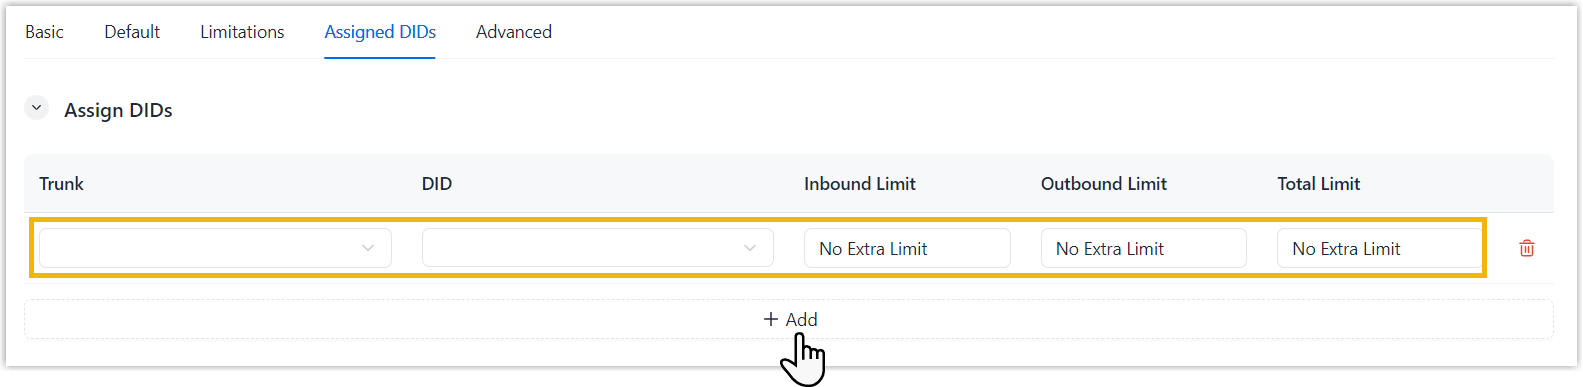
Setting Description Trunk Select a trunk.
DID Select DID numbers to assign to the tenant. Inbound Limit Set the maximum number of concurrent inbound calls to the DID number. Note: No Extra Limit indicates that no additional limit is applied at the tenant level, but the tenant's calls through the trunk are still limited by the settings configured for the trunk or reseller.- Trunk limit: SIP Trunks > SIP Trunks >
 > Advanced > Concurrent Call Limits.
 - Reseller
limit: SIP Trunks > SIP Trunks >
 > Reseller Assignments.
Outbound Limit Set the maximum number of concurrent outbound calls through the trunk. Note: No Extra Limit indicates that no additional limit is applied at the tenant level, but the tenant's calls through the trunk are still limited by the settings configured for the trunk or reseller.- Trunk limit: SIP Trunks > SIP Trunks > > Advanced > Concurrent Call Limits.
- Reseller
limit: SIP Trunks > SIP Trunks > > Reseller Assignments.
Total Limit Set the maximum number of concurrent calls through the trunk, including inbound and outbound calls. Note: No Extra Limit indicates that no additional limit is applied at the tenant level, but the tenant's calls through the trunk are still limited by the settings configured for the trunk or reseller.- Trunk limit: SIP Trunks > SIP Trunks > > Advanced > Concurrent Call Limits.
- Reseller
limit: SIP Trunks > SIP Trunks > > Reseller Assignments.
- Trunk limit: SIP Trunks > SIP Trunks >
- In the Default Outbound Caller ID section, select a number
from the DID pool to use as the default Outbound Caller ID.

- In the Assign DIDs section, click
Add to assign a trunk and configure the related
settings.
- In the Advanced tab, configure codec settings for user
extensions in different call scenarios. Note: Trunk codecs are configured and applied on a per-trunk basis (Path: SIP Trunks > SIP Trunks > > Advanced > Codec Settings).
Type Description Audio Codecs Codecs used for audio calls. Audio Codecs (Wi-Fi) Codecs used for audio calls over Wi-Fi on NovoOne Mobile Client. Audio Codecs (Cellular) Codecs used for audio calls over cellular network on NovoOne Mobile Client. - Click Save.
Result
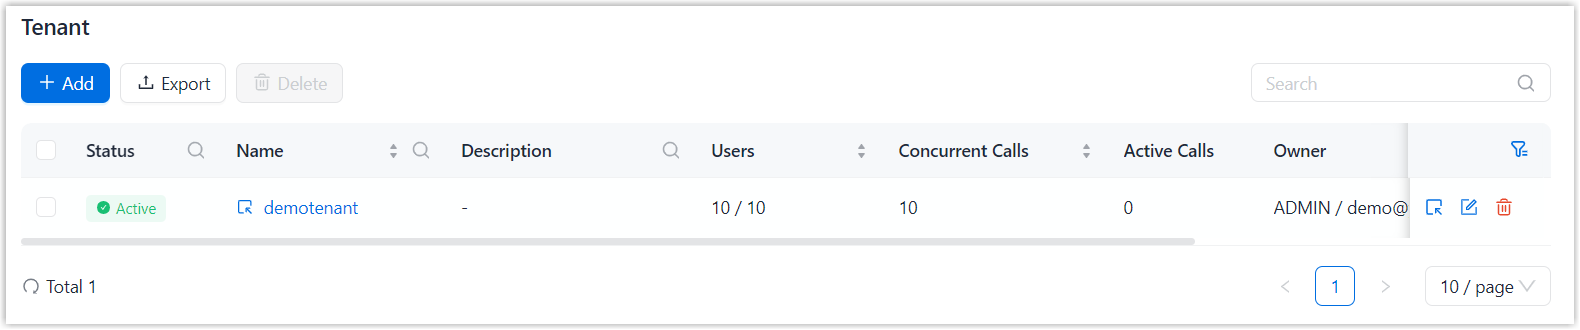
The tenant is created and displayed in the list.