Schedule Auto Backup
Backup Schedule is enabled by default, you can adjust the schedule settings according to your needs.
Note: Do NOT disable Backup Schedule.
- Log in the YMP web interface, go to .
-
Set where to store the backup files.
-
Choose the Storage Location to
Local.
The backup files will be stored to the local disk of the YMP server.

-
Choose the Storage Location to
Local.
-
Set the Backup Schedule.
Important: We suggest that you make a schedule to create backup files everyday and keep at least 7 backup files stored in the YMP system.
-
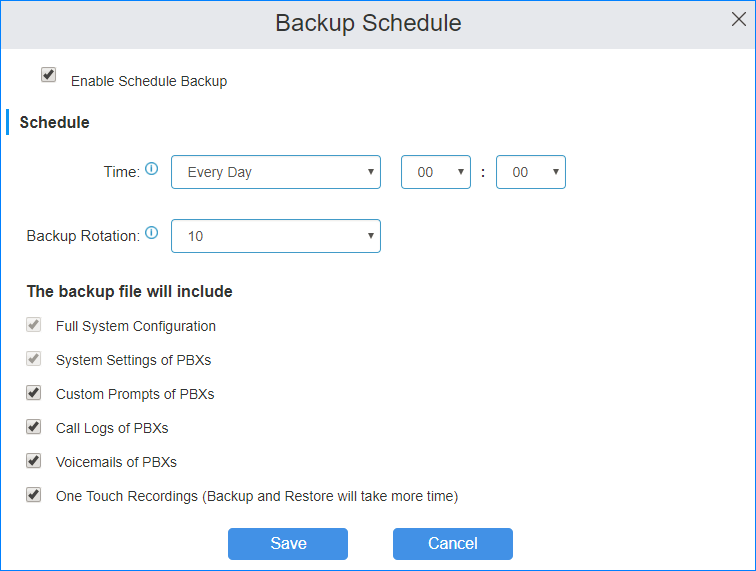
On the Backup Schedule page, configure the
following settings:
- Enable Schedule Backup: Check this option.
- Time: Set the backup frequency and when to create the backup files.
- Backup Rotation: Set the maximum number
of backup files that will be stored in the selected location.
When the number of backup files exceeds the set value, the oldest file will be replaced with the newest.
- The backup file will include: Choose
which configurations and files you want to back up.Note: To ensure that you won't lose any data, we recommend choosing all the files to backup.
-
On the Backup Schedule page, configure the
following settings: