Preparations
Before integrating Zoho applications and Yeastar S-Series VoIP PBX, you need to forward the web access port of the PBX according to your network environment.
Port forwarding
Zoho communicates with Yeastar S-Series VoIP PBX via the following designated ports. You must forward the web access port of your PBX to one of the following external ports.
- Supported external ports
-
- HTTPS 8040
- HTTP 8040
- HTTP 80
- HTTPS 443
-
Note:
- We recommend that you use HTTPS 8040 for secure communication, and upload HTTPS certificate to the PBX.
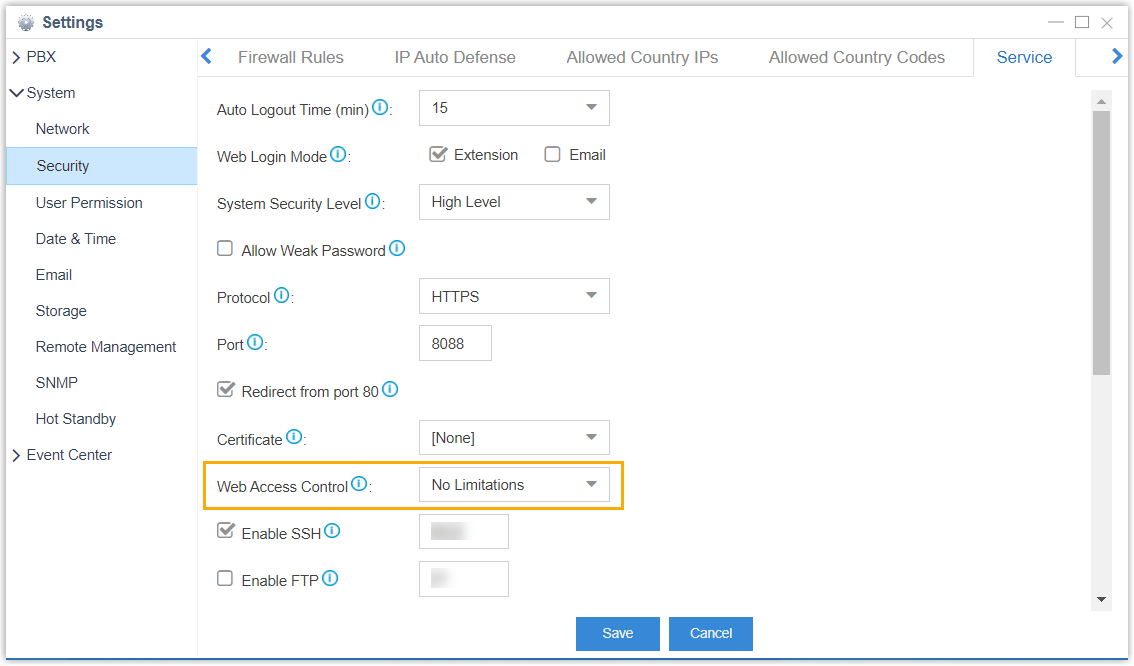
- Ensure
that the web access control is set to either
Permitted IP/Subnet Mask or
No Limitations (Path: ), so that Zoho is able to access the PBX
remotely. The corresponding configuration examples are shown below:
Permitted IP/Subnet Mask No Limitations 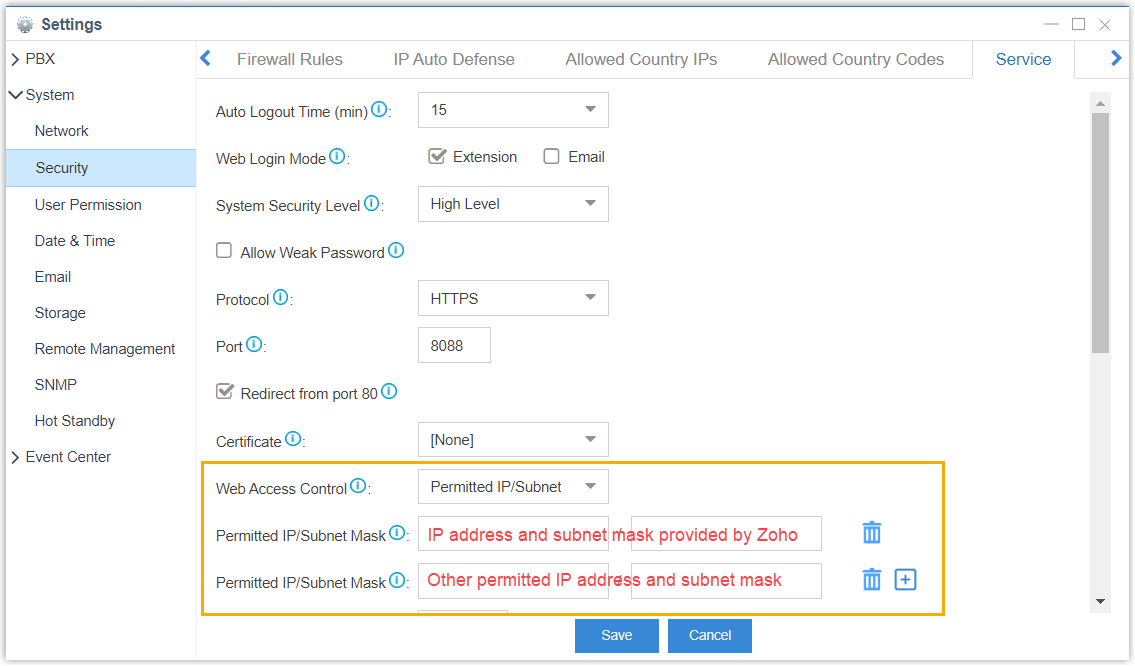
Important: After you forward the port, please set the password of web interface with high security to prevent from attacking.
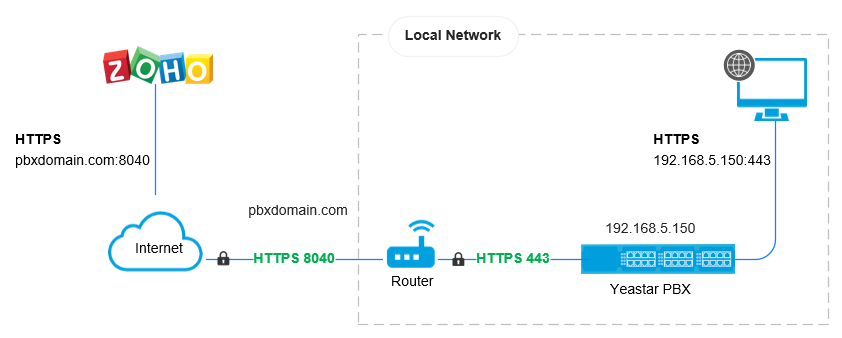
- Port forwarding example
- The following figure gives a port forwarding example: Forward the internal port HTTPS 443 to external port HTTPS 8040.
 Note: Zoho uses appcenter.yeastar.com to interact with Yeastar S-Series VoIP PBX. If the PBX is behind the firewall, add appcenter.yeastar.com to the firewall allowlist.
HTTPS Certificate configuration
If your PBX uses HTTPS protocol, you need to upload the HTTPS certificates and keys to your PBX.
Note: The HTTPS certificates and keys should be bought from an official
organization, or the certifications would not be authenticated by Zoho.
- Confirm the PBX domain, and purchase the HTTPS certificate.
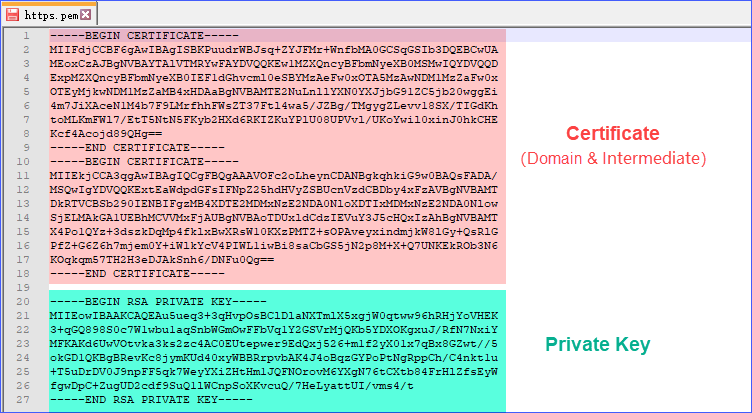
- Make a certificate in pem format.
- Create a new text file with a .pem extension. for example, https.pem.
- Copy and paste the certificate contents and key contents to the
https.pem file.
- Install the HTTPS certificate on your PBX.
- Log in the PBX web interface, go to .
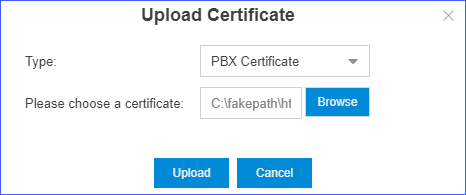
- Click Upload.
- In the Type drop-down list, select PBX Certificate.
- Click Browser to select the
pem certificate you made, and click
Upload.
- Go to .
- In the Protocol drop-down list, select HTTPS.
- In the Certificate drop-down list, select the
uploaded certificate.
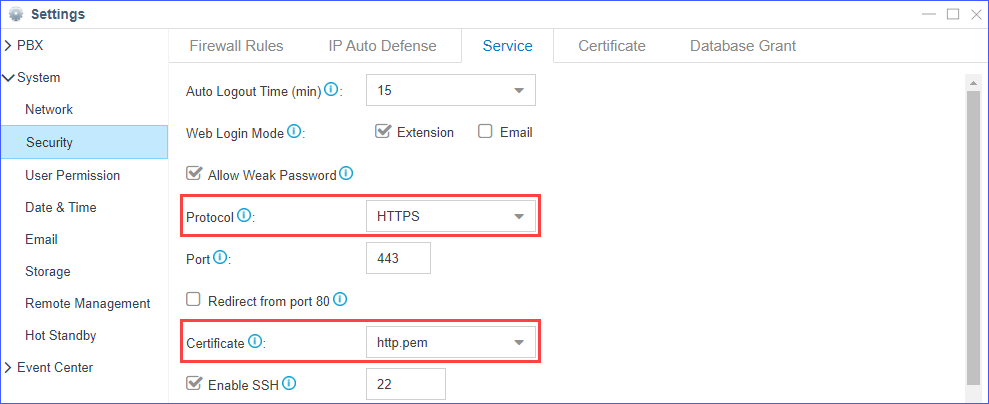
- Click Save.