Database Grant
Yeastar Cloud PBX is based on MySQL database. A third-party software can access the database of PBX. Grant permissions to database before accessing the database of PBX.
Prerequisites
- SBC version: 1.6.19 or later
- PBX version: 81.14.0.67 or later
If Database Grant feature is not available after upgrade, contact your PBX provider.
Applications
By accessing the database of PBX, you can get CDR and save it to the local database.
Capture data in database
- Add database grant on PBX for the targeted device.
- Log in to the PBX web interface, go to .
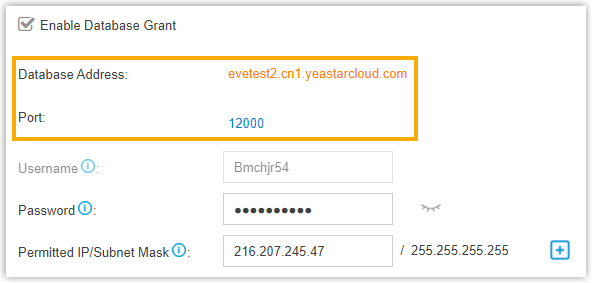
- Select the checkbox of Enable Database Grant.
- Configure the settings:
- Username: Enter the username that can be used by third party to access the database of PBX.
- Password: Enter the password that can be used by third party to access the database of PBX.
- Permitted IP/Subnet Mask: Enter
the IP address or IP section that is allowed to access
the database of PBX. The input format should be
XXX.XXX.XXX.XXX.
For example: 216.207.245.47 means that only the device with IP address 216.207.245.47 is allowed to access the database of PBX.
- Click Save and
Apply.
You will get the Database Address and Port for database connection.
- Access the database of PBX.
The following takes Navicat for MySQL for example to introduce how to access the database of PBX.
- Open Navicat for MySQL, click Connection, and select MySQL.
- Configure Navicat for MySQL with the
authentication information provided on PBX.
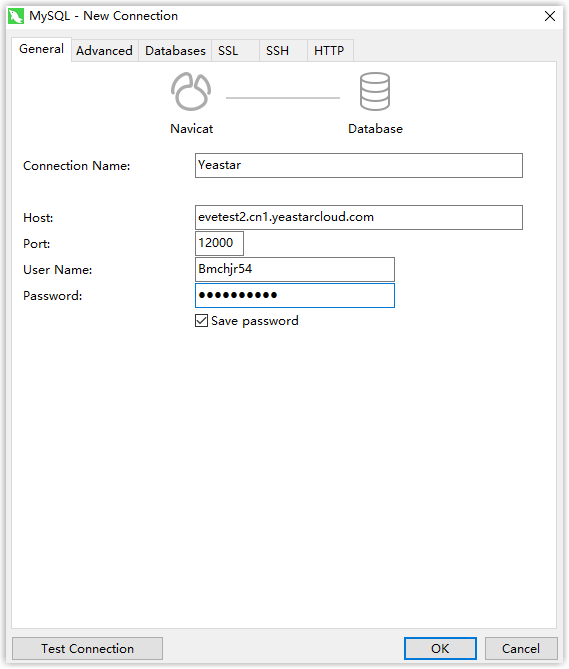
- Connection Name: Enter a connection name to help you identify it.
- Host: Enter the Database Address of PBX.
- Port: Enter the PBX port 12000.
- User Name: Enter the user name configured on Database Grant of PBX.
- Password: Enter the password configured on Database Grant of PBX.
- Click Test Connection to make sure that the connection is successful, and then click OK.
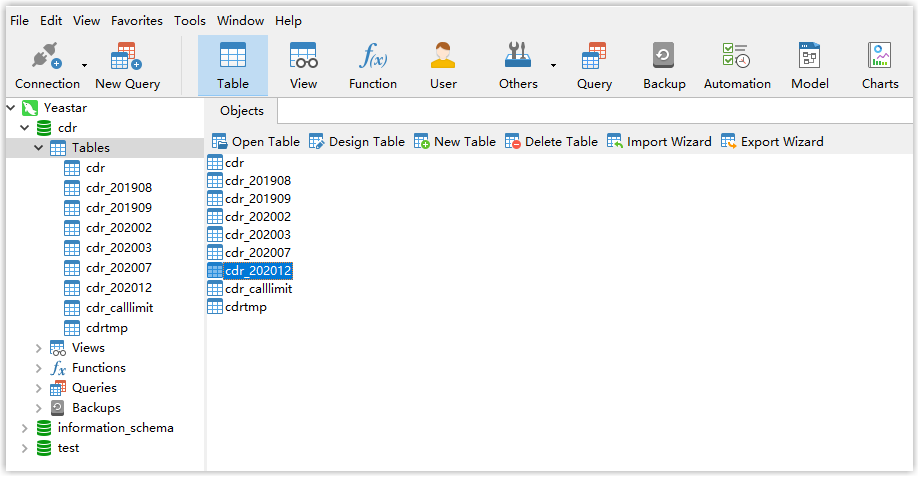
- Click cdr table, you can see existing cdr
tables on PBX.Note: The database generates a cdr table every month.