Step2. Set up a Security Group
A security group acts as a virtual firewall to control the traffic for its associated Virtual Machines (VMs). You can filter network traffic to and from the YMP VMs and SBC VM in a network security group.
Create a security group
- Sign in to the Azure portal.
- In the top-left corner of the portal, select .
- In create network security group, enter the following
information:
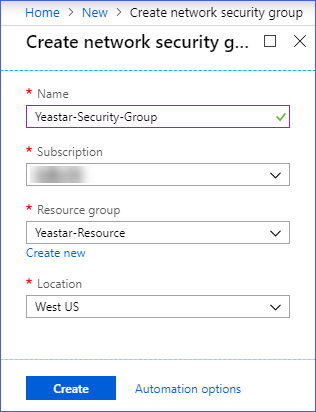
Setting Description Example Name Enter a name for the network security group. Enter Yeastar-Security-Group Subscription Select a subscription. - Resource group Select the same resource group as the virtual network. Select Yeastar-Resource Location Select the same location as the virtual network. Select West US - Click Create.
Add security rules
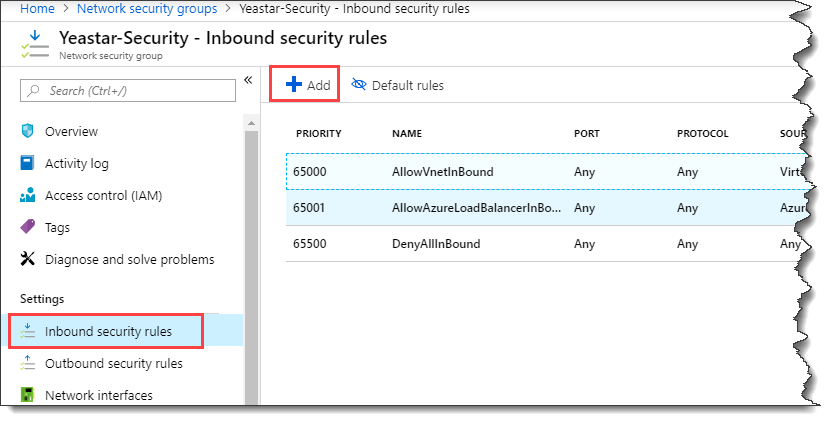
Add an inbound security rule to allow all inbound network traffic, and add an outbound security rule to allow all outbound network traffic.- In the left navigation, click Network security groups.
- On the Network security groups page, click the security group that you created.
- Add an inbound security rule.
- In the security group, select .
- On the Add inbound security rule page,
configure the following information:
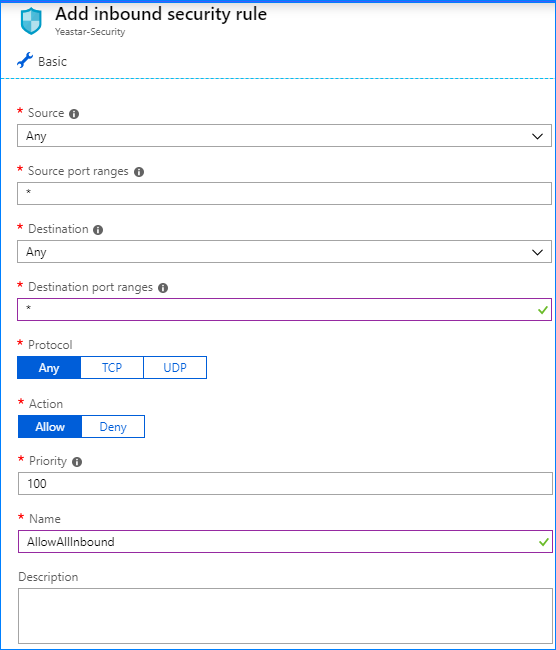
Setting Value Source Select Any Source port range Enter * Destination Select Any Destination port range Enter * Name Enter a name for the rule. For example, AllowAllInbound. - Leave the rest of the defaults and click Add.
- In the security group, select .
- Add an outbound security rule.
- In the security group, select .
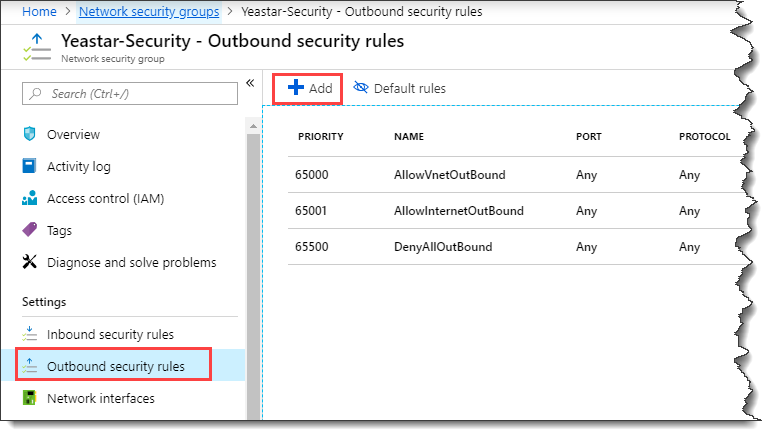
- On the Add outbound security rule page,
configure the following information:
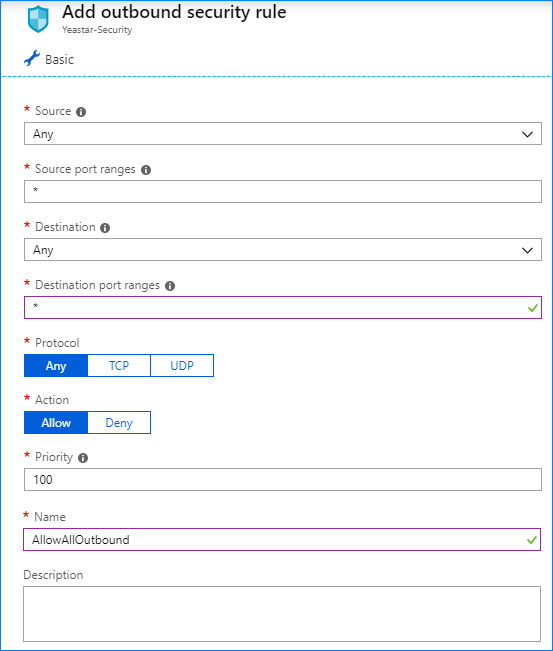
Setting Value Source Select Any Source port range Enter * Destination Select Any Destination port range Enter * Name Enter a name for the rule. For example, AllowAllOutbound. - Leave the rest of the defaults and click Add.
- In the security group, select .