Step1. Create the Virtual Network
A virtual network enables Azure resources, like virtual machines (VMs), to communicate privately with each other, and with the internet. Create a virtual network, later you need deploy YMP VMs and SBC VM into the virtual network.
- Sign in to the Azure portal.
- In the top-left corner of the portal, select .
-
In Create virtual network, enter or select the following
information:
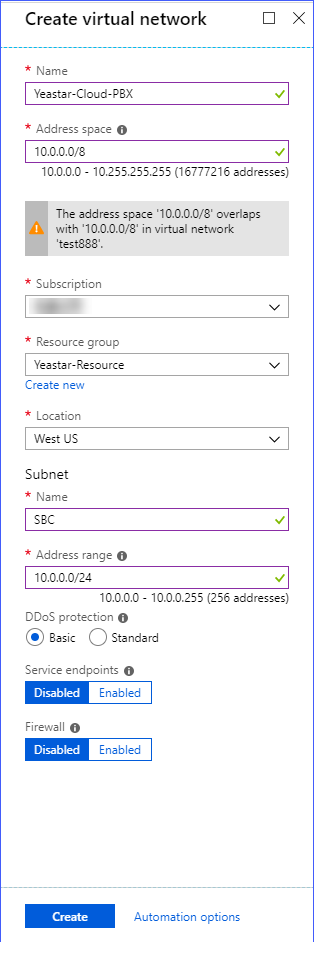
Setting Description Example Name Set a unique name for the virtual network. Enter Yeastar-Cloud-PBX Address space The address space for a virtual network is composed of one or more non-overlapping address ranges that are specified in CIDR notation. Restriction: The IP segments 172.19.0.0 and 172.17.0.0 are NOT allowed.Enter 10.0.0.0/8 Subscription Select a subscription. Note: Any Azure resource that you connect to the virtual network must be in the same subscription as the virtual network.- Resource group Select an existing resource group or create a new one. Note: An Azure resource that you connect to the virtual network can be in the same resource group as the virtual network or in a different resource group.Select Yeastar-Resource Location Select an Azure location, also known as a region. Note: Any Azure resource that you connect to the virtual network must be in the same location as the virtual network.Select West US Subnet The portal requires that you define one subnet when you create a virtual network, even though a virtual network isn't required to have any subnets.
Name Set a unique name for the subnet. Set this subnet to deploy SBC VM, enter SBC. Note: Later, you need to create another subnet to deploy YMP VMs.Address range The range must be within the address space you entered for the virtual network. Enter 10.0.0.0/24. - Leave the rest of the defaults and select Create.