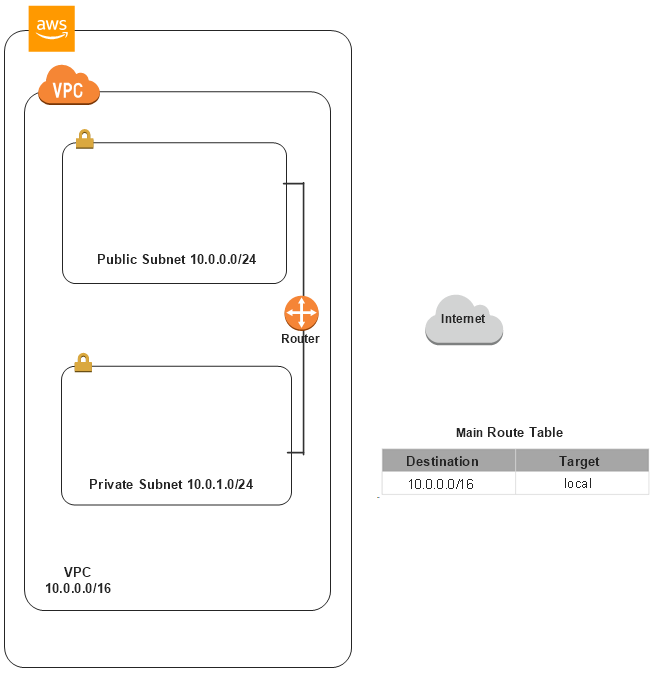
1) Create two Subnets in the VPC
After creating the VPC, you can need to create two subnets in the VPC. When you create a subnet, you specify the CIDR block for the subnet, which is a subset of the VPC CIDR block.
- Open the Amazon VPC console at https://console.aws.amazon.com/vpc/.
-
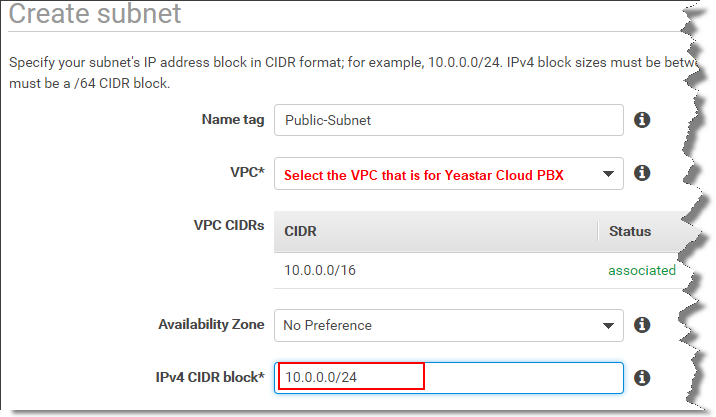
Create one subnet that will be used as a public subnet.
Note: If a subnet's traffic is routed to a internet gateway, the subnet is known as a public subnet.
- In the navigation pane, select Subnet, then click Create Subnet.
-
On the configuration page, set the Name tag. For
example,
Public-Subnet. - Select the VPC that is for Yeastar Cloud PBX.
-
Set the IPv4 CIDR block for the subnet. For
example,
10.0.0.0/24. - Click Create.
-
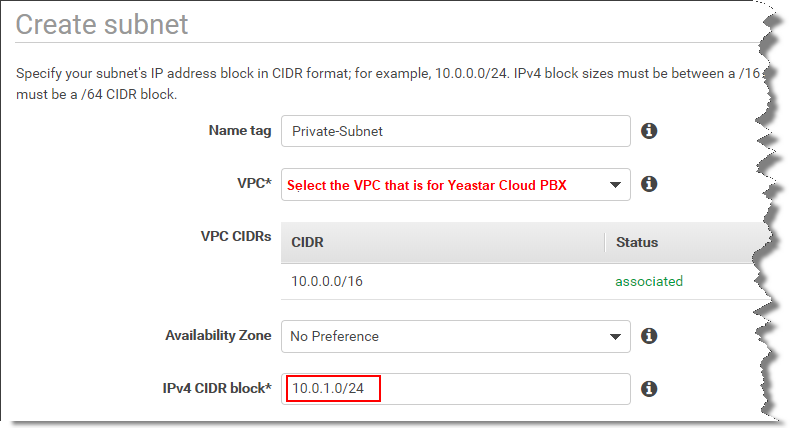
Create one subnet that will be used as a private subnet.
Note: If a subnet doesn't have a route to the internet gateway, the subnet is known as a private subnet.
- In the navigation pane, select Subnet, then click Create Subnet.
-
On the configuration page, set the Name tag. For
example,
Pravite-Subnet. - Select the VPC that is for Yeastar Cloud PBX.
-
Set the IPv4 CIDR block for the subnet. For
example,
10.0.1.0/24. - Click Create.