3) Associate Subnets with Table Routes
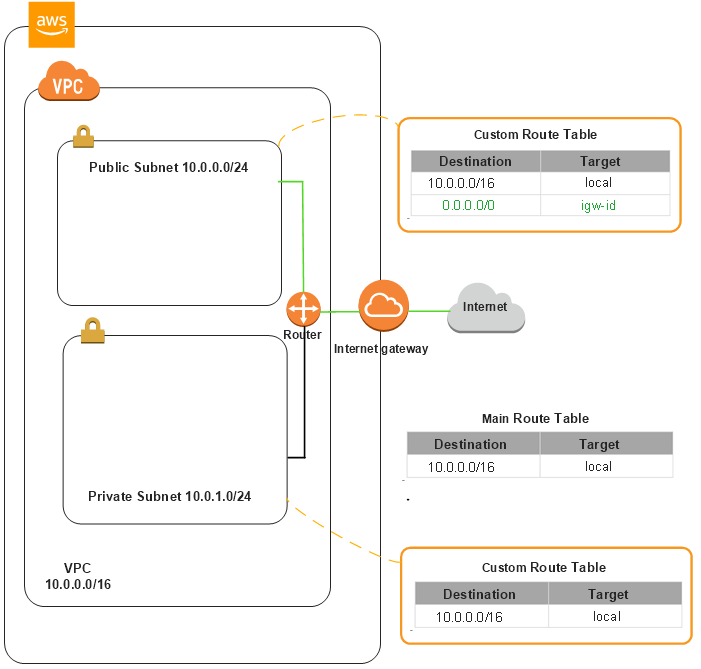
Each subnet must be associated with a route table, which specifies the allowed routes for outbound traffic leaving the subnet. Every subnet that you create is automatically associated with the main route table for the VPC. You need to create two custom table routes and apply the table routes to your subnets respectively.
Set up Public Subnet
Create a custom route table and add a route over the internet gateway. When a subnet
is associated with this route table, the subnet's traffic will be routed to the
internet. In this way, the subnet acts as a public subnet.
- Open the Amazon VPC console at https://console.aws.amazon.com/vpc/.
- In the navigation pane, select Route Tables, then click Create Route Table.
- Configure the route table, and click Yes,
Create.
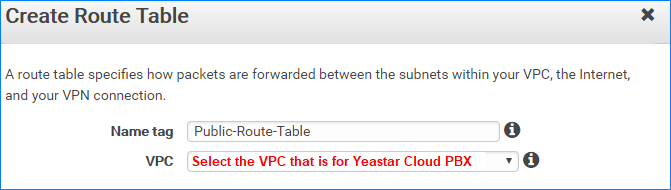
- Name tag: Specify the route table name.
For example,
Public-Route-Table. - VPC: Select the VPC that is for Yeastar Cloud PBX.
- Name tag: Specify the route table name.
For example,
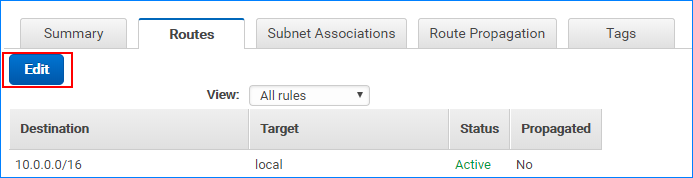
- On the Route Tables page, edit the new created route table.
- Select the target route table.
- Under the route table list, click Routes
tab, and click Edit.
- Scroll down the page, click Add another route.
- Enter Destination as
0.0.0.0/0, and select Target to the internet gateway.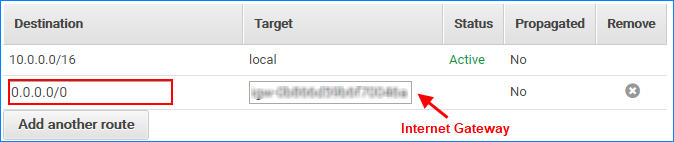
- Click Save.
- Associate the desired subnet to the route table.
- Click Subnet Associations tab, then click Edit.
- Select the desired subnet.
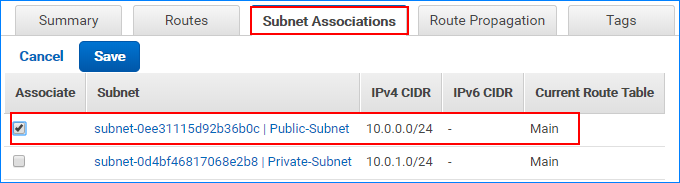
- Click Save.
Set up Private Subnet
Create a custom route table and remain the default route (same with the main table
route). If a subnet is associated with the route table, the subnet will act as a
private subnet.
- Open the Amazon VPC console at https://console.aws.amazon.com/vpc/.
- In the navigation pane, select Route Tables, then click Create Route Table.
- Configure the route table, and click Yes,
Create.
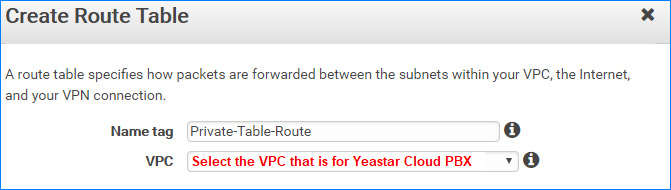
- Name tag: Specify the route table name.
For example,
Private-Route-Table. - VPC: Select the VPC that is for Yeastar Cloud PBX.
- Name tag: Specify the route table name.
For example,
- Associate the desired subnet to the route table.
- Click Subnet Associations tab, then click Edit.
- Select the desired subnet.
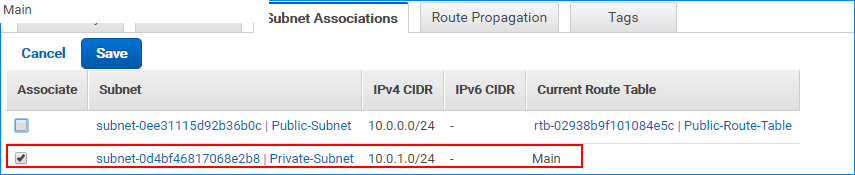
- Click Save.