Step3. Launch Instances to Your VPC
Launch two instances to your VPC. One instance for SBC, the other one instance for YMP.
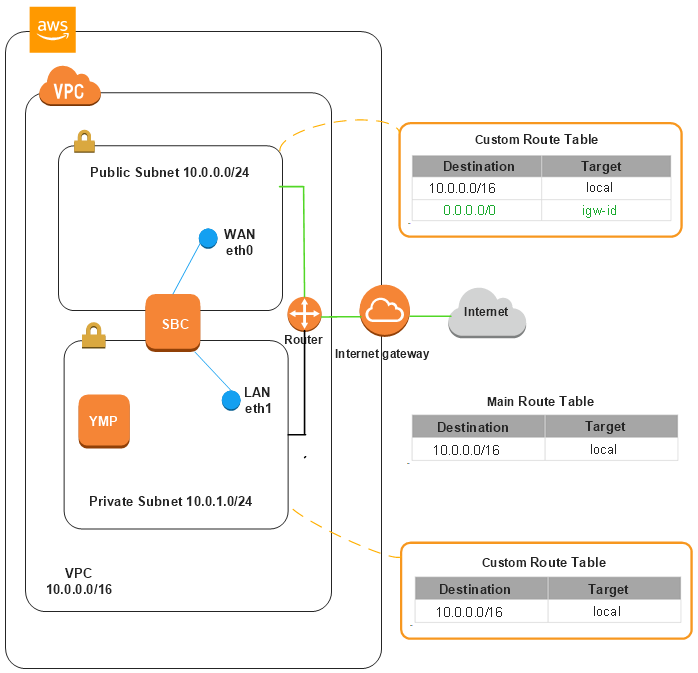
The following diagram represents the architecture of your VPC after you've completed this step.
Launch an Instance for SBC
- Open the Amazon EC2 console at https://console.aws.amazon.com/ec2/, click
Launch Instance.Note: In the navigation bar, on the top-right, ensure that you select the same region in which you created your VPC.
- Choose the AMI as Ubuntu Server 16.04 LTS (HVM), SSD Volume Type, click Select.
- Choose an Instance Type, c5.xlarge 4 vCPU 8 GB is recommended, click Next: Configure Instance Details.
- Configure Instance Details, click Next: Add Storage.
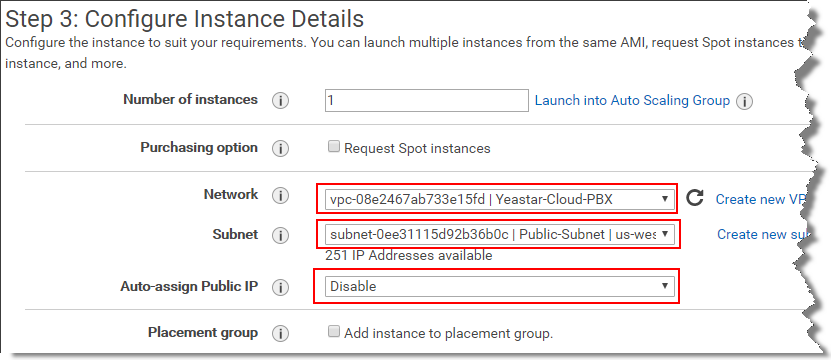
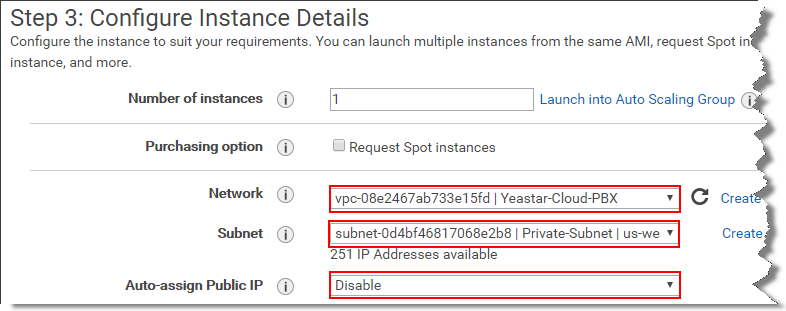
- Select Network to the VPC that is for Yeastar Cloud PBX.
- Select Subnet as the public subnet.
- Set Auto-assign Public IP to
Disable.
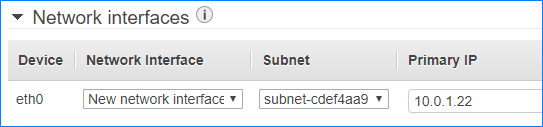
- Scroll down the page, in the Network
interfaces section, configure eth0 and add eth1.
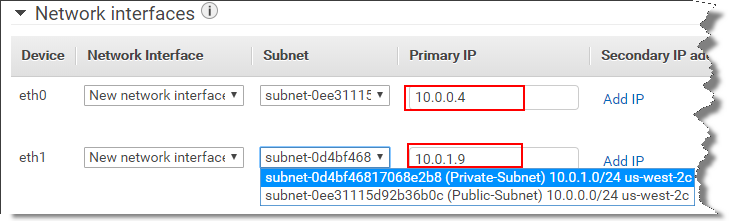
- eth0: The public subnet is selected automatically, auto assign IP address or enter an IP address.
- eth1: Select the private subnet, auto assign IP address or enter an IP address.
- On the Add Storage page, set the Root device volume
to
100GB, click Next, Add Tags.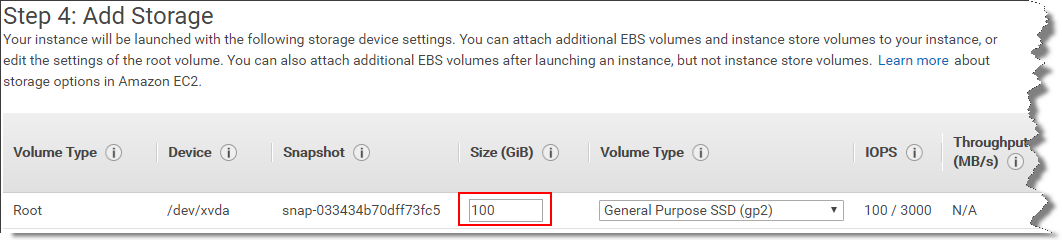
- On the Add Tags page, specify tags by providing key and value combinations.
- Click Next: Configure Security Group.
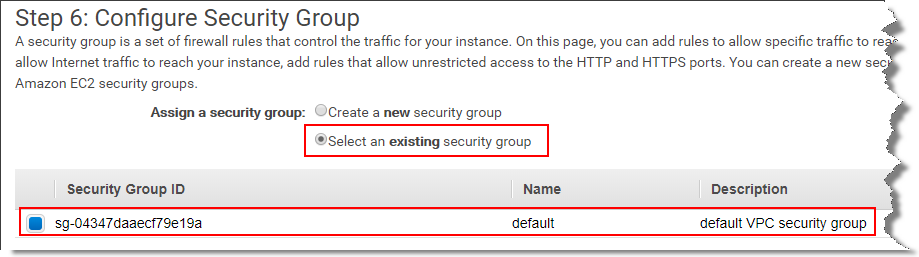
- Select Select an existing security group, and select
default VPC security group, click Review and
Launch.
- On the Review page, click Launch.
- Choose an existing key pair or create a new key pair, click
Launch Instances.

- After the instance is launched, go to the Instances
page, edit the instance name to help you identify it.

Launch an Instance for YMP
- Open the Amazon EC2 console at https://console.aws.amazon.com/ec2/, click
Launch Instance.Note: In the navigation bar, on the top-right, ensure that you select the same region in which you created your VPC and security group.
- Choose the AMI as Ubuntu Server 16.04 LTS (HVM), SSD Volume Type, click Select.
- Choose an Instance Type according to your needs, click Next: Configure Instance Details.
- Configure Instance Details, click Next: Add Storage.
- Select Network to the VPC that is for Yeastar Cloud PBX.
- Select Subnet to the private subnet.
- Set Auto-assign Public IP to
Disable.
- Scroll down the page, in the Network
interface section, auto assign IP address or
enter an IP address.
- On the Add Storage page, set the Root volume size
according to your required Concurrent Calls, click
Next, Add Tags.
- On the Add Tags page, specify tags by providing key and value combinations.
- Click Next: Configure Security Group.
- Select Select an existing security group, and select
default VPC security group, click Review and
Launch.
- On the Review page, click Launch.
- Choose an existing key pair or create a new key pair, click
Launch Instances.
- After the instance is launched, go to the Instances
page, edit the instance name to help you identify it.
