Deploy Homer Service using Deployment Tool
This topic describes how to install the Homer service on a server in your system architecture using the Yeastar-provided Deployment Tool.
Requirements
- Your computer runs the Windows operating system, as the tools are
.exeapplications. - Your system has a Basic deployment architecture (i.e., no High Availability (HA) configured).
- The firmware version of the YCM server is 87.19.0.27 or later to ensure the operations can be performed successfully using the tools.
Prerequisites
| Item | Prerequisites |
|---|---|
| Server |
|
| SSH Account | On the target server, create an SSH account
yeastar that meets the following
requirements:
|
| Resources |
|
Procedure
- On your computer, install and launch the Yeastar Deployment Tool.
- Log in with the default credential.
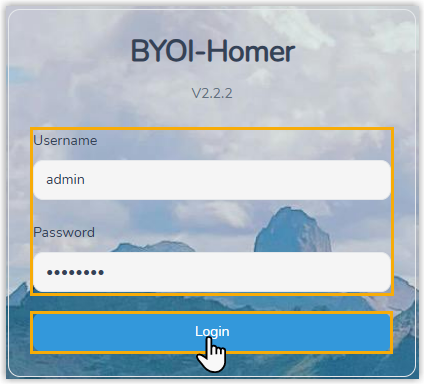
- Username:
admin - Password:
admin123
- Username:
- In the Deploy Mode section, select where you want to
install the Homer service.

- In the YCM Server Config/New Server
Config section, do as follows:
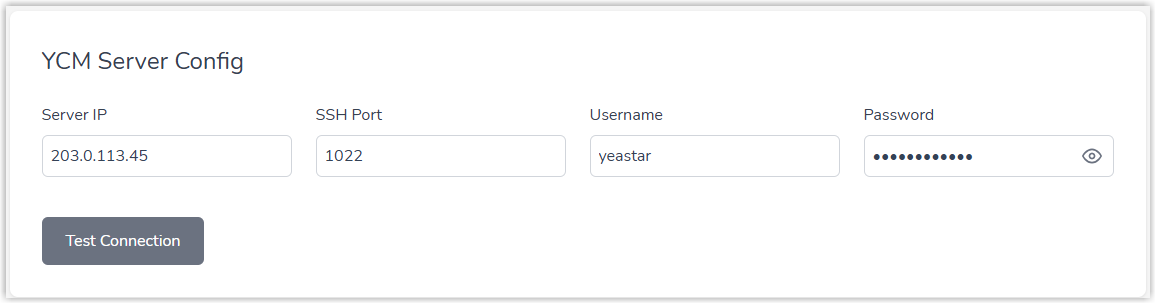
- Enter the server connection information:
- Server IP: Enter the public IP address of the target server.
- SSH Port: Enter 1022.
- Username: Enter yeastar.
- Password: Enter the SSH login
password for the
yeastaraccount.
- Optional: Click the Test
Connection button to verify that the tool can
connect to the target server using the provided
information.
The connection result is displayed on the interface.
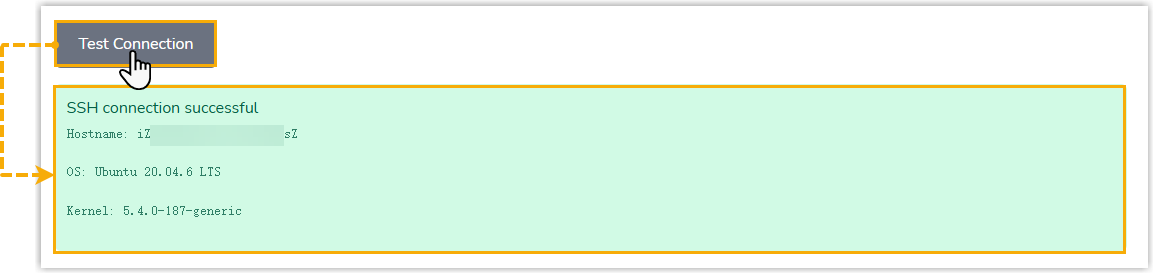
- Enter the server connection information:
- In the Package Config section, paste the download URL
of the Homer installation package.

- Optional: In the Certificate Config section,
configure a certificate for the Homer service.

- Select the checkbox of Use Custom SSL Certificate.
- Paste the contents of the
cert.pemandkey.pemfiles in the corresponding fields.
- Click Install Homer.
Result
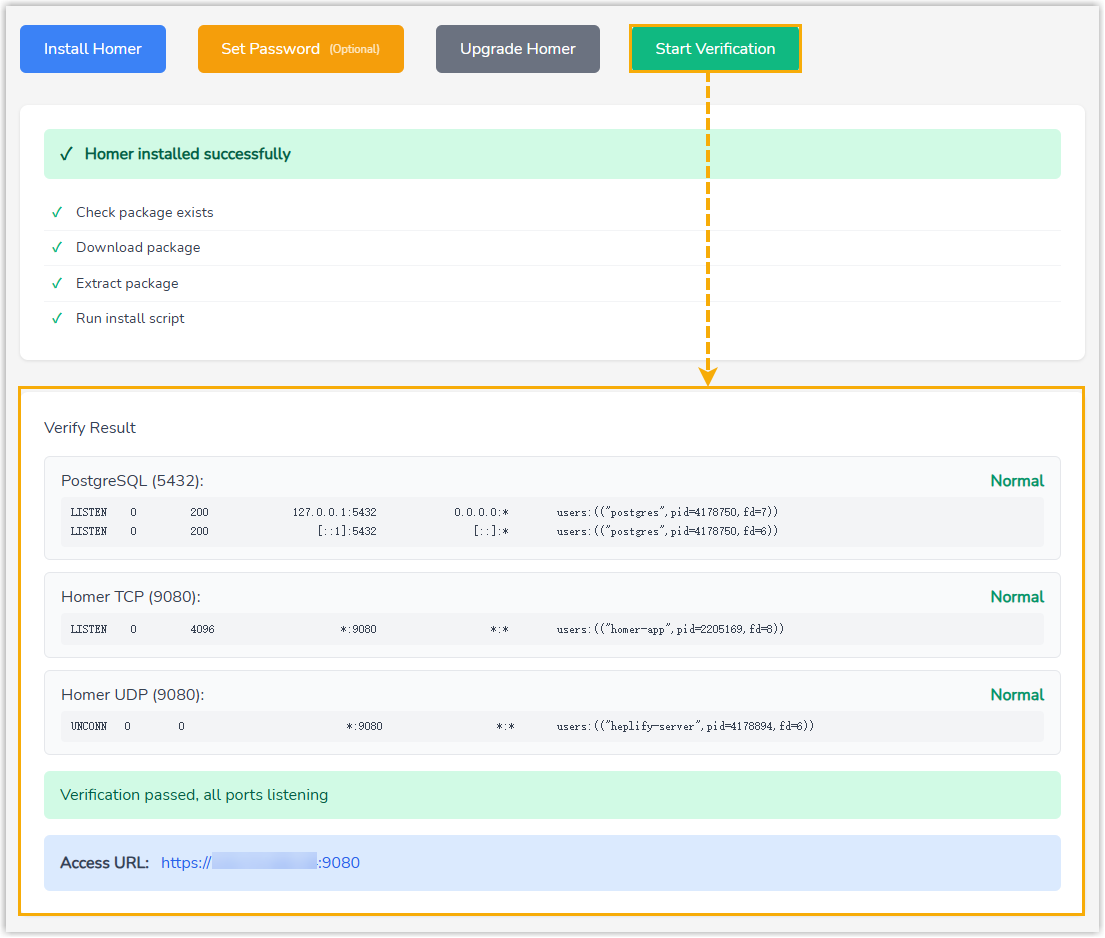
The interface displays a message “Homer installed successfully”, indicating that the installation is finished.

What to do next
- Verify the installation by clicking the Start
Verification at the bottom of the tool.
The interface shows the verification result, as well as the access URL of the Homer.
- Access the Homer via either of the following methods:
- Direct access with credentials
- This method requires login credentials, so you need to update the default credentials first, then access Homer using the new credentials.
-
- Change the password for Homer login.
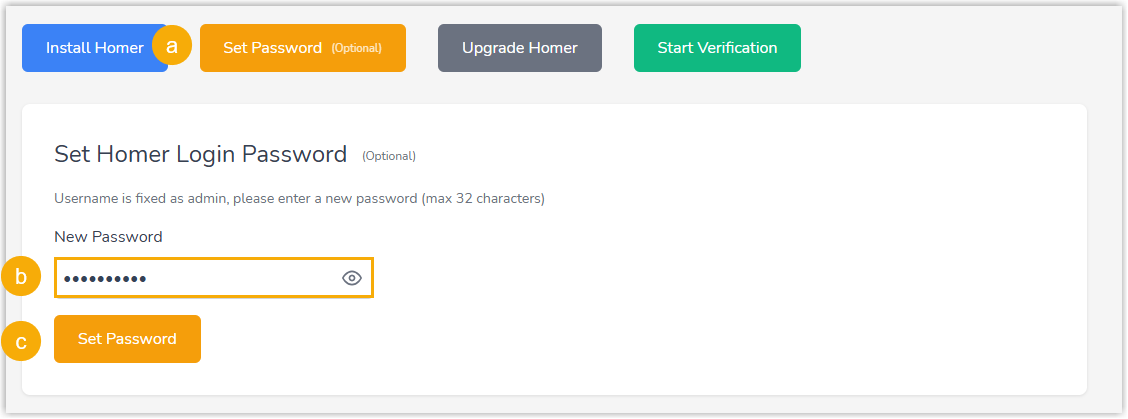
- At the bottom of the tool, click Set Password.
- In the New Password
field, set a login password.Note: The password length must not exceed 32 characters.
- Click Set
Password.
The interface displays a message "Password set successfully".
- Log in to Homer.
- Launch a web browser and paste the Homer
access URL into the address bar.
You will enter the login page of Homer.
- Enter the default username
adminand the new password to log in.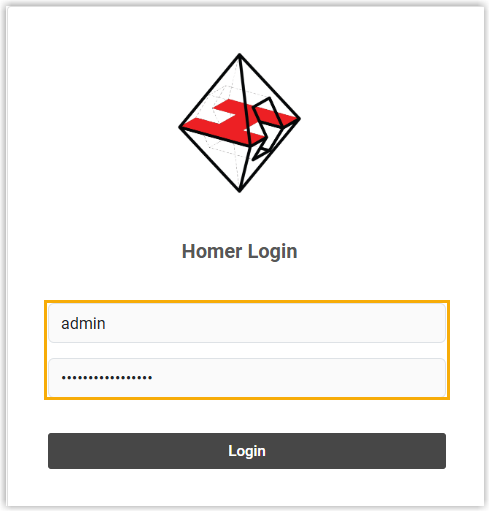
- Launch a web browser and paste the Homer
access URL into the address bar.
- Change the password for Homer login.
- Passwordless access via YCM
- This method requires you to associate Homer with Yeastar
Central Management first. After that, you can conveniently
access the Homer from the management portal in one-click
without entering any credentials.
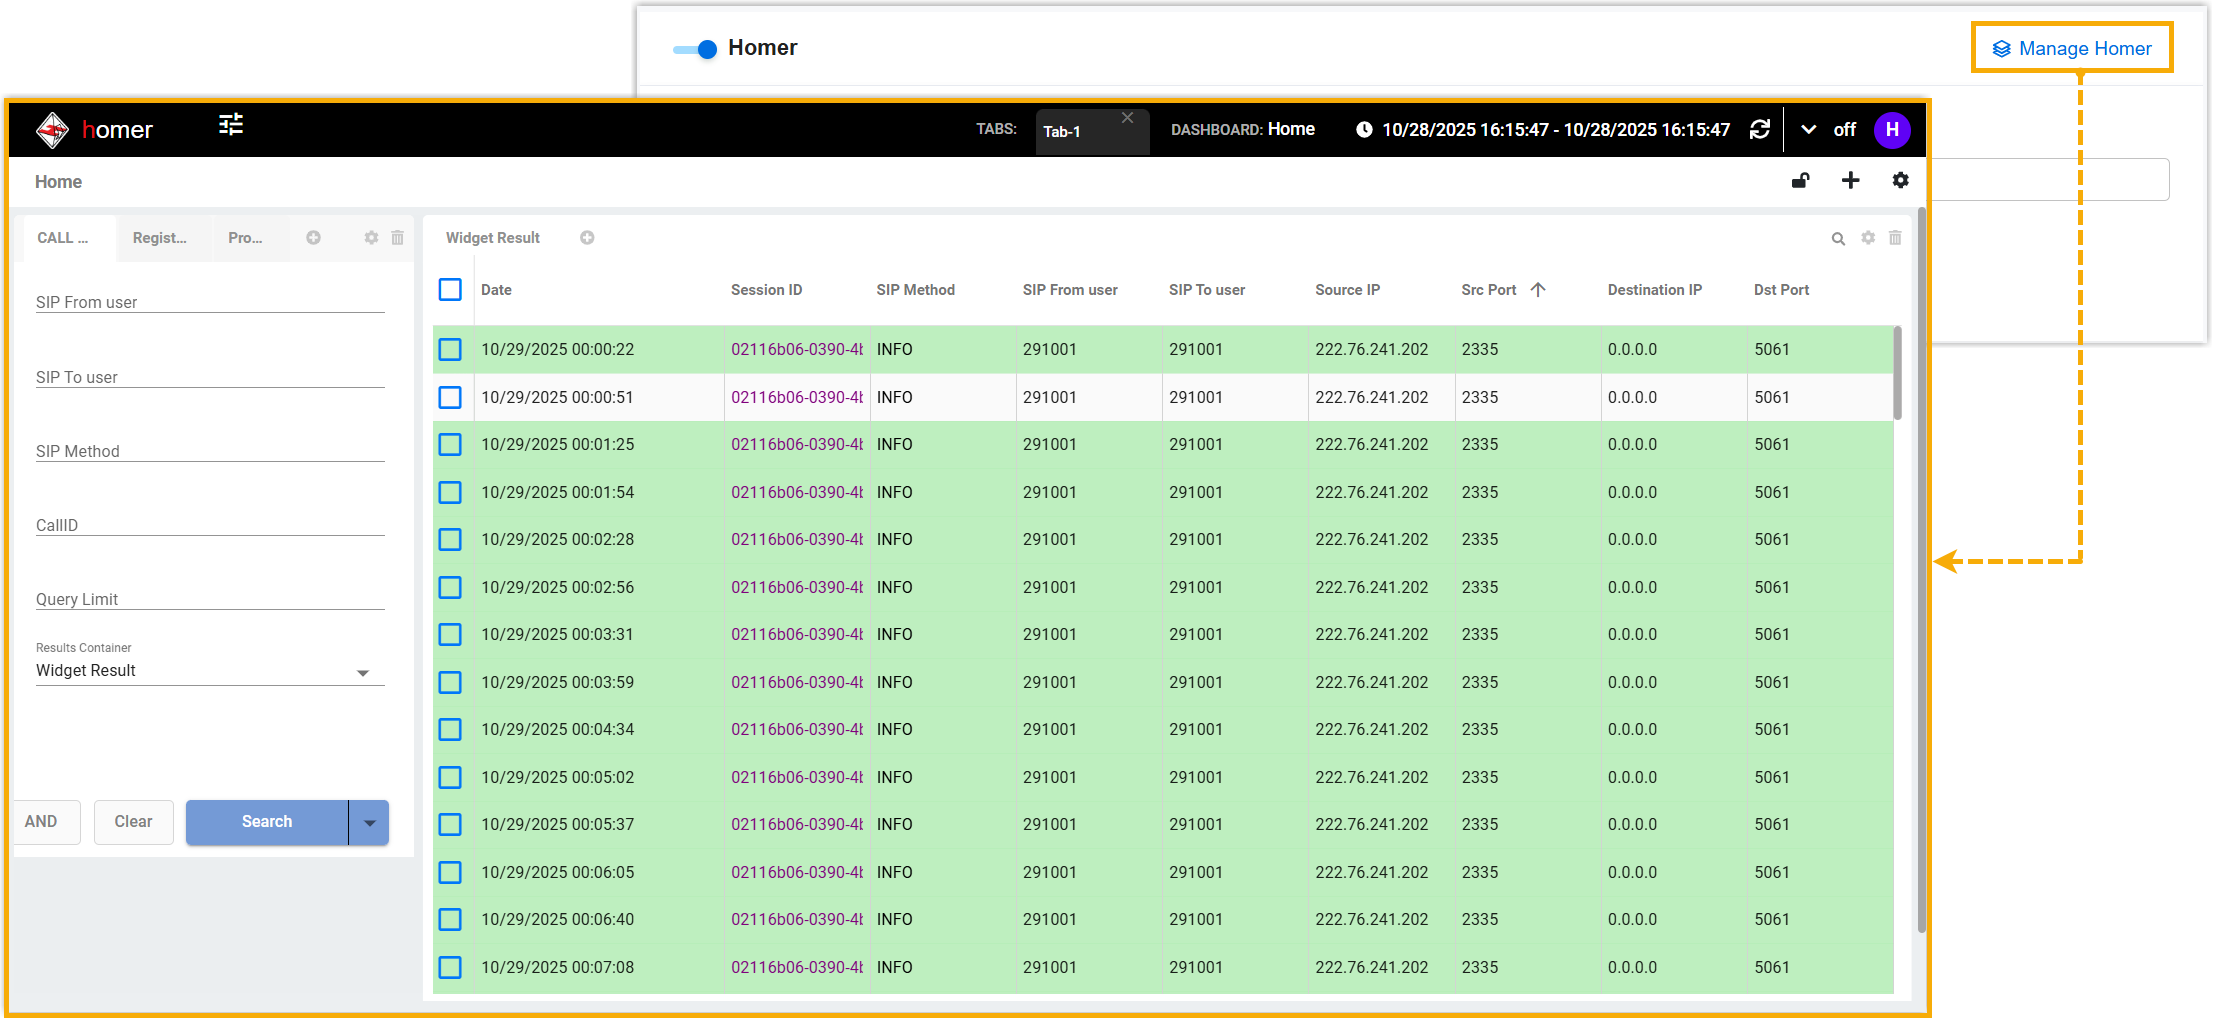
- Connect Homer to Yeastar Central Management
- Click the Manage Homer button
(Path: ) to directly enter the Homer web
interface.